Attract Butterflies By Making A DIY Feeder in 6 Simple Steps

BrightNest
by BrightNest
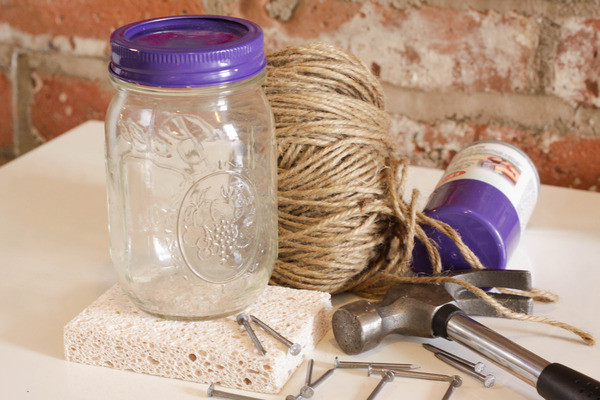
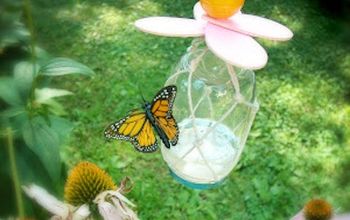
Don’t underestimate the butterfly – it’s more than just a pretty garden addition! There are 561 known butterfly species in the United States and Canada, all of which pollinate your flowers. Encourage butterflies to visit your yard and pollinate your plants by making a butterfly feeder. It’s easy!
UPDATE: Due to an overwhelming number of requests from readers, we've updated this post by adding a full step-by-step with instructional photographs. Thanks for your input!


For this project, you'll need:


-mason jar or baby food jar with sealable lid


-kitchen sponge


-hammer and nail


-heavy-duty string


-sugar


-scissors


-saucepan


-flower stickers or decorative tape (optional)
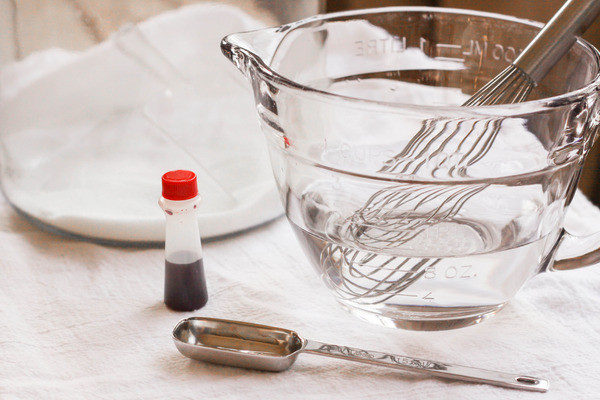
1. Prepare “Butterfly Food” by Mixing 9 Parts Water + 1 Part Sugar


If you are using a mason jar for your feeder, use tablespoons. If you are using a baby food jar, use teaspoons. Be careful not to add too much sugar to the water or it may dehydrate the butterflies! Bring the mixture to a boil in a pan on your stovetop until the sugar is completely dissolved. Set the solution aside until you're finished the rest of the project so it can cool completely. Note: Some evidence suggests dyes may have negative health effects on humming birds. If you have humming birds in your region, we suggest making this sugar solution without dyes and making your feeder extra colorful, instead!
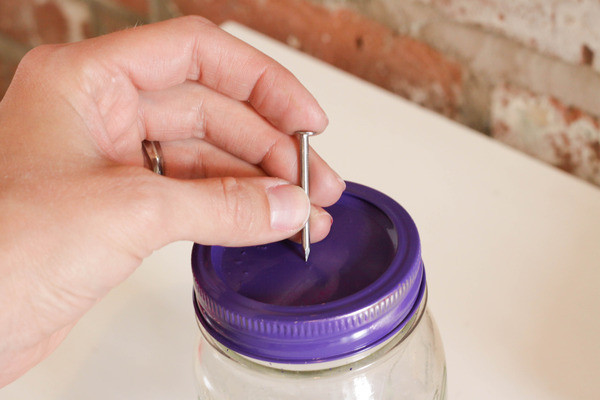
2. Make a Small Hole in the Mason Jar Lid


Using a nail and hammer, punch a small hole in the center of the lid. A piece of a sponge will need to fit snuggly in the hole, so keep it small – you can always make it bigger if necessary.
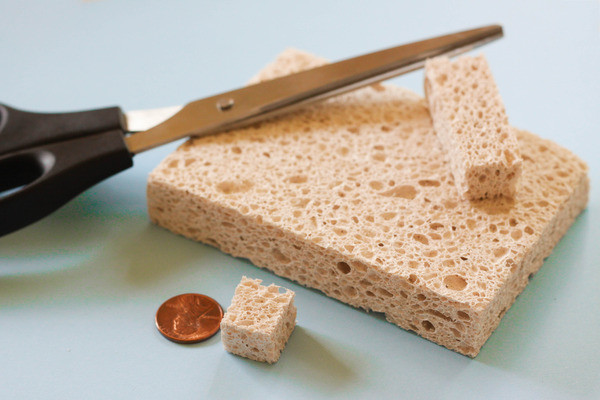
3. Place a Piece of Sponge Through the Hole


Cut a 1/2 inch strip from your sponge, then pull it through the hole in the lid so about half of the sponge is sticking out from the top – you’ll want the sponge to be a tight fit. When your jar is filled with the sugar water, the sponge needs to be soaked with the solution, but not dripping. Tip: Before you go any further, test your sponge’s fit by putting water into the jar and turning it upside down. If it drips, you will need to cut a larger piece of sponge.
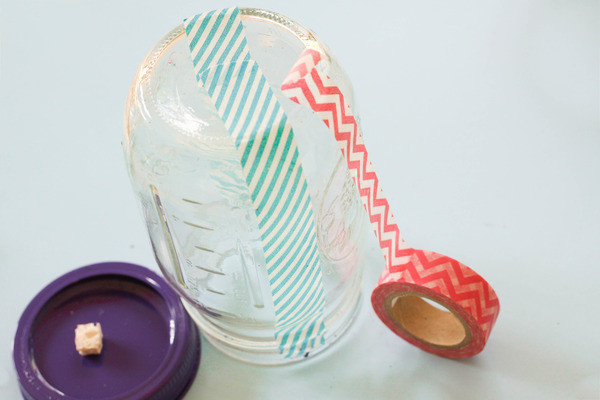
4. Decorate your Feeder


Before you tie any string around the jar, decorate your jar with brightly colored stickers, construction paper or washi tape. Flower shapes and bright colors are great options, because they imitate the real deal and hopefully entice butterflies to visit your feeder!
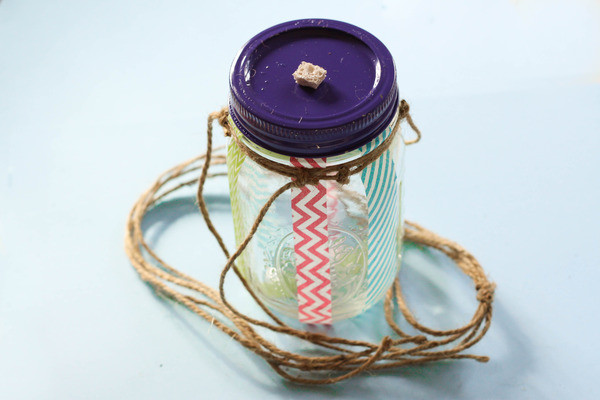
5. Use String to Make a Hanger


Flip your jar upside down. Tie some string around the neck of the jar (slightly below the lid). Cut two more pieces of string that are about two feet long. Take one end of the string and tie it to the piece that is already secured around the neck of the jar. Then, attach the other end to the string on the opposite side of the jar. This should make a loop and will allow for your jar to hang upside down. Tie the second length of string in the same way to make a second loop, perpendicular to the first.
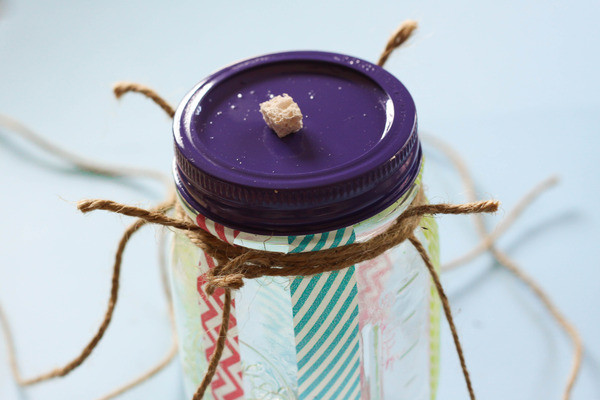
6. Secure the String
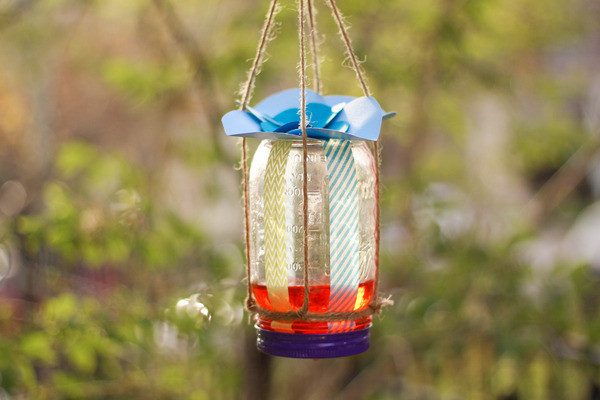

Place a final piece of string (or whatever material you want to hang your butterfly feeder with) through your two hanging loops to pull them together. Your jar should hang evenly. If it does, fill your jar with the cooled sugar water and screw on the lid tightly (with the sponge fitted through the hole). Tip: Before you hang your feeder, flip your jar upside down to make sure there’s not a leak.
7. Hang Your Feeder


That's it! Now you can hang your feeder outside. It will work best if it’s placed about six inches higher than your tallest flowers or three feet down from a tree branch. This way, it will be most visible to those beautiful butterflies!


View the full post, with more images, at: http://bit.ly/19cQLpj
BrightNest
Want more details about this and other DIY projects? Check out my blog post!
Go
Frequently asked questions
Have a question about this project?
Comments
Join the conversation
Next