


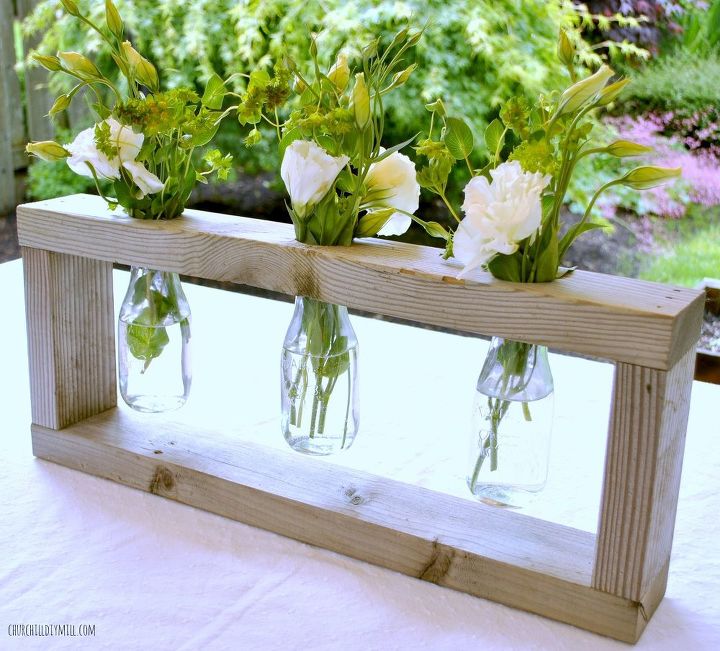
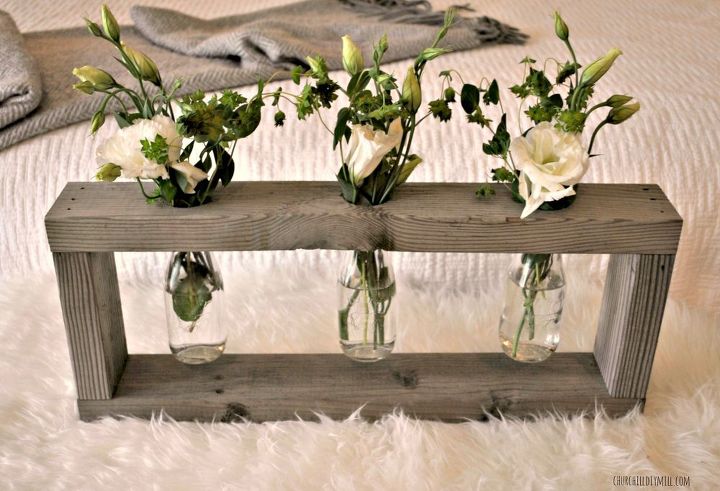
Rustic Wood Centerpiece-Monthly Home Depot Gift Challenge
Every month, a dozen or so super-talented bloggers and myself team up to make a DIY creation using one item from Home Depot and then give it away as a gift. This month’s item: a 2×4 piece of wood and the recipient: a new home owner. Oh, the possibilities…
*Home Depot in no way sponsors this post, but we spend a lot of time (and money) there, so we thought we’d blog about it.:)**
*Home Depot in no way sponsors this post, but we spend a lot of time (and money) there, so we thought we’d blog about it.:)**

What you'll need:
Here’s how to make the centerpiece:
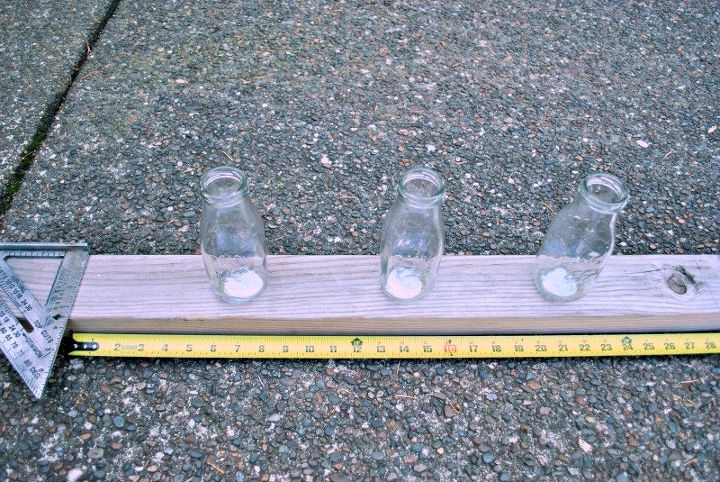
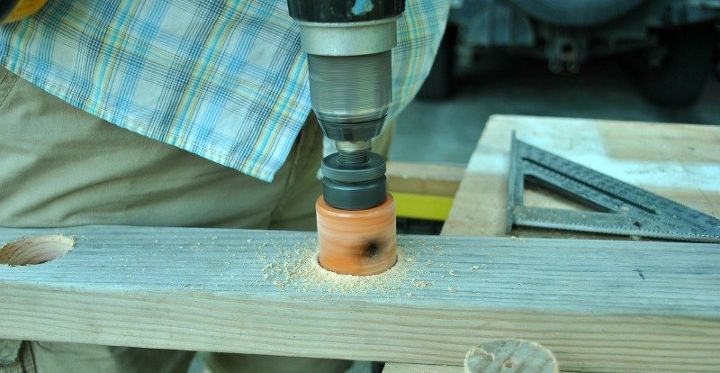
3. Using your hole saw (1 3/4 inch), drill three holes into the top piece of wood.
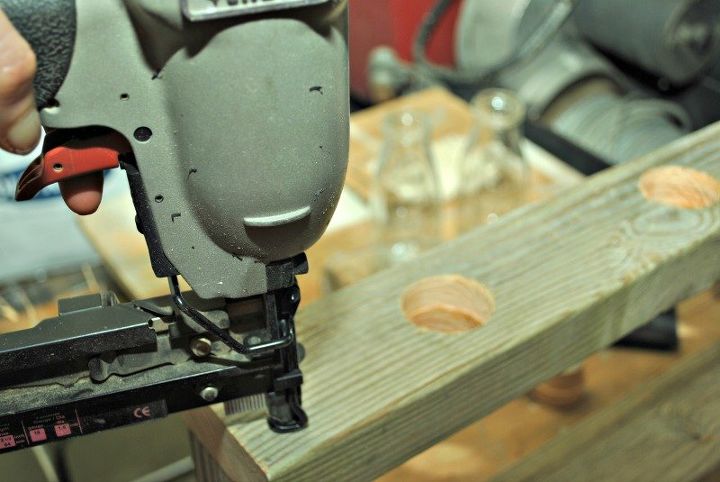
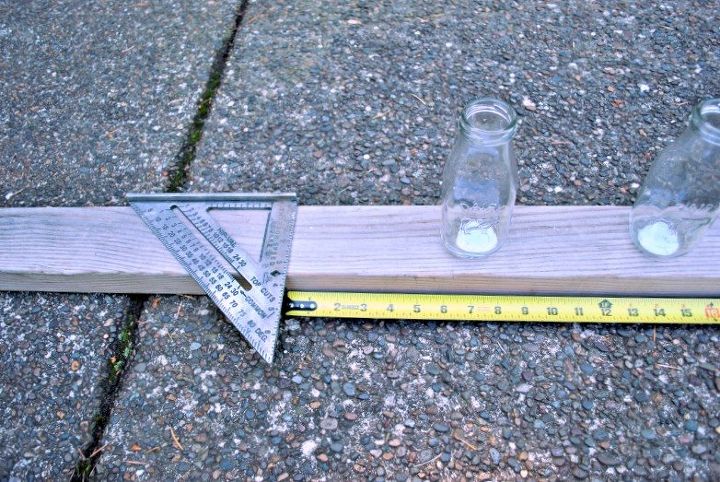
4. Nail the four pieces of wood together in the shape of a rectangle (top and bottom are 24 inches and the sides are 7 inches).
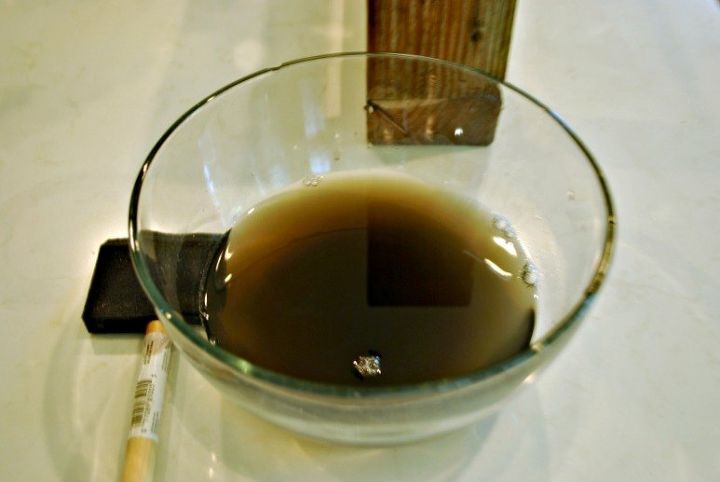
For the weathered look (ingredients):
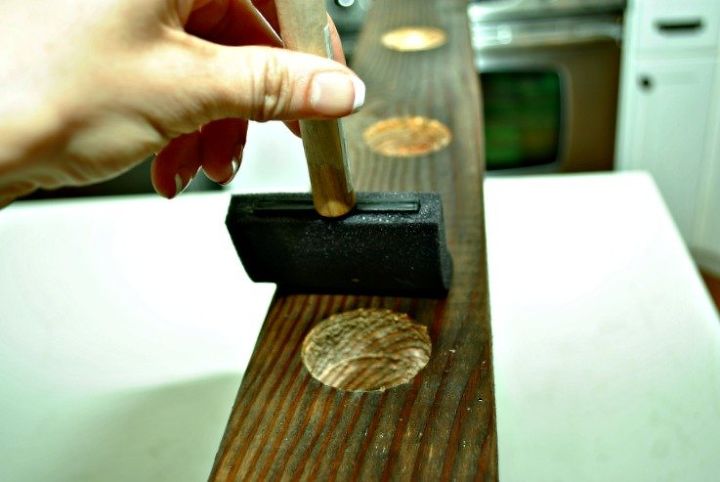
6. Using your paint brush, apply a generous coat of the stain to the wood. For a darker gray, stain the wood multiple times. The stain will appear brown at first on the wood, but as it dries it will turn grayish.
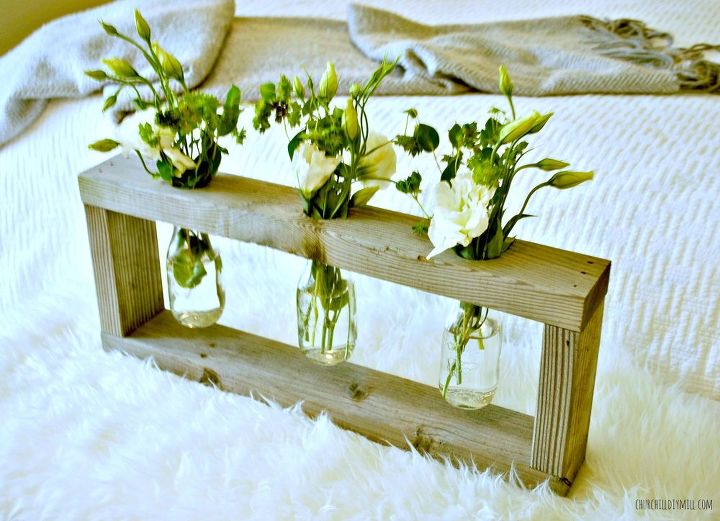

So, what do you think? Kind of makes me what to run around in a giant wheat field, sun shining, arms open wide.

Want more details about this and other DIY projects? Check out my blog post!
Comments
Join the conversation
2 of 7 comments
-
We were going to place hot glue around the rim, but it ended up fitting pretty snugly in the holes, so we left it as is. They seem to hold up well with water and flowers in them (as long as you don't put something really heavy in them). Thanks for looking!!
-
I love this. <3


Frequently asked questions
Have a question about this project?