


Master Closet Makeover-Project on a Whim
I never really planned on redoing our closet…at least not spur of the moment and not during the week of Christmas. We had talked about doing “something” with it this spring, but that was about as far as we had planned.
But, I had the week off from work this week (the week of Christmas) and I was itching to do a project. I had two ideas of projects I could reasonably complete in a week, BUT we needed to figure out a couple things to determine how big of a project they really were.
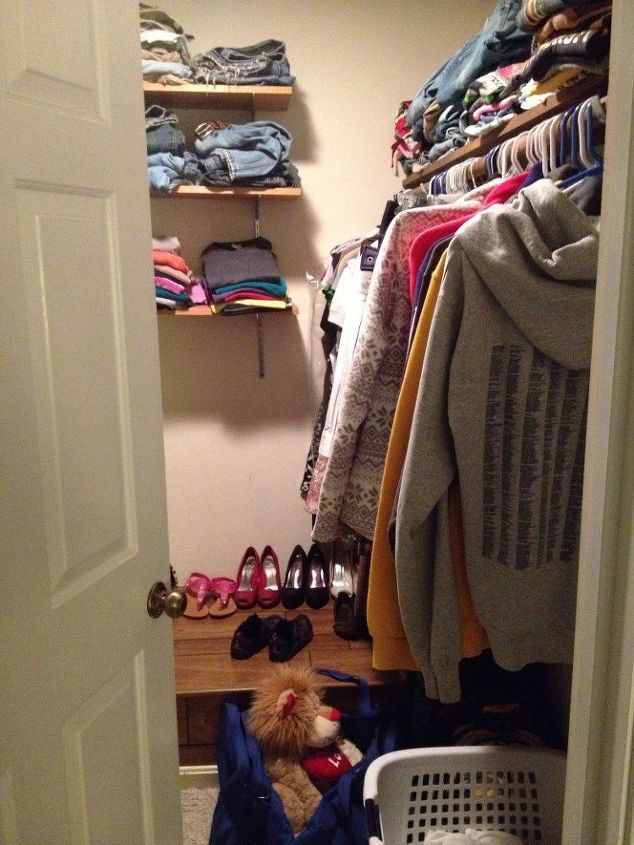
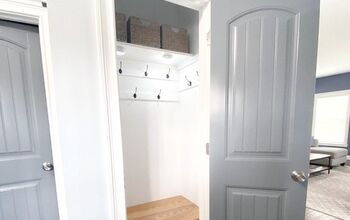
One idea was to remove the eyesore “thingy” in the closet. This did NOT include remodeling the closet, only removing this ugly paneled thing:
But, I had the week off from work this week (the week of Christmas) and I was itching to do a project. I had two ideas of projects I could reasonably complete in a week, BUT we needed to figure out a couple things to determine how big of a project they really were.
One idea was to remove the eyesore “thingy” in the closet. This did NOT include remodeling the closet, only removing this ugly paneled thing:
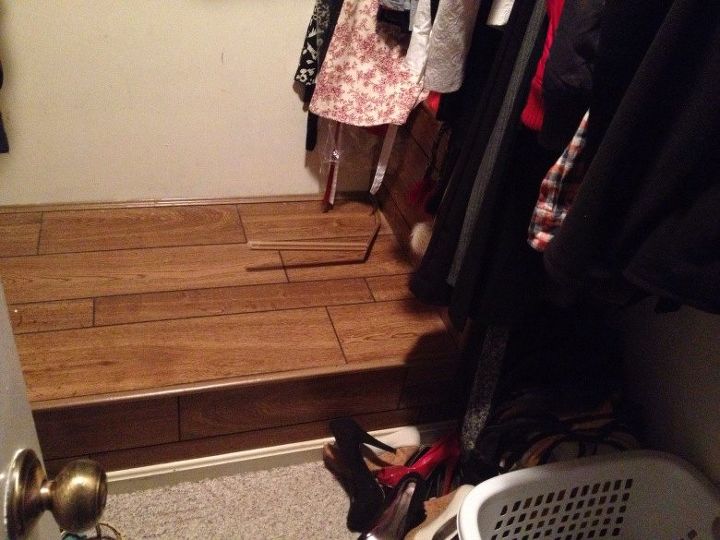
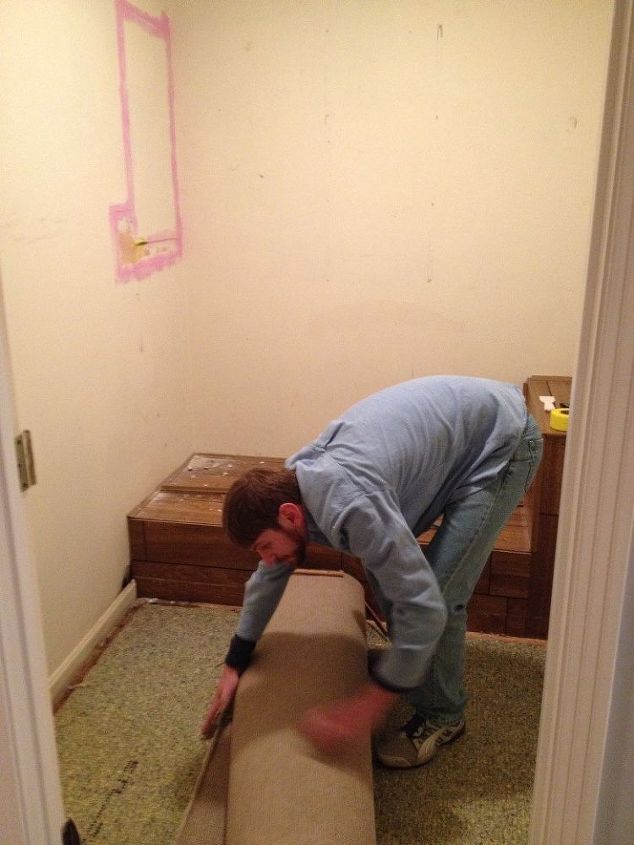
When we moved in, we wondered what in the world this thing was here for. It was ugly and took up a bunch of valuable closet space. So, first things first, this must go. However, if we removed it, and the carpet didn’t continue under it, we would need flooring for the whole closet.
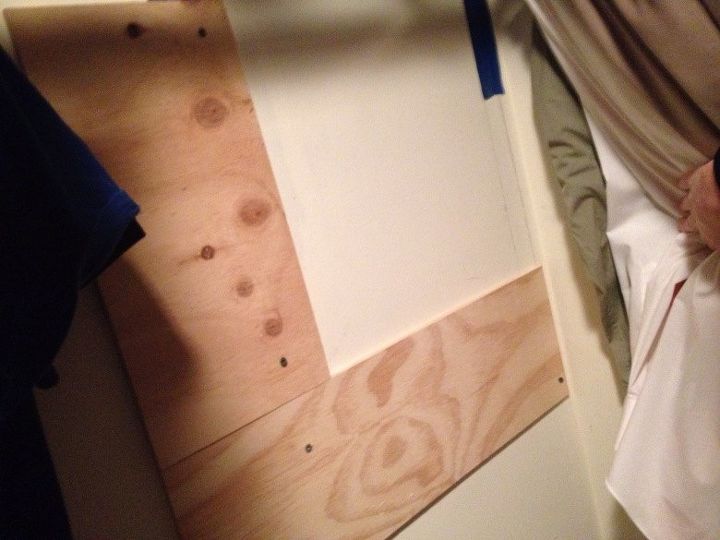
At some point, the copper pipes in the house were replaced with PVC. I guess it wasn’t high priority to properly patch the holes in the wall after this replacement. So whoever did it, just screwed some plywood over the holes. Nice….
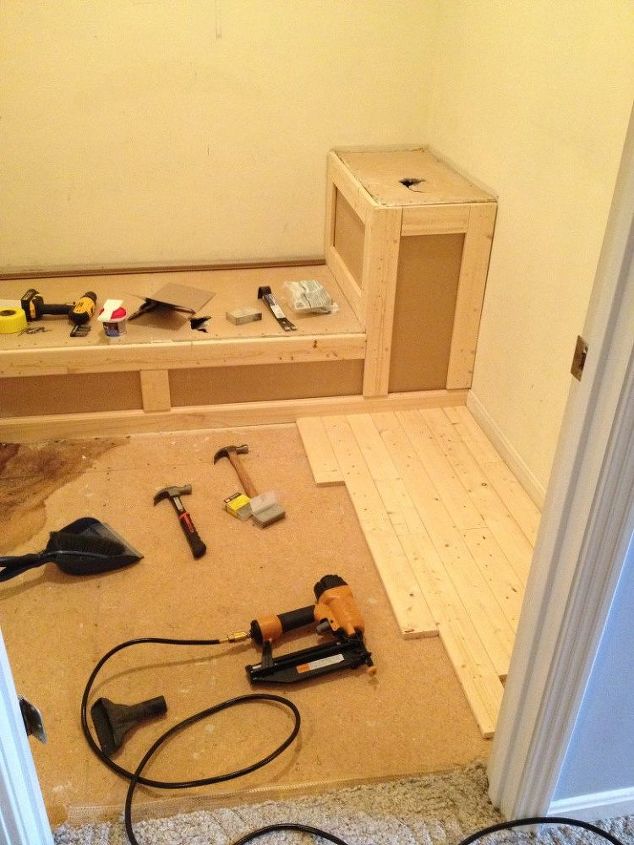
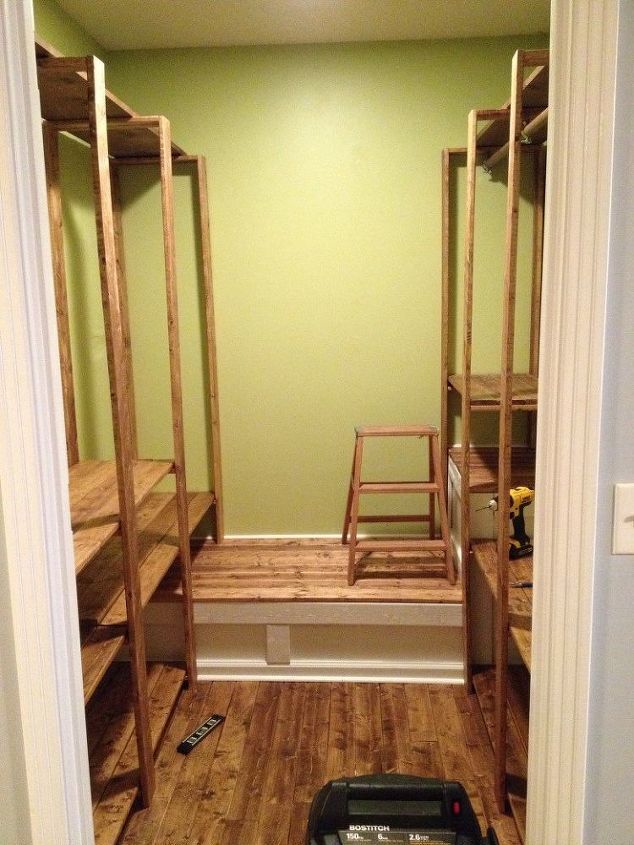
So we knew we would need plywood to patch the hole in the floor, drywall patches, and new flooring for the closet. Simple enough. Oh, and we needed stuff to build a whole new closet…not so simple. We went to Lowes (the service manager apparently recognizes us now since we are in there so often). We bought plywood, drywall patches and putty, and got a couple boxes of 99 cent laminate wood flooring.
I was so excited to demolish the thingy so I busted a new hole in it. Then we realized it was the return air duct. Which means…it has to stay. I may or may not have shed a tear, had a tantrum, said “I quit” more times than I can count on one hand. But, I gained composure, and reminded myself that I am an engineer and a problem solver and I will make this closet awesome.
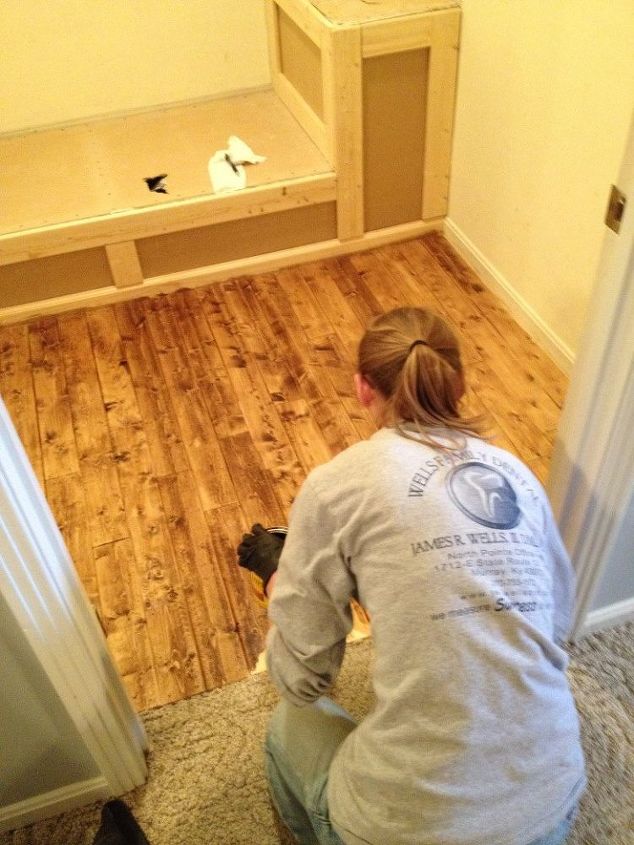
Then I stained the floor in Minwax Great American.
Then I painted the walls and the trim with leftover paint I had from previous projects.
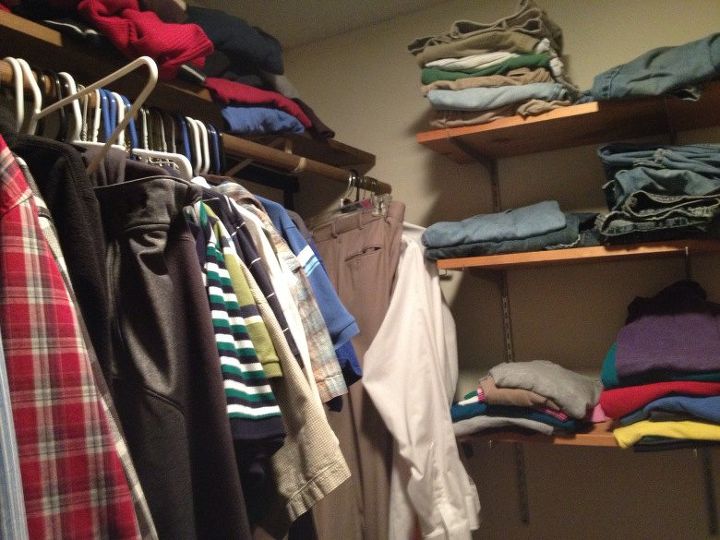
I had planned to copy Ana White’s idea of using galvanized pipes for hanging rods, but when we saw the price, we started thinking of cheaper ideas. Apparently galvanized pipes are expensive. We had two wooden dowels from the original closet, so we used those. Danny thought of using conduit hangers to hang the dowel rods from the top shelves. He’s so handy when he tries to be
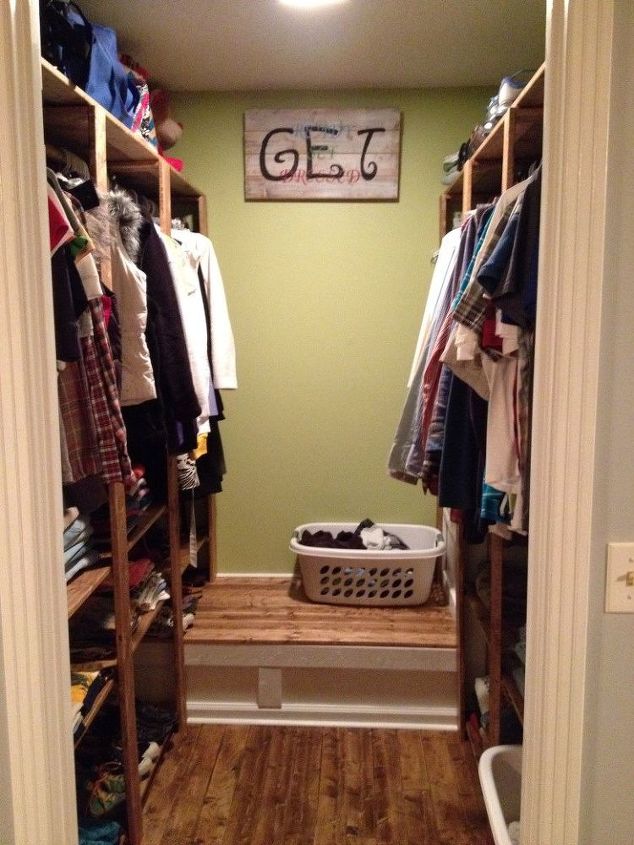
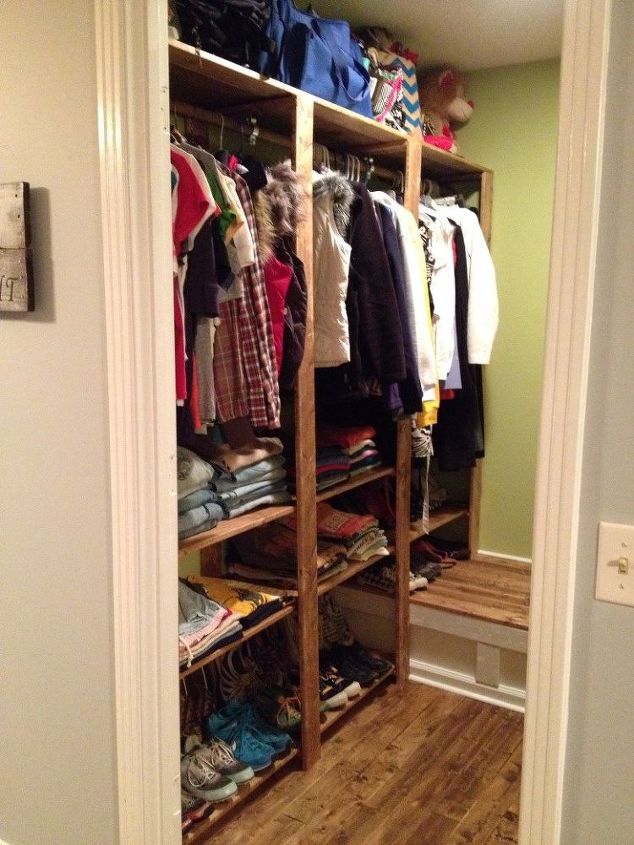
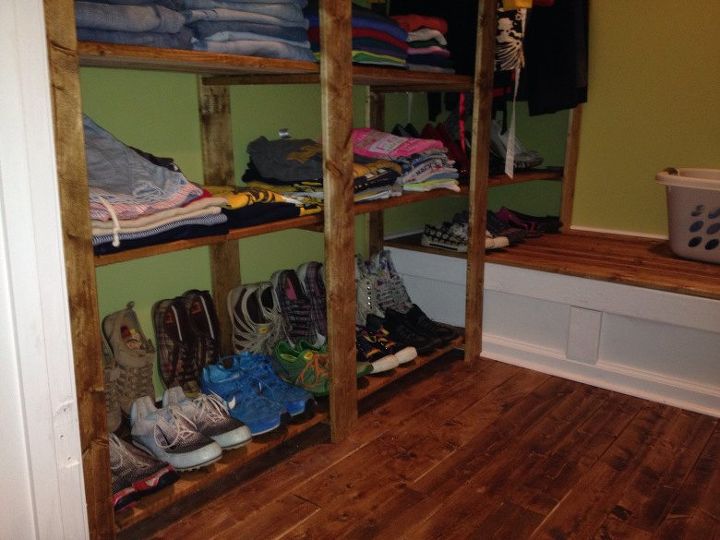
I LOVE it. Total cost: about $250. Totally worth it. By the way, the sign will be repainted…it doesn’t show up with those colors.

Want more details about this and other DIY projects? Check out my blog post!
Comments
Join the conversation
2 comments
-
Love the makeover! Good work!
-
Thank you!!! We had fun working on it and love that it is much more functional now!


Frequently asked questions
Have a question about this project?