


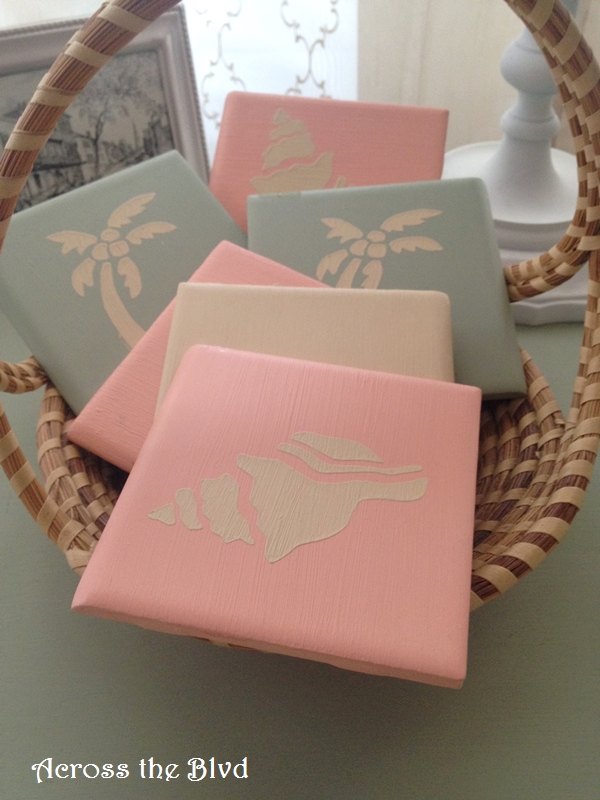
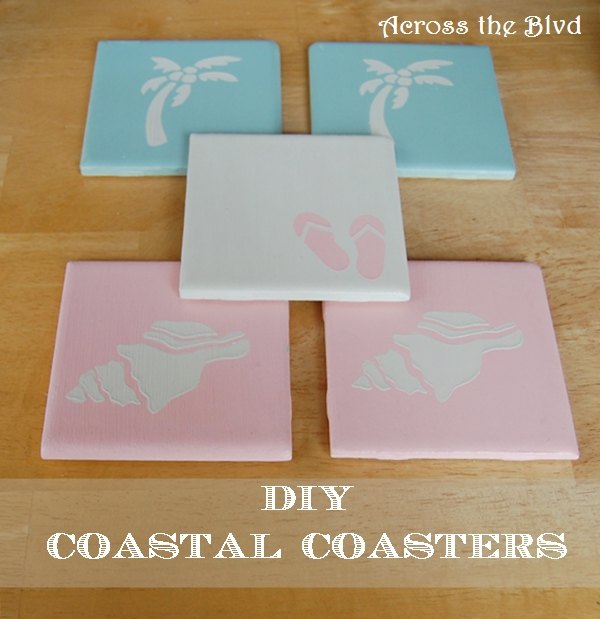
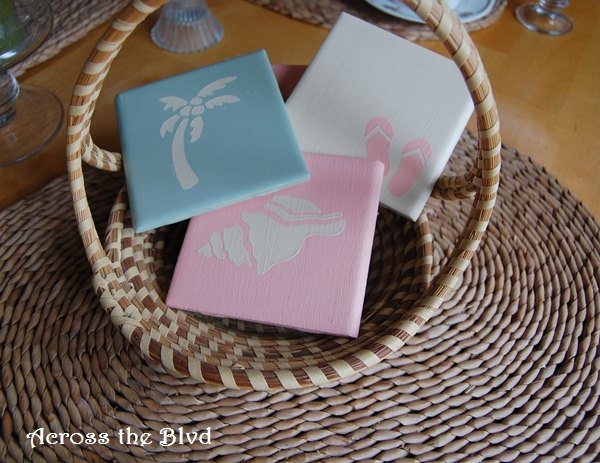
DIY Chalk Painted Coastal Coasters
Want to add some, simple, quick and inexpensive coastal touches to your decor? Using chalk paint, stencils and tiles, you can make these coastal coasters in under 30 minutes.
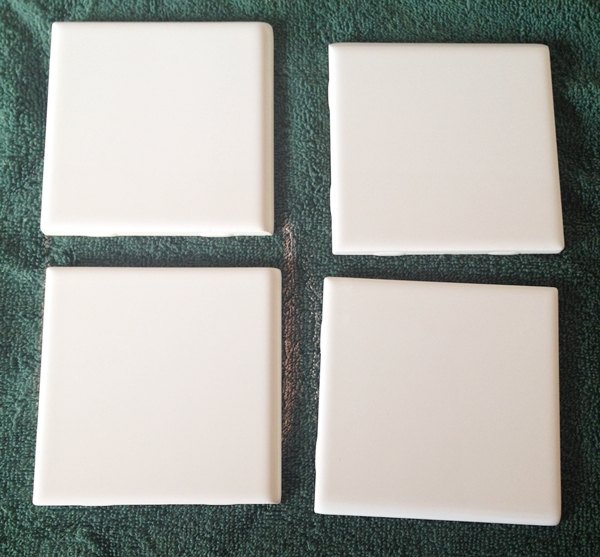
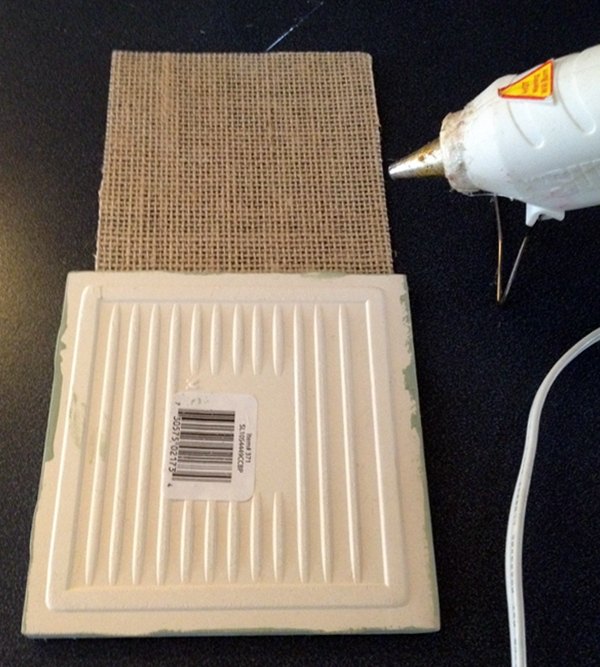
I purchased plain, white tiles from Lowes. Since I was going to use chalk paint, no sanding was required.
I gave each tile two coats of chalk paint using an assortment of colors. I already had the stencil and paint so there was no additional cost.
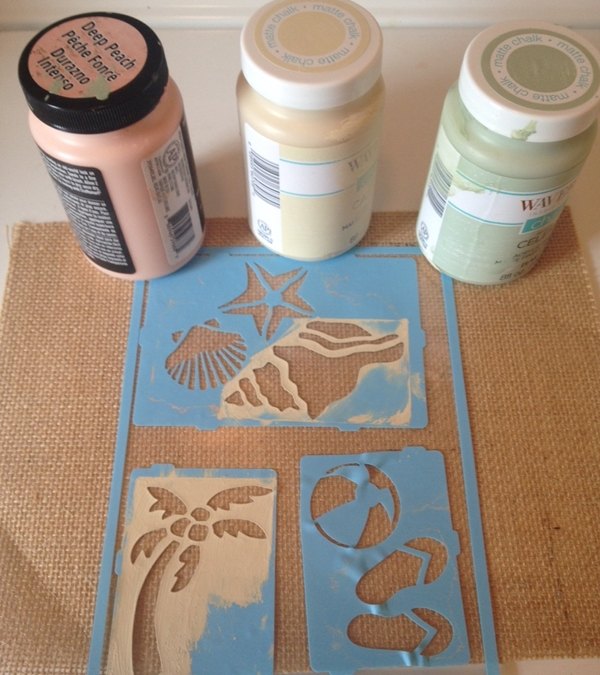
After the second coat of paint was dry, I used the stencils to give them each some coastal flair.
For the backing, I used laminated burlap. I cut squares slightly smaller than the tiles and hot glued them in place.
The last step is to spray each coaster with Polycrylic Finish. I gave them three coats to make sure they are water resistant. From start to finish, making these took about 30 minutes. How easy was that? I love craft projects that anyone can make that are inexpensive, don't you?
To see more details, please visit the link below.

Want more details about this and other DIY projects? Check out my blog post!
Comments
Join the conversation
4 of 8 comments
-
Love this. What a great house warming gift idea.
-
where can I get these stencils?


Frequently asked questions
Have a question about this project?
Can I use this idea to paint over my bathroom tile? I have a 1958 home and the tile is pink with black borders. HELP
How do you prevent the chalk paint from coming off when your coasters get wet or need to be cleaned?
Just great! Have done marbleized coasters, but these are better! Yes, where did you get the stencils? And do you think a sealer is necessary?