


How to Make a DIY Bar Cart Out of an Old Entertainment Center
Are you looking for DIY bar cart ideas? Today, I'm going to take you through the step-by-step process of transforming an old corner entertainment center into a super cute rolling DIY bar cart cabinet. Trust me, it's going to be a fun project!
Let's dive into the fun process of transforming the entertainment center into a fabulous rolling DIY bar cart:
Tools and materials:
- Sandpaper or a sanding block
- Wood filler
- Putty knife or spatula
- Primer
- Paint (color of your choice)
- Paint brushes or rollers
- Screwdriver
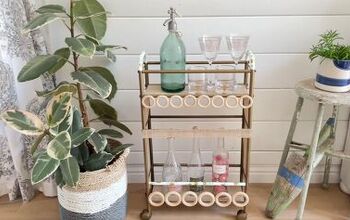
- Wine glass holder
- Wine bottle holder
- Replacement wheels (optional, if the existing ones are not suitable)
- Replacement hardware (knobs, handles, etc.)
- Old corner entertainment center
- Wood glue
- Screws
- Wine glasses and bottles (to test the holders)
- Optional: Stencils or decorative elements for personalization
Steps
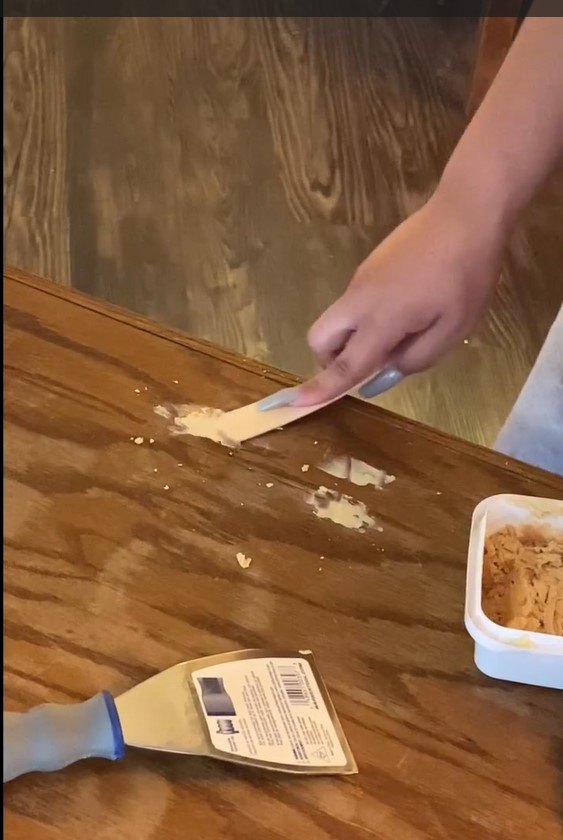
1. Filling holes
Clean the entire cabinet inside and out. Inspect the entertainment center for any holes or imperfections. Use wood filler to fill in these holes, and then use a putty knife or spatula to level the surface. Let the filler dry completely according to the manufacturer's instructions.
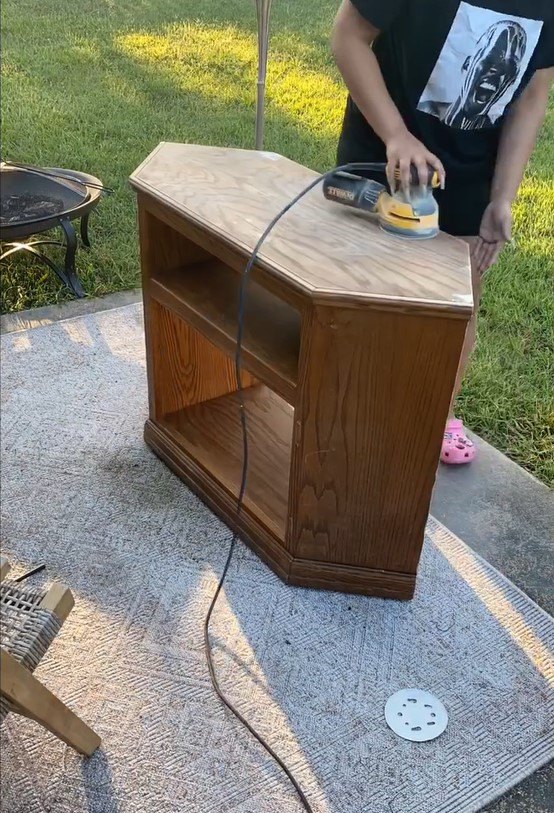
2. Sanding
Sand the entire surface of the entertainment center to create a smooth and even base for painting. This step is crucial for the paint to adhere properly.
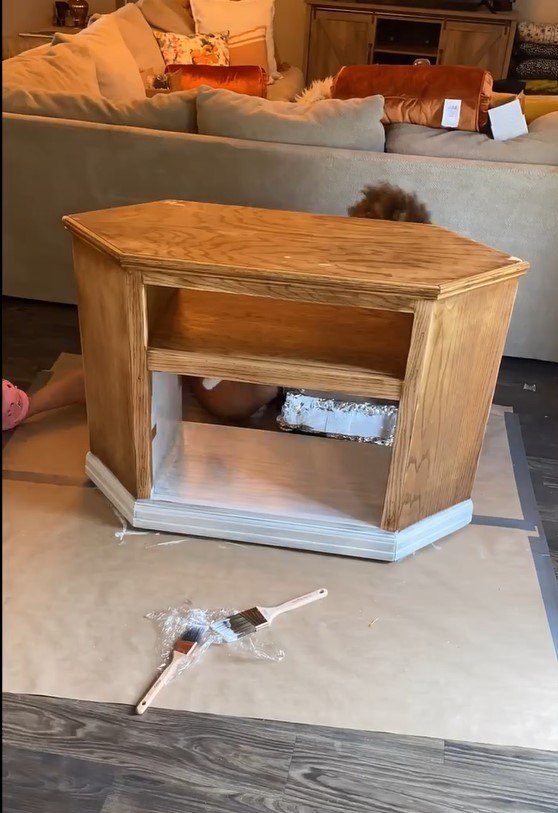
3. Priming
Apply a coat of primer to the entire entertainment center. This will help the paint adhere better and ensure a more even finish. Allow the primer to dry completely before moving on to the next step.
4. Painting
Now comes the fun part—painting! Choose a color that matches your style and the decor of your home. Apply a couple of coats of paint, allowing each coat to dry thoroughly before adding the next one. Remember to paint both the inside and outside of the entertainment center.
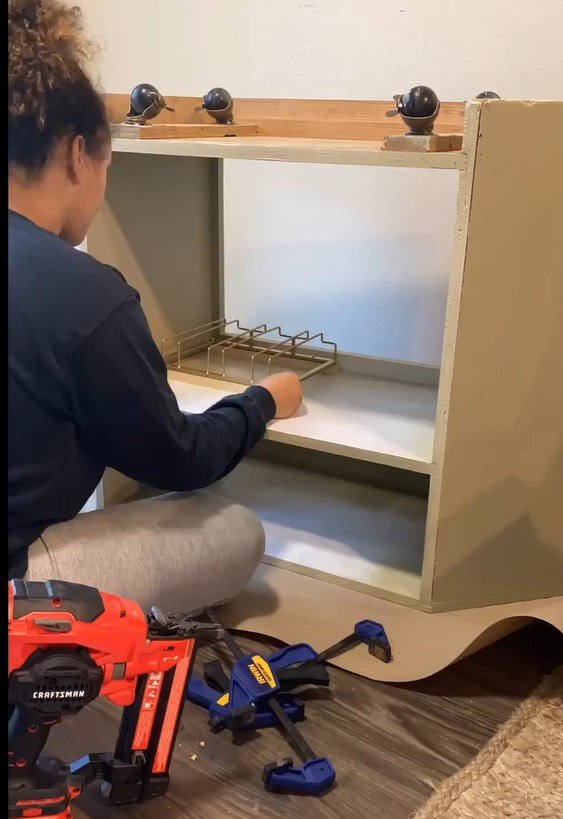
5. Installing wine glass holder
Measure and mark the desired location for the wine glass holder on the top shelf of the bar cart. Use the screws or wood glue (depending on the holder's design) to securely attach it to the shelf.
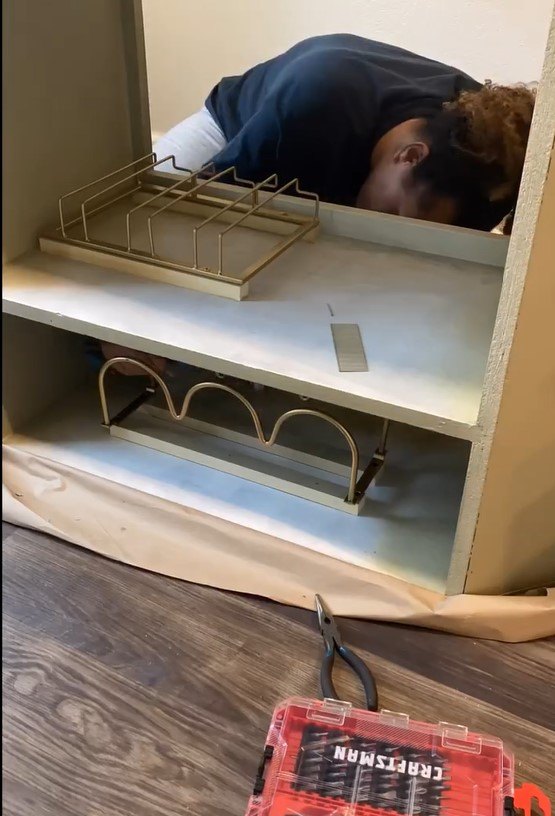
6. Adding wine bottle holder
Find a suitable spot on the bar cart to install the wine bottle holder. This could be on the side or inside one of the compartments. Attach the wine bottle holder securely using screws or wood glue.
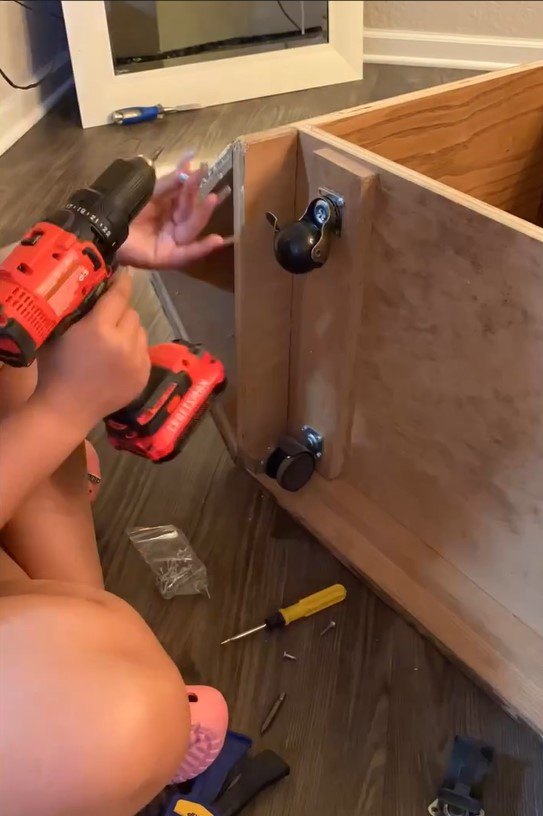
7. Replacing wheels (if necessary)
If the existing wheels are not suitable or missing, now is the time to replace them. Check the size and compatibility of the replacement wheels before installing them on the bottom of the cart. I changed them before I primed and painted but I would suggest installing new wheels after you paint the piece, just to keep them clean and shiny.
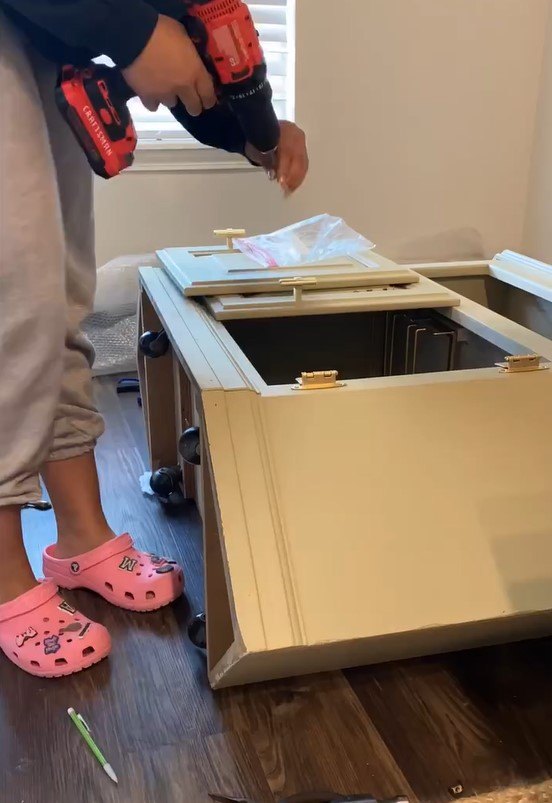
8. Replacing hardware
Update the look of the bar cart by replacing the old hardware with new knobs, handles, or pulls. This simple step can make a big difference in the overall appearance of the cart.


9. Finishing touches and personalization
Get creative and personalize the bar cart according to your taste. You can add stencils, decorative elements, or even labels to make it uniquely yours. I did not add any personalization to my cart. Take a final look at your newly transformed bar cart and make any necessary touch-ups. Clean off any dust or paint residue.
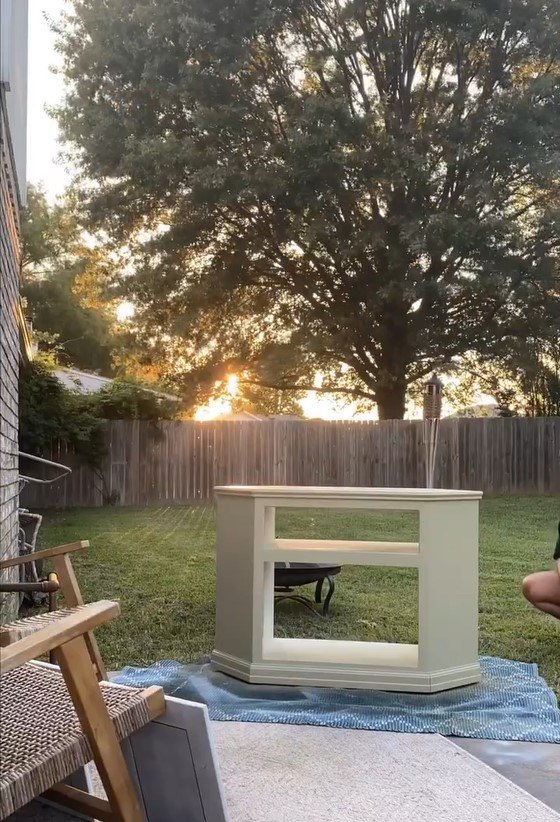
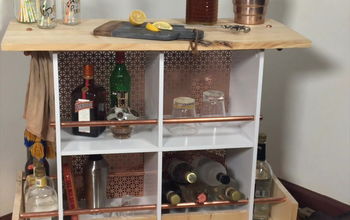
DIY bar cart
Your DIY rolling bar cart cabinet is now ready to impress your guests and add a touch of elegance to your space. Remember, you can sell your creation on platforms like Facebook Marketplace or use it to enhance the appeal of your Airbnb as I did.
Let me know if you think this was a super easy project in the comments below!
For more ideas, follow @flippedbyfaith_ on Instagram.


Frequently asked questions
Have a question about this project?