


DIY: Bathroom Makeover on a Budget

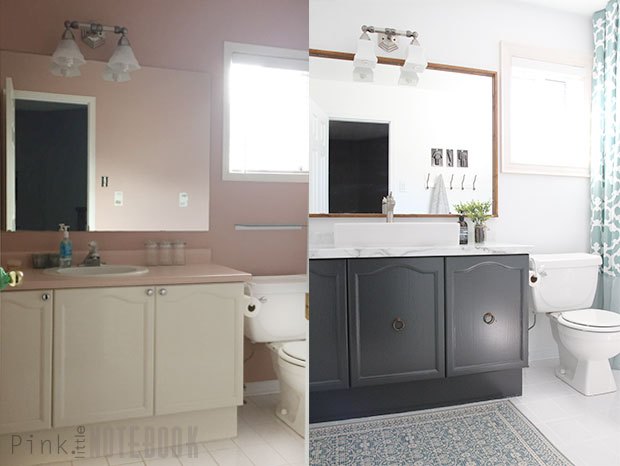
My main bath is finally complete!! I’m so happy about this one because not only was it done on a tight budget but we literally created magic with just paint and a few minor modifications to the vanity.

This project was quite the challenge. For the most part, I was able to come up with a creative way to use what we had. There was no room in the budget to lay new tile, replace the vanity or even buy new accessories (okay maybe I purchased a new rug!). I had to find a way to make this awkward pink bathroom blend in with the rest of our modern decor.
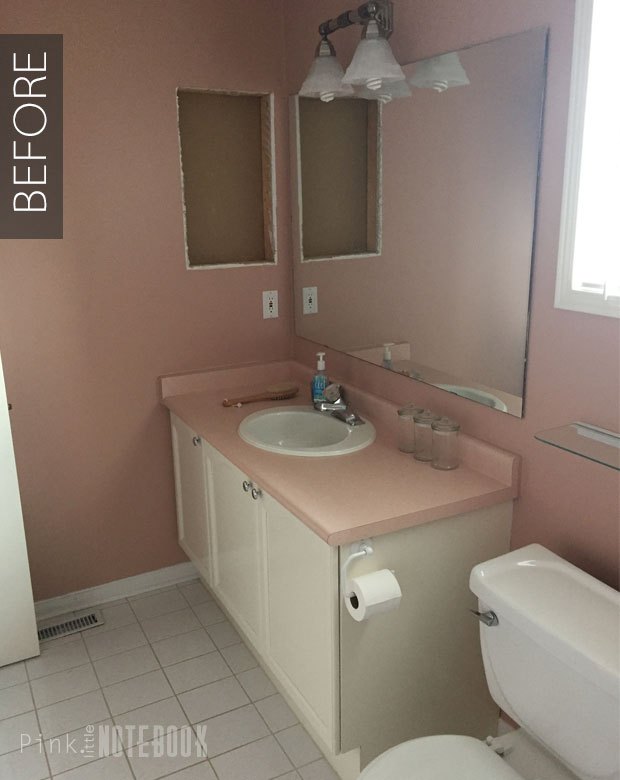
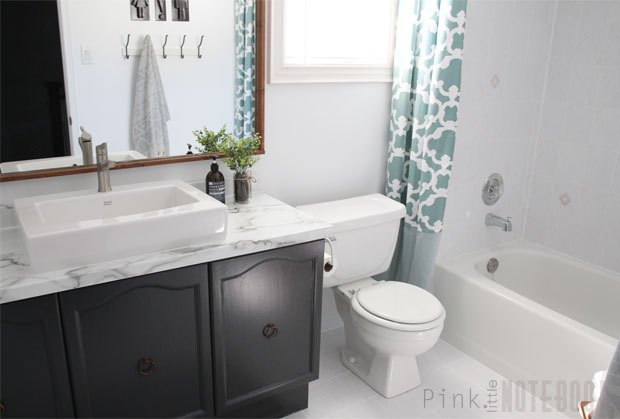
The vanity went through the biggest transformation in this bathroom. Not only did we paint the cabinets a dark shade, we repositioned the hardware to centre of the doors and replaced the dated countertop, sink and faucet. In case you’re wondering, it’s not marble, it’s a laminate countertop! You can check out all details about this vanity here. If you noticed the big hole in the wall in the “before” image, this was home to the world’s most hideous built-in medicine cabinet. Since storage is not an issue in this space, hubs ripped it out and patched with drywall for a clean updated look.
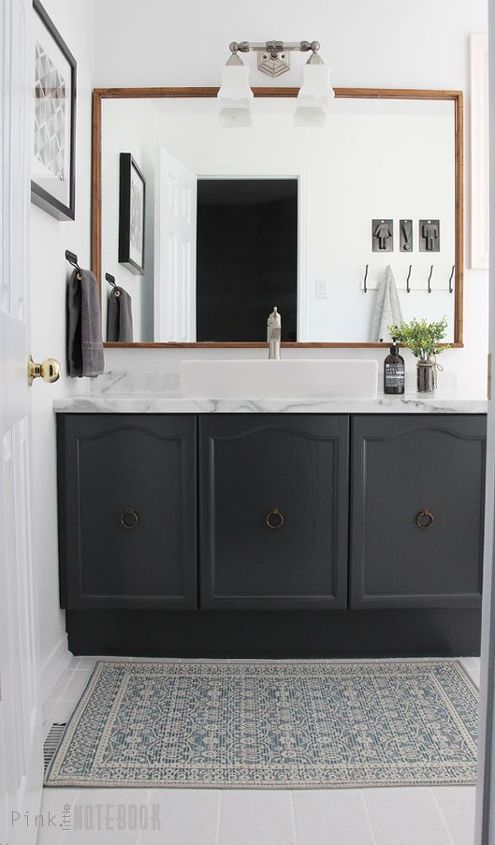
Here’s what we did. For starters, the pink walls are no longer pink. The quickest way to transform any space is with a can of paint. I chose the colour white, ONE, because I had it on hand, TWO, white seamlessly blends in with our somewhat neutral tile and THREE, it’s the easiest way to brighten up a dull space.
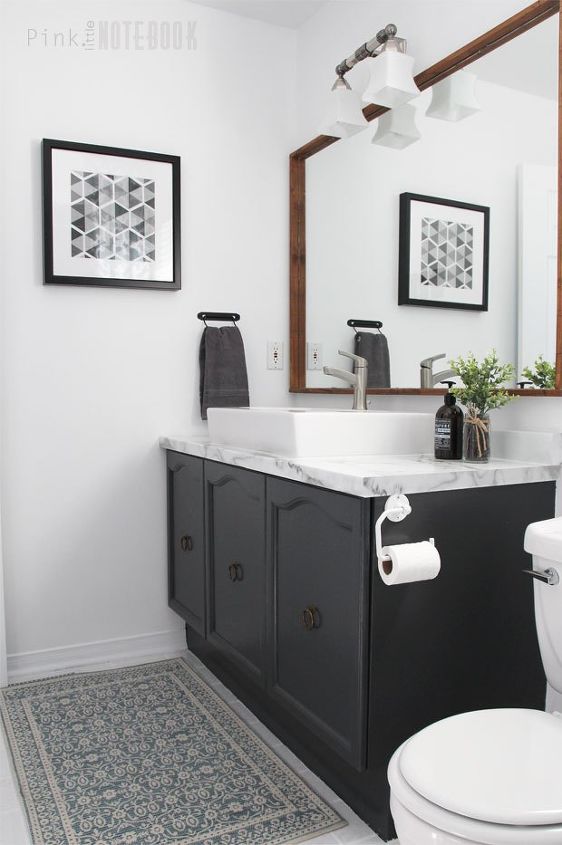
To dress up the mirror, we framed it with stained pieces of 1″ x 2″ wood strapping (which can be found at your local hardware store). This is absolutely my favourite way to modernize an old mirror—simply cut the strapping to size and nail to the wall encasing the mirror. It’s easy to do, costs only $6 and looks freaking amazing...............

The tile floor may look a little different and that’s because I took 10 years off them! By far, this is one of the most clever projects I’ve completed to date. I simply used white acrylic paint to cover all the beige grout…and NO it won’t wash off. It’s amazing how this little trick (that cost me less than $2 to do) made all the difference. I highly recommend it! Check out all the details here..........
When it comes to bathroom revamps, it’s easy to spend double the amount you initially had in mind. If you’re on a tight budget, just remember to replace only the things that absolutely need it. Find alternative solutions to update the remaining items in the space whether that means repainting, repurposing or even building things like your very own vanity. When there’s a will, there’s a way!
For full details regarding this bathroom refresh, check out the post in the link below.
Comments
Join the conversation
-
It's beautiful well done
-
I love it, it looks so much better, like it finally found itself.


Frequently asked questions
Have a question about this project?
I live in a house trailer it has wall panels ,how can I change them