


FAUX Tile With a Paint Pen + ARCHES: Budget Bathroom Makeover Part 1.

HI! I'm back from my unplanned blog hiatus. When I'm not here, you can find me on my Instagram or my TikTok. But lets get to it.
My primary bathroom has hardly been touched since we bought this house three years ago. It was drab and boring and in need of some character.
I had planned to replace the mirrors and I ordered these mirrors back in October of 2020 and they sat in my garage for over 10 months waiting for me to have time and a plan for this bathroom. At the time I ordered them, they were $75 each, but the price has gone up since.
So finally, I made the time and decided to replace the mirrors. One mirror was already detached from the wall just because the glue came loose months ago which is what prompted me to buy the mirrors in the first place.
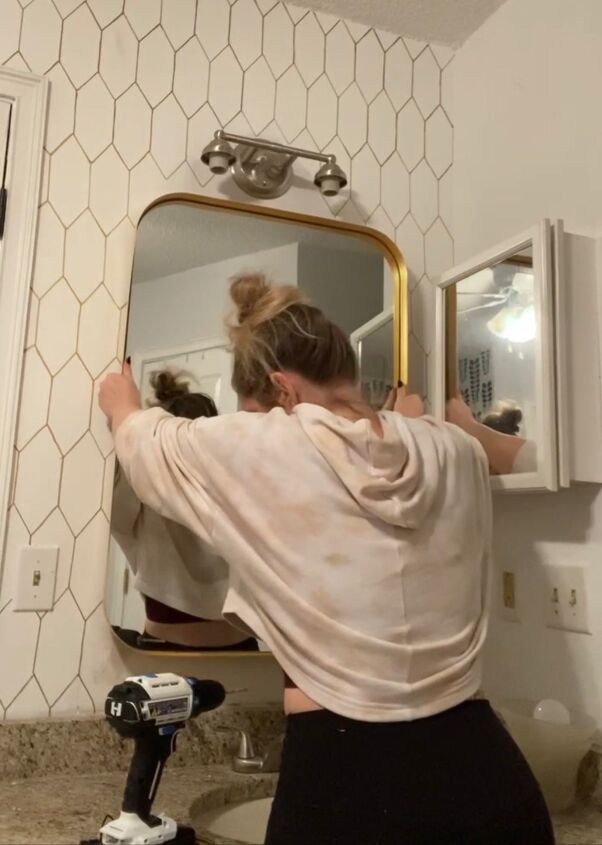
REMOVING MIRRORS
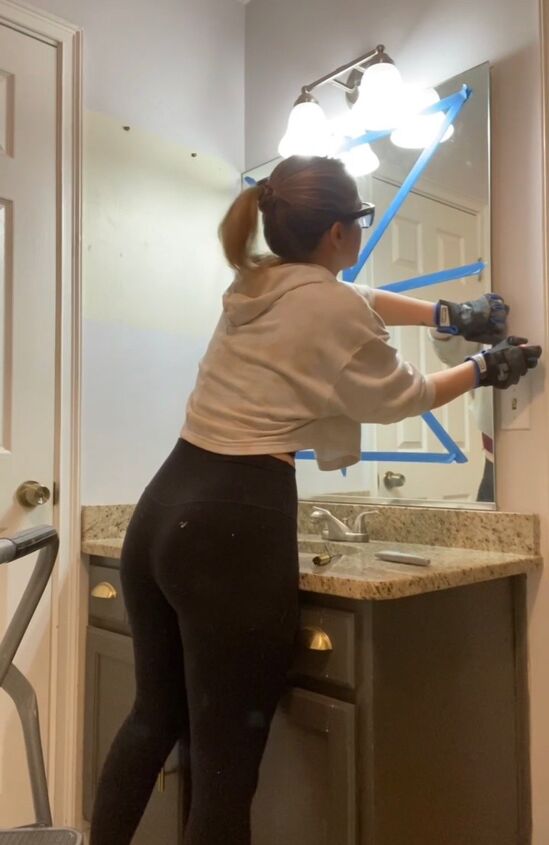
I started by taping up the old mirrors to make them safer for me to remove. If they break, the tape helps the pieces stay together. I also made sure to wear safety glasses ( mine linked here) and gloves. The mirror that was already loose was the first to go. Once that was off, I started on the other.
I scored the caulk that was holding the bottom to the granite counters, used a flat putty knife to pop the mirror off the wall. It came off surprisingly easy.

Once those were off the walls, I removed the rest of the glue from the wall by scraping and sanding. Then I patched those areas with spackle. Once that was dry, I lightly sanded those areas.

FAUX TILE WITH A PAINT PEN
After removing the mirrors and patching, I painted the all of the walls white. That was all that was in my original plan, but I always tend to snowball with my projects and I decided to try something that's been on my project list for awhile- FAUX TILE!
I found a piece of cardboard and measured out how big I wanted my picket fence "tile." I landed on 8 inches tall and 3 inches wide.
I cut that out, grabbed a gold Sharpie Paint pen, and went for it. A part of me thought, "Maybe I should trace this in pencil first..." but a bigger part of me thought, "Nah, just go for it."
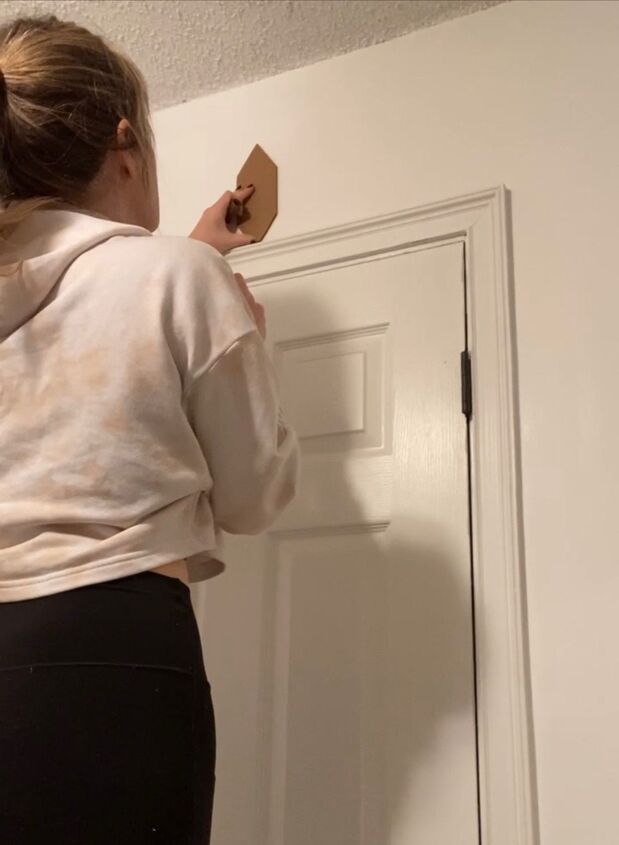
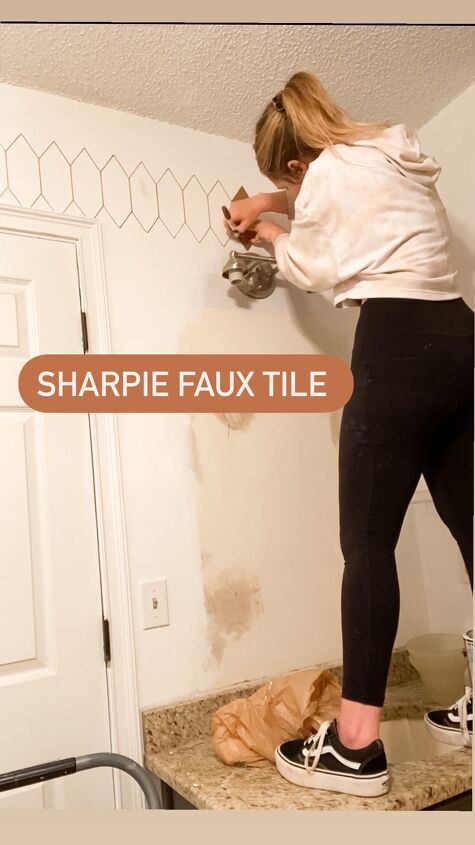
I started in the middle of the wall and worked my way out from there, tracing my cardboard template over and over until the whole wall (minus a small area over each vanity) was finished. I planned to do an arch around each mirror but needed to hang them first so that I could measure how big I wanted my arches.
HANGING MIRRORS
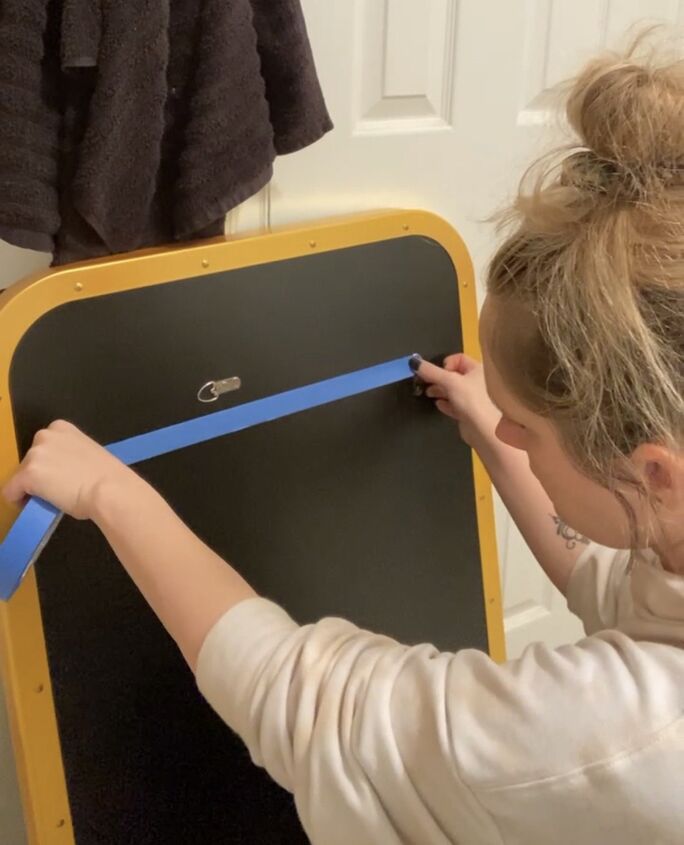
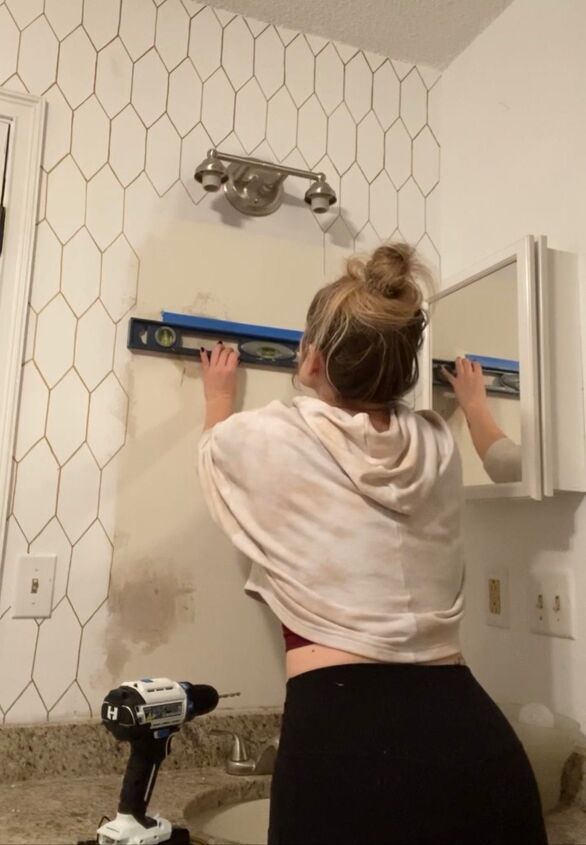
I hung my mirrors using the painters tape and toothpaste trick... I put tape across the back from hanger to hanger to get a perfect measurement for where my screws need to go (this also keeps them from falling down).
Then I put a dot of toothpaste on each hanger, pressed the mirror to the wall at the height I wanted it, then put the mirror back down. The toothpaste marks the wall and I can see where the screws should go!
I removed the tape from the back of the mirror and used my toothpaste marks as a guide for my tape. I then used a level to get my tape perfectly straight. I drilled holes for my anchors, inserted my screws, and hung my mirrors!
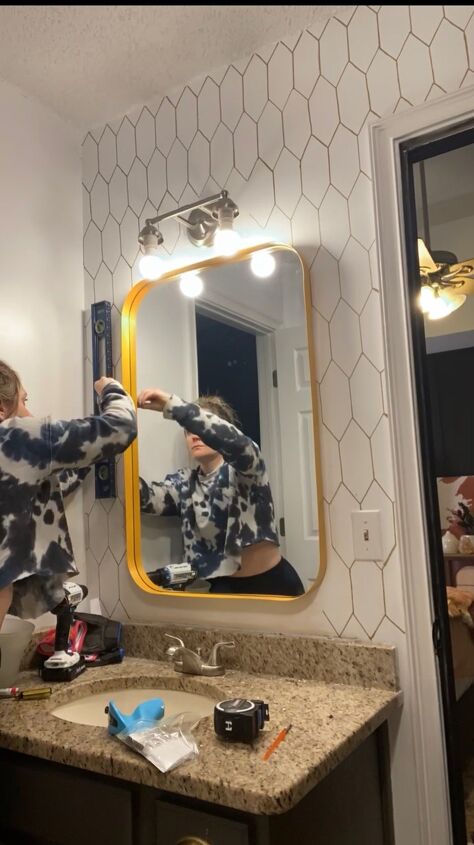
DRAWING ARCHES
Once they were hung, I measured 3" out from each side of the mirror and drew a straight line from the vanity up to where the mirror corner starts to curve. To make the arch at the top, I grabbed a belt and stuck a pencil through the hole. I found the distance between the center of my mirror and the outer pencil lines. I put the tip of my pencil at the end of one of my straight side lines and held the other end steady at the center point.
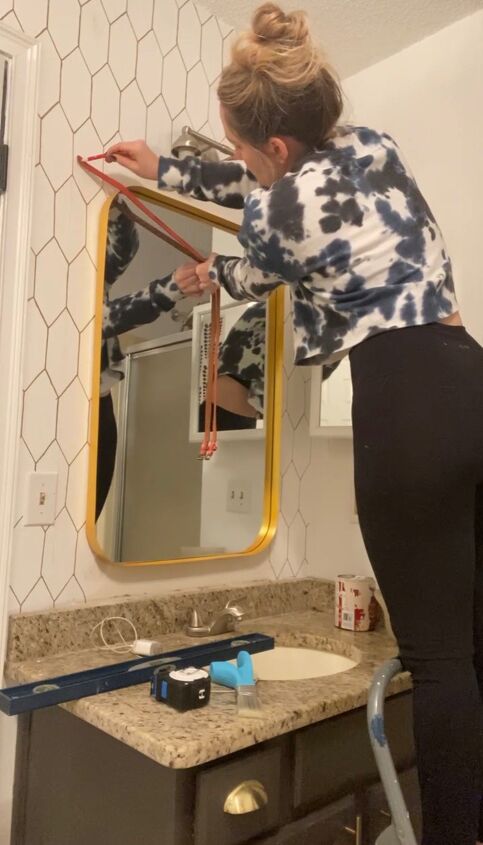
Then I carefully drew an arch by holding the belt or string taut and connected the two outer straight lines.
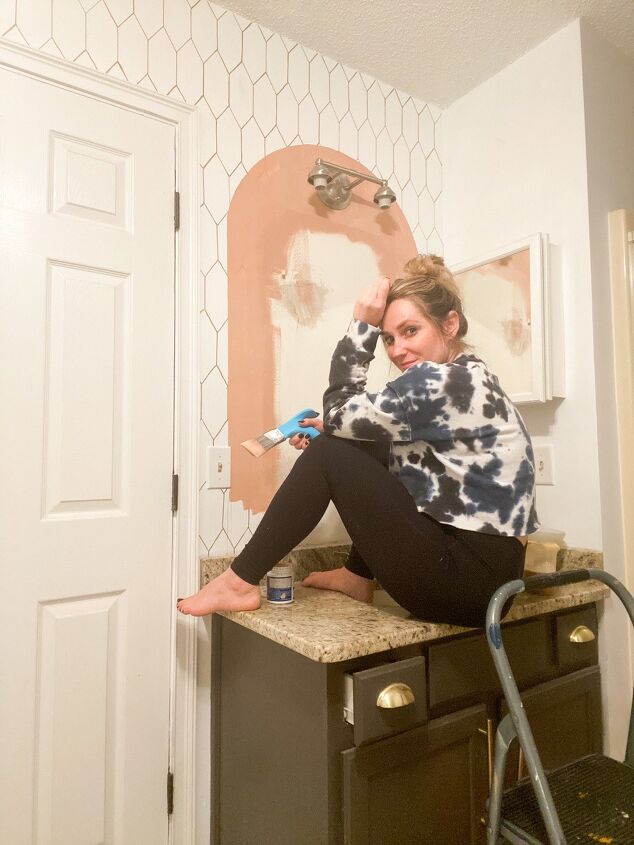
Next up- I took the mirrors down, picked up a sample of Valspar paint Adobe Glow and filled in those arches.
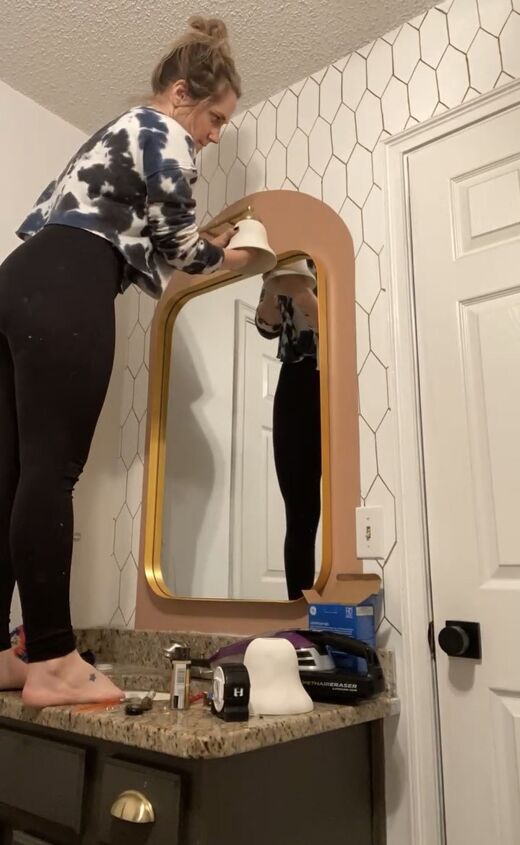
Once that was dry, I hung the mirrors back up. I have plans to replace these vanity lights at some point so for right now, I decided to paint the base with gold craft paint and I spray painted the shades with white chalk spray paint.
How far did I snowball after this?? Well- the next day I repainted the vanities so I'll tell you all about that in a later next post.
Resources for this project:
See all materials


Comments
Join the conversation
-
Very pretty!!!

-
Gotta try to get a model pic there? We just are mainly concerned about diys here 👍👍👍🤣🤣🤣


Frequently asked questions
Have a question about this project?