


DIY Toilet Paper Holder

I recently purchased some leather pulls for a dresser I bought to spice it up a bit. I had two left over leather pulls and decided to find something to do with them! I've never been a fan of the regular toilet paper holders so I decided to make my own with a few other supplies I had on hand!
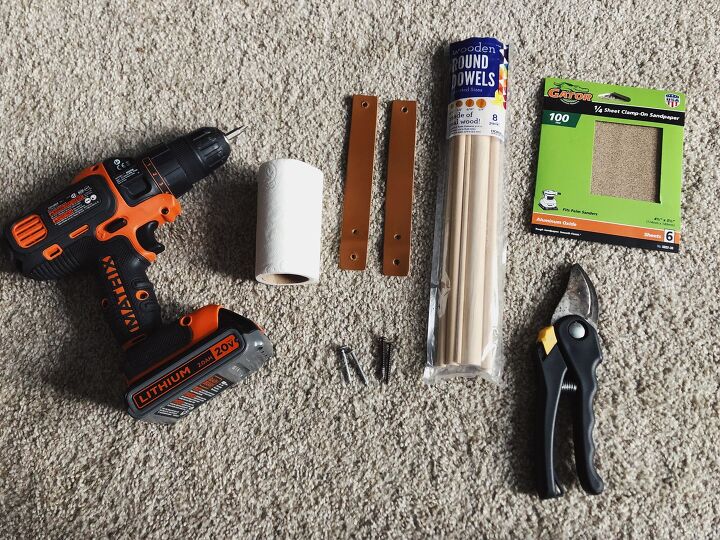
Materials Needed -
- leather pulls
- wooden dowel
- drill
- screws
- sand paper
- cutting device
- toilet paper
leather pulls link -
https://www.amazon.com/dp/B091GNNPXZ?psc=1&ref=ppx_yo2_dt_b_product_details
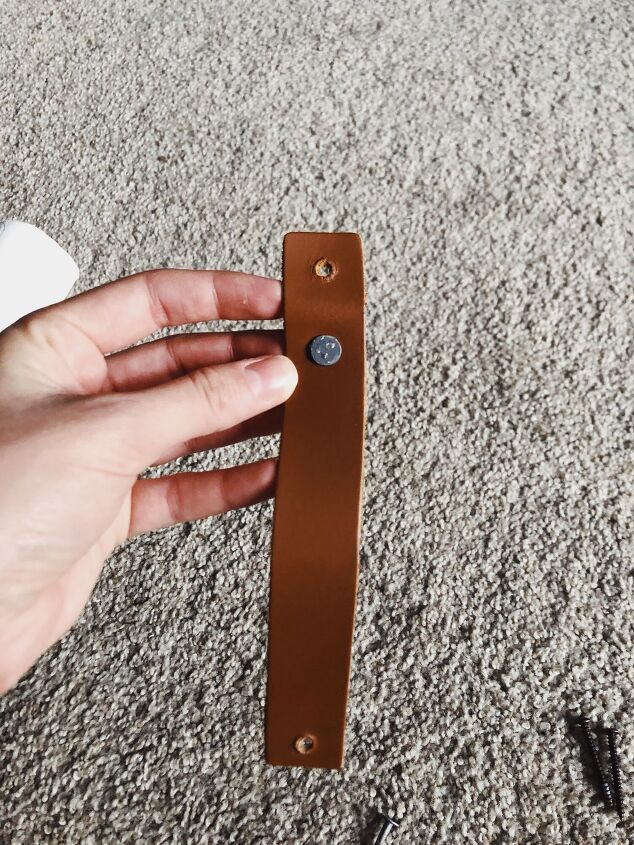
Step One - Assemble leather pulls
To put together the pulls I got I put the screw through the bottom of the two holes
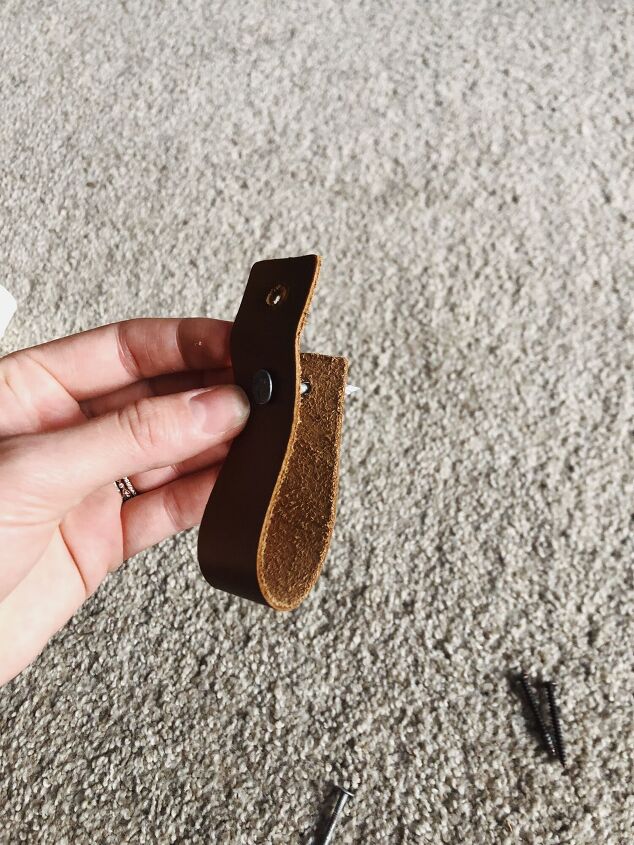
Then I folded the pull over and put it through that hole.
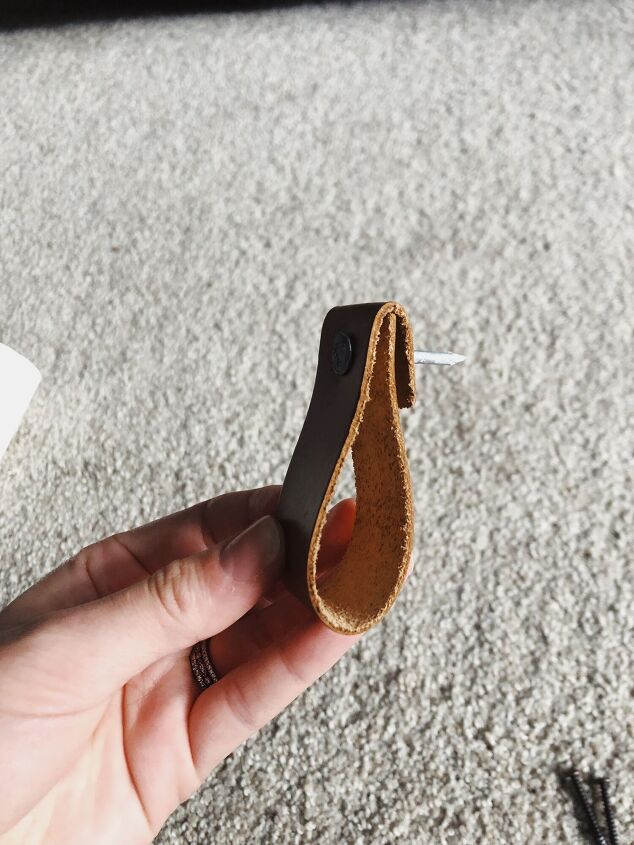
Then I folded the top over and put it through the hole.
Step Two - Put pulls on dowel
The dowels I had on hand were going to be too long for this project, so I put everything together how it would be hung up to see where I wanted to cut the dowel.
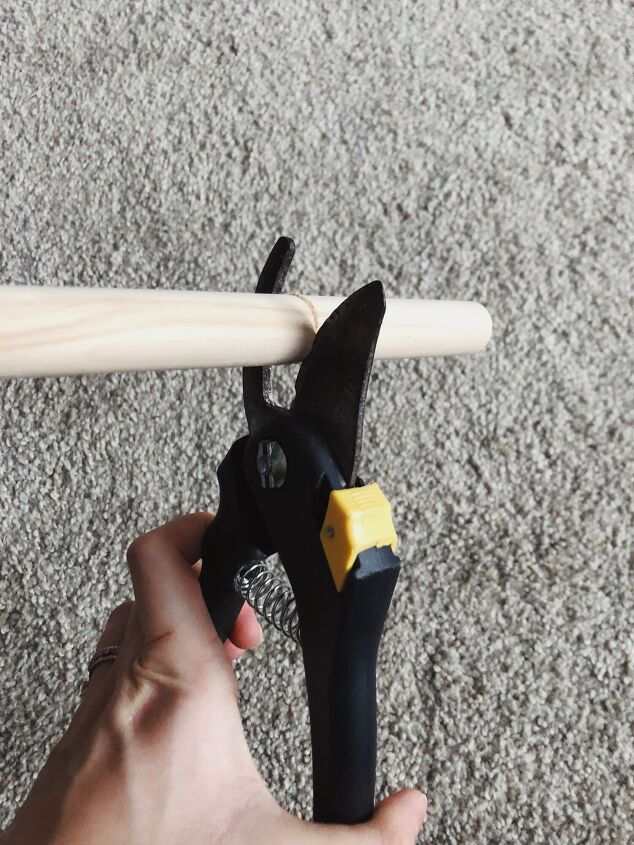
Step Three - Cut dowel
I just used what I could find, which happened to be garden trimmers. My hand saw has been missing since I moved a couple months ago, I would have used that if I could find it. Anything you have that will cut a small dowel works just fine!
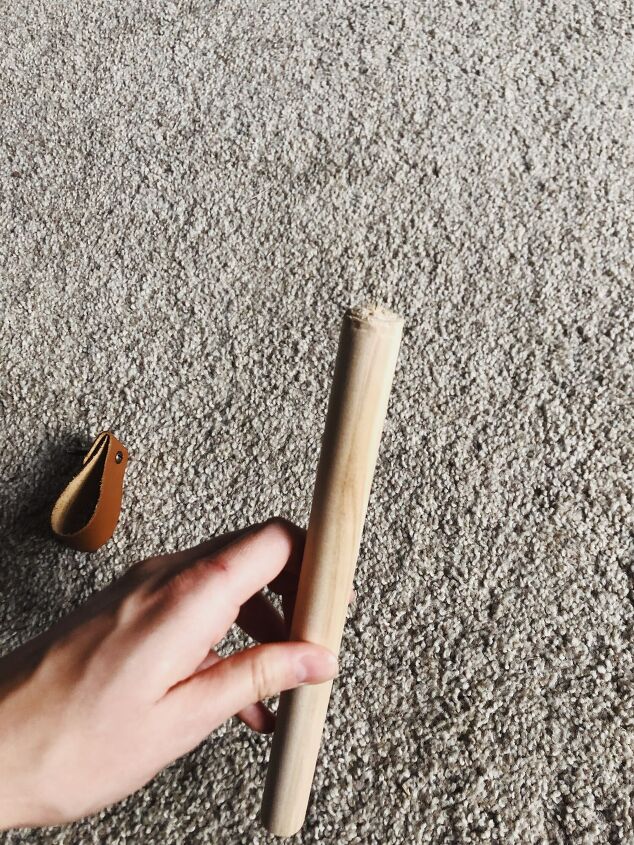
All cut!
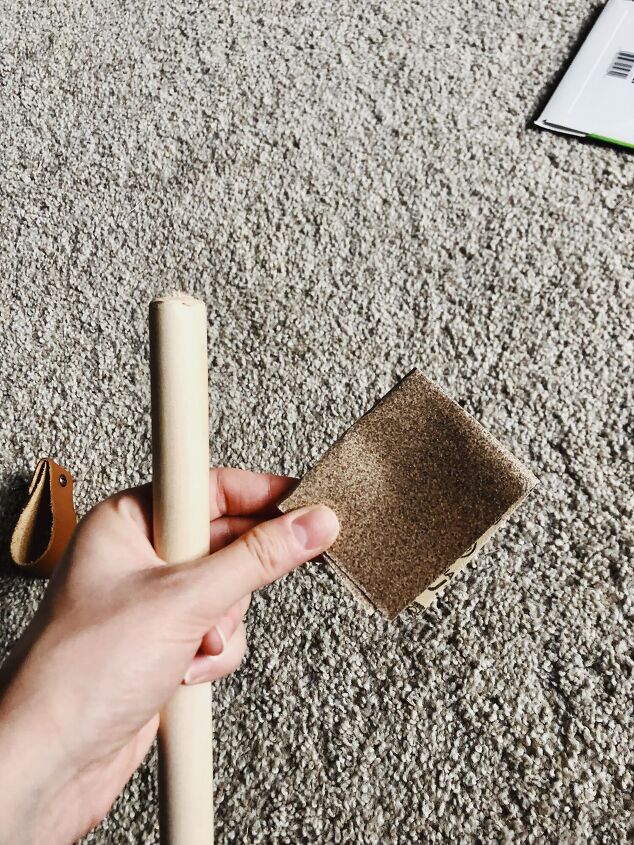
Step Four - Sand
I then took some 100 grit sand paper and sanded down the side I cut to smooth it out.
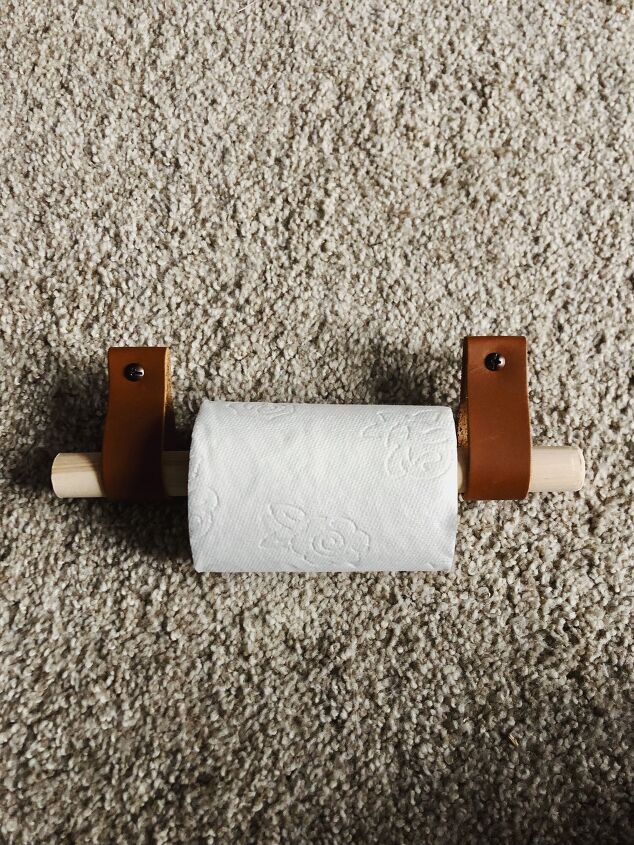
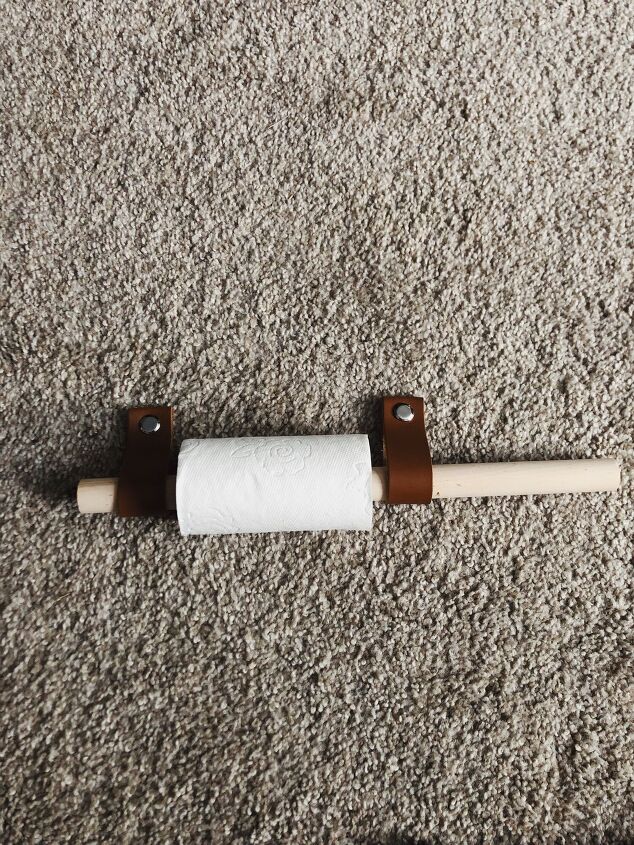
Almost done and how cute?! This is how it will look all hung up!
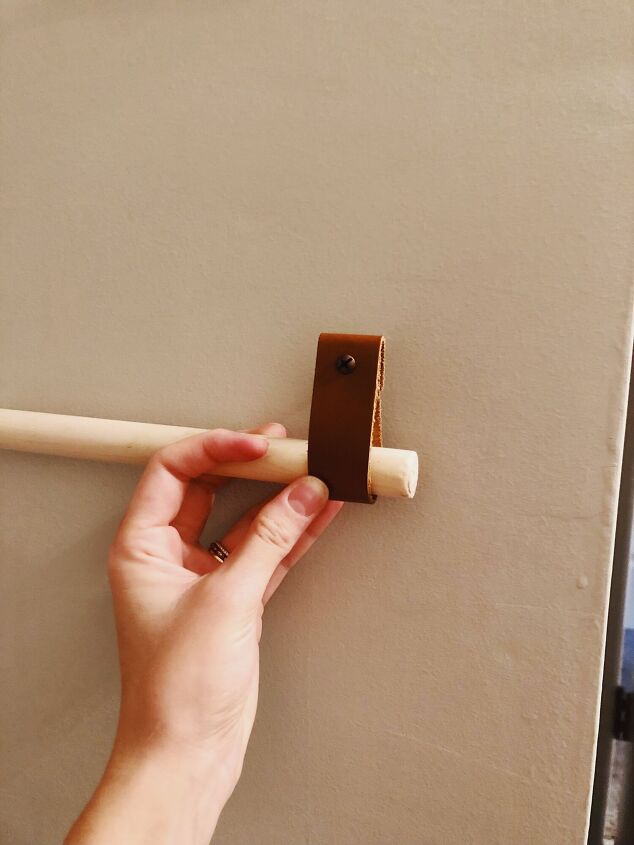
Step Five - Hang up
Hold up the dowel and leather pulls to see where you want it to hang. Use your drill and drill the screw into the wall. I had shown using a nail when assembling the leather pulls in the first step, but decided screws were the better option and would hold this better to the wall.
This step is where I stopped - I am currently renting and don't want to remove the existing toilet paper holder and have to patch and re-put up when it comes time to move again.
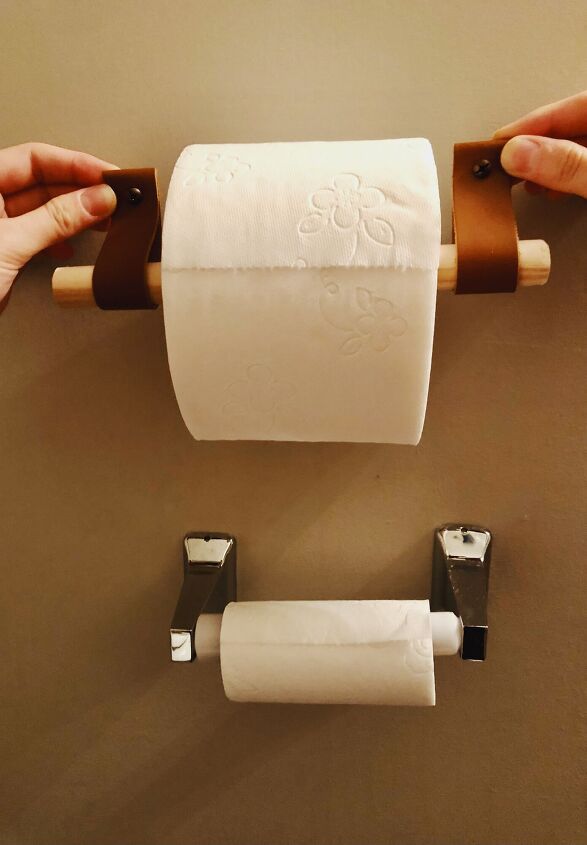
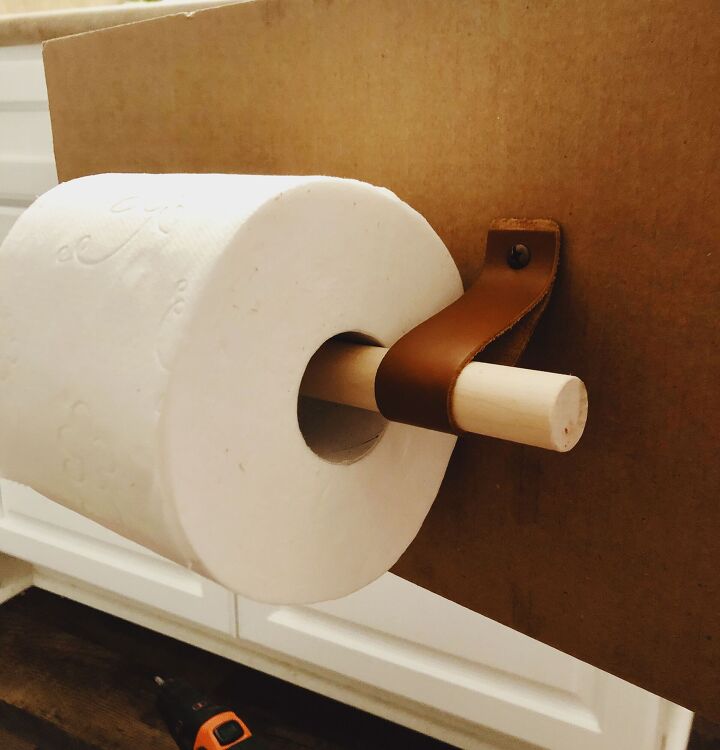
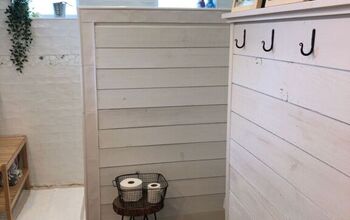
This is what the holder will look like on the wall - SO much better than the before (bottom).
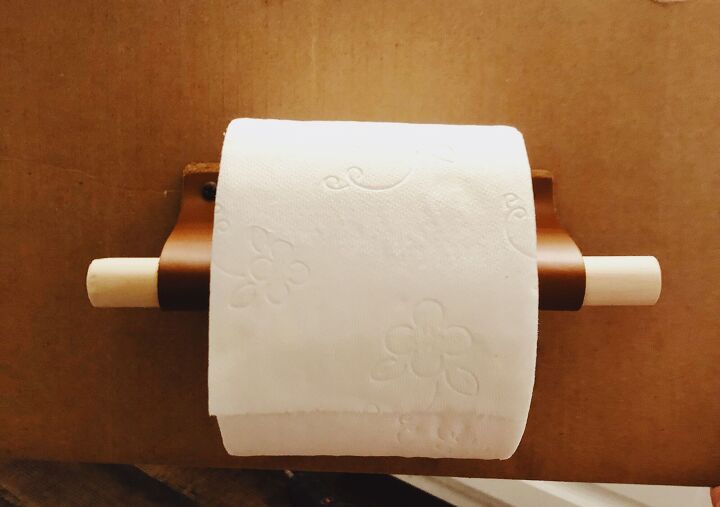
I screwed this to a piece of cardboard to show how it will look all hung up. I cannot wait until I move and I'm able to hang this up and use it!
Just two main materials and you have a cute update to your toilet paper holder!
Resources for this project:
See all materials


Comments
Join the conversation
-
Good idea
-
Unless you are nailing into studs, the nails will loosen over time and fall out. One should use screws and wall anchors. I agree with another person, the wood and leather would retain bacteria and moisture.


Frequently asked questions
Have a question about this project?
My question is if you put a full roll or T P on the holder, doesn't the wall stop the free flow of the roll? It looks like it rests on the wall.
What do you do about the scratches and marks on the painted wall due to fingernails and dirty little hands...plus where the roll rubs against the paint?