Clear Coat Wine Barrel Top Using Epoxy Resin

One of the benefits of having a wine barrel as part of your decor is having a really cool wine barrel top to display and put your favorite beverages and/or decor on. Unfortunately, the Arizona sun can wreak havoc on pretty much any surface and fade it into an unrecognizable haze of sun damage. (much like it has done to my skin!)
We picked up a couple of half wine barrels over the summer to use for planting, and also got a full barrel to use as a table/centerpiece under the pergola on our new patio. When I say picked up, I mean we had them delivered. The delivery guy picked them up and carried them, but there was no way I could have done that.
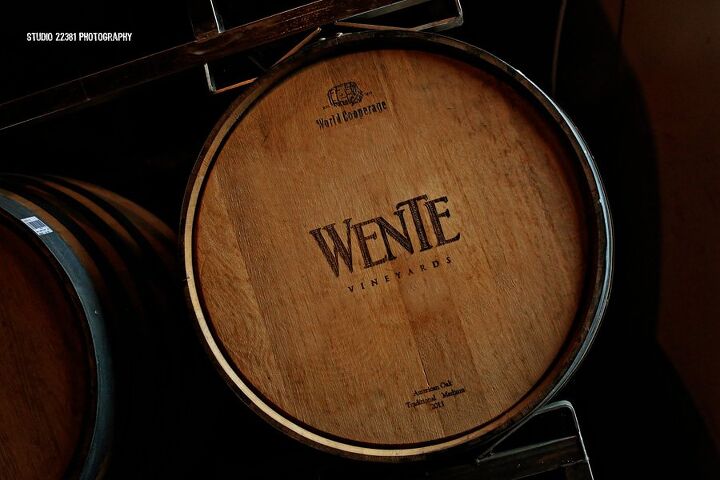
The barrel we got for our table was from Wente Vineyards and had a really cool wine barrel top which, in its prime, looked something similar to this...
It was very much faded when we got it, and the summer sun faded it even more. So much more that it was pretty hard to tell that there was any writing on the top (and where's the fun in that??).
The top was also uneven, as the weather had taken its toll not only on the coloring and waterproofing (wineproofing?), but also on the evenness of the boards. In order to make the top useable as a table/coaster for backyard partygoers (who am I kidding... it's 2020), we would need to waterproof and level the top.
Epoxy Resin to the rescue!
We decided to use some epoxy resin to not only provide a little waterproofing on the top and some protection from coffee/water/whatever rings AND to make it leveler, we decided to pour some epoxy resin on the wine barrel top.
First things first. Gather your supplies.
Pro-tip: You can follow these steps to put a beautiful finish on pretty much any wood-based project that you're working on.
Wine Barrel Top Beauty Supplies- wine barrel (gonna be tough to do this on any wine barrel project without one!)
- epoxy resin kit - I used the ProMarine kit for wood tabletops
- foam brushes
- gloves
- 4 measuring cups (I used plastic cups)
- 2 mixing containers (I used an old cottage cheese container)
- stirring stick
- propane torch (used to get all the bubbles out)
Pro-tip: You'll be mixing and applying the resin in 2 steps: a base coat and the actual pour. Plan your epoxy use accordingly.
Pro-tip: Put a drop cloth, piece of cardboard or other protective item under the barrel just in case you drip some resin on your patio and stain it forever. Just sayin'.
Make sure your wine barrel top is level... it'll make a difference for the final pour.
1. Prepare the Epoxy ResinPour equal parts epoxy and resin hardener into a container and mix thoroughly. AT LEAST for 5 minutes.
For the first application, you are looking to get a nice base coat on the wood to make sure that you get it waterproofed.
Pour a little resin on the top and use the brush to spread it evenly.
When the base coat is dry to the touch, mix up another batch of resin and get ready to pour.
4. Repeat Step 1... mix more resin and stir thoroughly5. Pour the Epoxy Resin
You won't need to use a brush for this part, as you are pouring more on than you used for the base coat. The resin will self-level.
After you have a sufficient pour (the depth is up to you, your plans, and your comfort level) you might see some bubbles start to form. Using a propane torch, lightly heat the areas that have air bubbles. It's kinda fun and therapeutic to watch them pop! :)
Cover the top of the barrel with something (I used a big piece of cardboard) to keep dust and other undesirable objects (bugs, cats, people fingers, etc) from messing up the resin. The waiting is the hardest part!
8. Enjoy!Move your wine barrel to its new home and brag to all your friends and neighbors. And eventually, you'll be able to have them all over to show it off!
Enjoyed the project?
Resources for this project:
See all materialsComments
Join the conversation
-
-
-
 Phyllis Allen
on Jan 01, 2023
Thank you for this idea. Can you accomplish this with 8 oz. of each material? It is the same company. I see they sell smaller bottles and for my first attempt I thought this might work, since wine barrel top is not too large. The set is around $20. Did you use the pro polish when done?
-








Frequently asked questions
Have a question about this project?
Where did u purchase your 1/4 barrel?
Is that an Australian labradoodle in one of your pics?
Jan