


Upcycling Nest of Tables

I friend of mine asked me to help her give her home a cottage feel.
She already had the furniture but nothing really flowed well in her home.
That's where I came in.
I transformed a Welsh dresser and coffee table to match the end result of the nest of tables.
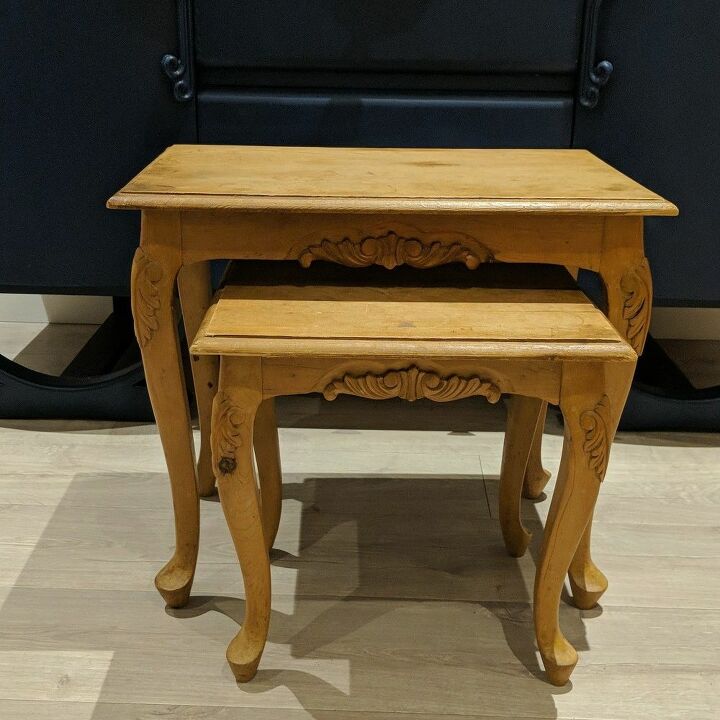
These tables although beautiful, were in really bad condition.
They had chips and chuncks missing. Not to mention the scratches down the legs.
Firstly I sanded off the wax/vanish then used a harder/rougher technique to even out the arears where there were chunks and chips in the wood.
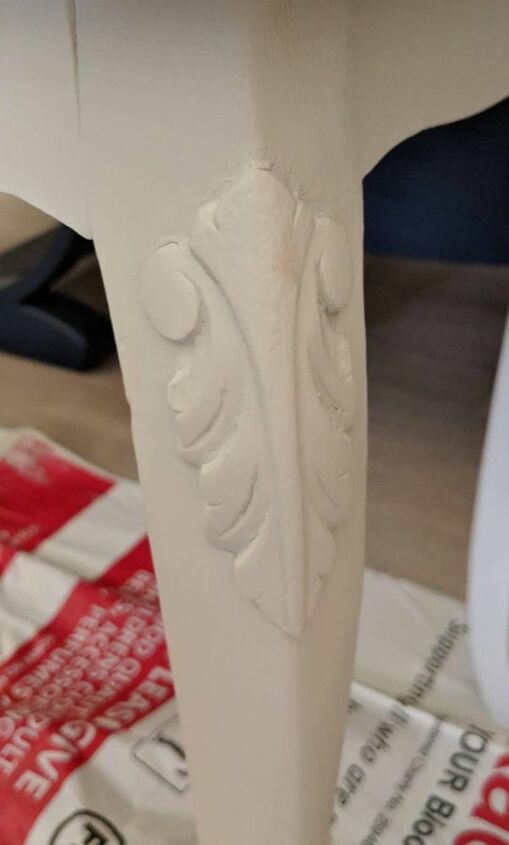
Once I evened out the edging I lightly sanded down detailing.
I folded up a smallish piece of sanding paper and went into the groves.
A sugar soap wash later and it's time to start painting.
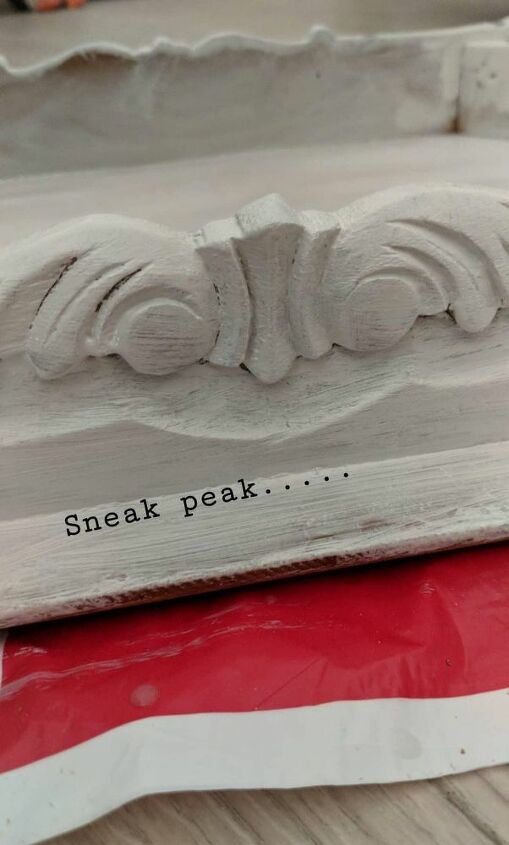
This was a really old piece of furniture. Even though the amazing Frenchic paint has a built in primer I knew I needed to still prime this. The oil berried deep in the wood would otherwise leave yellowish stains in the paintwork.
So first I painted the tables in primer. Any make will do the job. I bought mine from Wilkinsons.
The trick with the detailing is not to go so thick. Light layers, making sure you have gone deep into the crevices.
I did 3 layers on the top knowing that there would be tea and coffee cups on these rather often.
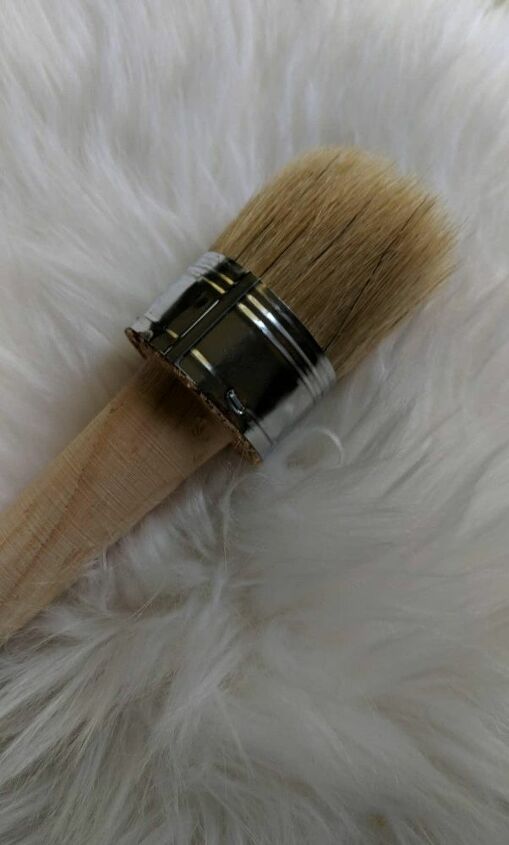
I use this wax brush from Amazon.
Lightly dip the brush into the wax making sure you've evenly covered the ends. You may want to use circular movements to apply the wax.
When waxing lightly brush the wax on. Leaning to one side more then the other with each stroke ensuring all the wax leaves the brush. It will spread more than you think. Once finnishes leave as directed on the tin and buff off the excess wax.
You can repeat this if you feel it is needed.
I use Frenchic paint which already has wax included in the mixture so the extra coat is just a precaution.
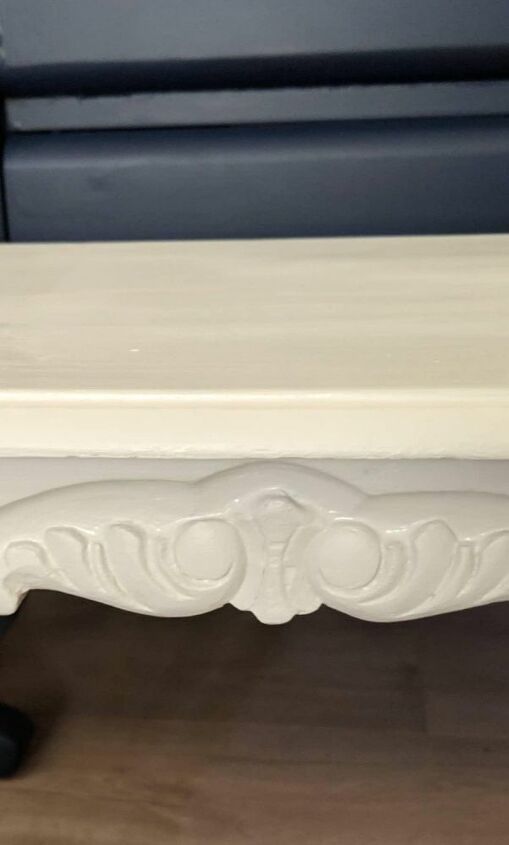
I used circular movements in the detailed arears to make sure the wax went in deep.
Top tip. Make sure you buff into the details or you will see the wax clumps when it dries.
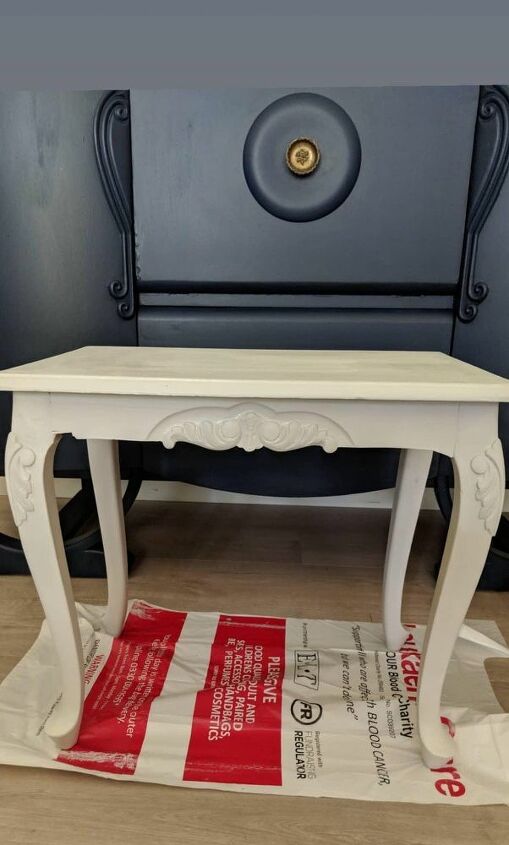
Now they are ready to use.


Frequently asked questions
Have a question about this project?