


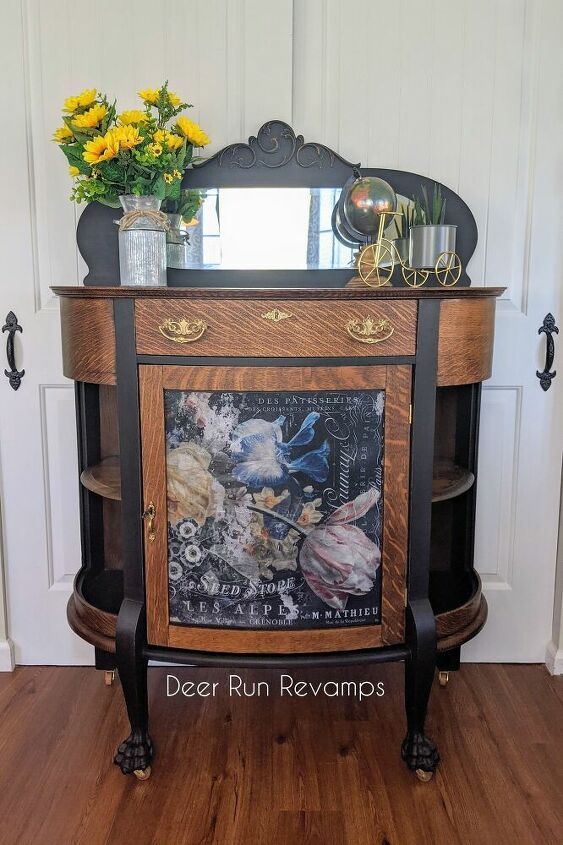
How To Bring An Antique Back To Life And Rebuild Broken Feet

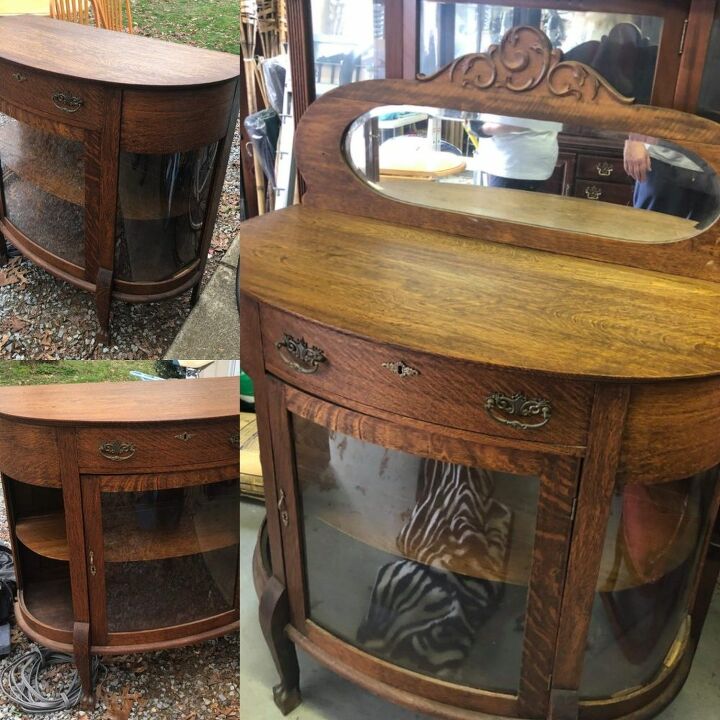
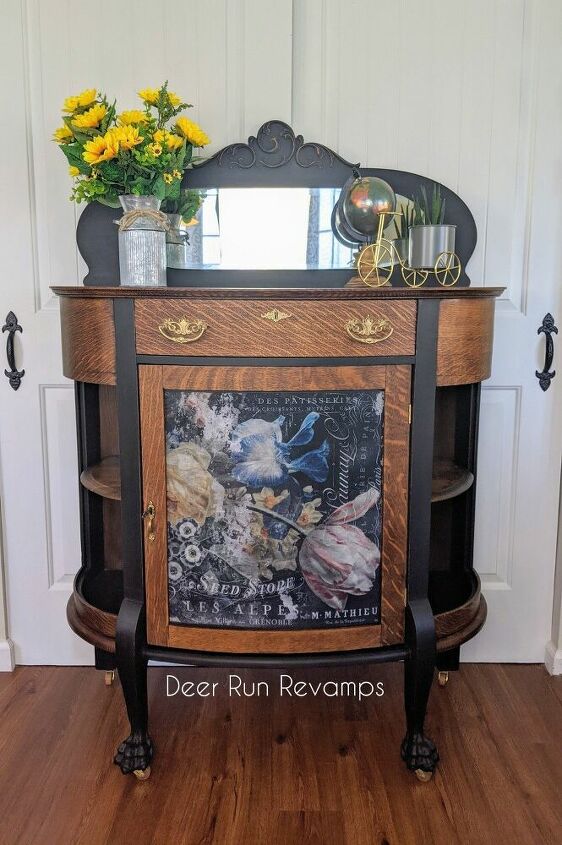
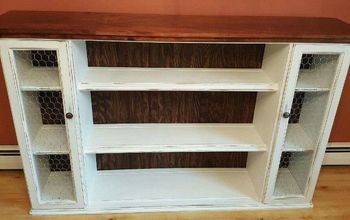
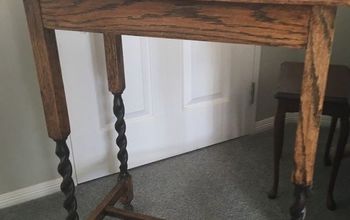
One day, I received a message from a woman who was looking to sell some of her antique furniture stash. Whatever wasn't bought would be put on the curb 😔 As soon as she sent me a photo of this piece, I knew it had to be mine.
Now, this wasn't an easy transformation. The wood was splitting, the back leg was split in half, a side panel of plexiglass was no longer there, and both front feet were missing the claw foot pieces. But that didn't stop me! I knew I could save this beauty from her near destiny, the trash.
That's why I do what I do 😁 I truly enjoy saving these pieces of history, and fixing them up so that they can be enjoyed for another 100+ years ❤️
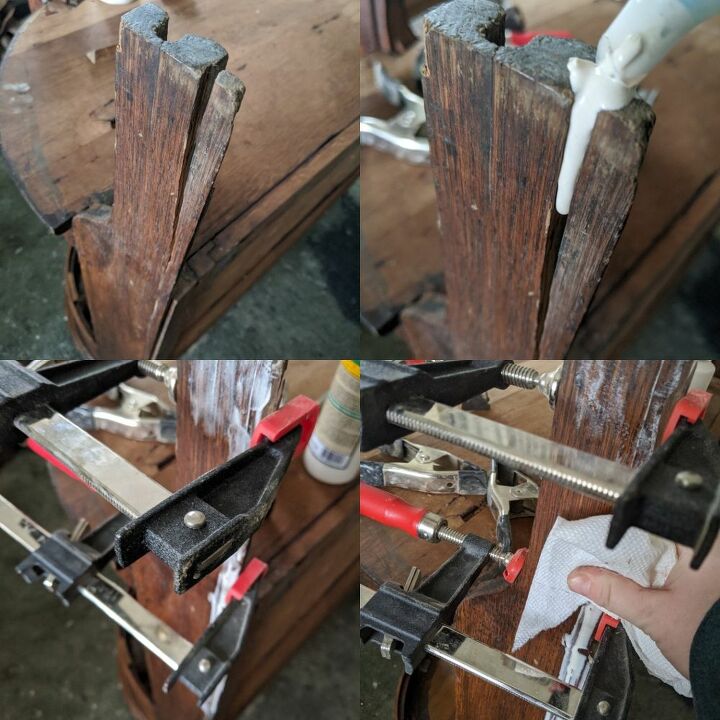
I flipped the piece upside down so that I can easily work on the feet.
The back foot was separating so I needed to glue that back together. Allow the wood glue to drip all the down inside the split, and don't be stingy with the glue! It cleans up easily. Then clamp it into place and wipe any excess glue off. Allow to dry for at least 8-10 hours before removing the clamps.
I had to do this for the other back leg as well.
The front feet were clearly missing a few pieces that make up the claw foot. It was just a straight leg with a couple of knuckles at the bottom. Then, when I opened the drawer, I felt like I hit the lotto! I found pieces of the claw feet! I pieced the one foot together, and then had no more pieces left. But, at least I had one complete foot!
So I decided to make a mold of that good foot, and then use Bondo to rebuild it. This is a trick that I've done numerous times, I even have other tutorials right here on Hometalk that show how I remake trim pieces, corners of dressers that chipped off, and detail pieces that are missing. This technique will come in handy for many many different projects!
First I needed to grab my wood glue again and glue the pieces of the foot back on. Then clamp them in place, wipe the excess glue, and allow to dry for 8 hours
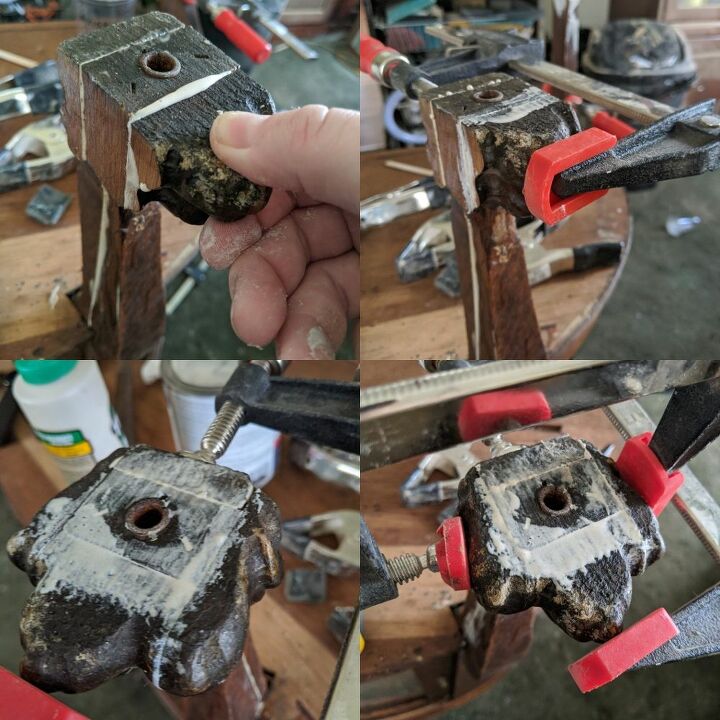
Now that the glue is dry and the foot is secure, I can make my mold.
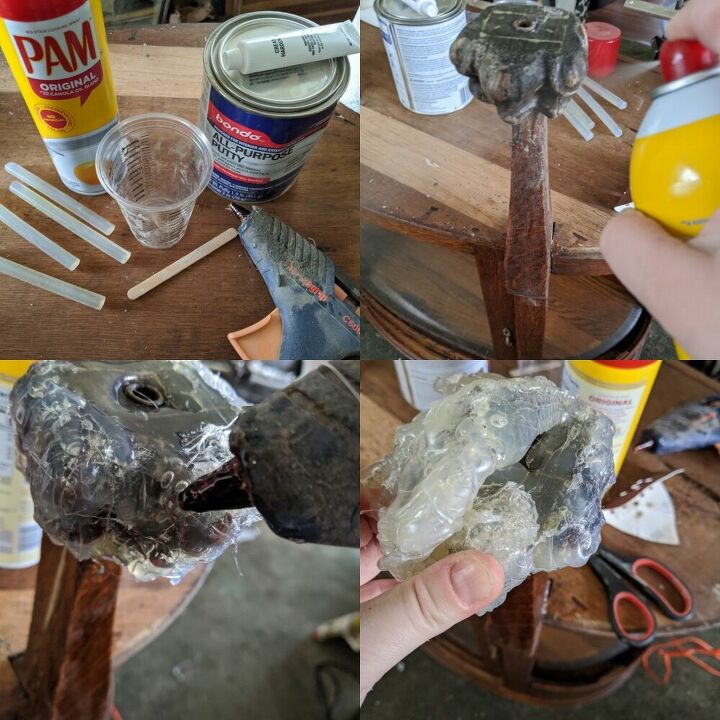
Gather up your supplies that you'll need.
Bondo, hot glue gun and glue sticks, cooking oil spray, disposable mixing cup and popsicle stick (or any disposable mixing utensil).
Make sure the area that the new foot will go on is clean and smooth. You can sand it with 220 grit sandpaper and dust off well.
I then sprayed the good foot that we pieced together with the cooking oil, and completely covered it in hot glue. Be sure to get in all of the nooks and crannies. Allow the hot glue to dry for 10-15 minutes and then pop it off of the foot. It won't look pretty, but now you have the perfect mold to make another foot.
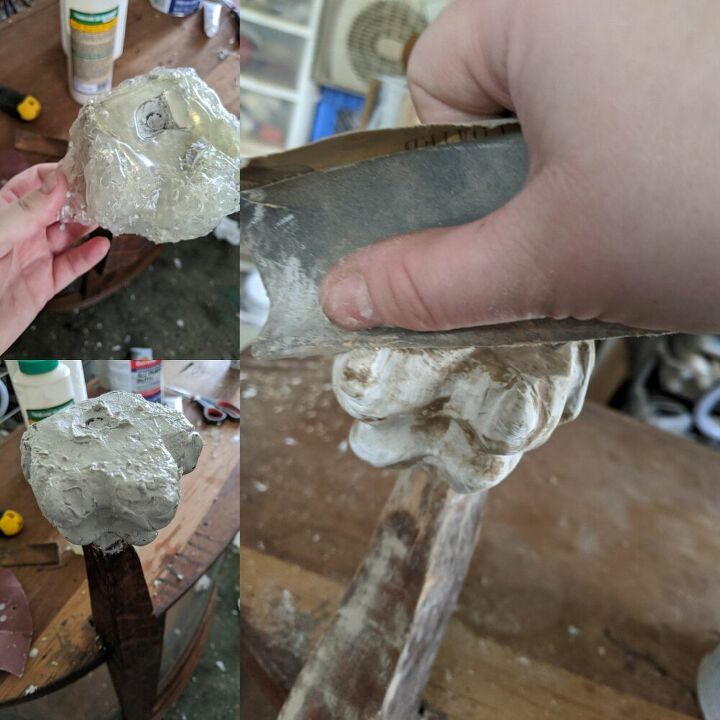
Spray the inside of the hot glue mold with the oil, but be sure that it's not pooling anywhere. If it is, just blot with a paper towel.
Now, using your disposable mixing cup and popsicle stick, mix up enough Bondo to create the missing pieces according to the directions on the can. If you've never used Bondo before, know that it starts to harden very quickly. So you need to move fast. Fill the hot glue mold with the mixed Bondo and smoosh it into place. Wipe away any excess Bondo that oozes out of the sides. Hold the mold in place for 60-90 seconds and then you can let go, but do not remove the mold. Allow the Bondo to dry for about 20-30 minutes (if the mold still feels hot, let it dry for a few more minutes), then peel off the hot glue mold. If there's any divots in the Bondo, just fill with wood filler. Now, sand, shape and smooth the new foot 😁
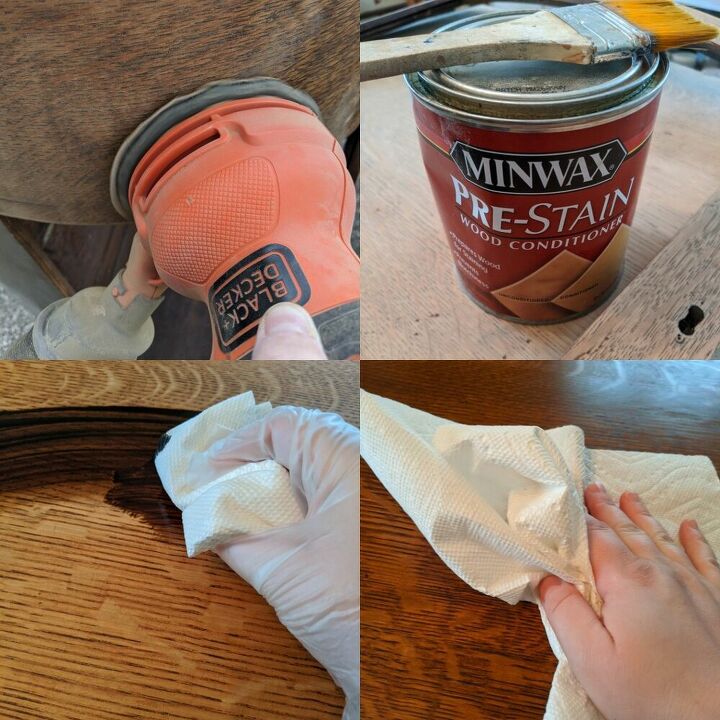
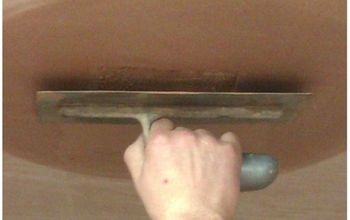
I wanted to restore as much of the wood as possible, so I sanded each area using my random orbital sander starting with 120 grit sandpaper to remove the varnish and stain. There wasn't much varnish left so I didn't need to apply any stripper. But if your piece has a thick layer of varnish on top, it will be quicker to strip the wood before sanding.
Once I removed most of the varnish and stain, I then switched to 180 grit sandpaper to smooth it out and remove any stain that was left, then finished off with 220 grit sandpaper.
I then applied Minwax Prestain. This will help the stain penetrate evenly. I applied it with a foam brush and followed the directions on the can.
I then stained it with Minwax Dark Walnut Oil Based Stain and wiped away the excess.
My absolute most favorite wax ever is made by Frenchic Furniture Paint. This stuff is so smooth and goes on so easily. 90% of the time, I don't even buff it. It already has a slight shine that is perfect for my liking. I use this stuff to seal most of my pieces that will lot be getting a ton of use. I love terry cloth sponges from Amazon for applying wax. Put a bit of wax onto the sponge and rub it into the wood in circular motions. Flip the sponge over and buff until you're happy.
If you want to seal with a more durable product, remember, the stain is oil based, so you need to wait 72 hours before sealing with a waterbased topcoat!
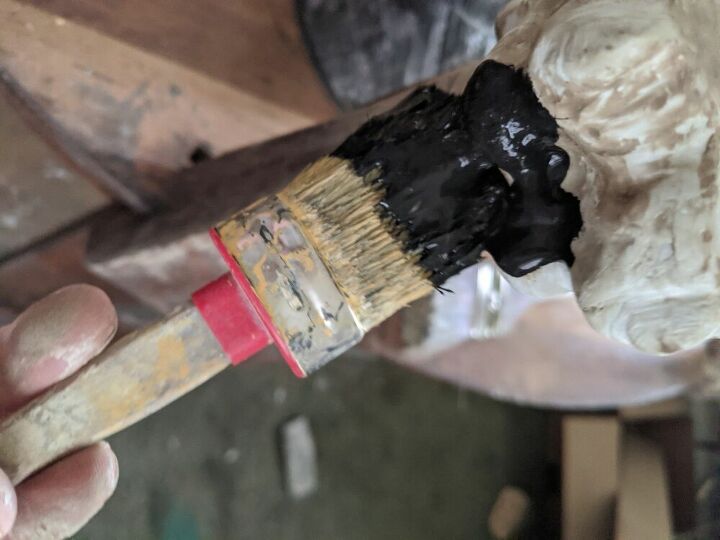
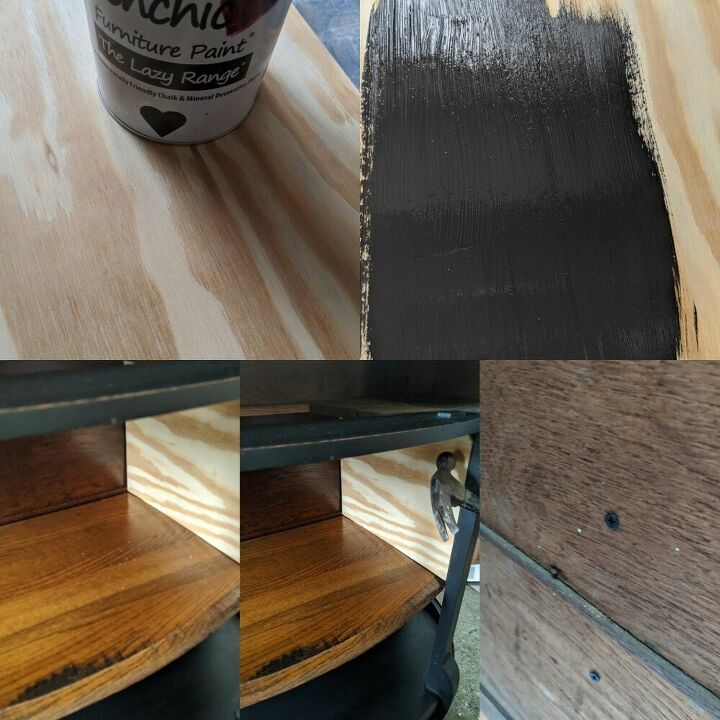
Since the legs and feet needed so much work, I had to paint them. The way the piece was setup, it made sense to paint the frame only which included the legs and strip between the drawer and cabinet door.
I used Frenchic Furniture Paint in "Loof" from the Lazy Range. Lazy Range paints have the topcoat built-in, so it's a one step paint.
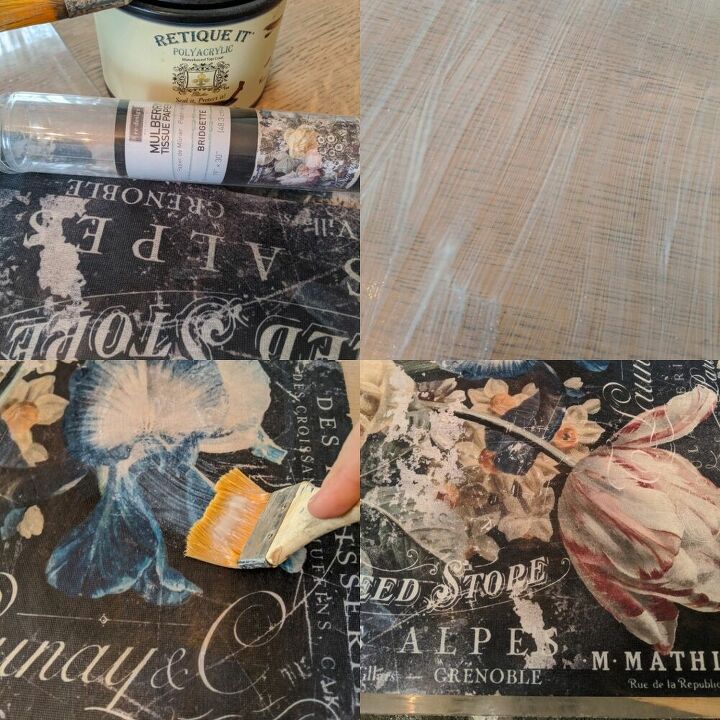
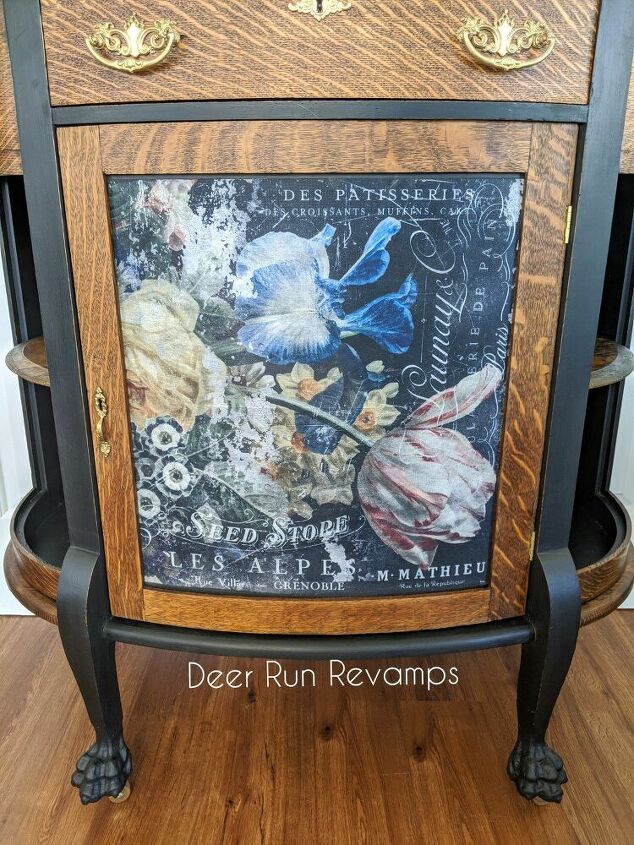
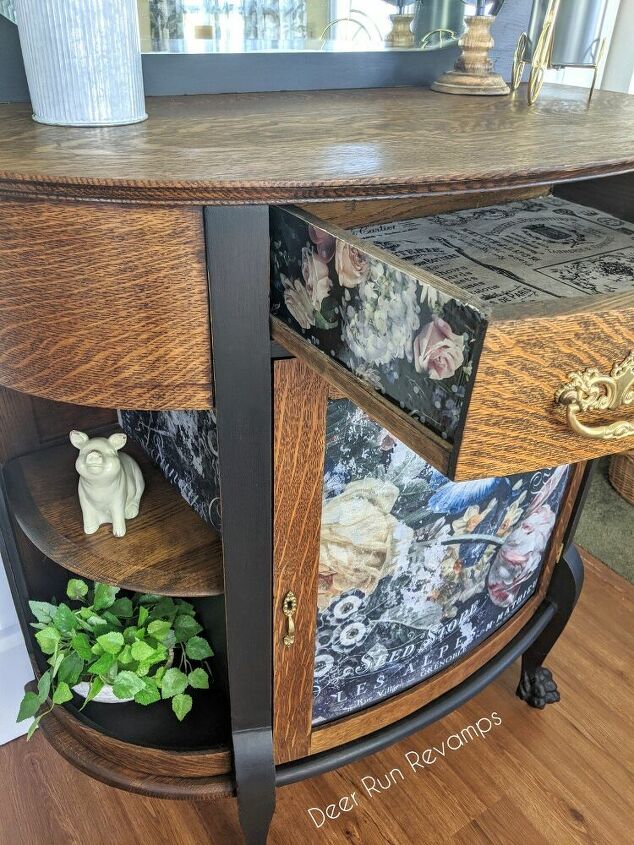
I absolutely love Redesign With Prima's Decoupage Tissue Papers. They are more like fabric than tissue paper and it's almost impossible to get wrinkles. They come in 2 sections and the design matches perfectly from piece to piece, so just but up each piece for a flawless and seamless design. For the front plexiglass panel, I used the tissue paper called "Bridgette"
I like to use Retique It's polyacrylic topcoat for decoupage, but any waterbased sealer will work. Apply a coat of your sealer over the area and then position the tissue paper over it while it's still wet (I was resting the plexiglass over the the top of the piece so it looks like I'm applying sealer to the wood, but I'm not). Once you have it where you want it, apply a layer of sealer over top the tissue paper and allow to dry over night.
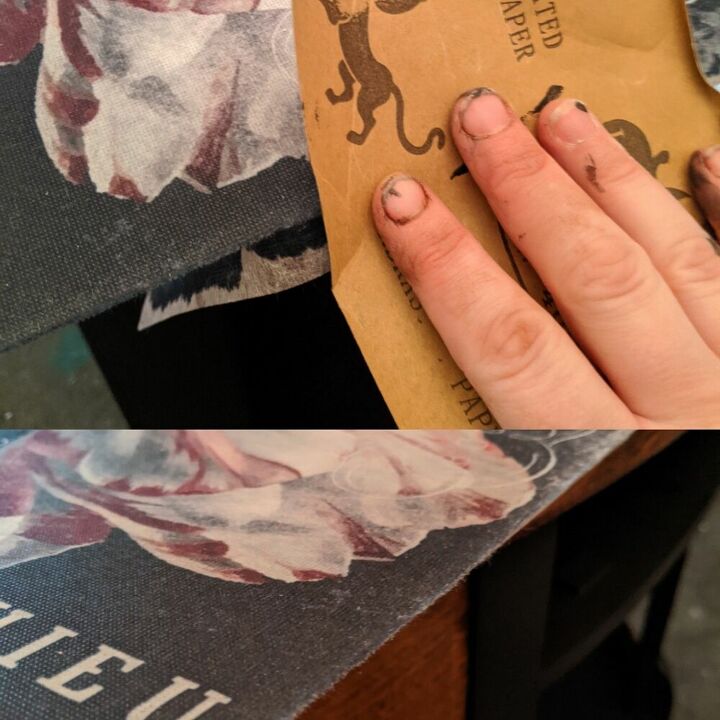
*Tip
Once the sealer is dry, take a piece of 220 grit sandpaper and sand over the edges of the tissue paper. This gives you a straight line and easily cuts off any excess paper.
I use this trick with contact paper and regular wrapping paper as well.
I like to do extra little details for the pieces that I sell. Customers love it and it looks more professional.
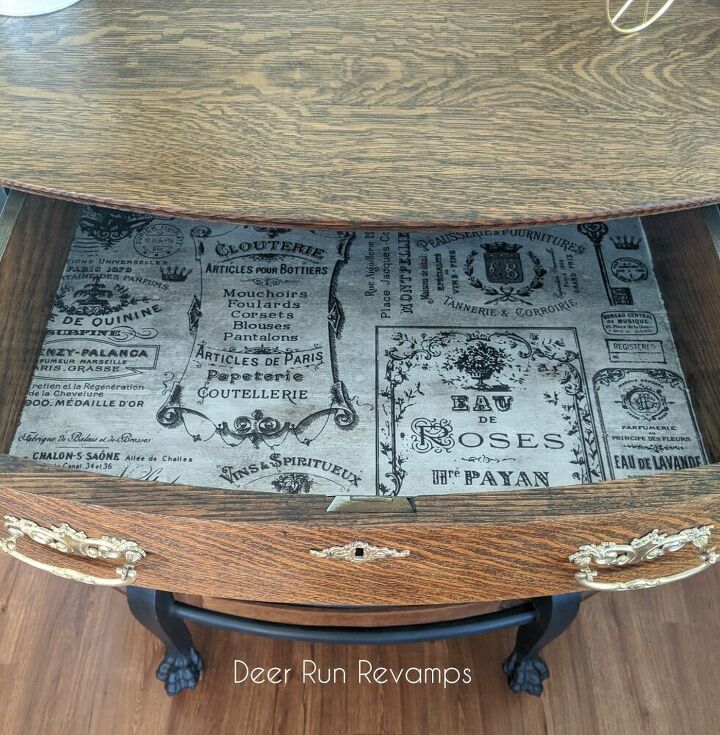
I used another Redesign With Prima Decoupage Tissue Paper for the drawer liners. This one is called "Chloe".
Apply the decoupage paper just like explained above. Use a sharp utility knife to cut the edges inside the drawer.
For the sides of the drawer, I chose a beautiful dark floral paper. I like to use glue sticks when using regular paper. Apply the glue to then entire side area, then smooth the paper over it. Use 220 grit sandpaper to sand the edges and get the paper to separate for the clean line

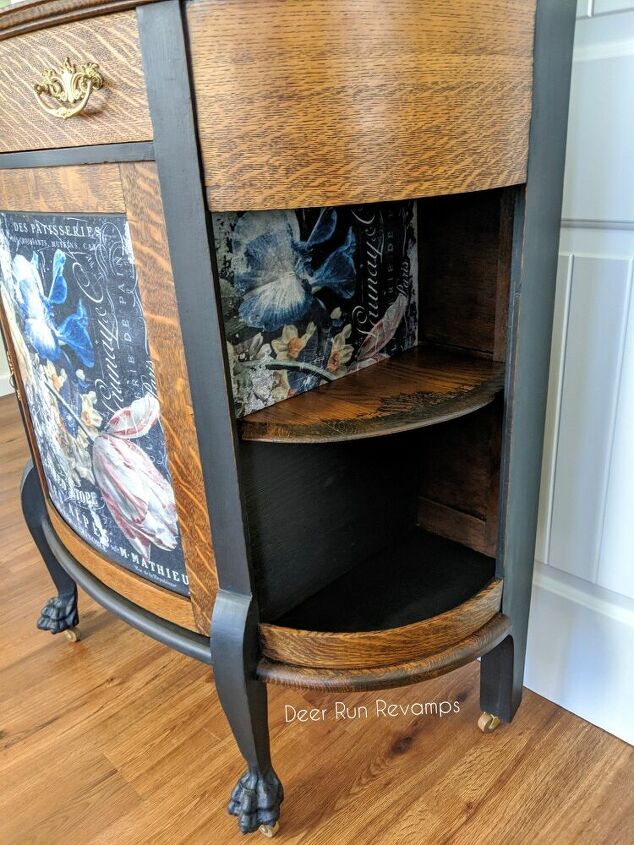
We wanted to keep the cabinet separate from the sides so we cut some plywood to act as dividers for the middle cabinet.
Cut your plywood to size, then paint it in the same black color "Loof".
For the top 2 dividers, I also applied the "Bridgette" tissue paper.
Once you have the dividers in place, from the back and below them, drill out the holes for the screws to attach them to the piece. Drilling out the holes first helps the wood to not split when putting the screws in. We drilled 2 holes from the back and 2 holes from underneath. Then put the screws in. This will prevent the dividers from moving.
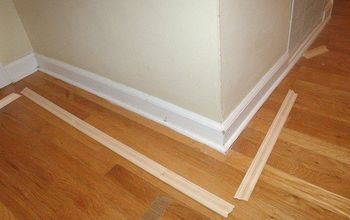
Since the middle cabinet still had a working lock, we decided to make it a liquor cabinet. We picked up a large piece of T-Moulding (found at home improvement stores in the flooring section) and cut it to size. Once we figured out the placement (make sure you allow enough space for the glass to glide smoothly), we drilled out the holes to stop the moulding from splitting, then screwed them into place. We did add 2 washers to allow a bit more space for the glasses to glide.

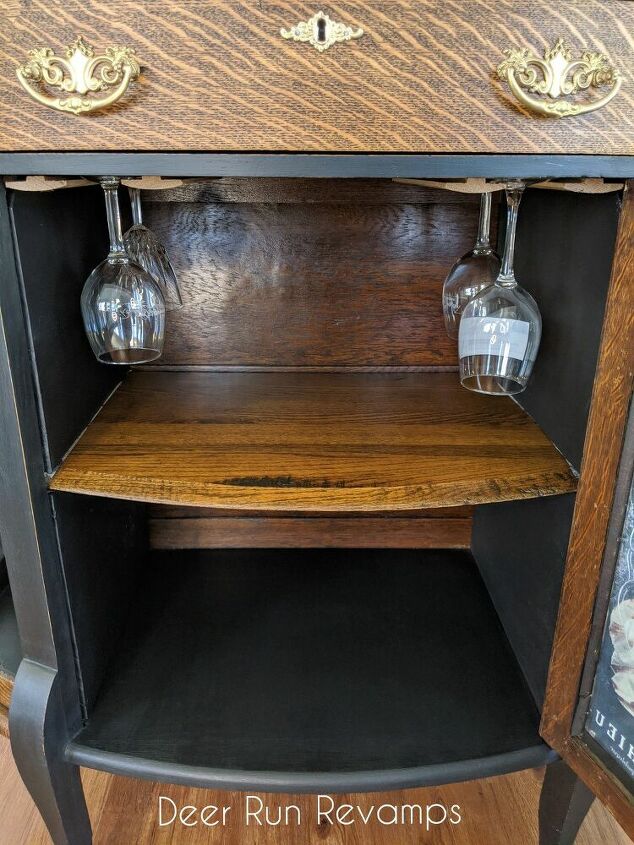
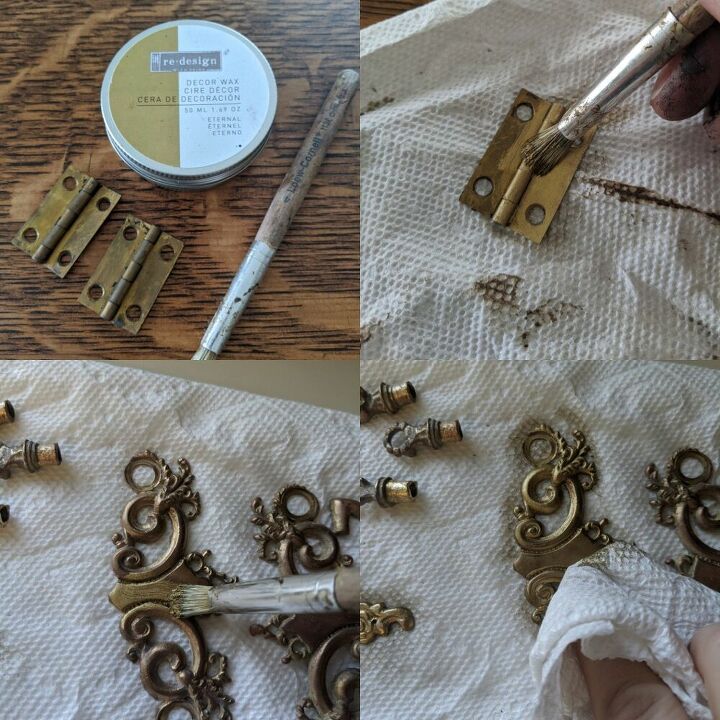
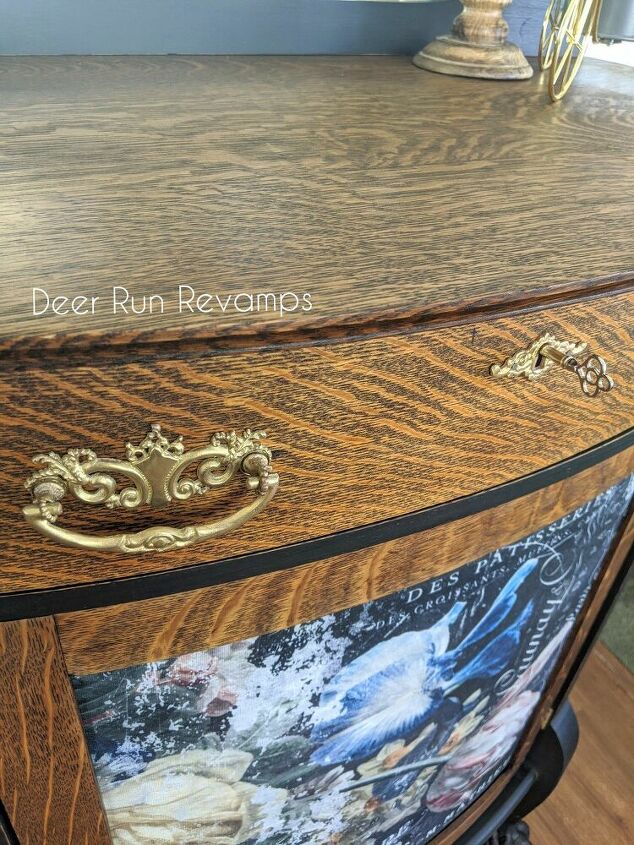
The original hardware on these antique pieces are usually high quality, highly detailed and beautiful..but dirty. Very dirty. Boil them in a 50/50 water/vinegar solution for 30 minutes then scrub them with bar keepers friend. Usually they're good to go from here, but sometimes you want to give them a bit more color. This is where Redesign With Prima's decor waxes come into play. "Eternal" Decor wax is a perfect aged brass color and my go to for hardware. Using a small detail brush, I brushed the wax onto the hardware and hinges. Take a paper towel and wipe off any excess and buff to a gorgeous shine
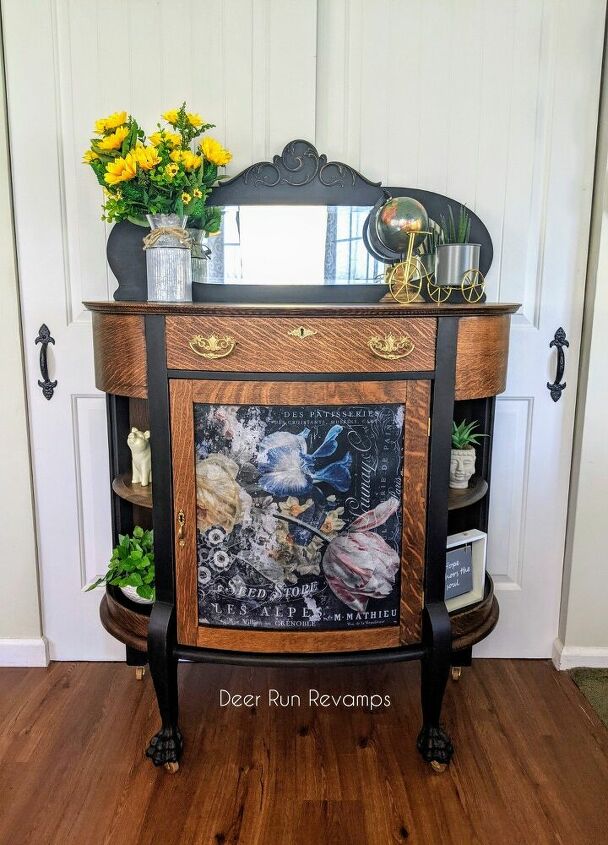
Now, step back and enjoy your masterpiece 😍
You can follow our journey and see many more transformations on Facebook or Instagram
Search for Deer Run Revamps or clink the link below 😉
You can find these products in our Etsy shop, linked in the materials section
We hope you enjoyed this tutorial and will find these tips, tricks and techniques useful for your future projects
Feel free to reach out with any questions you may have
I love old locking drawers and cabinets! I always have about 2 dozen skeleton keys on hand 😍
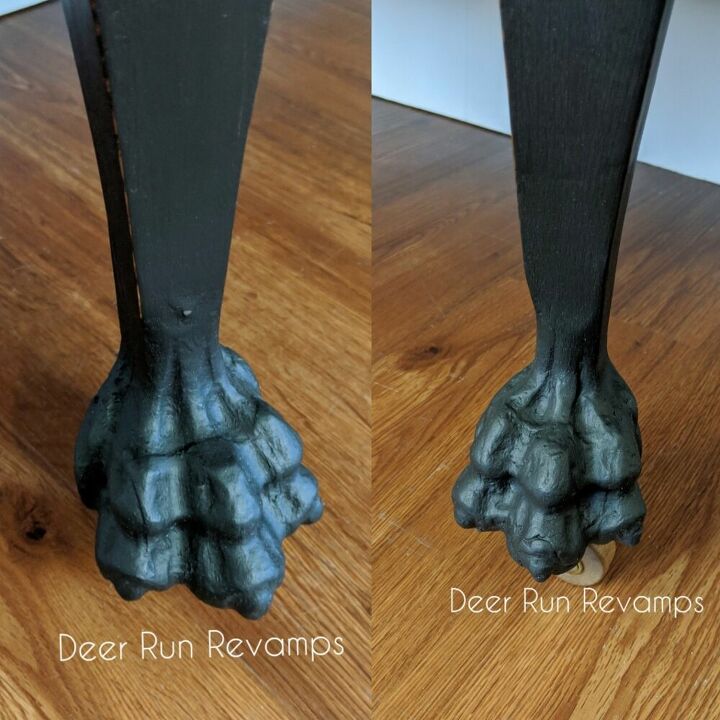
Can you tell which foot is wood and which is Bondo?
Thanks for reading! ❤️
Resources for this project:
See all materials


Comments
Join the conversation
-
You do awesome work! Wish you were closer - I would hire you!
-
Absolutely gorgeous.


Frequently asked questions
Have a question about this project?
It came out beautiful. I wonder though if there is something else that could be used besides bondo to create a 'new' foot or other missing piece. Would wood putty or something like that work? TIA
Hi Just want to say it turned out beautiful. I saw that u had vaneer splitting and chipping, how did u fix this and with what did u used .
Thank you, Mary
😀
I acquired an antique credenza last year that matches your piece and want to clean the hardware but there are two locks that I don’t know how to clean without spoiling the quarter sawn oak. The one has the key stuck inside. Can you help me with this?