Faux Antique Picture Frame

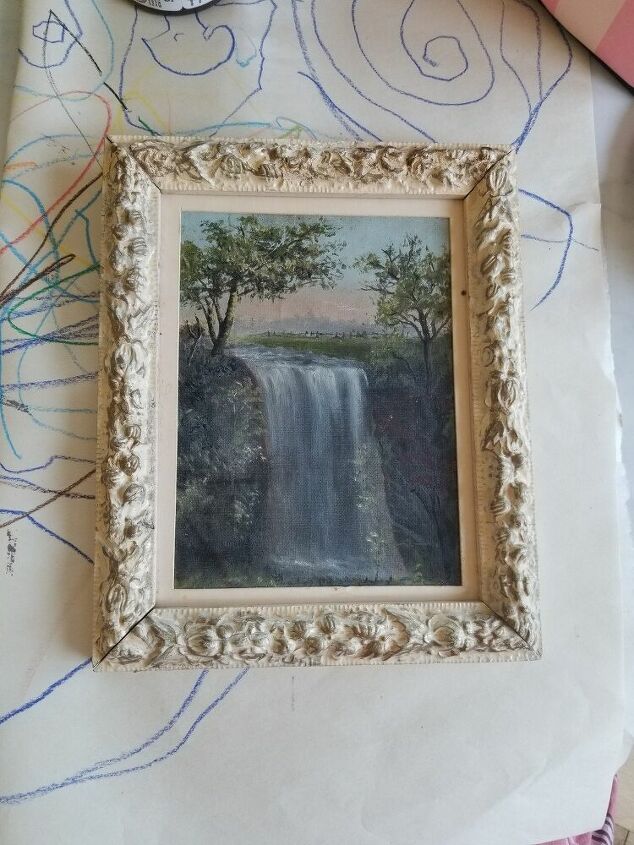
In the spirit of using what is on hand, I've been going through closets and unpacked boxes to pull out items and refresh my rooms. I came across a small painting of a waterfall I bought to use in a gallery wall that I never got to. I love the painting, but the frame was an off cream color with a touch of gold. It looked plastic even though I think it is actually wood. I wanted to warm it up to make some of the paint colors pop.
Here is a fun & easy art project to fill your vintage frame!
Or how about this budget-friendly art idea.
Identify a frame you want to paint.
Maybe you have a great frame, but not in the finish you want. Or perhaps you found a framed picture you love, but the frame isn't your style.
Gather materials to start painting.
I laid out a piece of newsprint under my frame. Cardboard, plastic tablecloth, or any other material to protect your surface is great. I pour out paints on a paper plate to use as a sort of palette. I forgot to include my small brush in the above photo. I use a wider brush to paint on the brown, and a smaller brush to apply the gold. The brown paint is by Americana Decor Creme Wax in Deep Brown. The wax finish works with the Rub 'n Buff Wax Metallic Finish (color is Antique Gold). I don't know how/if other paints work with the wax finish of the Rub 'n Buff. A very kind Michael's employee suggested this particular paint type, and it worked for another project, so I'm sticking with it!
More Rub 'n Buff Ideas
Paint one coat of brown paint.
The brown paint gives the look of darker wood. No need to apply it perfectly smooth, since the goal is to give an aged look.
Apply Rub 'n Buff lightly along the frame.
A little bit of Rub 'n Buff goes a long way! I just learned about this product earlier this year from my friend Adam, and now I can't put it down! I used Antique Gold color, but there are three other metallic options.
Apply a coat of watered down brown if needed.
My first layer of the gold was too bright for my liking. To knock down the brassiness, I dipped my brush in some water and then mixed into the brown. The brush wasn't dripping wet; I tapped some of the excess moisture before going into the brown. I didn't take a photo of me doing the dips, sorry! This step is optional, depending on how your Rub 'n Buff layer turned out. Since I wanted an aged, gilded look I used the watered down brown to dull the extra bright gold spots. The number of coats you choose will affect your time to complete the project. I waited about twenty four hours between coats, so my total time was three days.
Hang or lean your frame!
I was really excited to display my picture! The painting's colors are really warm and the frame now makes them more rich. I have been wanting to add some art to my kitchen, so I decided to try it in there. It stands out against the white tile and brings some much needed warmth!
Thanks for reading!
Follow me on Instagram for more DIY and home decor ideas!
DIY home decor using old picture frames
Enjoyed the project?
Resources for this project:

Comments
Join the conversation
-
-
-
 Dottie
on Jan 10, 2021
Where on earth did you get that painting? It looks exactly like the one I painted for my late Aunt. It is of Minnehaha Falls in Minneapolis, MN. Even the frame looks like the one she put on it. Is that on canvas board or stretched canvas? Do you see a signature on the painting?
-
 This Dear Casa
on Jan 11, 2021
Hi Dottie! I bought this sweet painting here at an antique shop in Seattle. Supposedly it is Snoqualamie Falls, which is a big attraction about 30 minutes from the city. The shopkeeper said he got it from a woman who would bring her old paintings in from time to time. It is marked as oil on canvas. There is no signature that I see. On the back of the canvas it says "Snoqualamie Falls" in cursive in pencil. That would be so interesting if it was somehow yours!!
-
-








Frequently asked questions
Have a question about this project?