


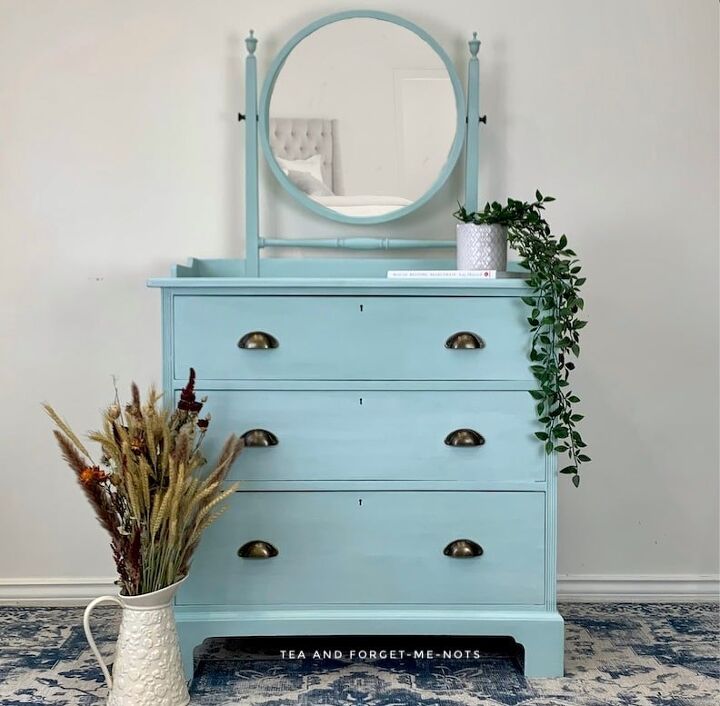
Create a Stunning, Spring-fresh Look on Furniture

Would you like to give your furniture a clean, spring-fresh look? It’s easy with pastel colours and a floral transfer.
Just in time for spring, it’s no surprise that florals and pretty colours are right up my alley. It’s probably my signature style. But I love it and the result turned out so nicely.
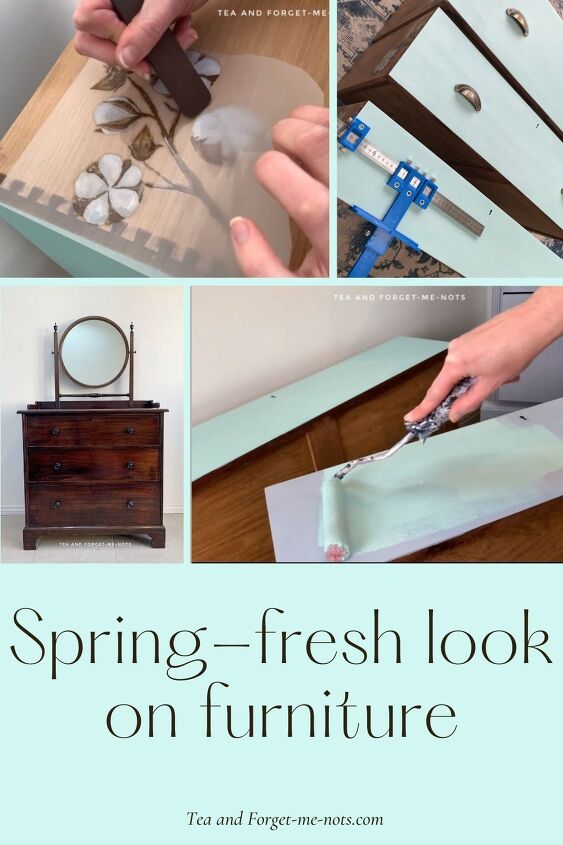
I found this chest of drawers and mirror at an auction. They hadn’t done a great job of displaying it as it was covered up with a lamp and a typewriter. But luckily for me! No one else bid on it so I got this beauty for £10.
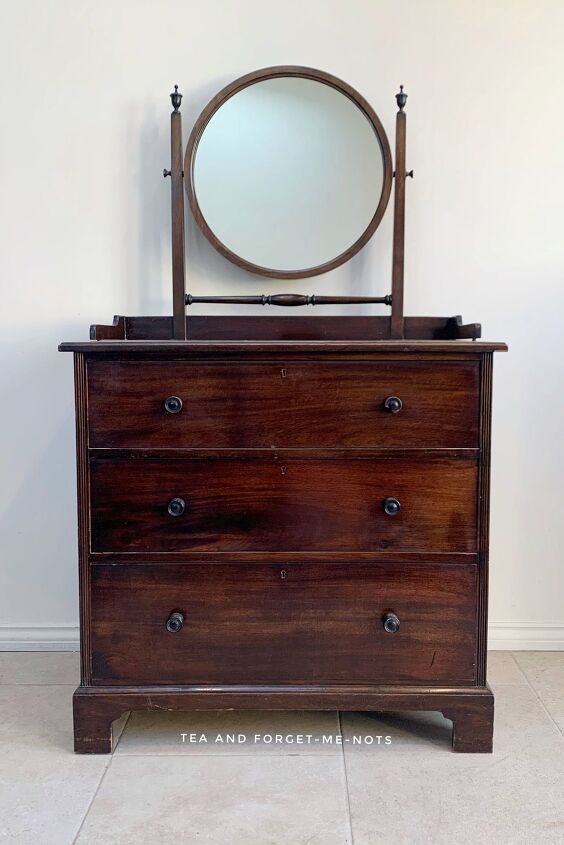
I particularly like the shape of the mirror. It’s quite unusual and delicate.
It was in great condition other than one broken handle. And you can tell it was in good condition because I didn’t even get carried away with wood filler this time.
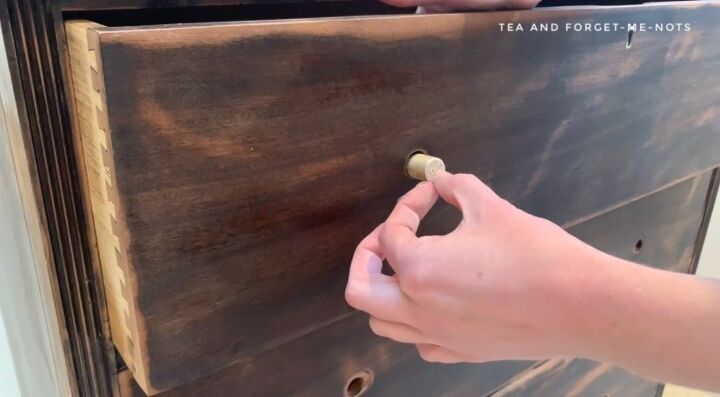
I wasn’t put off by the broken handle because these things are easy to change. Or usually are, anyway!
The backs of the handles were filled in with a wooden plug. A plug that didn’t want to be levered or drilled out of place. I drilled several holes through them but even so, the handles stayed on tight. In the end, I took my hammer to them which did the trick.
It was one of those typical examples of a project taking longer than you expect. I would have guessed that removing the six handles would take 5 minutes. Instead, it probably took an hour.
Removing the handles left 15mm holes in each drawer. So, I bought a wooden dowel and used Gorilla glue to fill them in. This left a small gap around the edges which I then filled with Dixie Mud.
To start, I cleaned it with White Lightning, fixed a small repair with wood filler and sanded the shine off of the surface.
From cleaning, I could tell that the wood had a red tone to it. This meant that it would be particularly important to prime it to avoid the risk of stains bleeding-through later on.
I used BOSS primer in gray to give it a solid base coat. That evened out the colour after the sanding and protected it from any possible bleed-through.
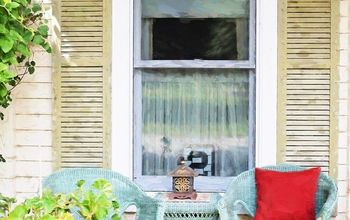
As spring is in the air, I wanted a pastel, floral type of look. I chose the green paint Tide Pool from the Dixie Belle Silk range. It’s an airy, light green and very spring-like to me.

I needed two coats of Tide Pool for the perfect coverage.
I sealed the paint with Clear Coat in Satin. The slight sheen to Satin is lovely.
I used a sponge for the first time to apply the top coat. And I can see why people recommend it. I’ve never thought that it was difficult to apply a top coat with a brush. But the sponge is a different level of convenience. It went on so smoothly and easily. I might be a convert.

To enhance some of the details further, I also added white wax. I really liked the beachy, whitewashed look that it gave the green. Normally I buff the wax off but I left this on, as it gave it more texture and depth.
The Silk range has a built-in top coat. Although I often do an additional top coat just out of habit. So between the built-in top coat, two coats of Clear Coat, and the white wax, this is a very well protected chest of drawers!
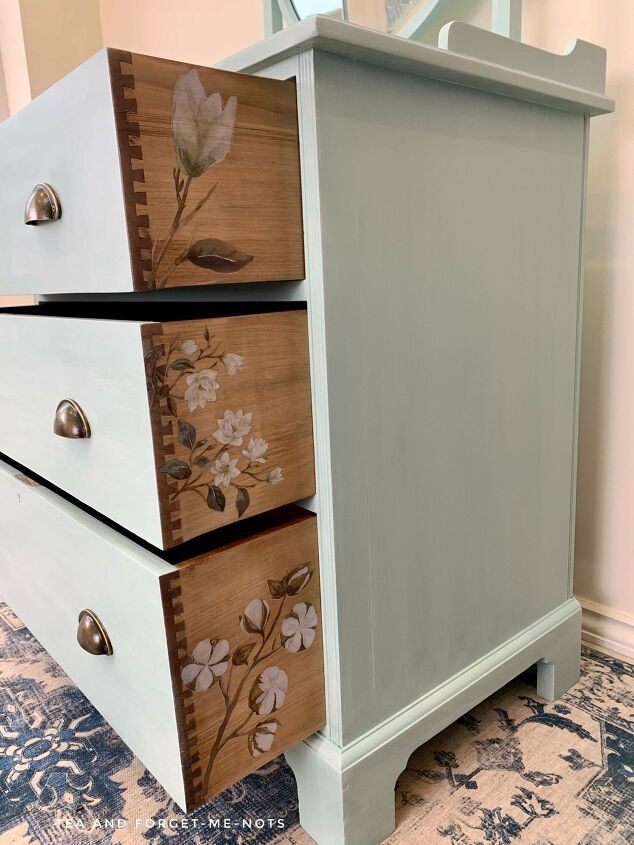
Spring-fresh look with a floral transfer
To kick up the spring look another level, I used a floral furniture transfer. I chose Magnolia Garden which is a selection of beautiful white magnolia flowers.
I cut out six flowers and created a peekaboo look with them on the drawer sides. So you would only see them when the drawers are pulled out.
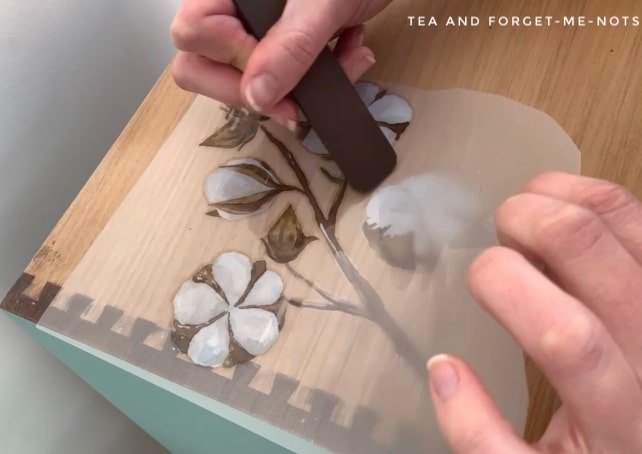
I’m no stranger to transfers and particularly love floral ones. The white of the flowers contrasted really nicely against the natural colour of the wood.
I still have about half of the transfer left to use on another project too.
As a finishing touch, I gave the insides of the drawers a quick revival. Fortunately, they were in great shape so I didn’t need to paint them. I used Big Mama’s Butta to refresh the wood. I used the scent, Orange Grove, which gave it a lovely orangey smell.
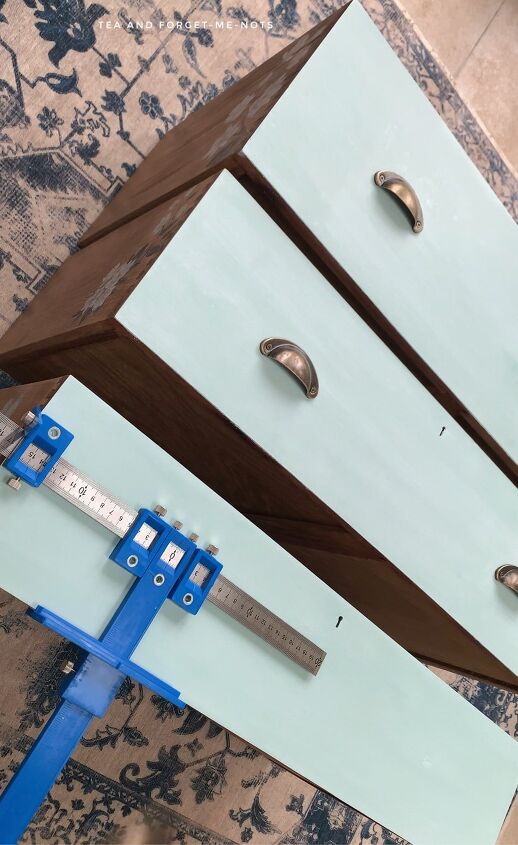
Now I needed new handles to replace the broken one. If I used single knobs I would have had to place them in a different location to the originals due to the big holes. My concern was that might make them look off balance. So instead I chose bronze cup pulls.
Sometimes I use Frog Tape to get the correct location for where to drill the holes. But as the backs of the handles weren’t flat, that wouldn’t work.
I got my carpenter’s hole locator which is a brilliant tool (recommended in my best 5 tools list, linked at the end!). It lets you work out the centre point of the handle and then creates a guide for where the holes you need to drill are.
If you have a small enough drill bit, you can even drill straight through the guide into the drawer. As each of the three drawers were slightly different sizes, it did need a little readjusting each time. But overall, such a convenient way to get accurate handle holes.
Changing the handles did mean more repair work than anticipated but otherwise, it was all easy. It takes time and patience but there were no surprises.
I loved this transformation. It’s fresh and uplifting and the subtle transfers add a secret something.
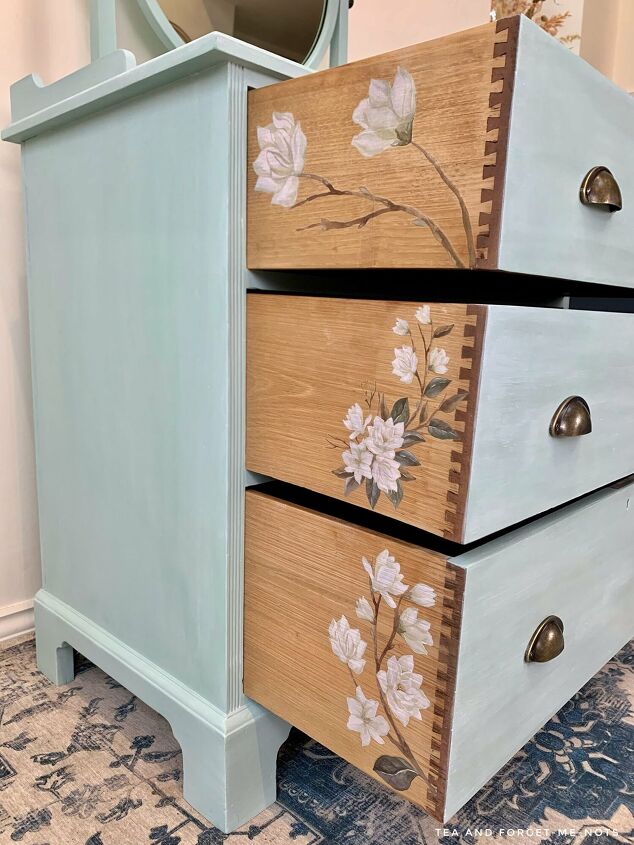
As each flower is different, it feels like every drawer is unique.
Would peekaboo flower drawers make you smile in the morning? Or is that just me?
Thanks for reading. If you’d like to see more of the transformation, please check out the YouTube video.
Want to know the 5 tools under $20 that will make your life easier?
Thanks to Dixie Belle for sponsoring this blog post. All opinions are my own.


Frequently asked questions
Have a question about this project?