


How to Paint & Repurpose a Cigar Box as a Girl's Keepsake Box
3 Materials
$40
2 Minutes
Easy
My client originally purchased this cigar box but she never really found a place for it. It was not fulfilling its purpose. Then she got the idea to use it in her daughter’s room. She’s only 3….and needed a keepsake box for all her treasures and trinkets. So I will share with you my paint & design process on how to turn a boring cigar box into something every girly girl will love!
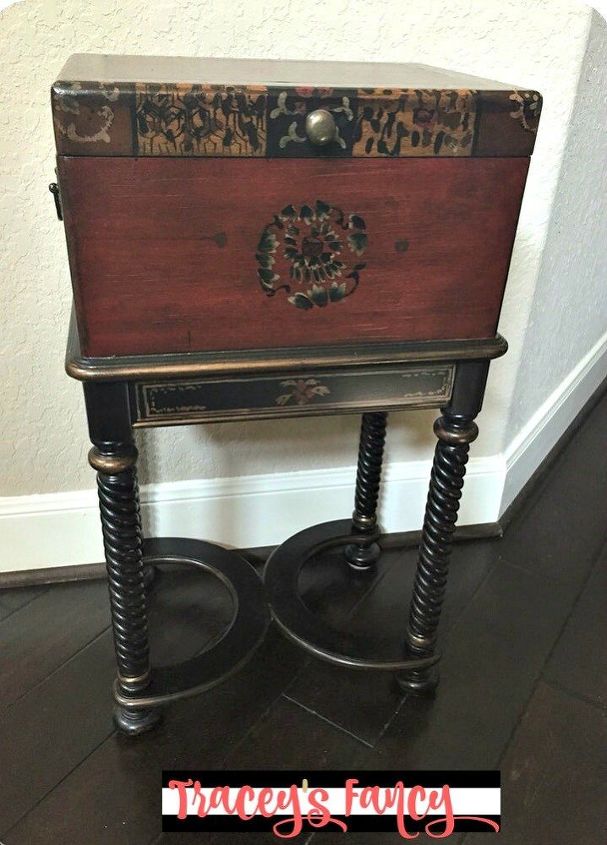
Our main goal: lighten it up!
First, I coated this piece heavily in shellac as I knew the potential for bleed through was about 589% possible! I then gave it a nice juicy coat of Ultra Guard, which is my go-to primer by Heirloom Traditions paint.
This allowed me to move forward with my design and not worry about bleed-throughs and tannins showing their ugly and annoying face later! This extra step is a precaution! If you haven’t used it before…it is thin, easy to apply, and STINKS!
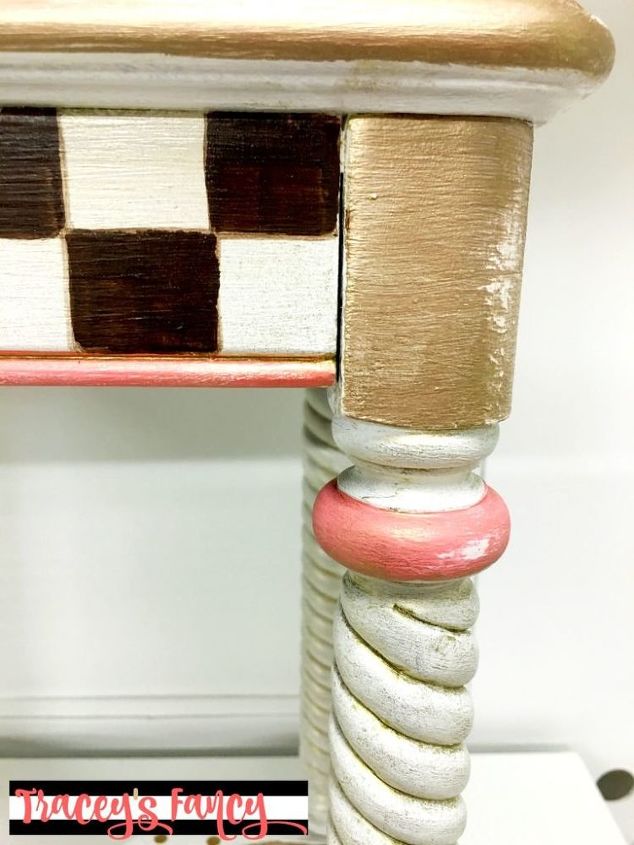
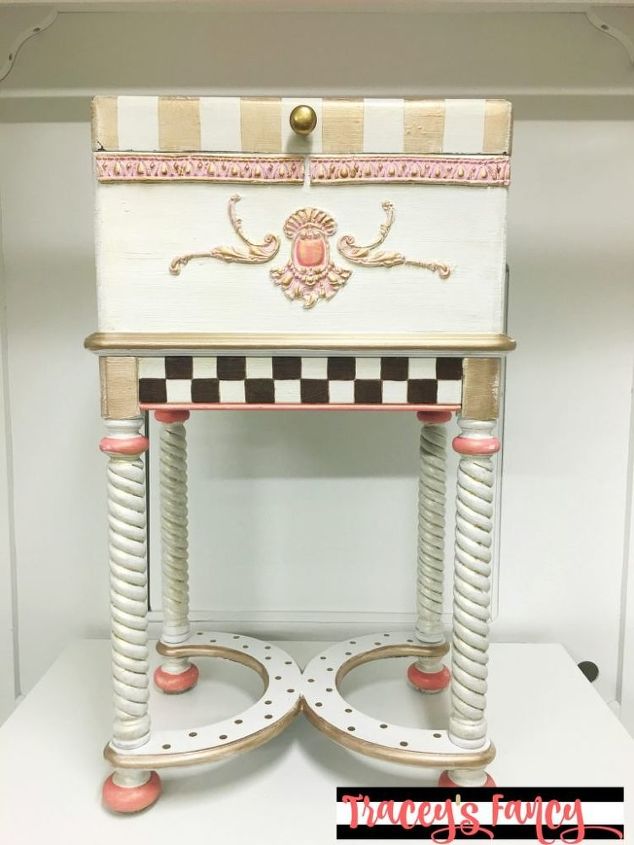
I used two coats of white to cover the entire piece. I painted checkerboard pattern (yes….I freehand this) in a deep rich almost black brown! My entire blog post has the complete supply list of all the paint colors and products I used.
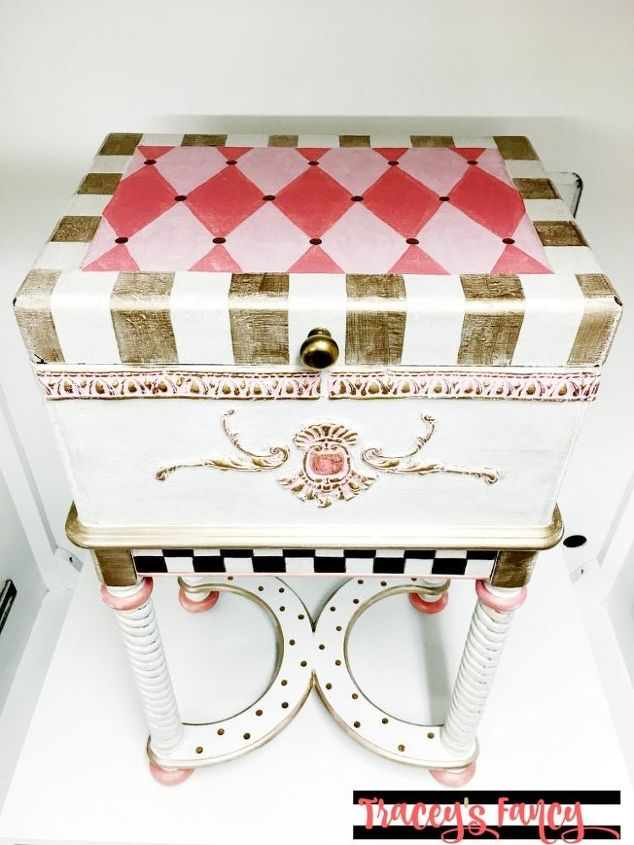
I painted the harlequin pattern on top (freehanded) in my two favorite lighter pinks offered by HTP. All of the heavy gold that you see on the corners, the dots, and the trim I painted with liquid leaf gold. It is my go-to for an opaque brilliant gold paint! I even used it to outline the checkerboard pattern.
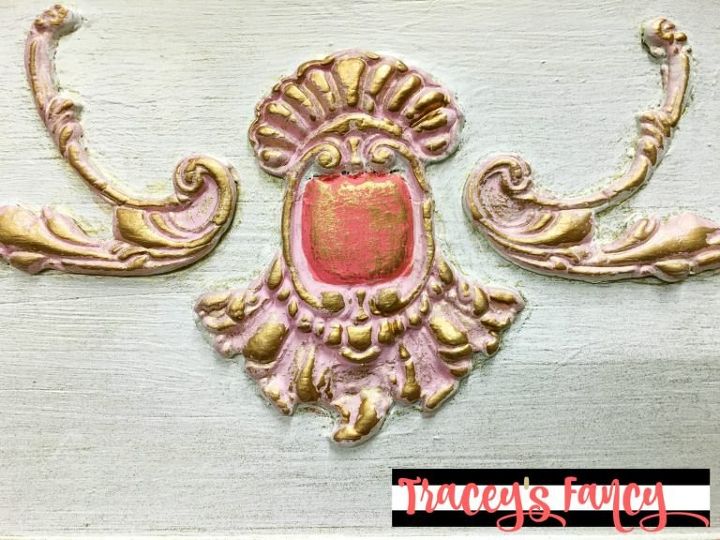
As adorable as this Repurposed Cigar Box is….when I covered it entirely in white paint it just became so boring!! The legs are beautiful…but the box itself lost all dimension. I really felt when I added the painting designs and detail that it would be enough…but it just wasn’t. So I broke out my trusty molds by Iron Orchid Designs. These silicone molds are SO much fun to work with. They also offer a paper clay that is super easy for beginners in molds like myself.
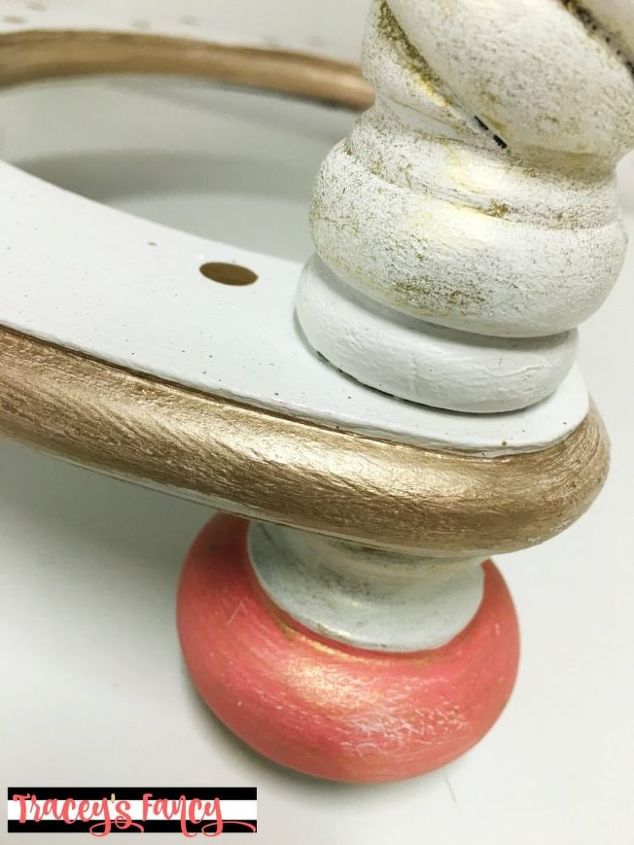
Now if you look closely at the spindle leg you will see a light brushing of gold glaze. I just brushed a staining gel on all sloppy-like and wiped it right back off. The gold pigments settled into every little nook and cranny and left me with this shimmery finish that is so perfect. It went from “cute” to “elegant” with this one simple step! AND as an ADDED bonus….the gels SEAL your piece!!! There is no need for a sealer if you use them all over as a glaze! BOOYA!
I hope you enjoyed this little trinket of love! It really is amazing what we can do with good quality paint products and a little imagination! Now a special little girl will get to hold her keepsakes and make good use out of this cigar box.
Love my fancy designs? Yes, they're whimsical and different than the other painters out there. See more of the fun inside my head by subscribing to my blog here. I love to share my furniture makeovers, wall art ideas and painting tips on my blog.
You can also find me on Facebook @traceysfancy Let me know if you have painted a Cigar Box or found a new purpose for one!! I want to hear from you!!!
Head over to my blog by clicking the link below and leave me some love! Thanks!

Want more details about this and other DIY projects? Check out my blog post!


Frequently asked questions
Have a question about this project?