


LIVE EDGE NIGHT STAND

8 Materials
My first reflection is that I'm 70 years old with health problems (diabetes, COPD) and single no hubby to depend on. Am I strong and stubborn enough to get this project to fruition? After all this was going to be more taxing than my 2 previous DIY's which was making refurbished Bottle Openers that I previously posted. Can't succeed if you don't try! I hope you will pardon any English as I am French Canadian. Cost appox. $100.00
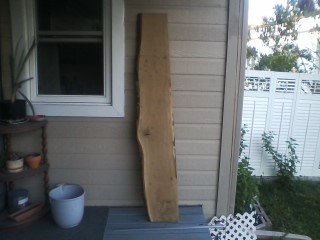
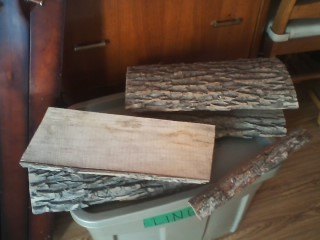
Last spring I saw a standing night table made from a plank of wood, though it was cute, it gave me the idea to make another version with a live edge plank. I have a friend that his a fishing boat manufacturer and sells wood planks. Well for only $80.00 I purchased a Red Oak live edge plank , took it home and gazed at it for a while and tried to get inspired to find the wood I would use to make the shelves. Then I remembered that at the back of his shop he had the first slices taken from the trees cut into approximately into 16" pieces with the bark still on them in a big pile doomed for the fire pit. Now they would be my shelves and base and they were FREE. It was time to get to work!
So my first step was to sand all the pieces and my beautiful Red Oak plank. What tools and materials did I need for this was my other reflection. Now it was time for purchases and gathering everything I needed.
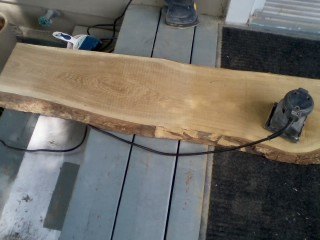
While I was gathering all the equipment and materials I needed, I borrowed a sander from my neighbor and started sanding my live edge plank and pieces of wood for the shelves. All the while informing myself about grades of sandpapers I would need and other products.
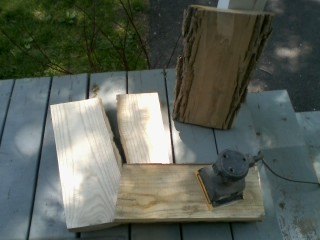
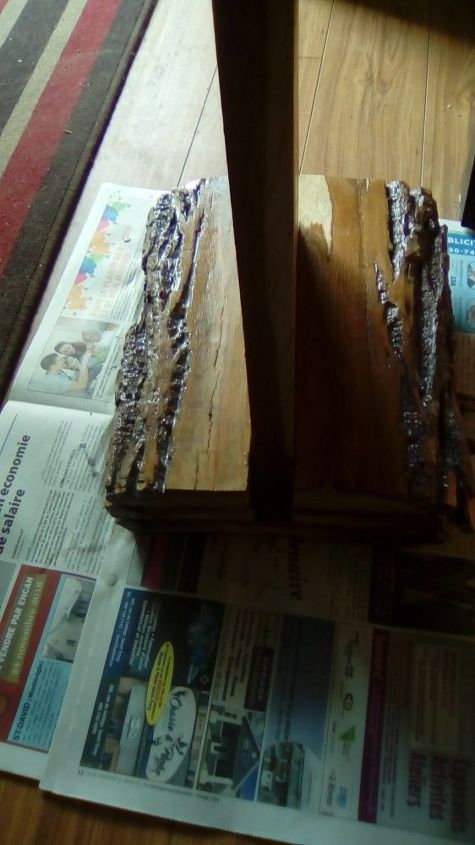
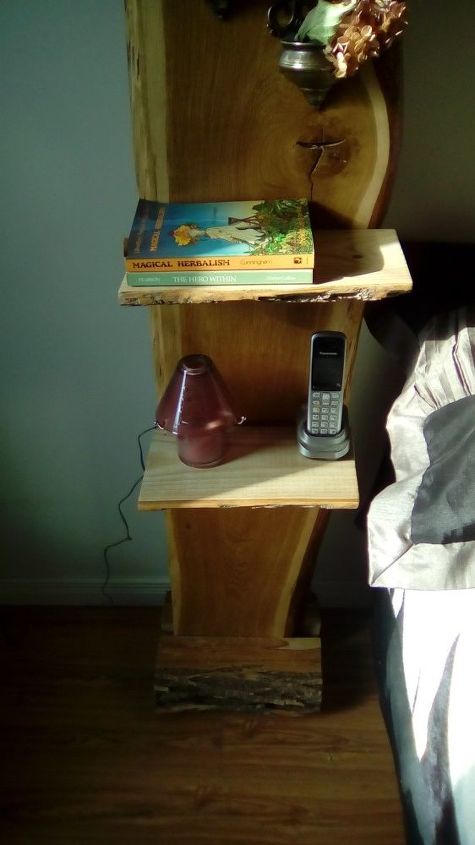
Since I did not have the appropriate saw, I solicited the help of my neighbor to trim off a side of the slices of wood so that I would have flush pieces to screw on my shelves, also you can see at the back of my photo one of the live edge pieces that I used for the base. One of them was sawed in half for the front and back and glued to a full piece crating a groove for my plank.
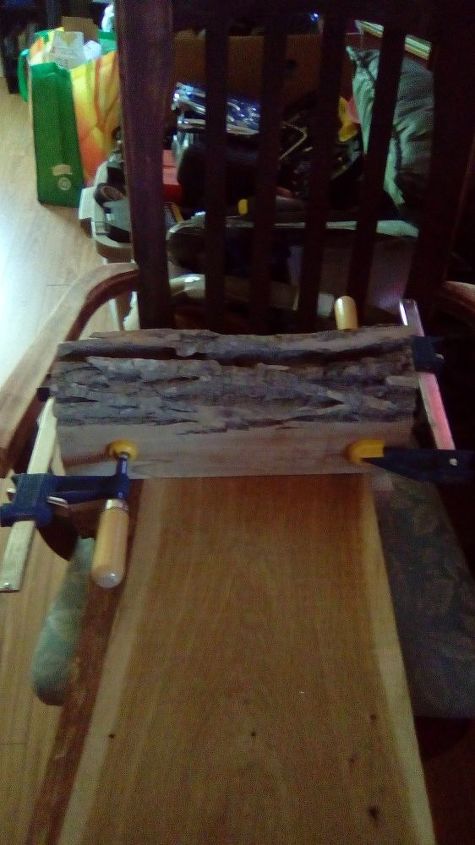
I had one of my live edge pieces sawed in half and glued and screwed my base for the bottom part so that my plank, so that I would be able to stand it up straight. I had also varnished all the pieces beforehand. Even the bark was varnished.
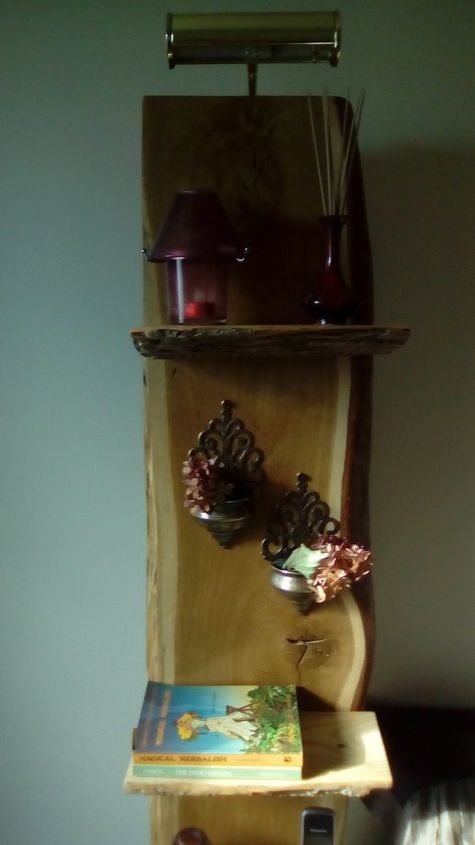
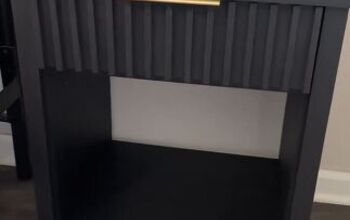
This summer I also got to sand many other pieces while the weather was good, and completing other projects that I will be posting at a later date. But as you can poorly see from this photo my night table is standing up. In the meantime garage sales, found saws and sanders and a beautiful little light for the crown on my night stand.
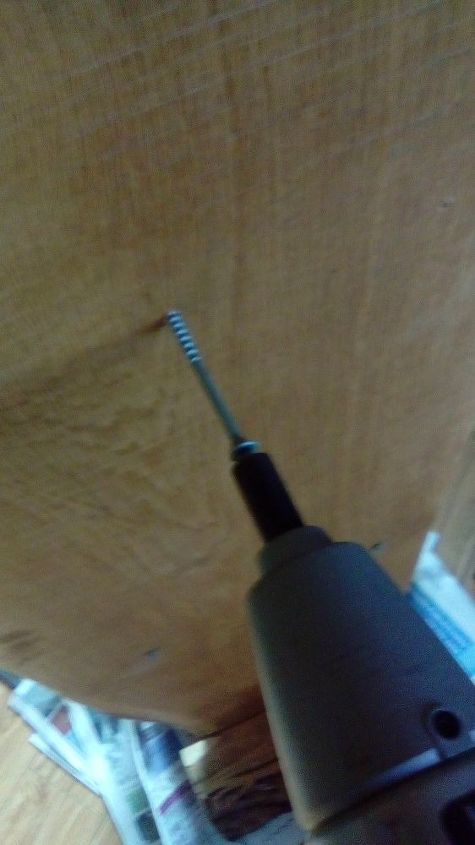
To attache the shelves I drilled holes in the front of the plank and then installed the screws at the back of the board and clamped the shelves in the front, them I screwed a little bit more to make marks in the shelves. Now I predrilled the holes in the shelves and they were ready to be screwed on. I also screwed on my little light at the top.
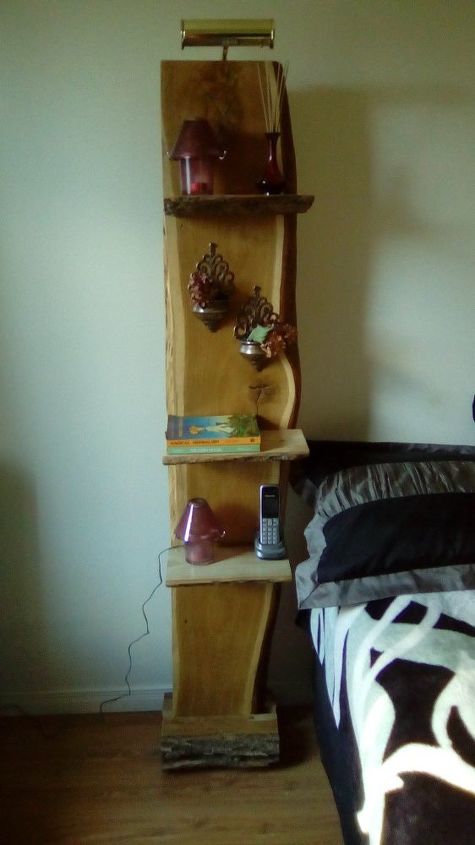
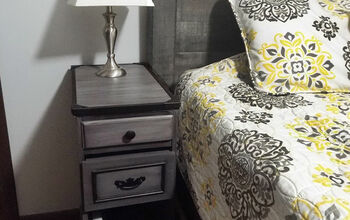
So now all that was left was to assemble a few decorations and I had two brass plant holders from a Party Life demonstration from years back. But since you don't seem to see the hole photo here I will post 2 more, one of the bottom and another of the top parts of my new night stand and I hope that this inspires you no matter what age or limitations you have you can still create.
Don't limit yourself!
And think of recycling!
Comments
Join the conversation
3 of 67 comments
-
I am so inspired by your determination and your creativity!!! Great job!!
-
Love the raw edges and that you are able to see the beautiful bark


Frequently asked questions
Have a question about this project?