


DIY Fire Pit Area

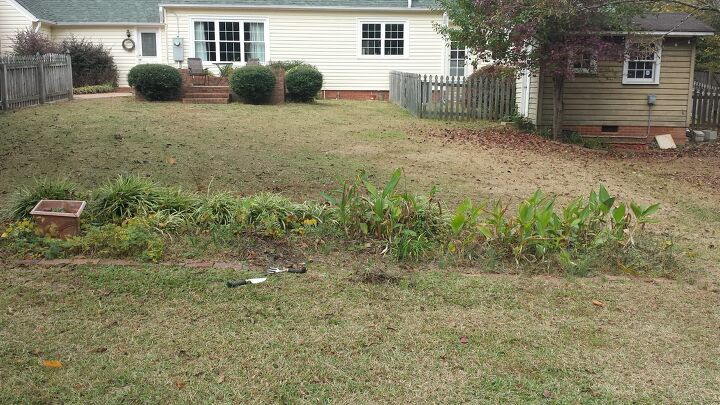
We bought our house almost 6 years ago and let’s just say, the backyard needed some love. There were some overgrown flower beds and a pretty sad excuse for a fire pit that the previous owners had left behind.
Best natural weed killer!
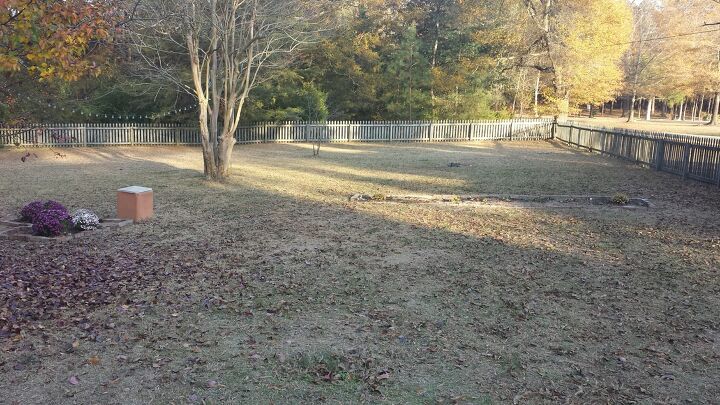
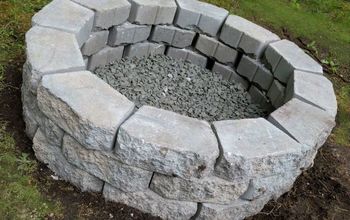
We moved into our house in the fall and by early spring, we had already replaced the sad, dilapidated looking brick circle “fire pit” for a much nicer kit that we found at Lowe’s.
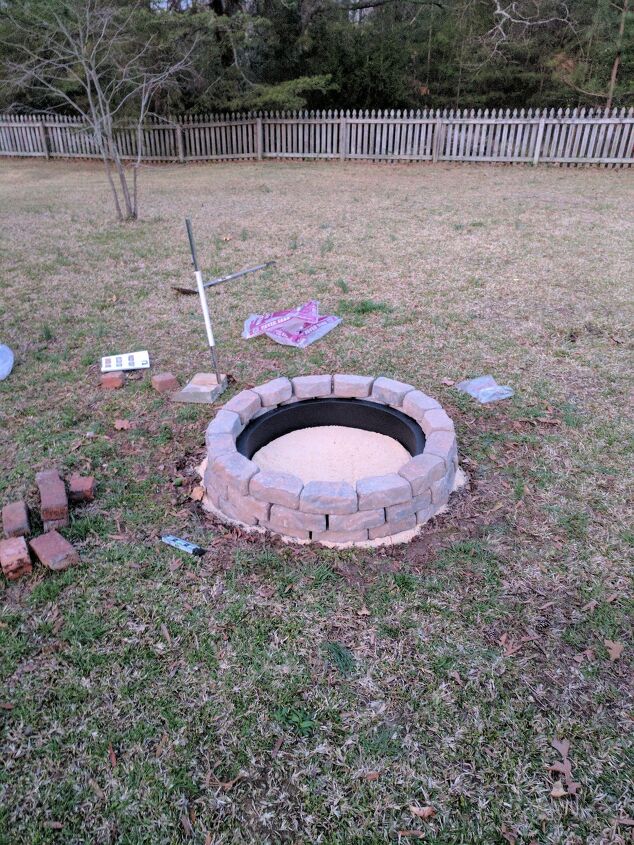
I wish I could say that once we upgraded the fire pit ring and the stones that we used it all the time. But, we didn’t. Hah. It sat in our backyard with wood in it that was never burned for almost 4 years before I finally said enough is enough. Earlier this summer, I started thinking about how we’d be much more likely to use our fire pit area if we actually had a place to sit. And I didn’t want to just put chairs in the yard because it would be a hassle to have to move them every single time we mow. We live in the south so we mow A LOT in the summer time. So, since I knew I didn’t want to just plop some chairs on the grass, I started brainstorming different seating areas that I could create. I didn’t want to spend a ton of money and I wanted to be able to do it myself. I looked on Pinterest/Google a bit, but honestly, I just came up with the idea in my head. I knew what I wanted and had an idea of what I wanted it to look like, so I got to work.
I started by eyeballing how far out I thought the seating area should go. I placed other patio chairs that we had around the circle to get an idea of how much room I would need and then honestly just picked a spot that I thought looked good. Then I grabbed my tape measure and actually measured how far out from the fire pit that spot was so that I could measure an equal distance around out from the fire pit. Kind of backwards thinking, but this is how my brain works. Once I figured out the distance, I spray painted a circle as I measured to give me a template.
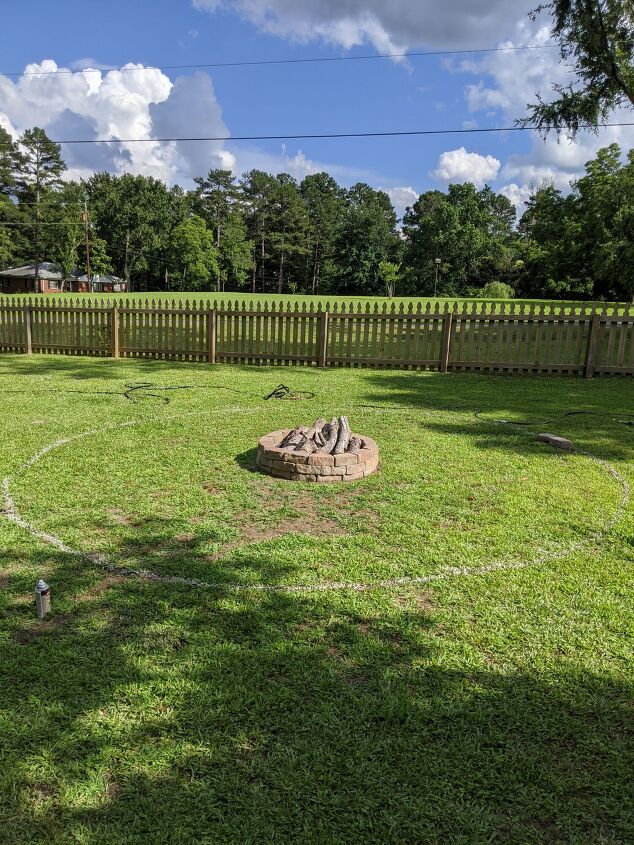
Next was the fun part: digging up all. the. grass. This part was rough and honestly had me asking myself over and over “why did you do this to yourself?” “What have you gotten yourself into?” I think I also contemplated just giving up all together and just forgetting the idea. I’m so glad I didn’t though!
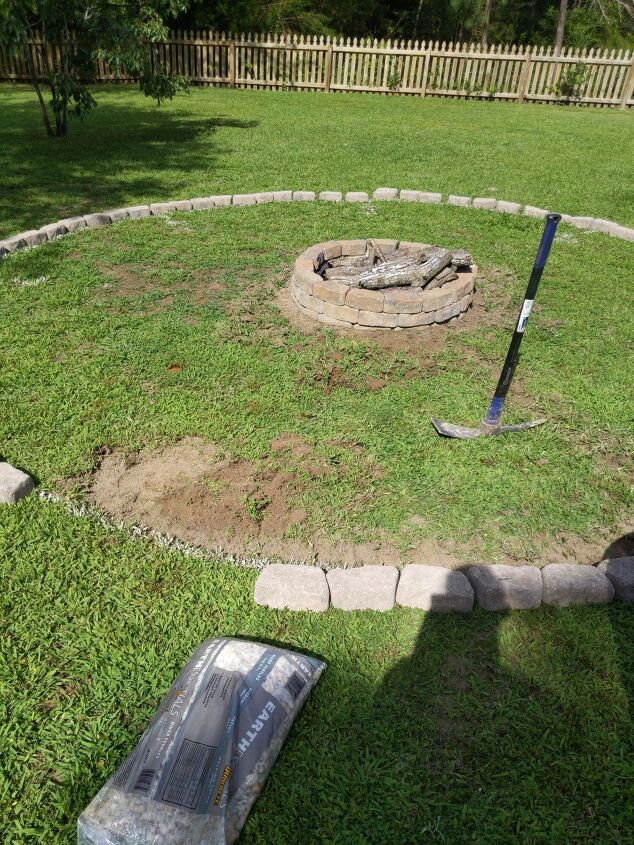
I took me longer than I want to admit to dig up all the grass. Partly because it was hard work and I didn’t want to do it. And partly because I decided to take on this project in the middle of summer in North Carolina so it was at least 90 degrees with like 80% humidity every single day. Miserable.
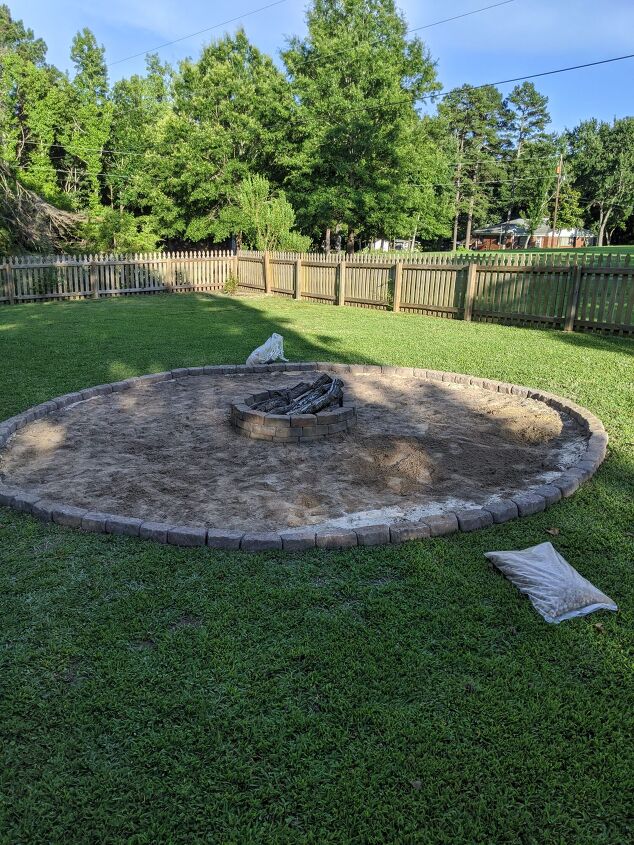
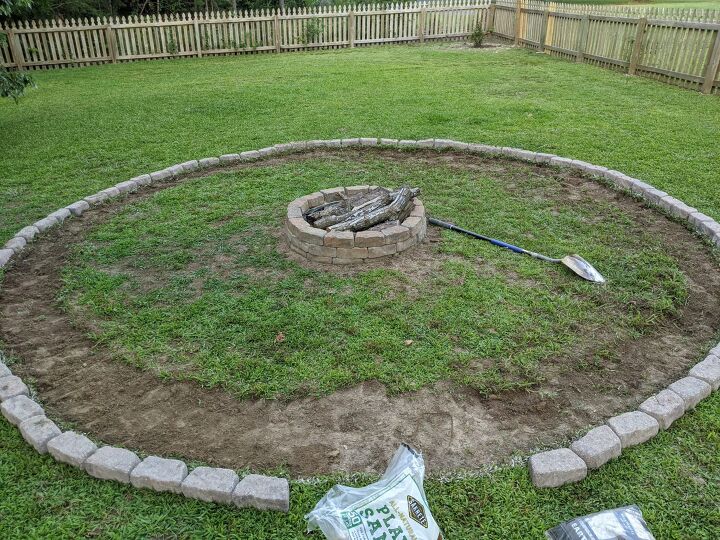
Once I finally got all the grass cleared, I dug out a little trench of sorts to place the stones that would mark the border of the seating area, placed some sand to help level it a bit, and got to work on filling it in. I will say, this is where I messed up a bit in the project and I would advise you to do differently if you choose to tackle this project for yourself. I didn’t put any sort of weed barrier or landscaping fabric down before I laid sand and river pebbles. This has already been a bit annoying for me as I’ve noticed weeds pushing their way through. It’s not a huge deal as I’ve been staying on top of it, but it’s definitely an inconvenience. If I could do it over, I’d definitely put down some sort of weed barrier though so that this wouldn’t be as big of an issue. Anyway, moving on…
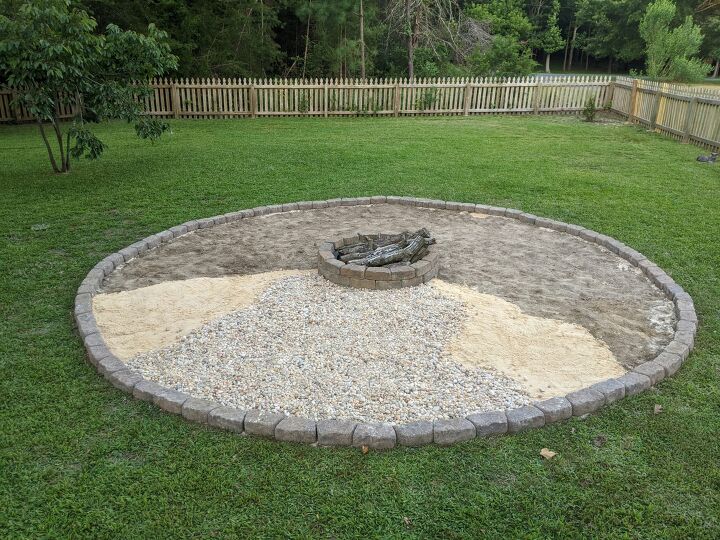
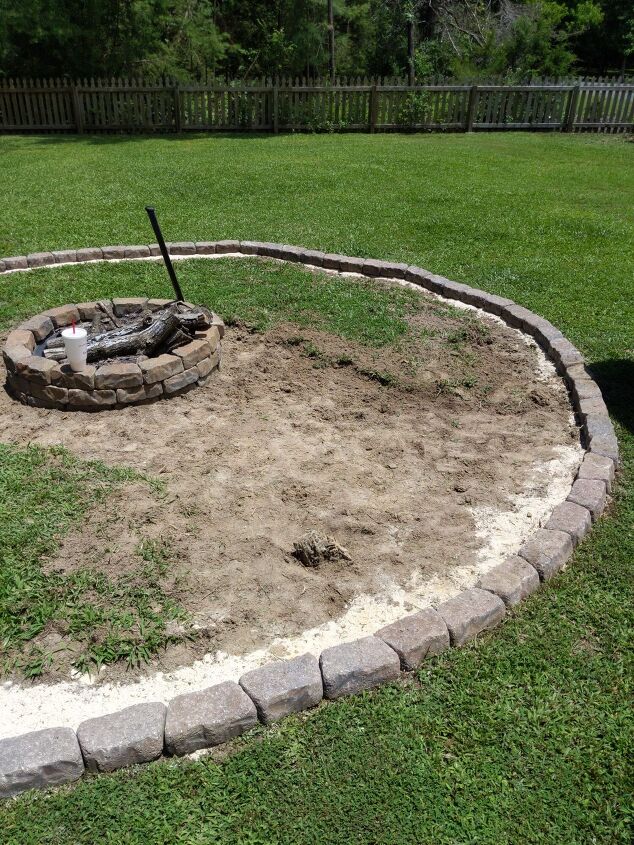
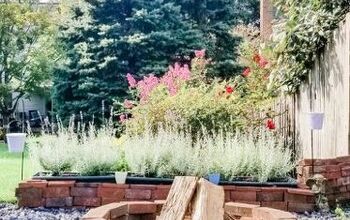
I decided to buy sand and river pebbles from Lowe’s by the bag to do this project because I didn’t think I would need enough to buy it in bulk from a landscaping supply type store. I would have maybe done this differently as well though because I probably would have saved money buying it in bulk and it would have saved me countless trips to the store. Anyway, after many bags of sand and pebbles, I finally filled in the circle and completed the seating area!
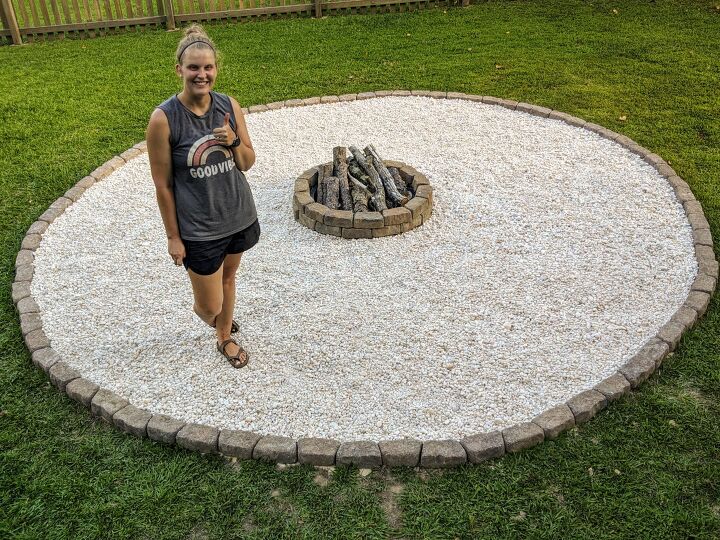
I was so proud of what I was able to accomplish with hard work and my bare hands and think this will be an area that we will use for years to come. I also think it could be a nice selling point should we choose to sell our house in the future. ( Chairs)

Let me know what you think in the comments below! If you choose to tackle this project yourself, I’d love to see pictures so tag me on Instagram (@joynerathome)!
[Products are linked above, but feel free to let me know if you have questions!]
Resources for this project:
See all materials


Comments
Join the conversation
-
Unless you buy the really expensive weed barrier, you will still have weed issues. You can use cardboard boxes and over lap them. You can always find free boxes and they are bio degradable so they won't hurt the environment. They will last as long or longer than any weed fabric. You could also put down a couple of layers and it still would not cost anything extra.
-
How many of the landscaping blocks did you use to go around your circle , and then how many to encircle the fire pit?
thank you for you idea , I am doing this next weekend.


Frequently asked questions
Have a question about this project?
I know you didn’t measure but Any idea how big the circle is?
I did this same thing only I added a extra row of pavers for flowers