4 Ways to Finish or Refinish Epoxy Wood Tables & Resin Art

4 Materials
$50
1 Hour
Easy
In this HT post, I show you 4 finishes I use for epoxy wood projects. These finishes work great for new epoxy table tops, epoxy resin artwork, and to resurface existing table tops. Additionally, I show you how to apply each finish & how I decide which to use. I currently use each of these finishes on the custom made furniture and art pieces I make for my clients.Be sure to visit my blog and subscribe to my YouTube channel for DIY tutorials & handmade items.There are several things that will be difficult to explain with words and images, so be sure to check out the Youtube video on this post.
Choosing the Best Finish for Epoxy Wood Projects


In this article, I list my 4 favorite finish options for epoxy resin and wood projects.
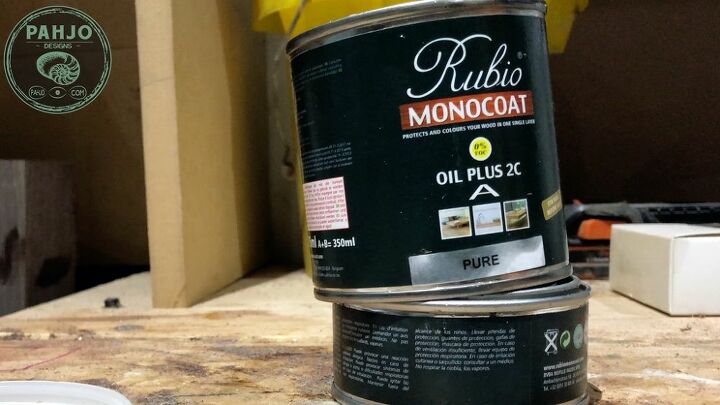
  • Rubio Monocoat Oil Plus 2c
  • Odie’s Oil
  • Festool Polish
  • Stonecoat Countertop Epoxy
Why did I include 4 best finishes rather than 1? When it comes to finishes, one-size-fits-all does not apply.These finishes cover the variety of requirements requested from my clients.Furthermore, each finish provides my clients with options if they are not sure which finish to choose for their wood and resin table.Don’t worry, I cover the parameters I use to choose the best finish for epoxy river tables. So, keep reading.
Finish 1: Rubio MonocoatRubio Monocoat Oil Plus 2c is a 2-part (3 parts oil to 1 part activator) finish which leaves a matte/satin sheen and fantastic protection.  This stuff literally works like magic and it’s my favorite finish to use on wood and resin projects.When do I use Rubio Monocoat Oil Plus 2c to finish epoxy river tables? In short, I use it as often as I can except on exterior projects.For 350mL, RMC oil plus 2c will set you back $50.40 on Amazon. So, it is roughly $4.25 per ounce.RMC oil plus 2c comes in 2 cans stacked on top of one another.  The larger can is the oil and the shorter can is activator.  Keep in mind, you can use the oil without the activator, but it takes much longer to cure.  I don’t have any experience with only using the oil as I only use it with the activator.Rubio Monocoat TipsDue to its advanced molecular bonding technology, it only requires a single layer.  It is truly a 1 step finish with 0% VOCs or water and also bonds to bare wood at the molecular level.Rubio Monocoat is used quite often for wood flooring, so it’s made to withstand abuse.


As a quick tip, I sand up to 320 grit before applying rubio monocoat oil plus 2c. Rubio Monocoat recommends to not sand above 120 grit, but this didn’t work well for me on a table top. I think 120 grit is fine for flooring, but a table top needs to be sanded higher than 120 grit – especially an epoxy river table top.


Rubio monocoat oil plus 2c is available in 40 standard colors plus multiple trend colors.  I prefer to use Rubio Monocoat without color, but I may use color in future projects to enhance the grain of certain wood species.Although Rubio Monocoat produce many wood finishes for exterior use, oil plus 2c is not one of them.I have learned RMC oil plus 2c has a 2 week shelf life after opening the can if the cans are sealed properly.After mixing, it lasts 6 to 8 hours.
Apply Rubio Monocoat to Epoxy River TableTo apply rubio monocoat oil plus 2c finish to an epoxy river table, simply mix 3 parts oil to 1 part activator.This stuff goes a long way and it’s very easy to apply.To determine the coverage area for rubio monocoat, use 1 ounce per 10 square feet. Keep in mind, porous wood may require more material; however, start with 1 ounce per 10 square feet in order to not waste material.In order to achieve the proper mixture, I use a measuring syringe. The syringe makes it easy to remove the material from the can without spilling it. Also, I use a different syringe for part A and part B so the material doesn’t cure in the syringe.Next, I dump the material in the middle of the table.I use a plastic spreader to work the material towards the sides and ends of the table.Once the surface is completely covered, I allow a bead of oil to drip over the sides and use my hand with nitrile gloves to spread the material.I allow the finish to sit for roughly 10 minutes to make certain the molecular bond reaction occurs.Then, I wipe off the excess with a rag. I try to remove as much excess with the rag in a 10 to 15 minute time interval.
Wipe and Buff Rubio Monocoat


Keep in mind, any buffer and wool pad works fine for this step.I allow the finish to sit for roughly 10 minutes to make certain the molecular bond reaction occurs.Then, I wipe off the excess with a rag. I try to remove as much excess with the rag in a 10 to 15 minute time interval.As a last step, I use my Festool RO125 sander in rotary mode with no vacuum attached to completely remove the excess.Depending on the wood surface, I use a soft felt pad or sheepskin pad to remove excess rubio monocoat oil plus 2c.
Rubio Monocoat Final Product


In a well ventilated room, the surface can be used within 24 to 36 hours. 
Finish 2: Odie's Oil to Finish Epoxy Wood Table


Like Rubio Monocoat, Odie’s oil protects wood surfaces with one coat, contains no toxic solvents, and it’s easy to apply. Furthermore, it is made in the great US of A.Odie’s Oil costs $54.99 for a 9 ounce bottle on Amazon.  The 9 ounce bottle covers 400 square feet of hardwood surface area, which is roughly $6.00 per ounce.Also, Odie’s oil works great on exterior projects. I find Odie’s Oil works better on exterior projects if I apply Odie’s super penetrating oil first.The final sanding grit determines the sheen level of Odie’s Oil.Higher grit sandpaper produces a high sheen level and lower grits produce a lower sheen level.
Mix Odie's Oil


It is important to thoroughly mix the oil to a consistency close to honey.  Many of the ingredients of the oil sink to the bottom, so I mix well before each application.
How to Apply Odie's Oil


To apply Odie’s oil, I use either a fine scotch brite pad or a polishing pad with a low speed setting on my RO125. Again, any car buffer with a wool pad works well.Additionally, gloves are not necessary when applying Odie’s Oil.Next, I allow it to setup for 45 minutes.  Odie’s oil produces a light haze (similar to dust on a surface) when completely set up.


Remove and Buff Excess


I remove the as much of the excess oil with a clean, 100% terry towel.Then, I buff it off with a sheepskin pad using my Festool RO125 in rotary mode with no vacuum attached.Keep in mind, buffing isn’t necessary as long as all the finish is removed from the surface with the Terry Towel.Buffing the surface gives me the peace of mind to know I removed all the material.The piece can be handled almost immediately after buffing, but I recommend to give it 24 hours before any use. If the piece will be exposed to water or liquid, Odie’s Oil recommends 10 to 14 days of cure time.  I’ve exposed pieces to water after 5 days with no issues, but I recommend to err on the side of caution and follow the manufacturer’s instructions.
Finish 3: Festool MPA 5010 Polishing Compound


Please note: You can substitute this product for McGuires Mirror Glaze Polish as a cheaper alternative that works very well.I use festool polishing compound MPA 5010 with the corresponding sponge in the following situations: 
  • To remove scratches from epoxy and apply a finish at the same time.
  • On epoxy wall art projects after sanding to any grit higher than 1000.
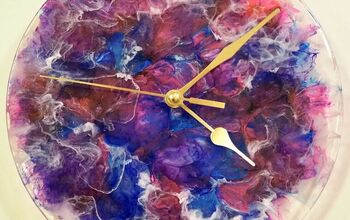
For example, I used this polishing compound on my resin wave wall art project to not only remove tiny epoxy scratches, but also as a finish.Festool has a system for everything and their polishing compounds are no exception.  This system works well in the automotive industry and can also be used to achieve a high sheen on wood.The color-coded bottles and sponges provide a system to achieve great results without frustration and confusion.  In addition, the sponges come in flat and waffled versions.  I normally use the flat sponge as it works well for flat surfaces, but the waffle sponge works on flat surfaces as well.Basically, I use the sponge that is cleaner of the two. As a quick tip, MPA is a festool abbreviation system for their polishes. The number represents the grit of the polish. So, 5010 equates to 5000 grit polish.I find the orange polish is perfect for wood surfaces as it produces the least amount of gloss compared to other festool polishes.  For wood and resin surfaces, the sheen of the orange festool polish is plenty in my opinion.
How to Polish Epoxy Wood Surface


Before I apply the polish, I sand up to 1200 or 2000 grit.I use my RO125 in rotary mode on the lowest speed setting with no dust collection attached.Next, I place the polish on the surface and spread it around with the sponge. I do this to load up the sponge with polish and to prevent it from spraying everywhere.Then, I work the polish into the wood and resin.
Remove and Buff Excess Polish


To remove the polish, I use a sheepskin pad or felt polishing pad depending on my inventory.The sheepskin pad works well for removing polish from wood and resin surfaces.If you don’t already own festool products, it makes no sense to invest money into this system for polishing.  I recommend using McGuires Mirror Glaze to achieve similar results; however, the sheen will be higher than the orange festool polish.Ultimately, I use the festool polishing system because it removes the guess work for me and produces a fantastic result as depicted from the resin and wood wave art piece.
Finish 4: StoneCoat Countertop Epoxy


To round out my best finishes for epoxy river tables is Stonecoat countertop epoxy.I use an epoxy finish on my projects only when my client specifically requests an epoxy top coat as the final finish.Otherwise, I steer clear of this option.Personally, I don’t like this type of finish on wood and resin tables, but many of my clients do which is why I use it.To clarify, I love the stonecoat countertop epoxy product. In fact, Mike inspired me to get started with my first epoxy project.I don’t like to finish wood tables with epoxy as a top coat for the following reasons:
  • I’m not a fan of the high gloss finish.
  • Epoxy Resin top coats make a mess during application.
  • Require harsh chemicals to clean spills and epoxy resin tools.
  • They are time consuming to apply requiring multiple layers.
  • This finish requires me to essentially close my shop for a few days to avoid contaminating the material with dust.
  • Lastly, it is the most expensive finish. In turn, mistakes are expensive.
Stonecoat countertop epoxy requires 3 coats when used on a resin and wood table: 2 Seal Coats, 1 Flood Coat. 
How to Apply Stonecoat Countertop Epoxy


The first 2 coats are seal coats and cover 1 square foot of surface area per ounce. The third coat is a flood coat and covers 1 square foot per 3 ounces.


Seal Coats


A rubber squeegee works well to spread the material on the surface of the woodThese coats seal the wood to prevent air bubbles for the final flood coat.Before I apply the second seal coat, I lightly sand the surface with 220 grit or higher.It’s important to note each seal coat requires 24 hours to dry and requires a light sanding with 220 grit sandpaper (or higher) between coats.
Flood Coat


First, I sand the surface and pour the epoxy on the table.It’s recommended to apply stonecoat epoxy with a 1/8th inch trowel. Once I spread the material evenly with the trowel, I dab the epoxy with a synthetic shortcut brush to get rid of the trowel marks.As a last step, I use a torch or heat gun over the material. Heat helps the epoxy self level and it removes any remaining air bubbles.
How to Choose?


In this article, I listed the best finishes for epoxy river table projects.However, you may still be asking yourself, “How do I choose which finish to use?”Well, great question. Below is a quick guide I use to decide which finish to use.
  • Rubio Monocoat Oil Plus 2c Pure
  • Everything except for exterior projects.
  • Odie’s Oil
  • Use on exterior projectsWhen a greater level of sheen control is required
  • Festool Compound Polish MPA 5010
  • Repair scratches in existing epoxy top coatsEpoxy wall art when sanding to 1000 grit or above
  • Stonecoat Countertop Epoxy
  • Use only when client requests an epoxy top coat finish


In conclusion, I hope my best finishes for epoxy river table list provided you with value.Please leave a comment down below and let me know your best finish for epoxy resin & wood projects.
Resources for this project:
See all materials
Any price and availability information displayed on [relevant Amazon Site(s), as applicable] at the time of purchase will apply to the purchase of this product.
Hometalk may collect a small share of sales from the links on this page.More info
Jeremy Hoffpauir
Want more details about this and other DIY projects? Check out my blog post!
Go
Frequently asked questions
Have a question about this project?
  3 questions
  • Ck Ck on Jan 25, 2020

    Can you use on top of Formica?

    Food safe?

  • Kathleen Church Kathleen Church on Feb 13, 2020

    If I made a wooden tray and filled it with epoxy and then placed tiles in the tray with the epoxy would it seal it and be waterproof??

  • Kathleen Church Kathleen Church on Feb 21, 2020

    If I made a wooden flat box? Like the size of a cookie sheet. Could I pour in epoxy clear and add ceramic tiles to hold in place? Would it hold the tiles like a glue?? Nice job on your project by the way!!

Comments
Join the conversation
3 of 5 comments
Next