


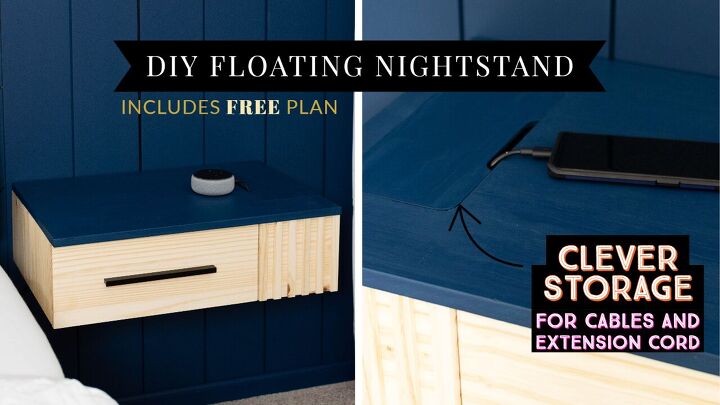
DIY Modern Floating Nightstand
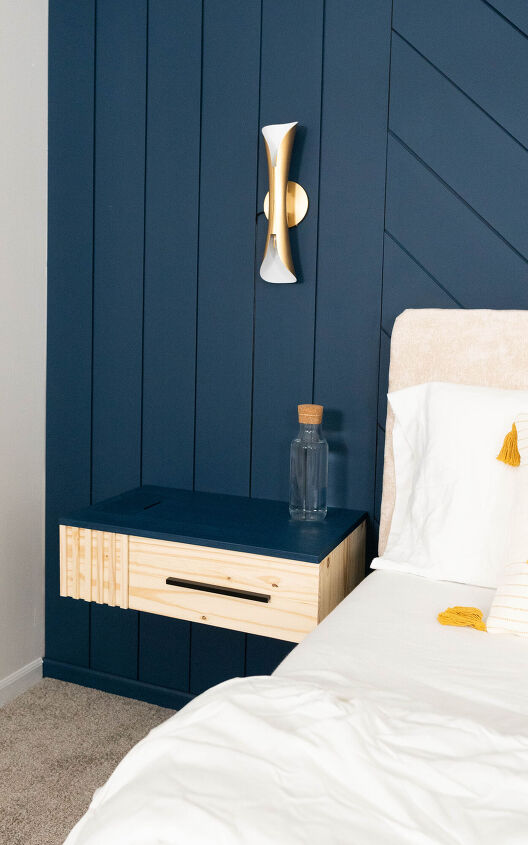
As a part of my Master bedroom remodeling, I am building this DIY Modern Floating Nightstand. This blog includes Free plan and cut list if you want to build it. Its a simple design with storage and hidden power cubby for your chargers and other electronics you wish to have near your bed.
Check out the video for better understanding.
DESIGN:
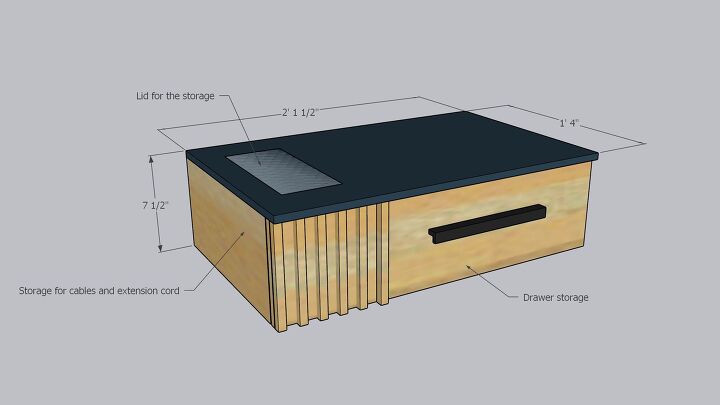
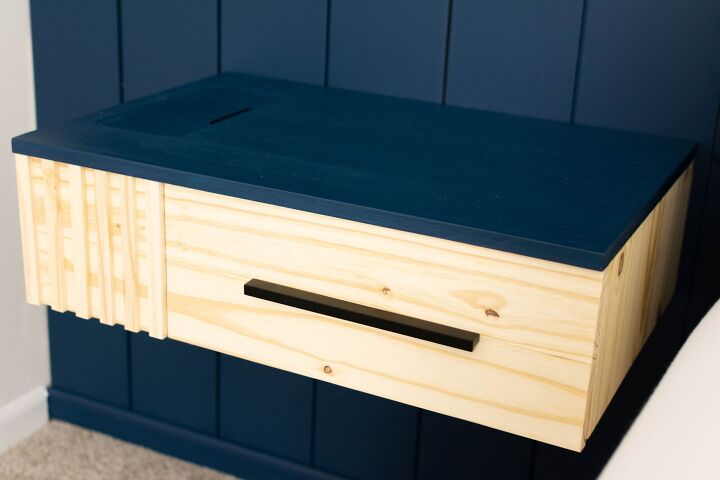
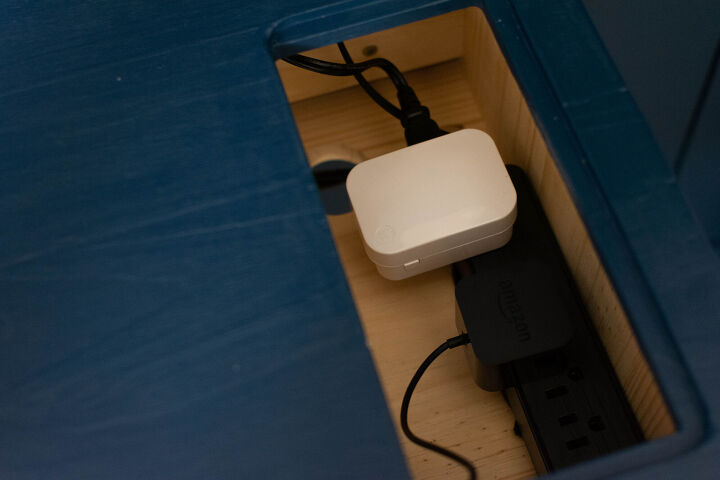
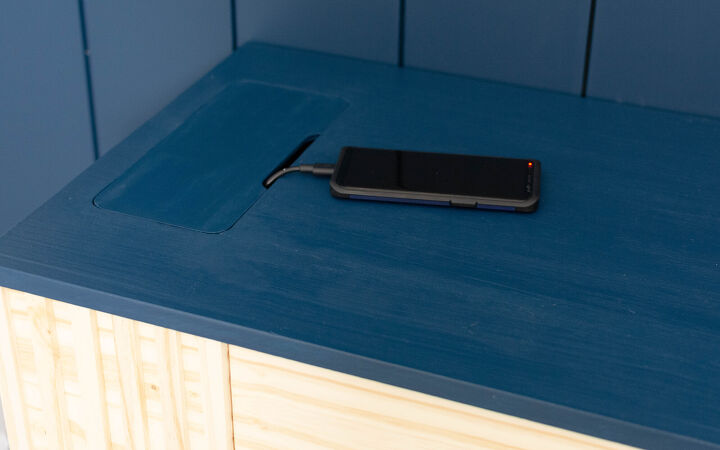
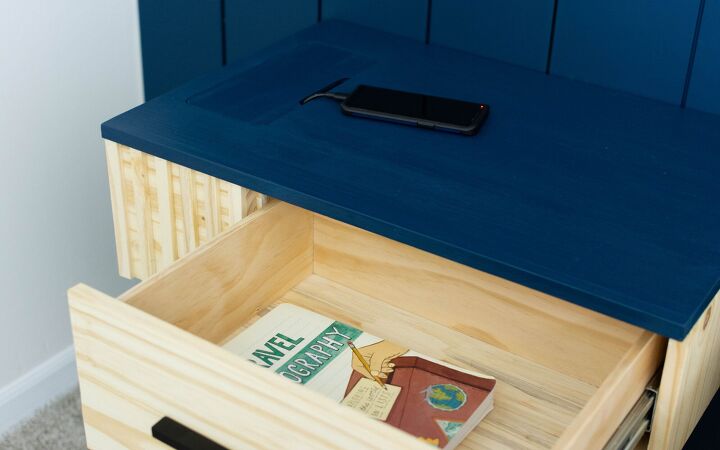
The requirement was simple. We just needed a small drawer near the bed to store personal stuffs and a hidden power strip with at least 3 sockets. Also, this stand is wall mounted to achieve the floating look and to keep the design minimal. The cubby that holds the power strip is designed to house all the power adaptors and stay perfectly hidden without being an eye sore. The cables can be drawn out of the slot provided on the Top to charge or connect your gadgets. Its very functional and looks great near the bed.
I specially designed this night stand to go along with the pattern accent wall I made with shiplap boards. But this design will definitely fit into any room style.
Size: 25-1/2″ (L) x 7-1/2″ (H) x 16″ (D)
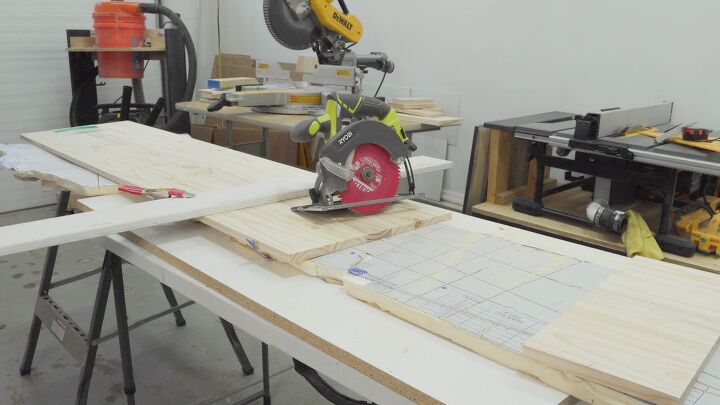
CUT
Cut the parts except for the drawer. After assembling, you can measure and cut the parts for the drawer.
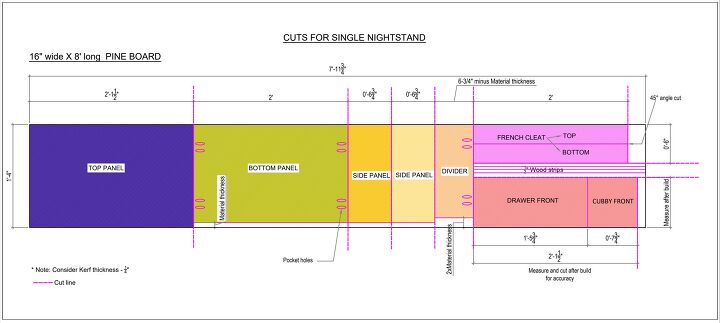
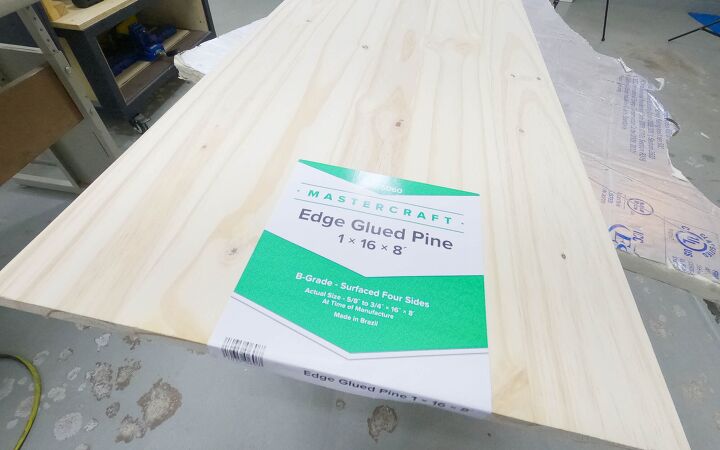
I am using a single sheet of 16inch wide & 8ft long edge glued pine boards for each nightstand. I did all the cross cuts using a circular saw and a straight edge guide. Then, did all the rip cuts with table saw to required widths.
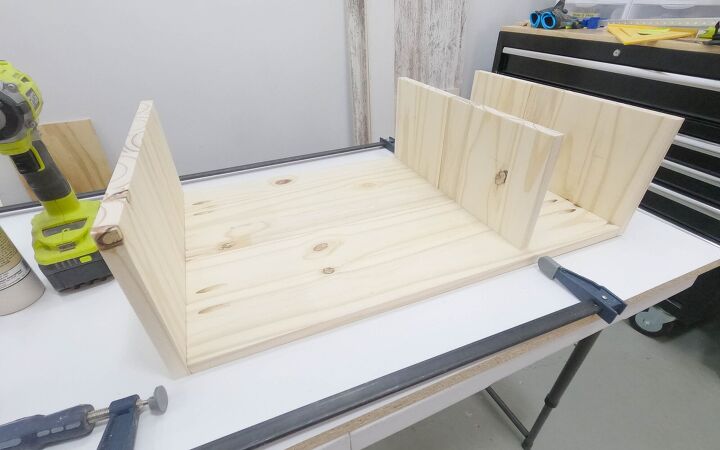
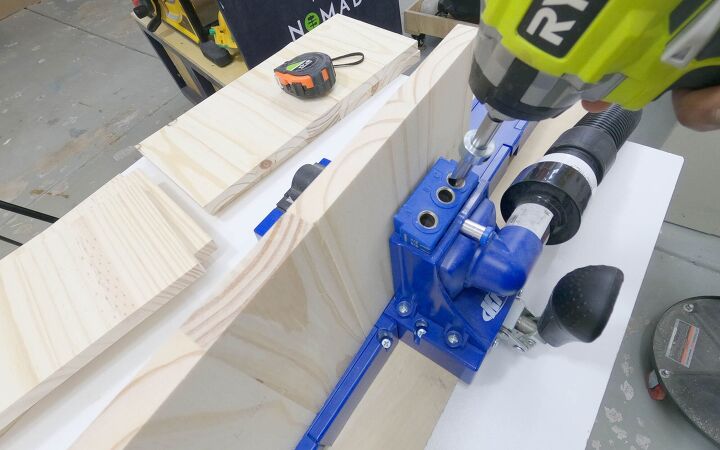
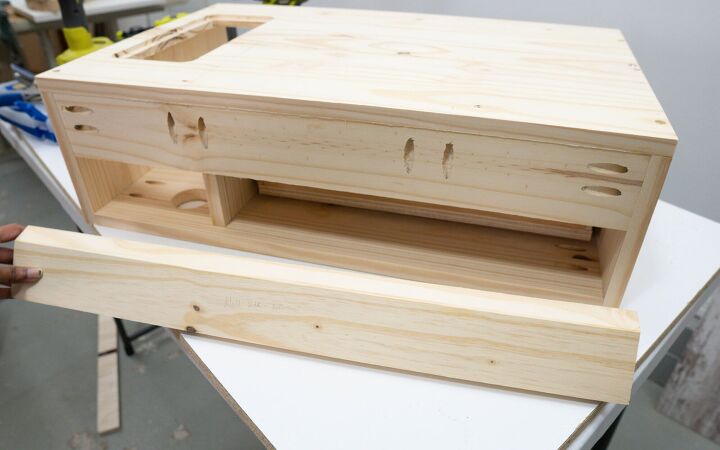
ASSEMBLE
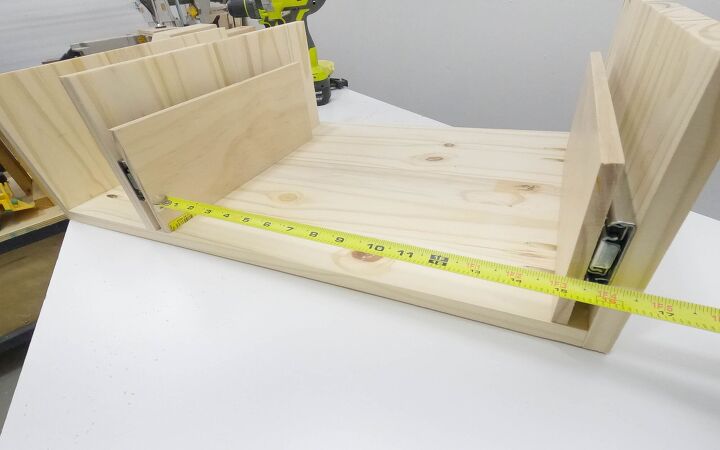
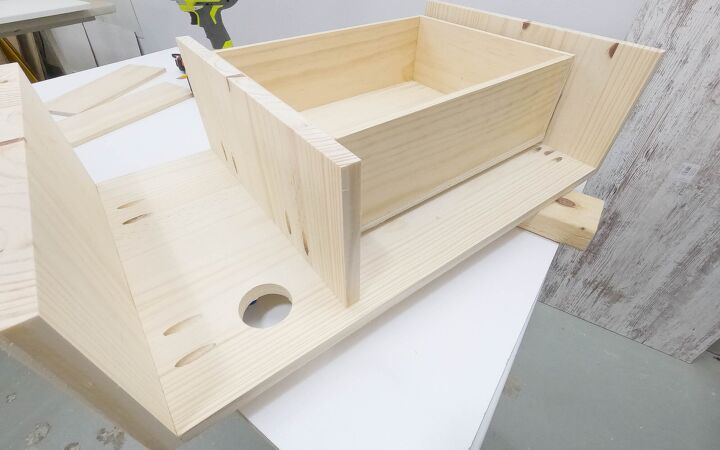
Make the pocket holes on the bottom and divider as shown in the cut list diagram above. Then, connect the side panels to the bottom panel using glue and 1” pocket screws. Make sure to clamp the pieces together and check if its square. Next, place a spacer for 6- 1/2″ and connect the divider to the bottom. Remember that both the side tables are mirror of each other. So, the divider should be connected towards the left for the left nightstand and towards right for the right night stand.
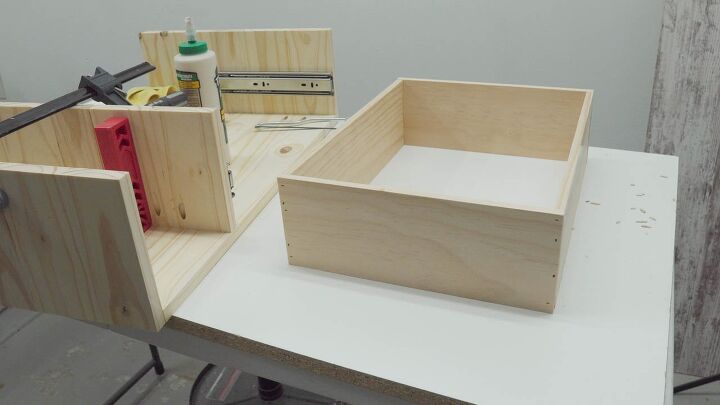
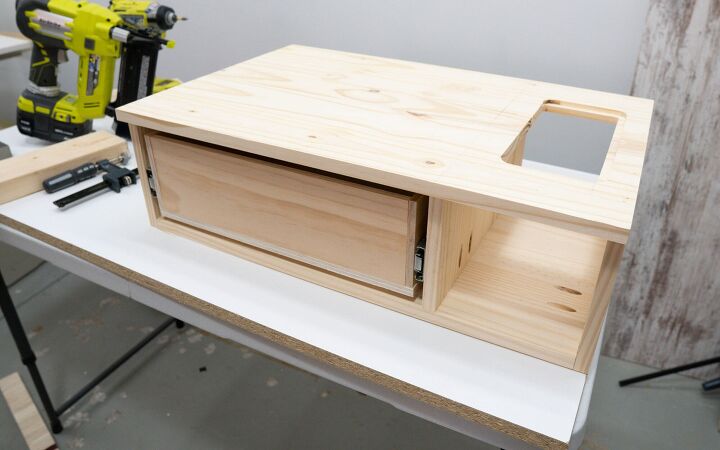
INSTALL DRAWER & SLIDES
Without the top, you will have better access. So, its better to build the drawers and install it first, before fixing the top. First, attach one half of the slide to the verticals and measure the in-between gap to build the drawer box. The sides of the drawer box are built using 1×6 pine boards and the bottom from 1/2Inch plywood. You can use any material you like, or even scrap wood that you might already have. The 1×6 pine boards are ripped to be 4-1/2″ wide and cut to length as drawer sides. Always, measure and cut according to size. Finally install other half of the slides on the drawer box.
MAKE GROMMET HOLE
Next, make a 2 inch hole inside the cubby about few inches away from the back edge.. This is to take the cable from the power strip to the outlet.
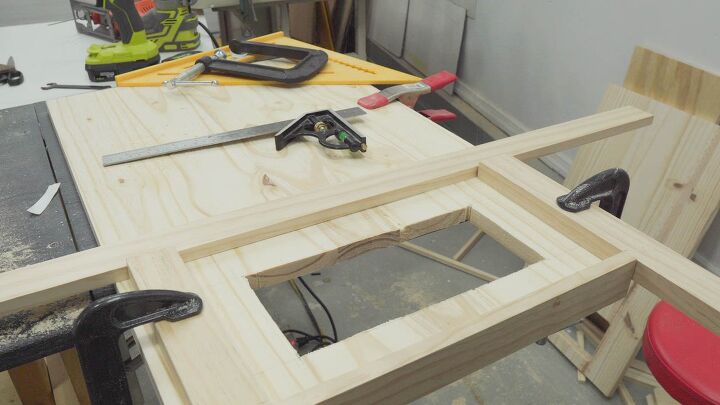
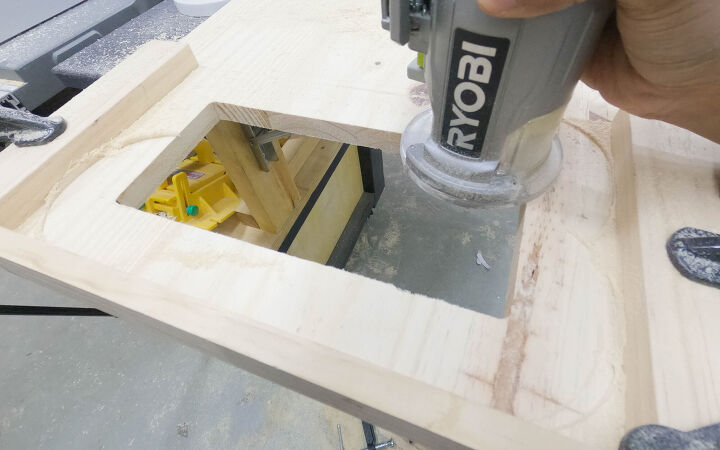
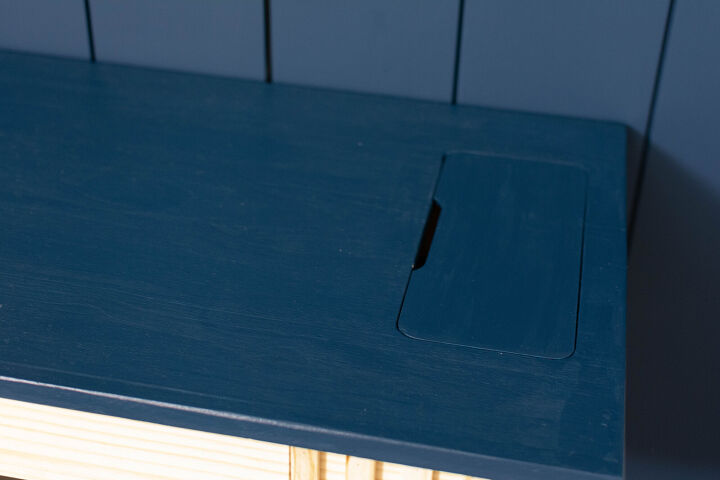
CUT OPENING ON TOP
This opening is made on the top panel for the cubby to access the power strip. To do this, mark the outline and remove the bulk part of the opening with a jigsaw. Then clamp temporary guides with some scrap wood around the opening and route it using straight bit to get a clean edge. Then use a rabbet bit to route a recess on three sides of the opening. This recess will hold the lid in position.
Measurements and Cut diagram for the Lid can be found here.
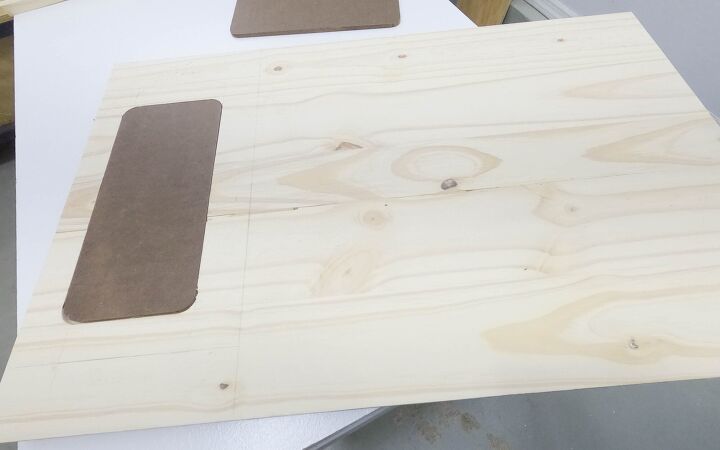
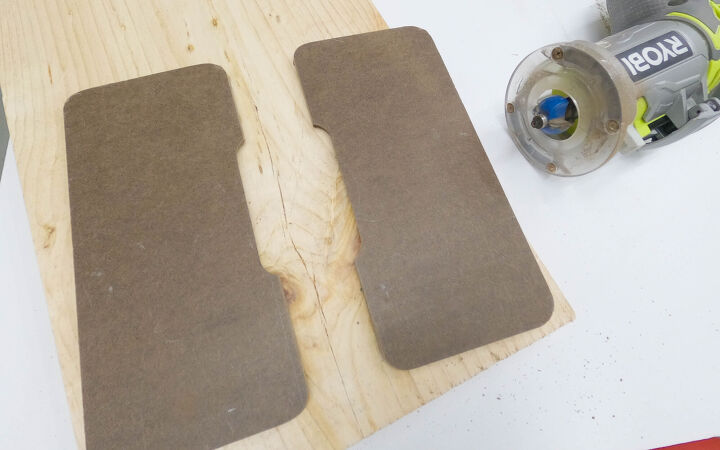
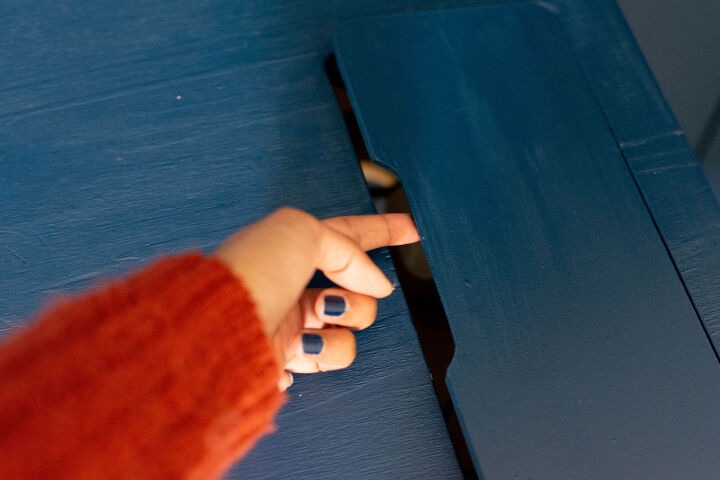
LID FOR THE CUBBY
Next, cut the lid out of a quarter inch thick hardboard. Then mark and cut a slot on one side of the cubby lid to act as a finger pull. It’s also for the wires to come out of the cubby from the power strip inside.
FIX TOP
Then, fix the top using brad nails and recessed screws.
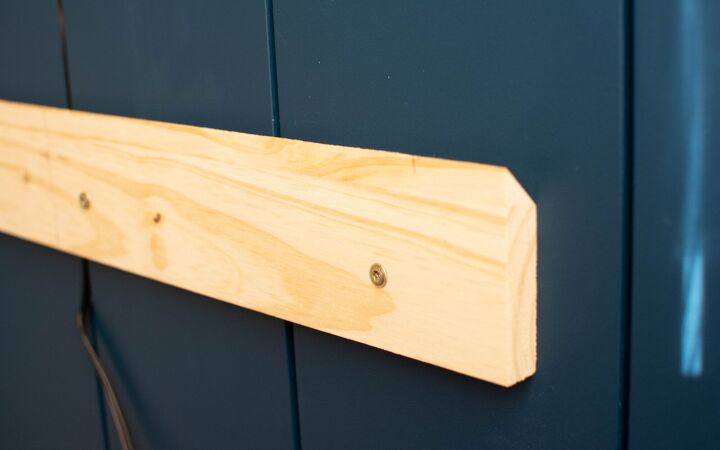
ADD FRENCH CLEATS
Measure the inner width and height of the storage. Then reduce at least an inch on the overall height. Cut a plank for that size and cut 45 degree angle cut at the center. Now you will have two pieces. One piece with 45 degree angle cut on bottom is installed to the storage and another half with 45 degree angle cut on top is mounted on the wall. This is a perfect system to mount objects on walls. I have used this in many of my projects such as to mount my vanity dressing unit, fruit basket and shoe storage shelf. You can check them out if you want to. Just remember that this night stand is going to cantilever about 16 inches. So, its not meant to lean or sit or climb on it.
CUT DRAWER & CUBBY FRONTS
Measure the size and cut the front pieces for the drawer and cubby. These can be installed after mounting the night stands.
ADD LIPPING (OPTIONAL)
At this stage, I realized that these pine boards are not really 16inch wide evenly. Since it would look awkward, I cut pine strips and added them as a lipping to the front. This will hide away the issue. If your material is sized even then this step is not necessary.
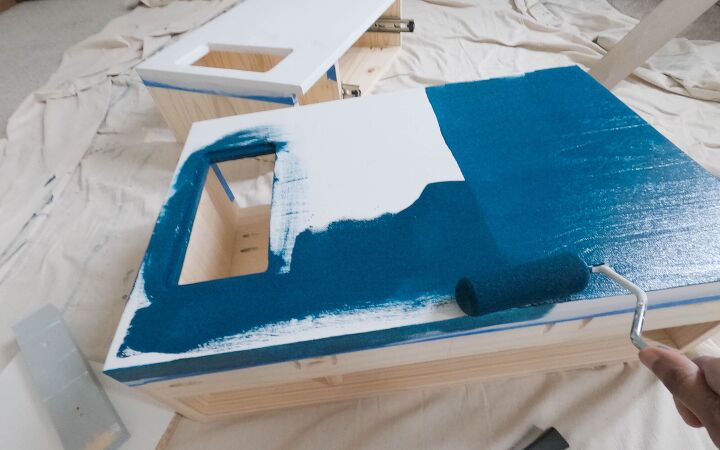
FILL HOLES, SAND, PAINT & SEAL
Next, fill all the nail / screw holes with putty or spackling and sand everything down to get a smooth surface and soften the edges. Use 80 grit first and then use 220 grit. Then, clean it thoroughly with tack cloth to get rid of all the dust and prep before painting/sealing.
I wanted the top to be the same color as the wall, which is nocturne blue from Behr. And the entire stand is sealed with a clear polyacrylic sealer.
MOUNT
Find the wall stud. Measure the back of the night stand and mount the bottom cleat on wall. I planned this ahead and had installed necessary wood backing behind the shiplap to get sufficient mounting support.
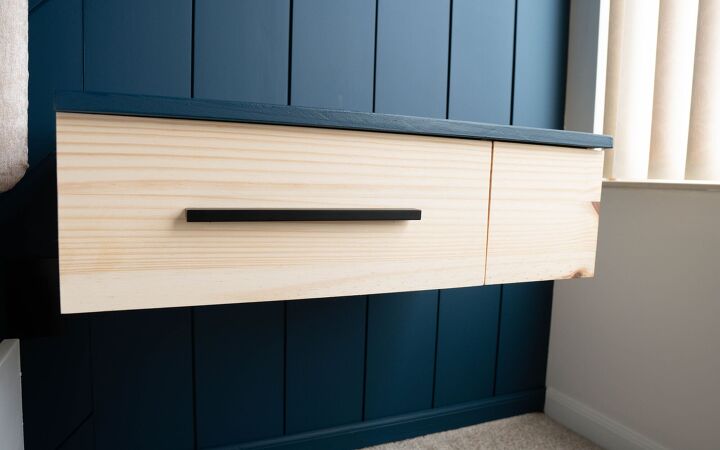
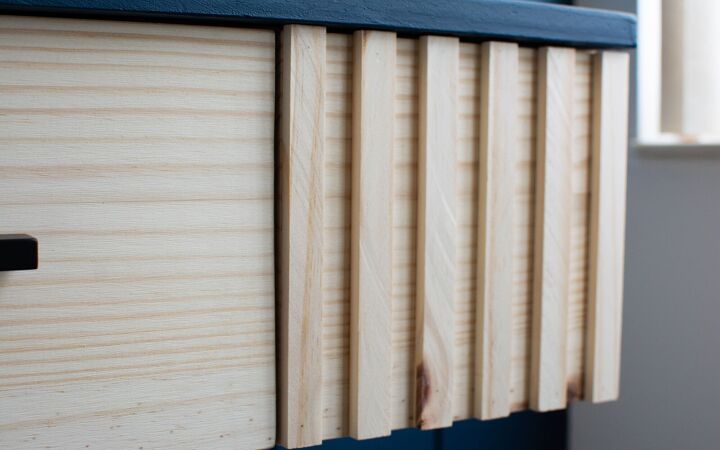
INSTALL THE FRONTS & HANDLE
Finally, install the drawer front and handle. Then fix the cubby front with glue and nails. I also added wood strips on the cubby face to tie the design elements together. You can skip this if you want.
FINAL REVEAL- DIY Modern Floating Nightstand
It doesn’t just look awesome but it’s even functional with a clever storage for your cables & extension cords and drawer storage for your personal stuff. Modern floating bedside stands designed to be a mirror of each other and personalized considering the essentials of the user.
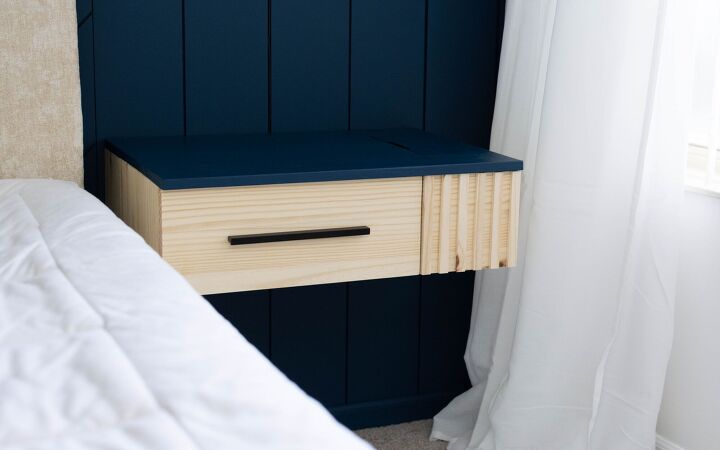

Full reveal of this Master bedroom transformation can be found here. https://www.thenomadstudio.com/diy-upholstered-headboard-bedframe/
More Gorgeous Bedroom Ideas
Resources for this project:
See all materials


Comments
Join the conversation
-
Just looked at the bed frame makeover which is also amazing, saw the nightstands in those pics and had to come check them out! They are beautiful! The whole room is beautifully one!
-
Floating bedside 'tables' are very sensible as they save floor space, make the area seem larger, and make vacuuming so much easier.


Frequently asked questions
Have a question about this project?
'Love the blue. What is the paint color?
Nice look. I’ll never build, poor skills and no tools but I’d hire someone to build for me. Maybe a side hustle for you? Thanks for sharing