


DIY Storage Ottoman: Staining & Styling

Disclaimer: This post was sponsored by Retique It. All opinions are my own.
Hey everyone! I stained, upholstered & styled my DIY storage ottoman and I did it myself which means you can too!
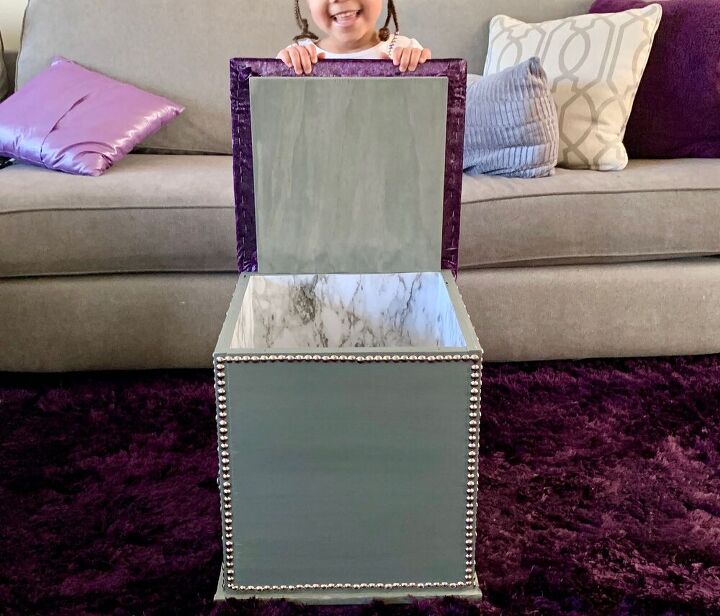
When our oldest started crawling, we ditched our living room coffee table in leu of safety, leaving us without some basic functionality & storage. Three years and two toddlers later, my husband would like an ottoman to rest his feet. Of course I go into full DIY mode to create a contemporary ottoman that will fit our living room decor and provide us extra storage! We all can use storage solutions in our lives, right?! Here are all the steps and mistakes I learned in the process of staining and styling our new ottoman!
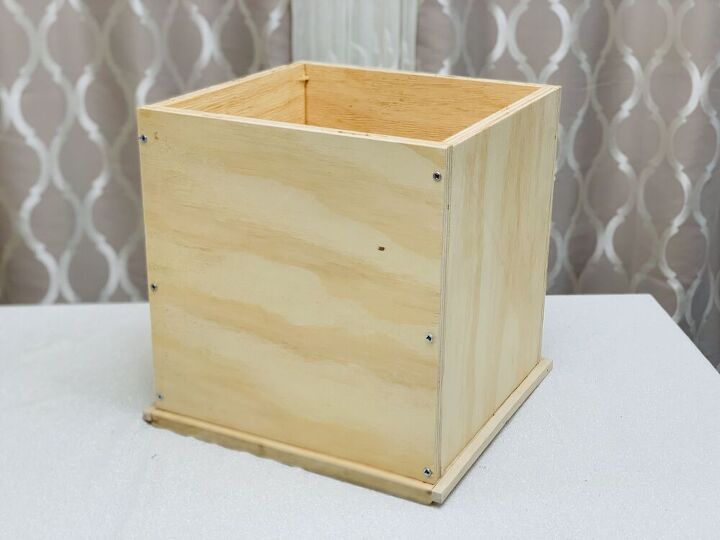
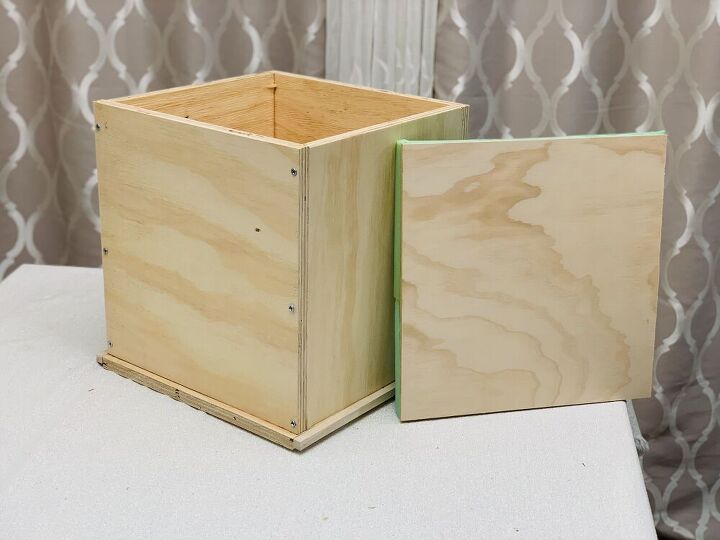
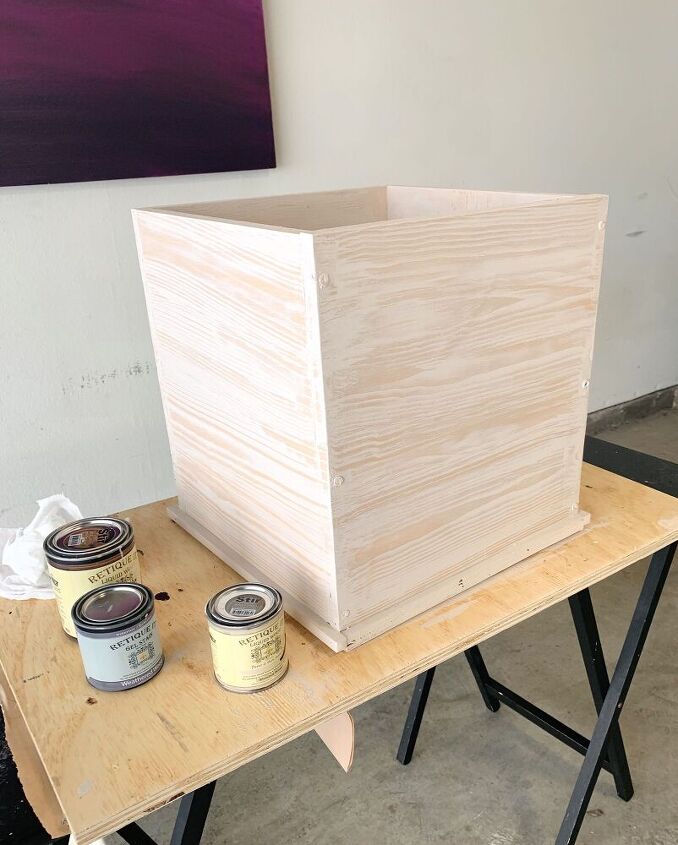
I started off by building my ottoman, if you’re looking for a project to take on, see the full tutorial here! You can also use an old ottoman or thrift find you’d like to refresh. Another option, pick up a storage cube and use the dimensions to create an upholstered top by following the steps below.
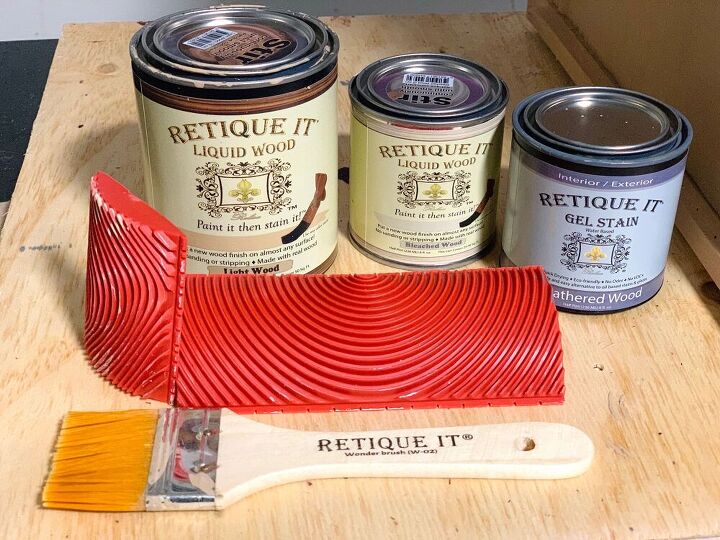
I’m trying Retique-it Liquid Wood and a gray gel stain to get the contemporary feel I’m going for. Yes, It is already made from wood, however, the wood grain is horizontal on some sides and vertical on others. The liquid wood literally goes on as a fresh layer of wood, no mater what material you are applying it to. If you’d like to stain a piece of furniture with old paint, something made from laminate or even plastic, you can apply liquid wood, use the graining tool to add grain marks back onto it and then stain and it will look exactly like a wood based piece of furniture. Sanding is not necessary at all so your project time…slashed in half!
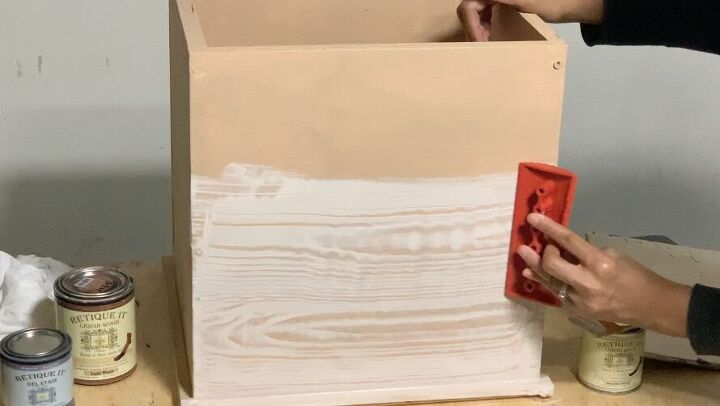
I started by applying the base layer of liquid wood in ‘Light Wood” and allowed it to dry about 2 hours. I went over it with a lighter layer, of liquid wood in “Bleach Wood” and immediately used the graining tool to add what I call a new DIY grain. The graining tool isn’t necessary but I was pleasantly surprised as how well it turned out after applying it one row at a time. I did this on all four sides making sure the grain was now going in the same direction.
It looks so good, you could leave it just like this…but we’ll keep going! If you’d like, you could sand it down lightly before applying your stain but it’s totally not necessary with this technique.
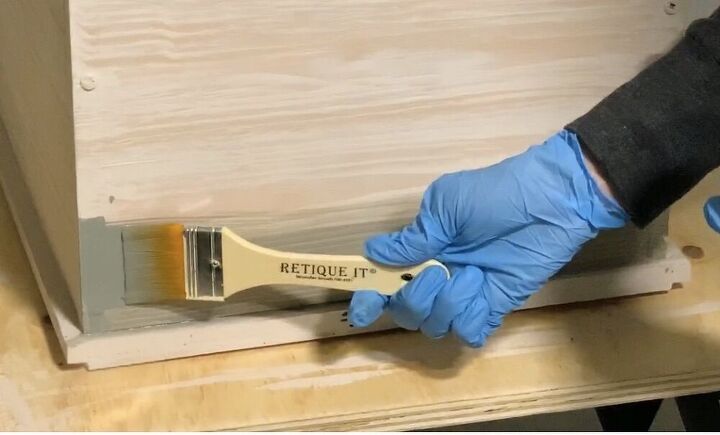
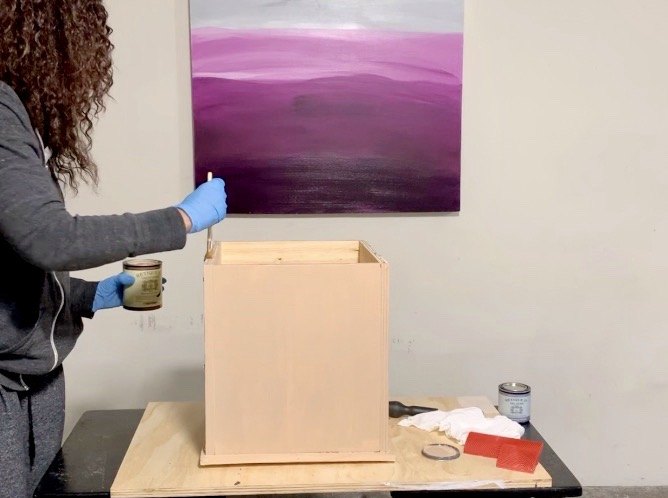
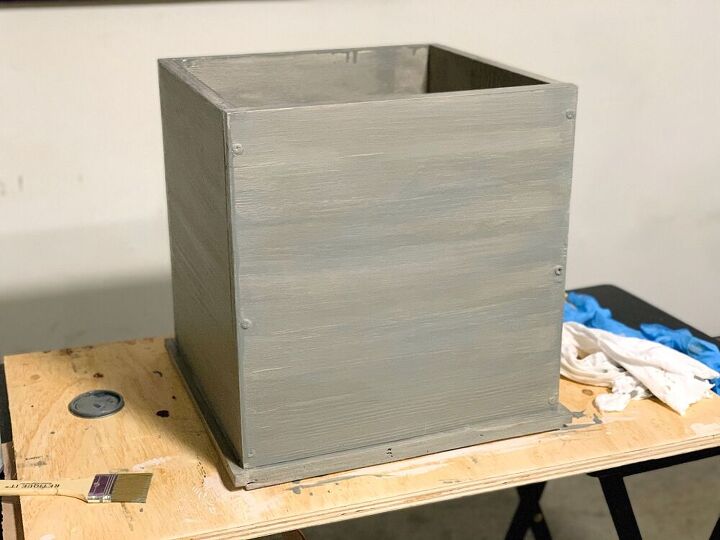
Once this graining technique dried, I applied two coats of a water based gel stain in weathered gray. You can use a paint brush going it in a back and forth motion being sure to start at the bottom and work up to the top.
DON’T: On the first coat, I didn’t go around one last time to wipe off any excess stain, as a result I had some minor drip marks along the edges once it dried. It’s not super noticeable with the second coat but I know it’s there.
After the stain dried, I applied a protective layer of polyurethane to seal it and give a beautiful satin finish. I also add felt pads to the bottom four corners of the ottoman to protect our floors.
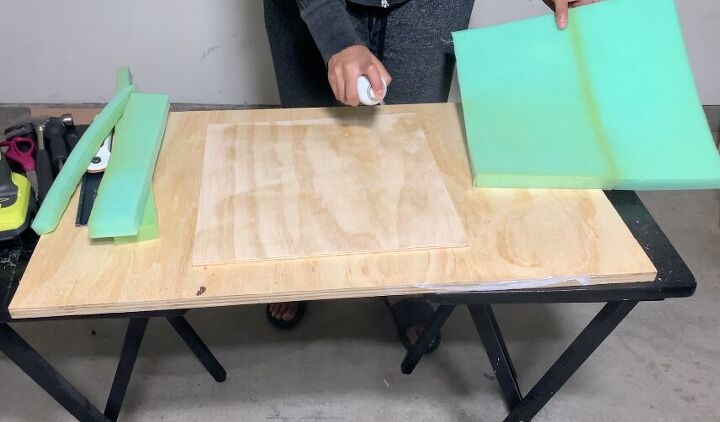
I had my local hardwood store cut a very thin piece of plywood using the dimensions of the top of my ottoman (15’x15’). I also had an additional piece cut two inches smaller to apply under the top of ottoman so it fits firmly without shifting.
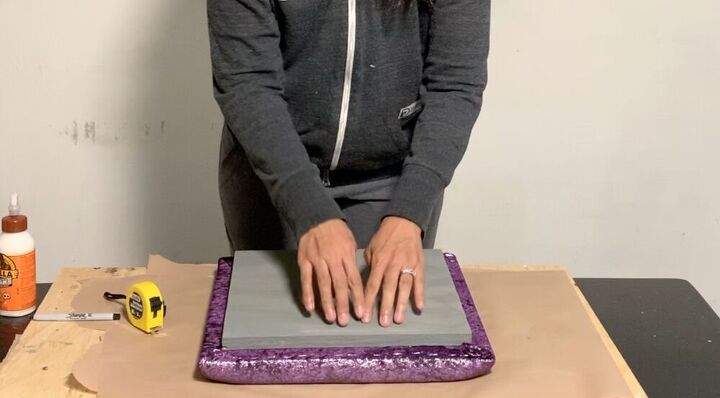
Using spray adhesive, apply a 1” thick piece of upholstery foam measuring 15”x15" to the plywood board. Once dry, I laid out a 17”x17” piece of batting and placed the cushion on top face down wrapping the batting around and adhering with a staple gun. Pull it tight on each side so there is no give and cut off the excess.
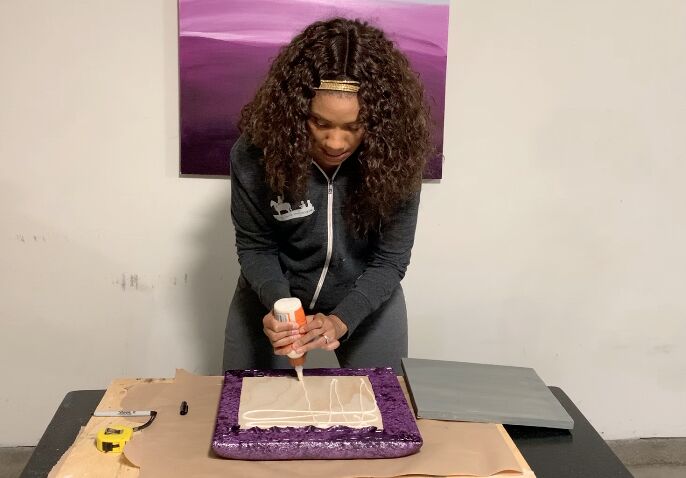
Repeated this process with your fabric in the same measurements. Next, apply a generous amount of wood glue to the exposed wood area and place plywood board measuring 13’x13’ directly in the center. Allow to dry and the top is complete!
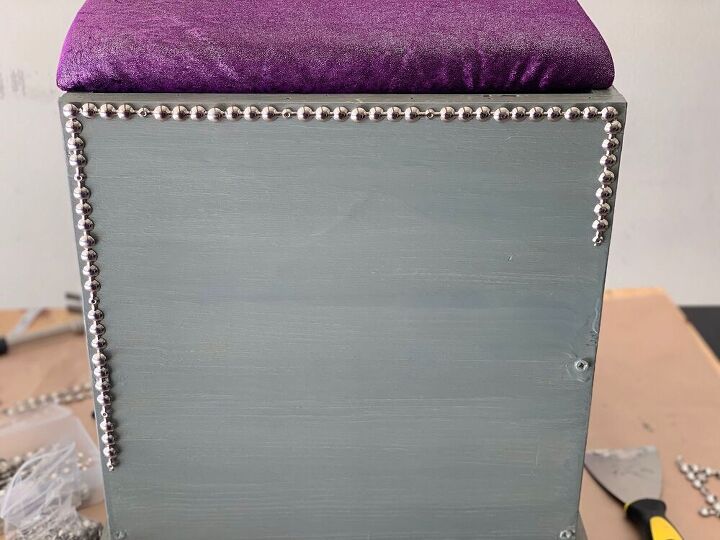
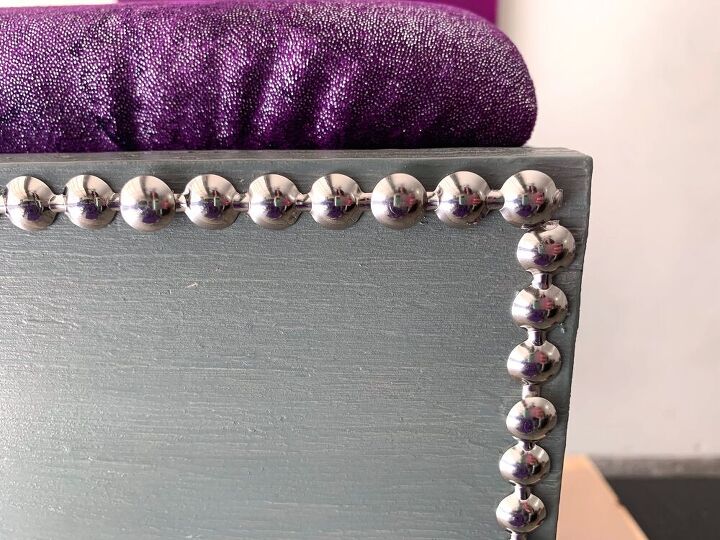
Make this contemporary ottoman complete by styling with nailhead trim! I purchased a kit on amazon. If I had it to do over I would have purchased the long continuous pieces as opposed to the shorter pieces, only because it was more difficult to fit the individual pieces to the specific measurements of my ottoman.
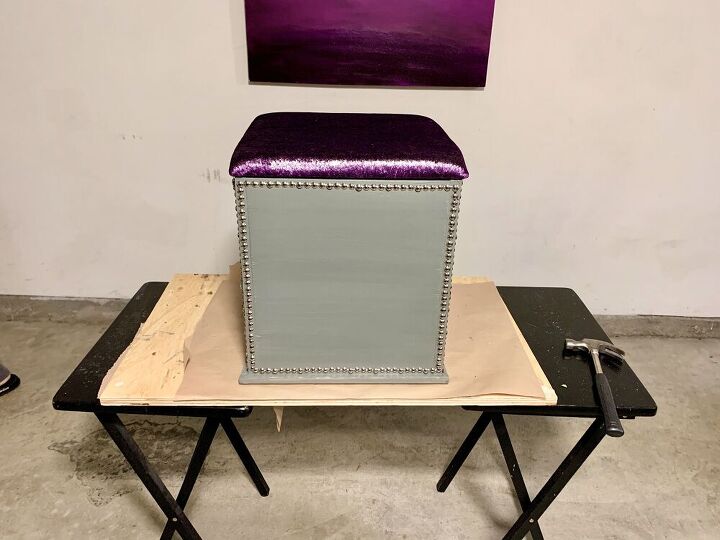
There you have it, a GORGEOUS hand made storage ottoman that you can brag about! I love the finished product, it looks high end and the stain technique came out pretty cool for my first time! I’ll definitely be using it on some trays we have that need a refresh!
Lessons Learned:
- I would have preferred the base of my ottoman to stand 12”-13” in height rather than 15” in height (this does not include the hight of the upholstered top). That way, I could have added legs or small wheels to the bottom. The height of my ottoman is perfect as is, however, it would be too high if I add legs or wheels at the existing height.
I hope you are inspired to try staining something around your house and make it your own! Trust me, the family will definitely want to get in on the action, the storage ottoman is a hit in my house!!
Please visit me at MyEye4DIY.com and Instagram (@MyEye4DIY) for regular DIY tutorials !
Resources for this project:
See all materials


Comments
Join the conversation
-
Turned out great! Thanks for sharing.
-
Nice idea. I know myself and I am sure many others look for a place to stash things when company is coming, and this is a great way to hide toys, magazines/news papers, etc. Nice job.


Frequently asked questions
Have a question about this project?
Great job !! 🎍 I was wondering if you can use the Retique to make a dark looking wood ? Would wood grain show up ? I have a table from maybe the late 90's ( side of the road find in great condition ) , and the top is like a staggered pale wood. I was looking at it yesterday as a matter of fact, and I thought that I would just have to paint it brown, it already has a white base that only needs cleaning, and it's going on my new enclosed porch, whenever I finally finish it. This looks like a great product and I am really interested but hesitant to purchase if I would only have to redo the table top.
Again, great job on the storage ottoman ! Girl power !!💪👏
Very nice project, thank you for sharing. May I ask did you think to add hinges and a lid support so that the little one didn't have to wrangle with the cover? Thank you for taking the time to answer.
So nice! Definitely going to give this a try. I would also like to know whether the top is loose from the Ottoman itself.I do not see any hinges?