


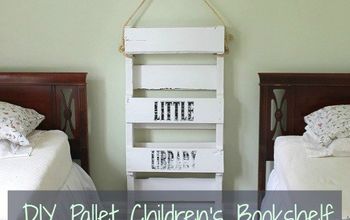
How to Build a DIY Kids Bookshelf (Homework Station)

I was compensated by Worx Tools for this post. All opinions are my own.
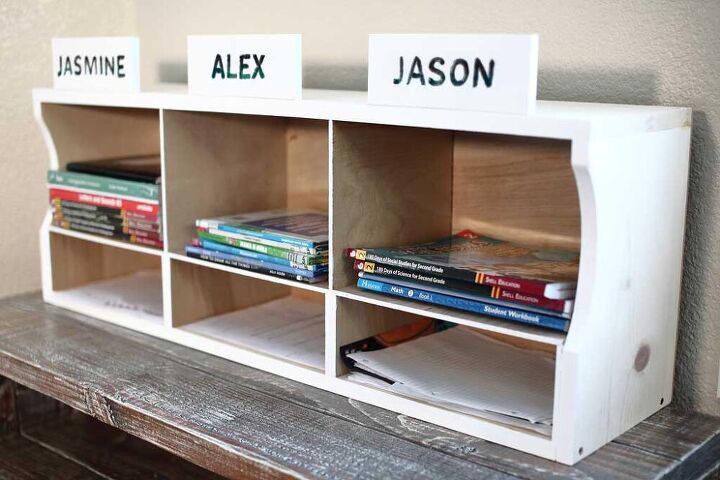
A lot of the kids nowadays are learning remotely from home due to pandemic, which means they have their books and homework at home. It doesn’t take much to have their homework and textbooks all over the house. To solve this problem I’ve built a simple DIY kid’s bookshelf for keeping homework papers and textbooks in one place.
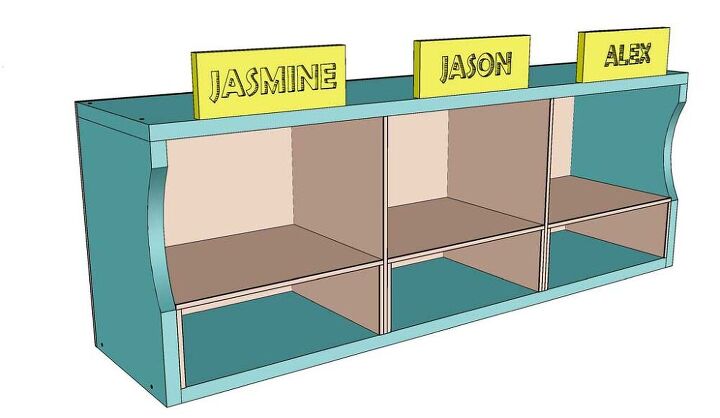
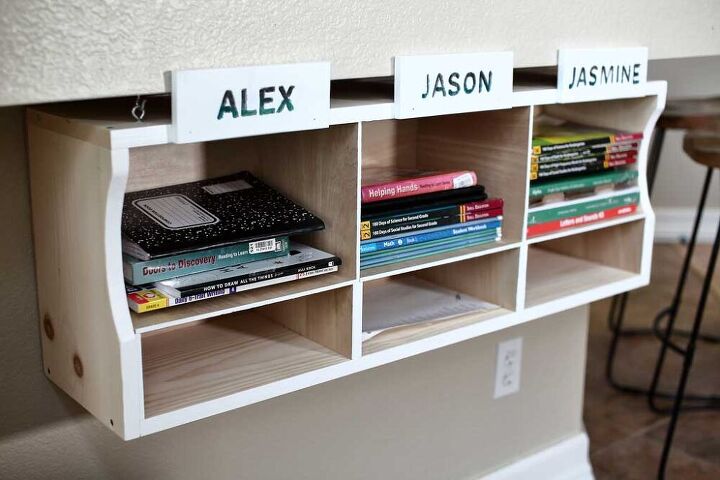
This simple textbook shelf could be converted into a homework station with additional compartments for crayons or other school items. To make the homework shelf more personalized, I decided to carve out my kids’ names on the board and attach it to the shelf. We have two boys and a girl, so this shelf is made with three sections for each child. The plans could be easily modified to make this shelf with more or fewer sections.
Worx MakerX Tools
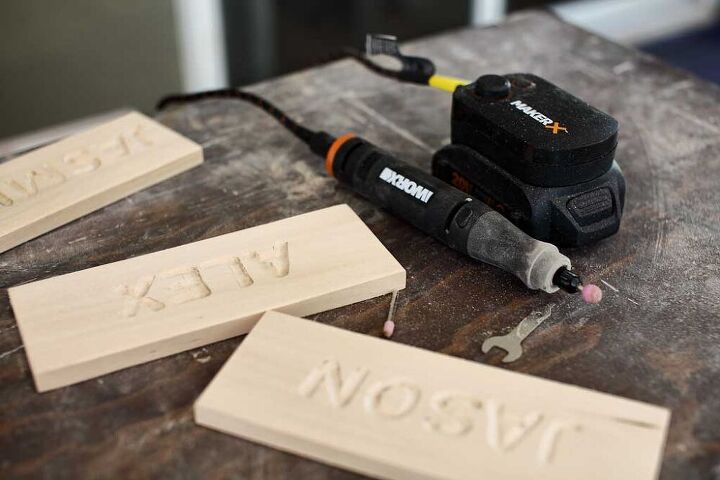
To carve out the letters on the wooden board, I used Worx MakerX combo tools. This set includes a Rotary Tool, Angle Grinder, Air Brush, Mini Heat Gun, and Wood & Metal Crafter. With these tools, you could build a lot of different projects not just carving wood.
But for this project, the main tool I used was a rotary tool that has a brushless motor. It connects to a 20v hub with a max/min controller to regulate the speed when carving out wood. It makes it very convenient for drilling/carving different types of wood or other materials.
When carving wood with a rotary tool, especially if you’re a beginner I recommend using basswood. Basswood is very soft and could be easily carved out. There are many other types of softwood out there but basswood seems to be the best for this type of project. Pine is also considered a softwood, but it has wood grains that are much harder than the rest of the wood. So you’ll have soft and hard areas of the wood and it becomes harder to carve out a straight line.
Tools for this project
- Tape Measure
- Jig Saw
- Skill Saw
- Drill
- Worx Rotary Tool Kit
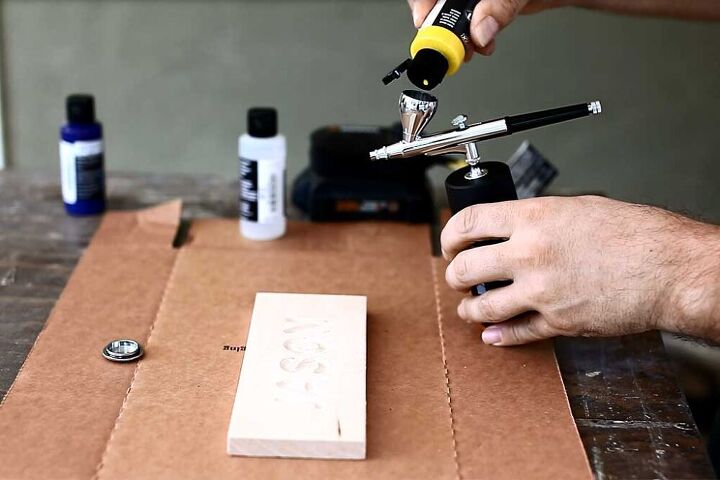
- Worx Air Brush
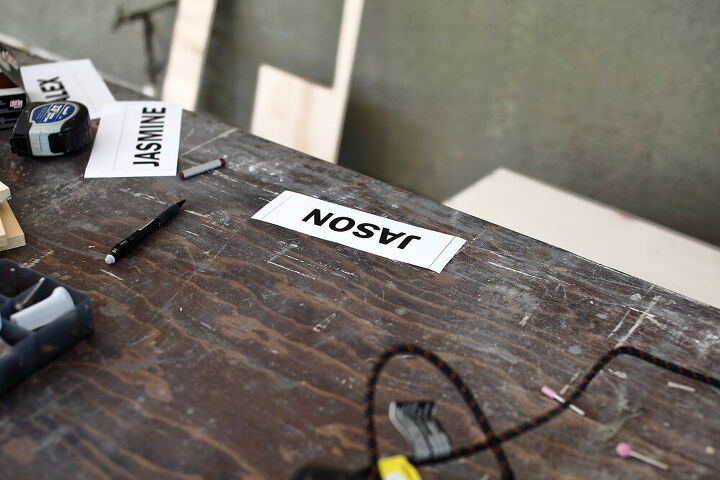
First, we need to write the names on the board before carving it out. To make the letter look nice, I printed out the names on a piece of paper and then traced it onto the board. If you have good handwriting skills you could just write the letters without tracing.
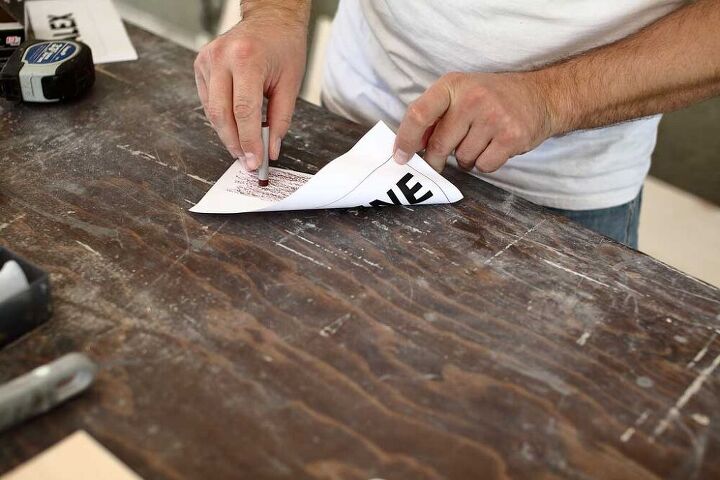
Once the names are printed, flip it face down and color in the backside with chalk.
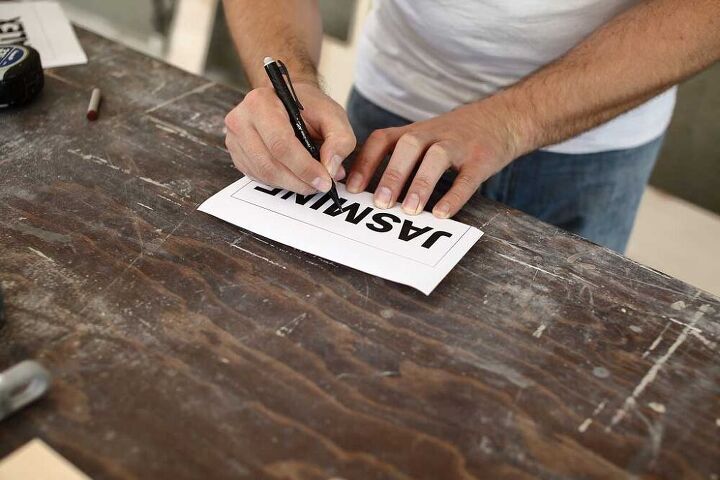
Then place the paper on the board with the names facing up and trace the letters. Make sure not to move the paper during this process. When you trace the letters the chalk on the backside is transferred onto the board. Then remove the paper and you’ll see the letters on the board. If the letters are too light or have gaps, just correct it with the pencil.
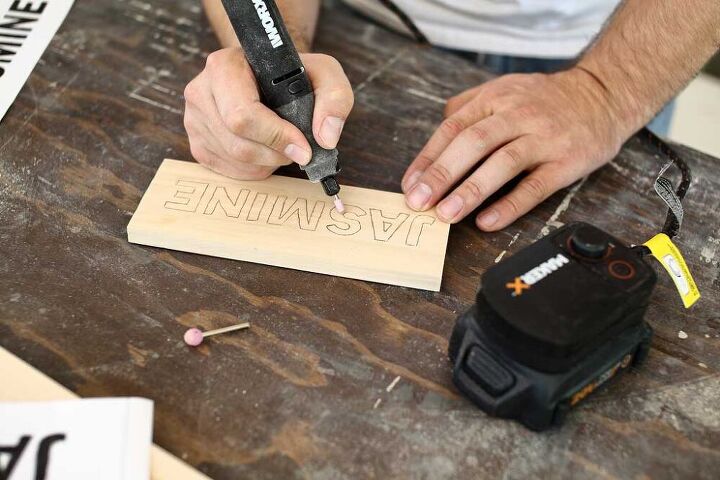
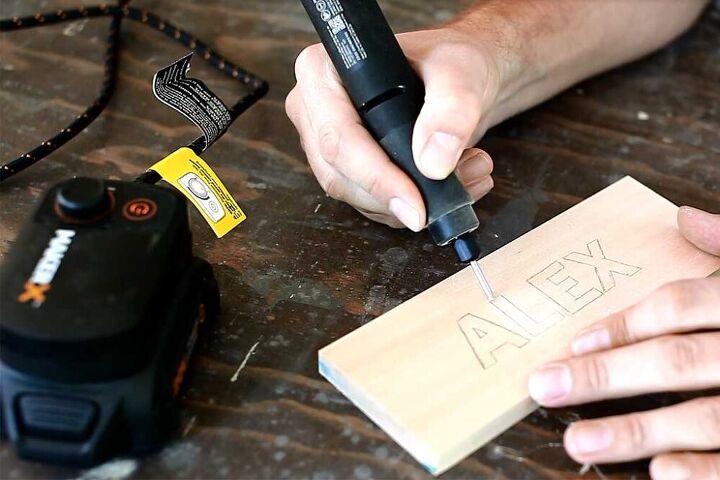
Take the rotary tool and insert an attachment for carving wood. First, I used a straight attachment to carve out the perimeter of the letters. Then I used a ball attachment to carve out the letter. There are other attachments that you could use to make better or smoother lines.
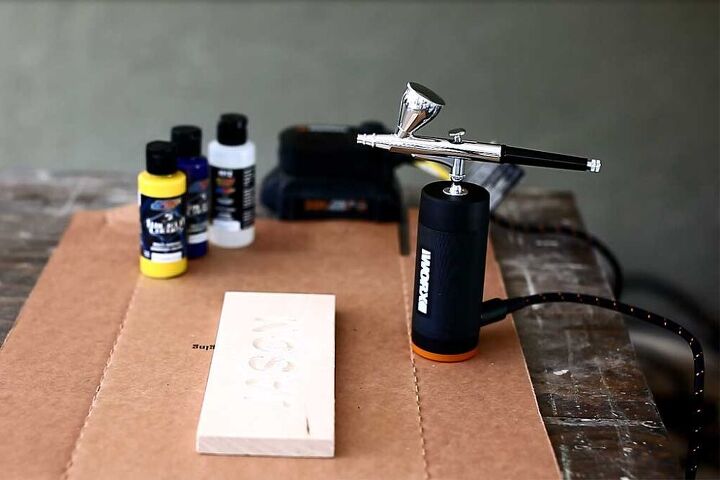
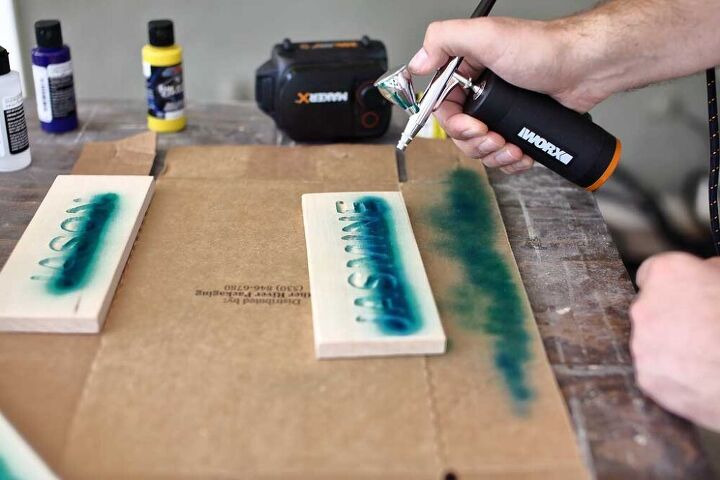
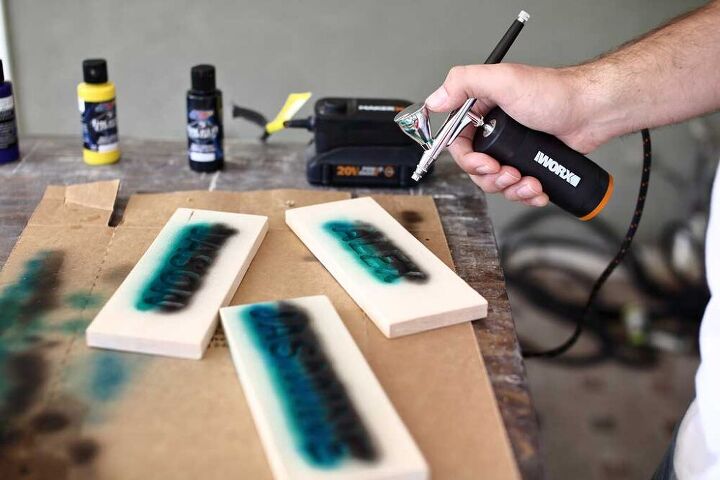
Take Worx Air Brush and add green color into the paint cup. Then spray the lower half of the letters. Next, add black paint and spray the upper half of the letters. Then take a roller with white paint and paint the board white, leaving the inner groove of the letter untouched.
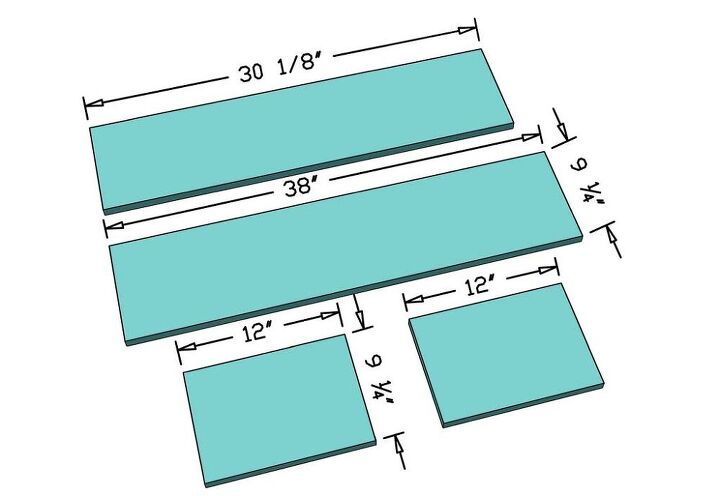
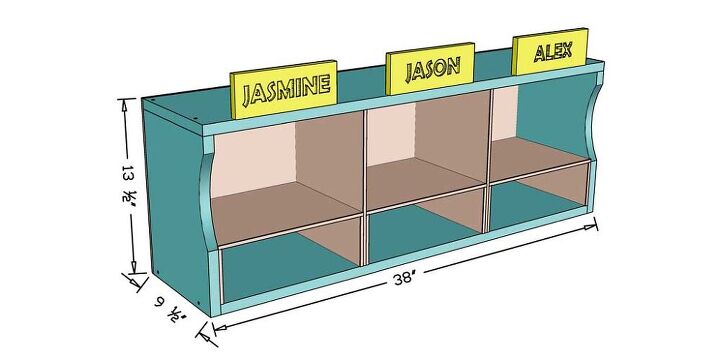
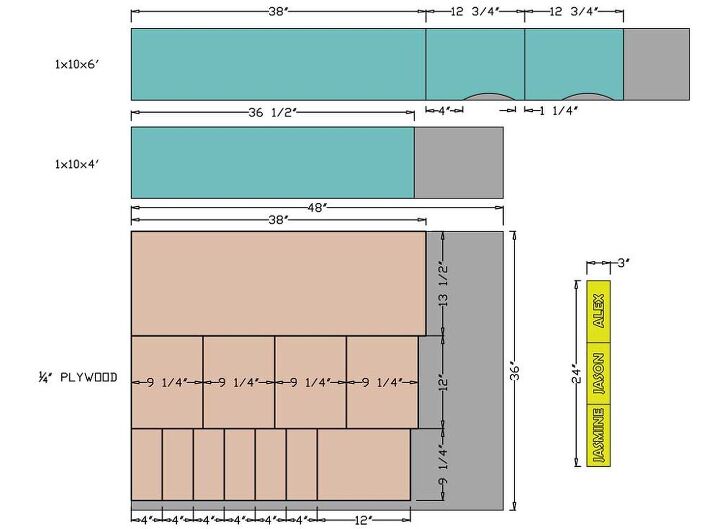
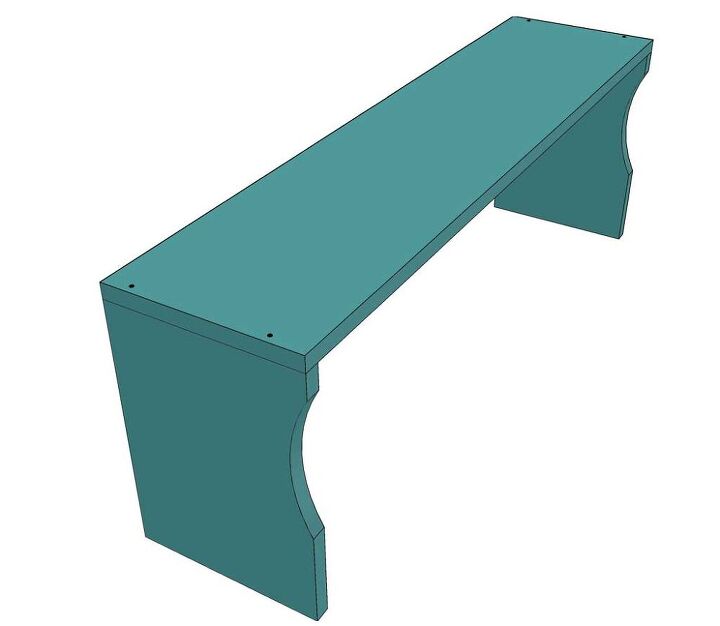
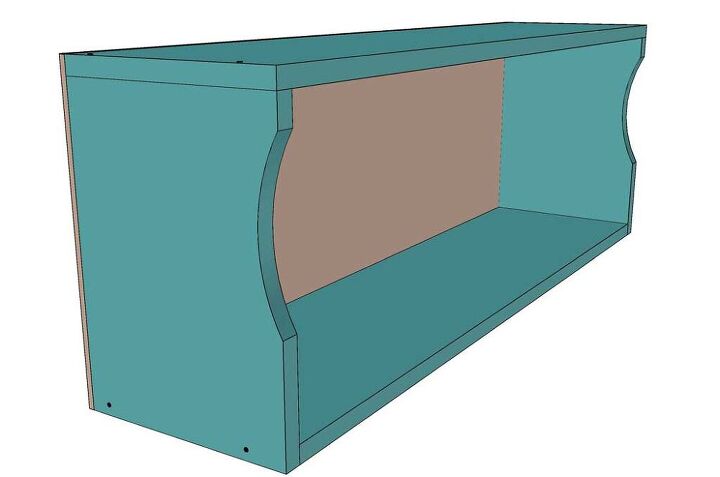
Now it’s time to make the shelf. Take 1×10 board and cut one top piece to 38″ in length, one bottom piece to 36 1/2″ and two sides pieces to 12 3/4″ in length.
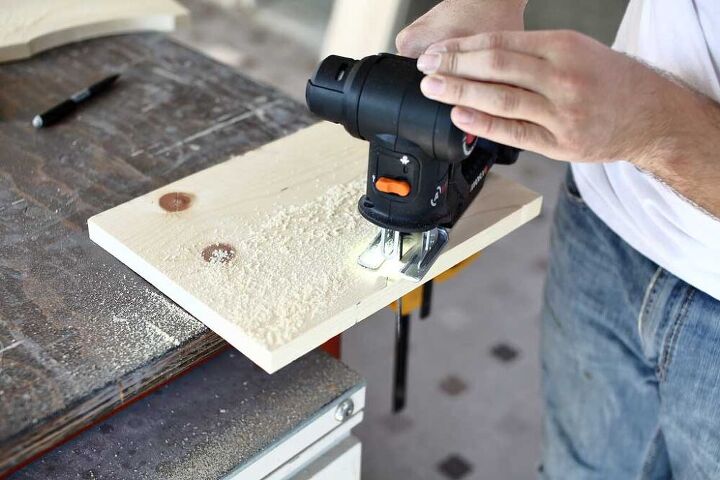
Originally I wanted to build a standard shelf with typical sideboards. But I figured it would be nice to have something different than just a rectangle board. So I’ve cut out an arch in front of the side piece to give it a unique look.
Take the sideboard and in the front measure 4″ from the bottom and 1 1/4″ from the top. Now draw an arc that is 1″ deep. Then using a jig saw cut out the arch.
You could modify this arch to any shape or size you want. Or you could skip this step altogether if you prefer just a regular rectangle board.
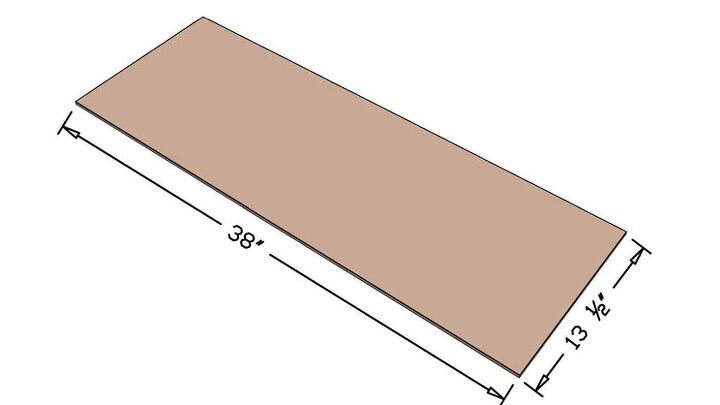
Now cut the remaining pieces out of ¼” plywood. The backboard does not support any weight so there is no need to make it from ¾” board.
Take 1/4″ plywood and cut backboard piece to 38”x13 1/2″.
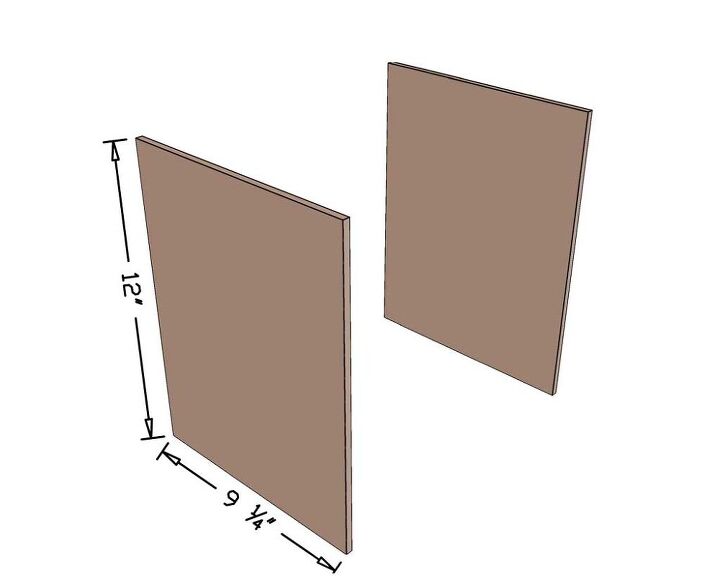
This shelf will be divided into three sections by adding two dividers inside the shelf. Again take 1/4″ plywood cut two divider boards to 12”x9 1/4″.
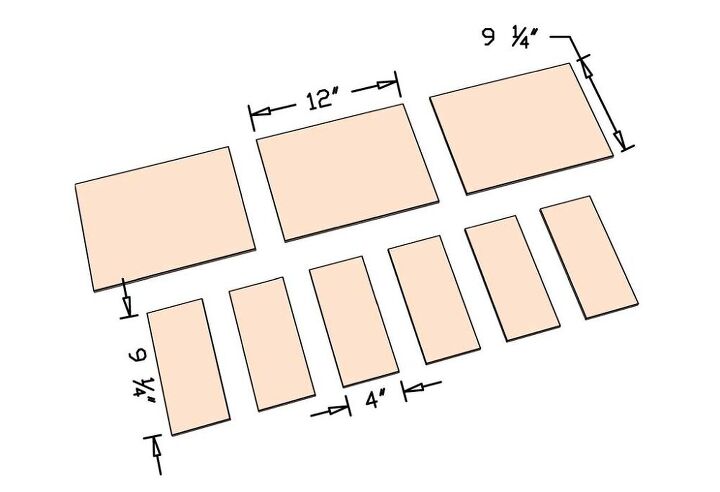
Even though the shelf boards will have weight on them the size of these boards are fairly small so I decided to use ¼” plywood. I didn’t want the shelf to be bulky.
Cut three shelf boards to 12”x 9 1/4″.
Since the ¼” plywood is very thin and attaching the shelf boards to the sides with screws was not an option, I had to make support boards for the shelf boards to lay on.
Cut six support boards to 4”x9 ¼” using ¼” plywood.
Now it’s time to put everything together. Take the top board and pre-drill the pilot holes on the top for the screws. Since the screws are going to be very close to the edge, pre-drilling a pilot hole will prevent the wood from splitting.
Apply wood glue and attach the sideboards using 1 ¼” wood screws.
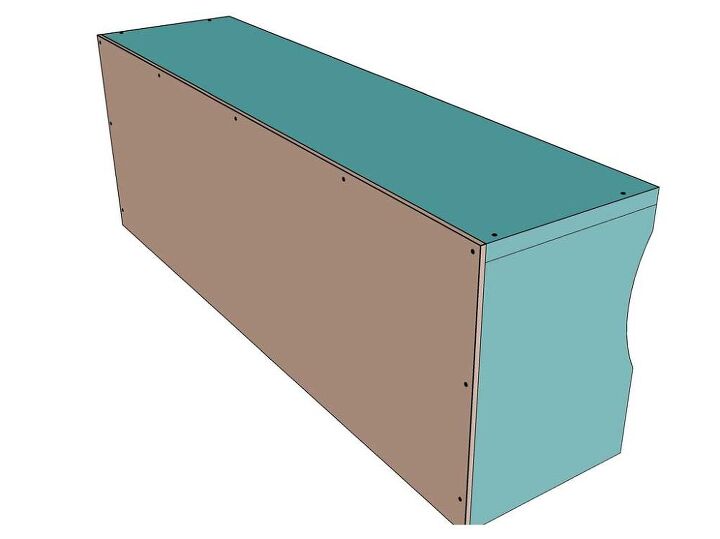
Place the shelf on the workbench facing down. Then attach the backboard to the sideboards and the top with 1 ¼” wood screws. The plywood typically does not split so pre-drilling pilot holes are not necessary for this step.
Similar to step 11, when attaching the bottom board, pre-drill the pilot holes on the sides. Then apply wood glue and secure it with 1 1/2″ wood screws from the sides.
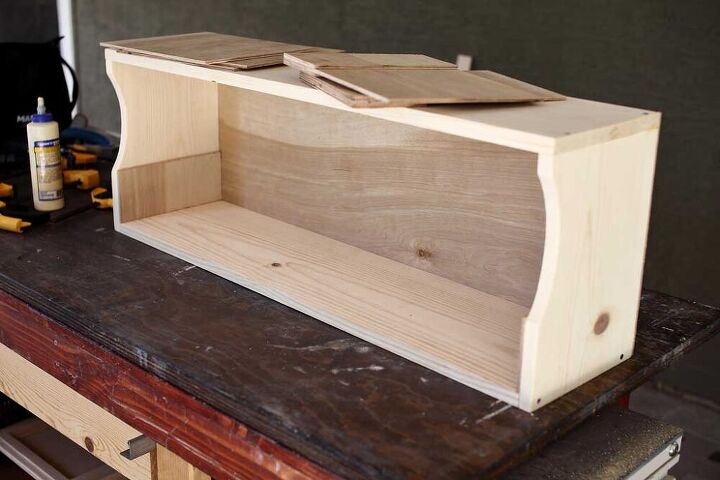
Before inserting the shelf divider or the shelf board, glue two 4” tall shelf supports to the sides of the shelf. These supporting boards will be holding the shelf boards from sliding down. Clamp the support board and let it sit for a few hours until the wood glue dries.
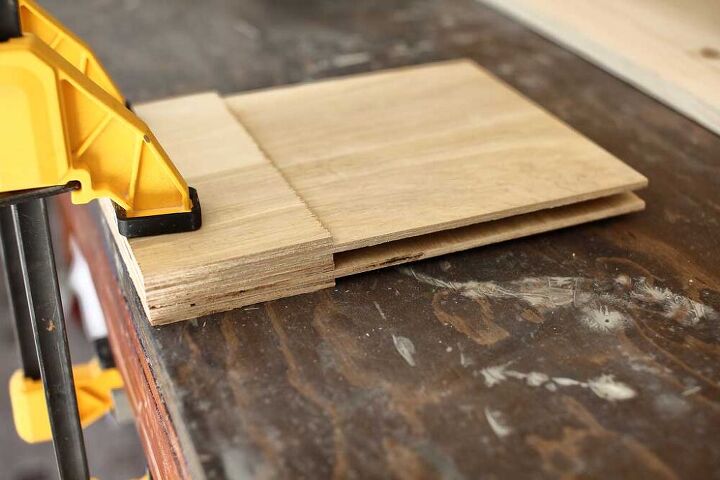
The divider boards need to have 4” tall support boards glued on both sides, see picture. Apply wood glue to the support boards and glue them together. Clamp the boards to the workbench and let it dry for a few hours.
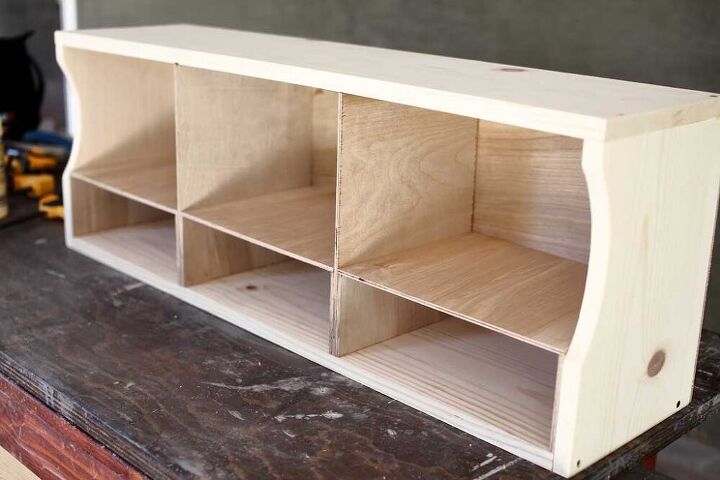
Once the glue dries, insert the divider boards and the shelf board into the shelf. You could screw in the dividers from the bottom and the lower back to keep it from moving.
Now attach the carved name boards to the top board of the shelf. Make sure to pre-drill the pilot hole so that wood does not split. You could paint the shelf any color you want or just leave it the way it is. You are done with a DIY kid’s bookshelf (homework station).
Resources for this project:
See all materials


Comments
Join the conversation
-
I love this. If you made it a little deeper it would make a great entry way bench with shoe and stuff storage.


Frequently asked questions
Have a question about this project?