


How to Build a Homeschool Desk
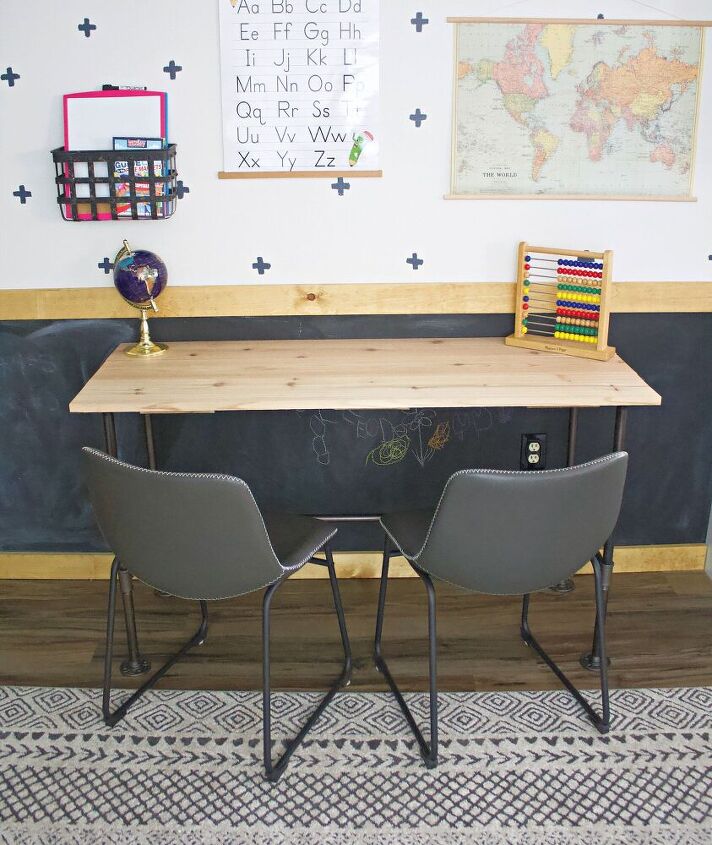
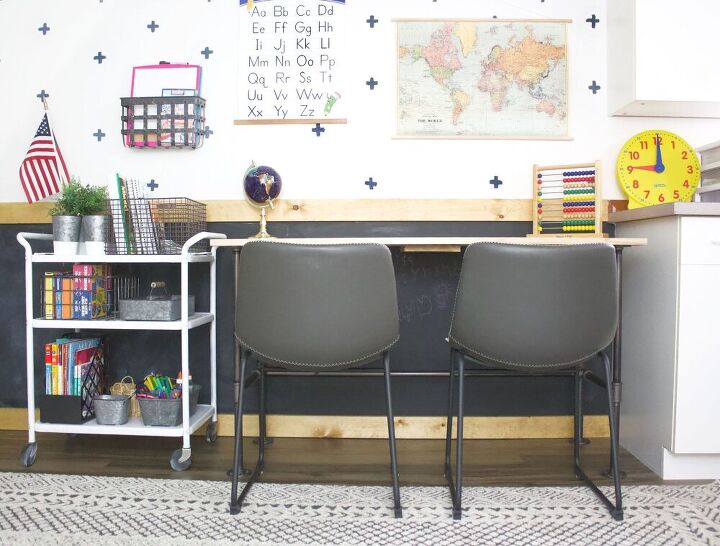
I’m so excited to share our homeschool desk with you today! It is cuuuuute!
This homeschool desk fits perfectly in the little section of our downstairs room. When I told Travis my vision for the kids desk he was all on board. He’d never done a desk with pipes before, and we both love a little of the industrial look thrown into our decor.
You will need:
We ended up purchasing the cedar boards we used at a local lumber yard. Home Depot was low on stock and the boards were pretty warped. You want some flat, straight, dry boards for any project you’re using boards for a surface.
- 3, 1x8x8 cedar boards
- 6, 3/4 in. Black Malleable Iron Threaded Tees
- 4, 3/4 in. Black Malleable Iron Floor Flanges (2-Pack)
- 4, 3/4 in. Black Malleable Iron Threaded Tees
- 2, 3/4 in. x 12 in. Black Steel Nipples
- 4, 3/4 in. x 10 in. Black Steel Nipples
- 4, 3/4 in. x 18 in. Black Steel Schedule 40 Cut Pipes
- 2, 3/4 in. x Close Black Steel Nipples
- 1, 3/4 in. x 48 in. Black Steel Schedule 40 Cut Pipe
- 1 pack of 8 x 3/4 in. Phillips Flat Head Brass Wood Screws
HOW TO MAKE THE HOMESCHOOL DESK
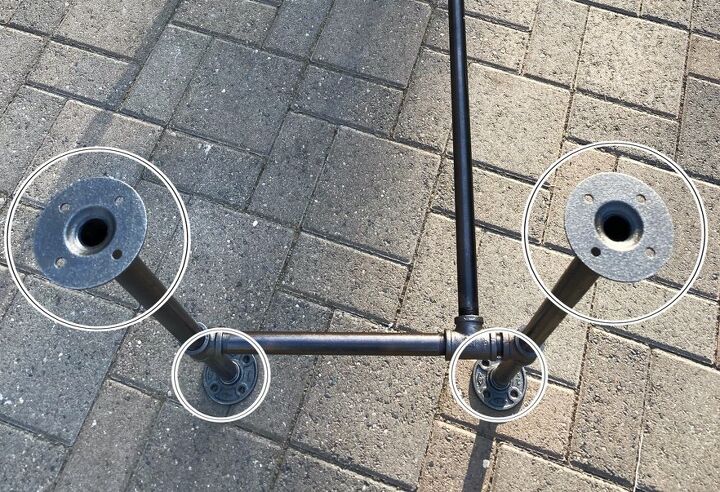
Beginning with legs, assemble the needed pipes. Take one 10″ and one 18″ black pipe, insert them into the black T, one on each end, horizontally. Do this for all 4 legs.
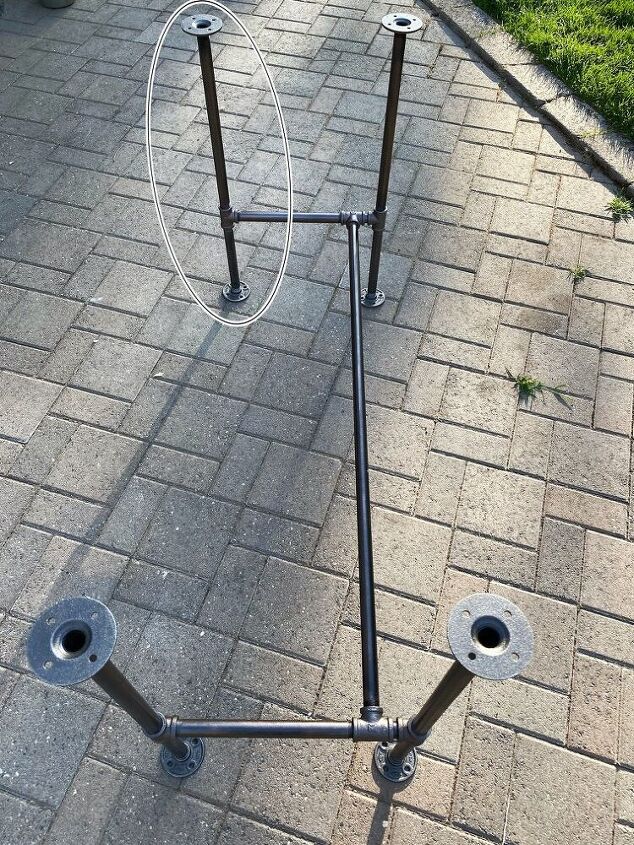
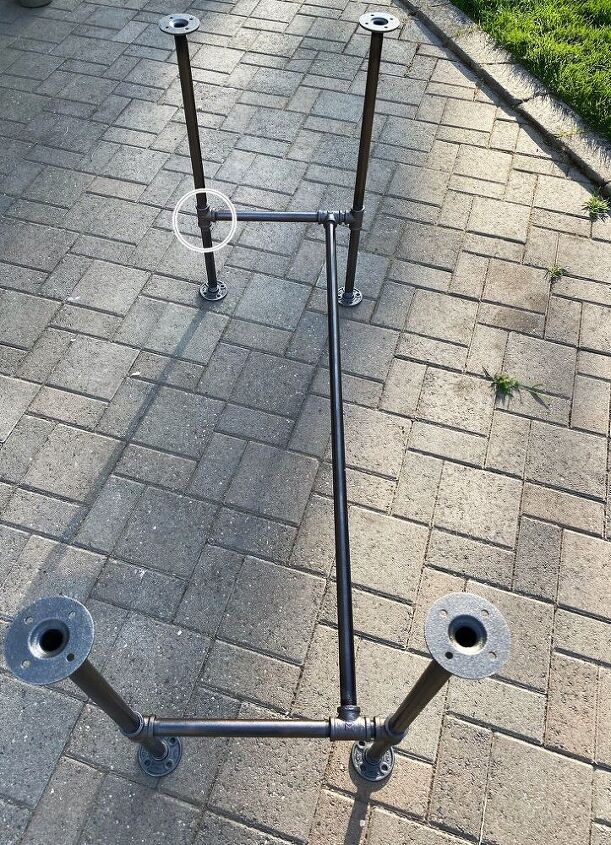
Two of these legs will be the front, for these, insert a 12″ pipe into the remaining opening of each T that you had attached to the front legs. Screw each of the remaining T connectors to the 12″ pipes you have coming off the front legs.
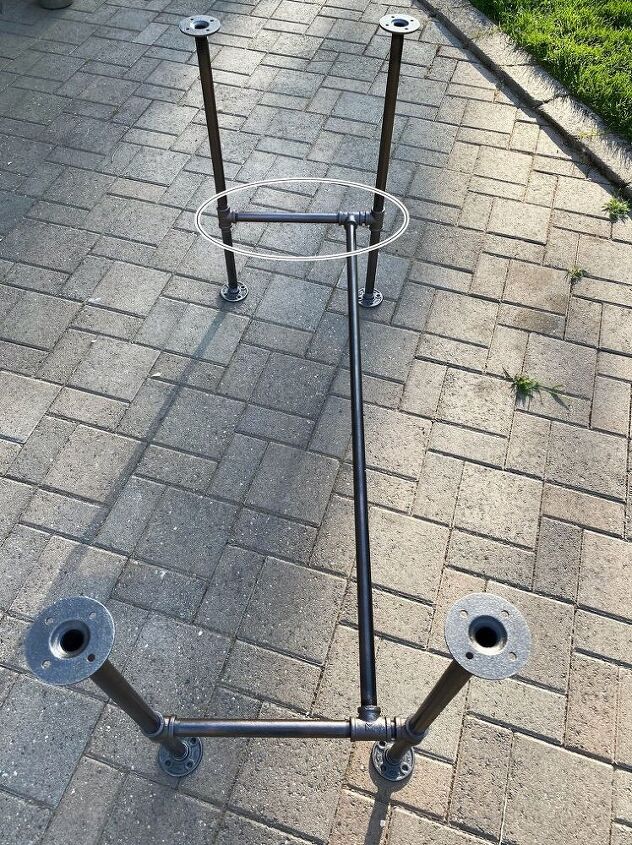
Connect each 3/4 in. x Close Black Steel Nipple to the T, then to finish it off connect the legs on each side by the T’s on the back legs. Each set of legs should be connected at this point.
Connect the 48″ crossbar into the T’s holding the legs together.
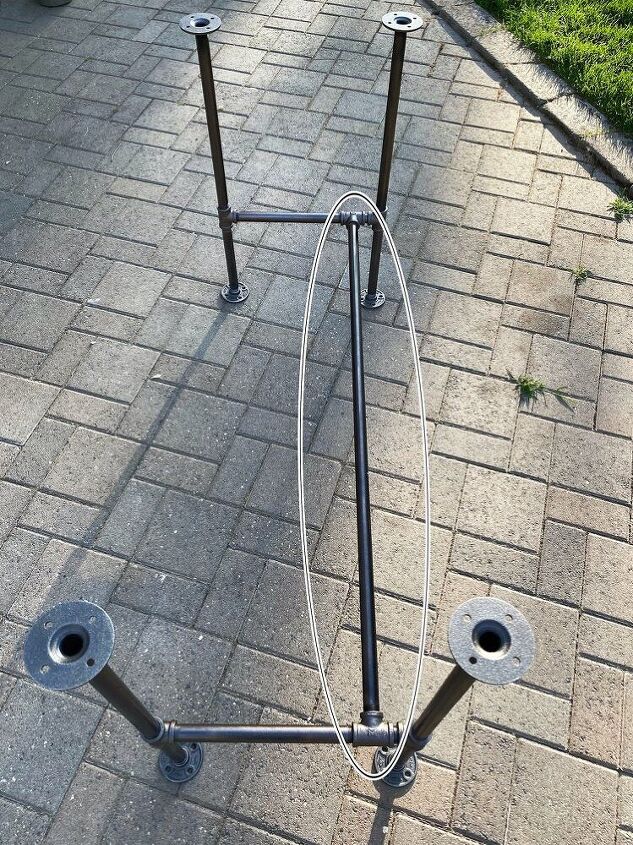
Now connect the floor flanges to the tops and bottoms of the legs. The floor flanges that will be on the ground are what you help to level out the desk. We wanted our desk to be 4’8″ long, so that’s what we cut all three boards to.
Attach the three cedar boards using 2, 19″ pieces of cedar board. For these boards, use 1 1/4″ screws to secure together.
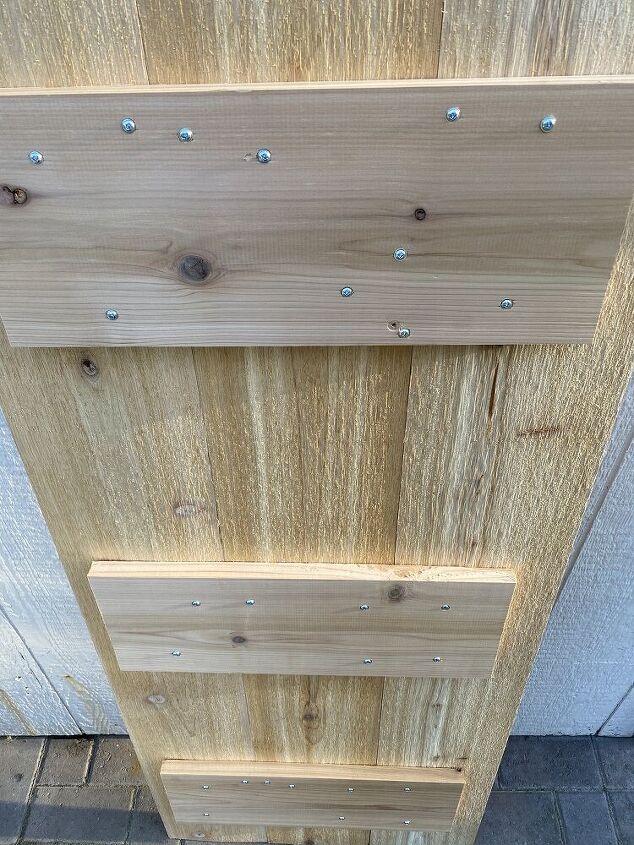
Placing the top of the desk face down on the ground, flip the top portion of the legs over onto the back of the desk. Measure and make legs square on back of table. Screw into place using the flat head brass screws. Flip back over and the desk is complete! Sand down and seal with polyurethane.
Now enjoy your new desk!

Resources for this project:
See all materials


Comments
Join the conversation
-
I'm so glad I found this! My son just asked me to build a desk like this for him!!
-
I
JM


Frequently asked questions
Have a question about this project?