


How to Make a Designer-Inspired DIY Flow Wall Desk Dupe

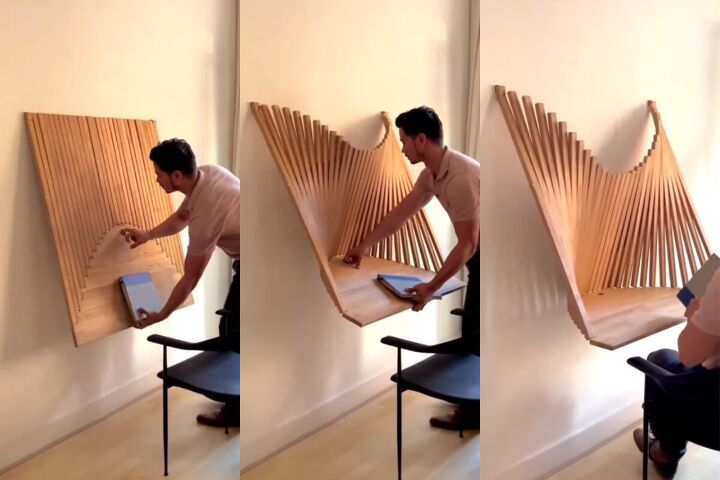
We are back with a new episode of Can I Really Make That? The viral Flow Wall Desk by Robert Van Embricqs has been spamming me, you, and everybody on the planet. I don’t know whether to classify this as furniture or art; it’s literally so genius. So today, we will attempt to make our own DIY flow wall desk dupe.
Tools and materials
Table of contents
- 1. Make the tabletop
- 2. Measure & mark the wood
- 3. Mark the lengths
- 4. Cut the tabletop
- 5. Add the hinges
- 6. Adjust the end pieces
- 7. Drill the desk to the wall
- 8. Mark where the metal rod will go
- 9. Cut the wood pieces
- 10. Make the attachments for the metal rod
- 11. Drill a hole in the tabletop
- 12. Hang the desk
- DIY flow wall desk
1. Make the tabletop
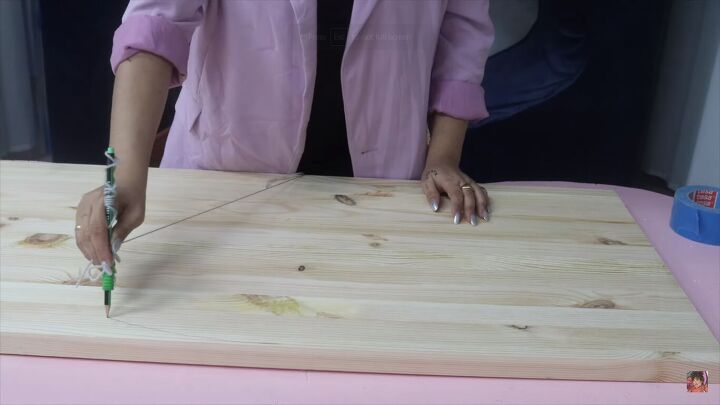
First, we’re going to make the half-circle shape for the tabletop. To do that, I have a thick piece of wood, around 3cm (1.18 inches) thick. I wanted thick, sturdy wood for this DIY because we’re going to be cutting a lot of holes in it later and I wanted to make sure it would hold.
Use a measuring tape to find the center, tape string to that point, and attach a pen to the end of the string. Then, draw your half circle.
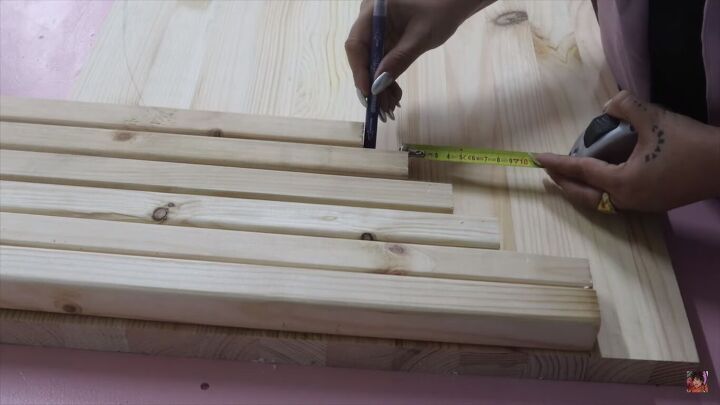
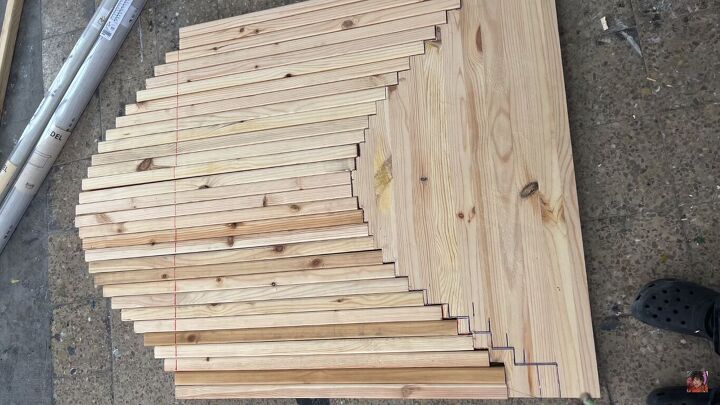
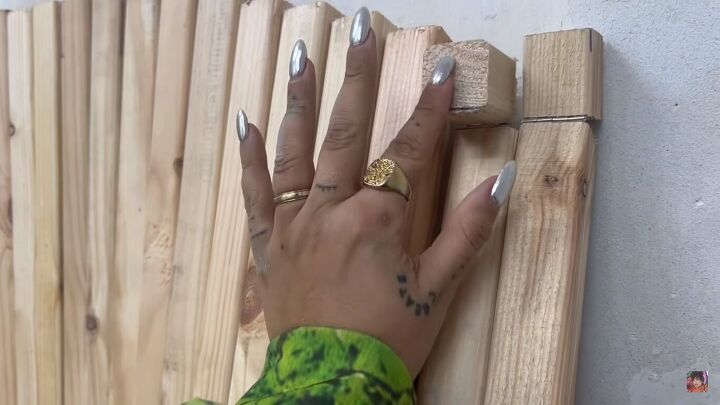
2. Measure & mark the wood pieces
Next, stack the wood pieces side by side, following the curve of the tabletop. I kept the distance between each in increments of 3cm (1.18 inches) and a little more for the ends, as shown. Towards the center of the tabletop, the increments were smaller.
Draw around the ends to get the shape we need to cut.
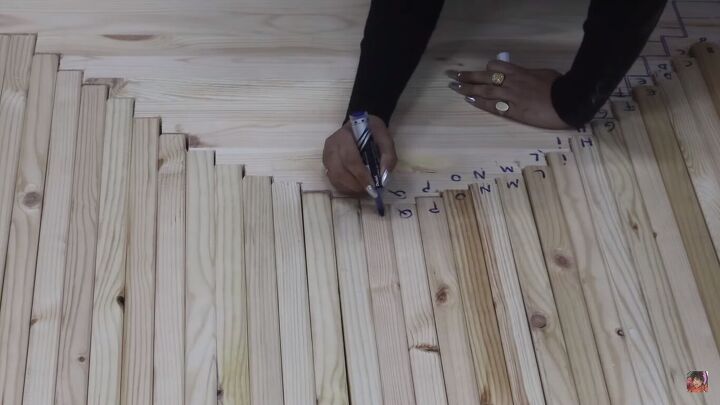
3. Mark the wood pieces to the same length
As you can see, I took the shortest of the lengths and marked all the others against that. However, I won’t cut this until nearer the end of the process.
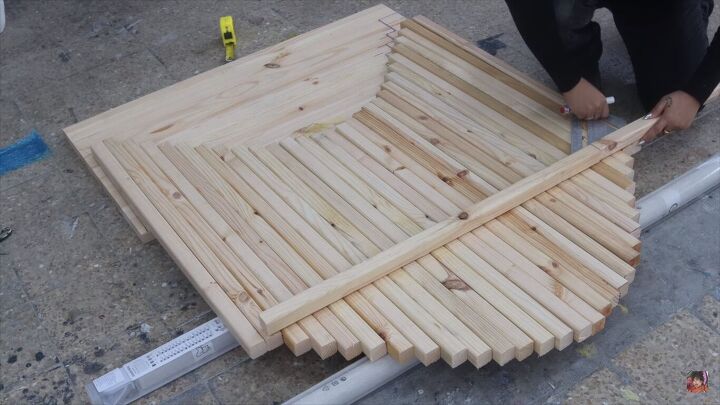
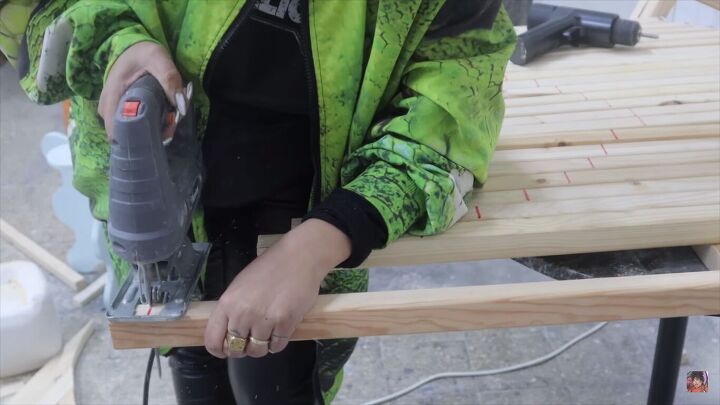
4. Cut the tabletop
Cut out the staggered pattern along the curve with your jigsaw.
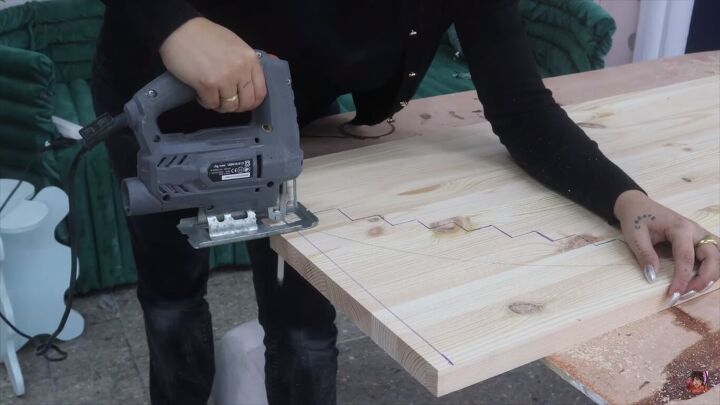
So this is what you should have so far.
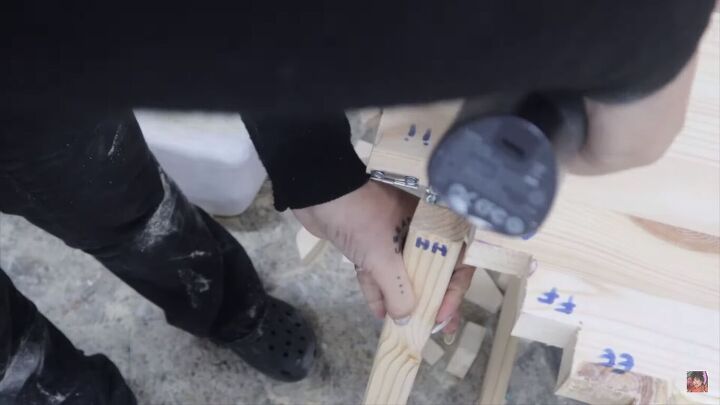
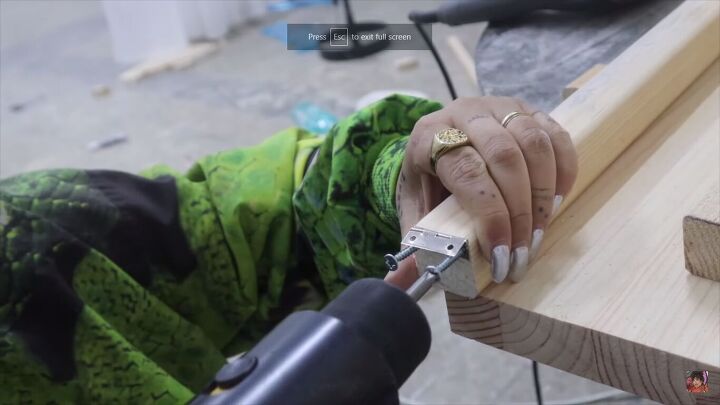
5. Add the hinges
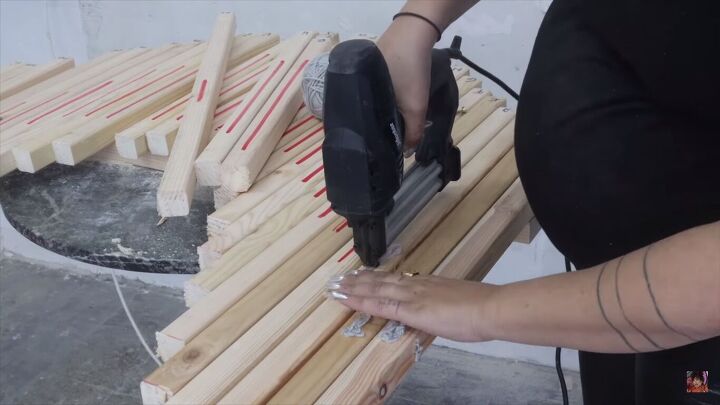
First, mark every section of wood so you know which pieces go where.
I needed the hinges to fall to the front, so I’m keeping them on the edge, then I’ll put the wood pieces directly on them.
Remember to drill a tiny hole before you insert your screw, or else the wood is going to pop.
Repeat for the entire length of the table.
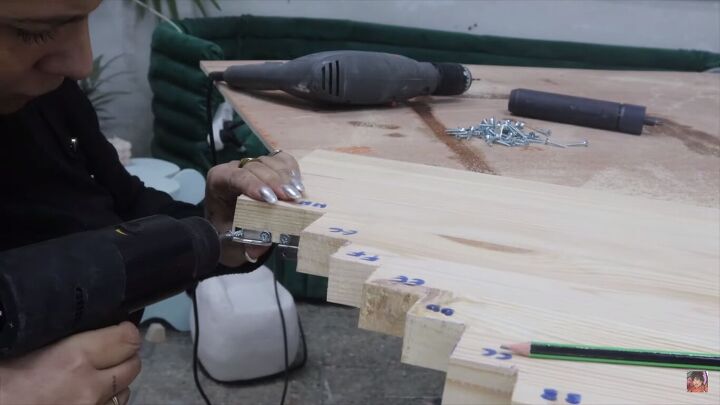
Screw the wood pieces to the other sides of the hinge.
6. Adjust the end pieces
As you can see in the original, there is a slight bend on the end pieces to help the desk attach to the wall. I decided to use two end pieces for either side for more stability.
Measure 4cm (1.57cm) from the top and cut straight.
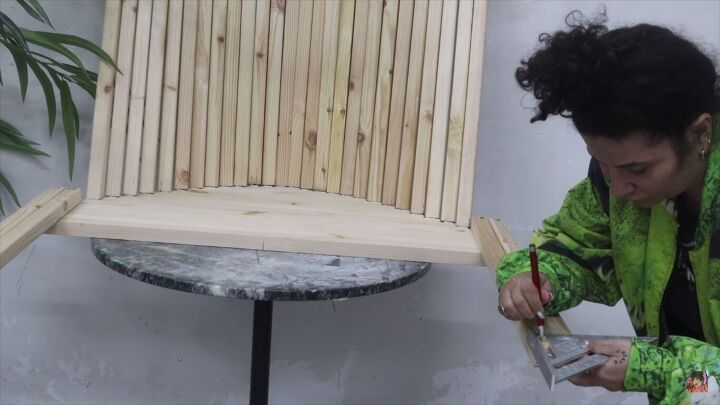
Then, add the hinges to the top. This time, in the opposite direction because we want it to fold away from the wall.
This flexibility allows the desk to open without scraping the wall.
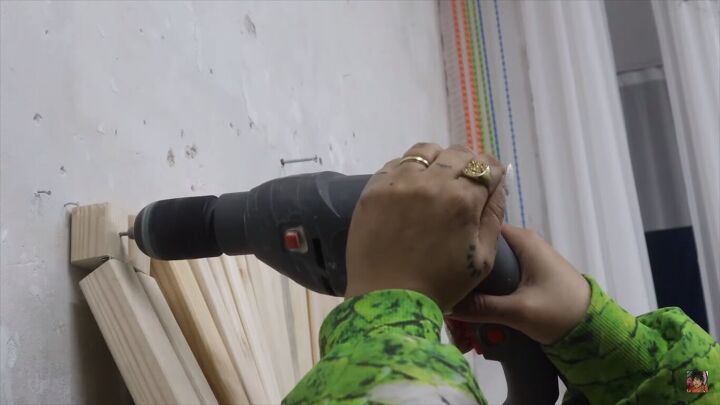
7. Drill the desk to the wall
Once you have everything set and you know where you want your desk to be, drill holes in the end wood pieces.
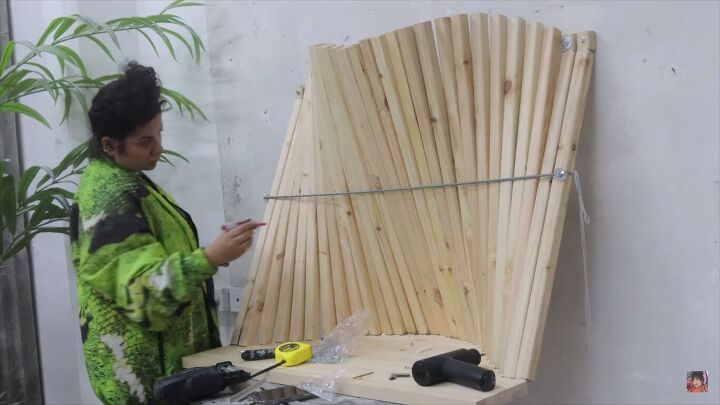
8. Mark where the metal rod will go
Now, we’re going to insert a metal rod through all of the wood pieces in the middle, so that they don’t fall forward when the desk is opened. Attach it in place, then mark along the wood pieces where it needs to be.
9. Cut the wood pieces
Remember that we marked the length of the wood pieces at the beginning? Now you can cut them with your jigsaw.
10. Make the attachments for the metal rod
Most tutorials would tell you to drill holes for this step, but we’re going to do something quicker, easier, and budget-friendly! We’re going to use string to hold the rod in place. Mark where the string will go; this accounts for the movement and flexibility of the rod.

Then, attach string along those lines.
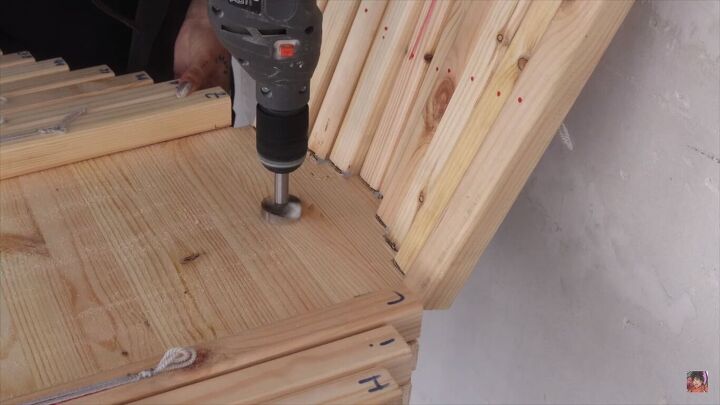
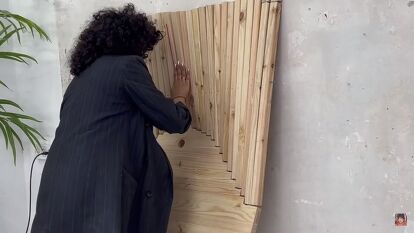
11. Drill a hole in the tabletop
Finally, we’re going to drill a hole here at the back middle of the desk. This way, we can use our finger to open the desk.
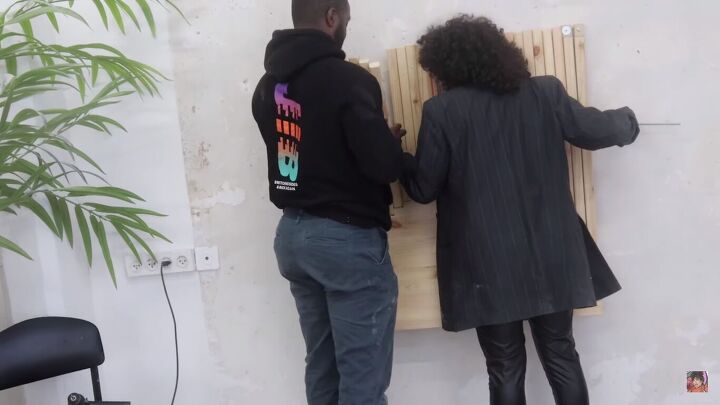
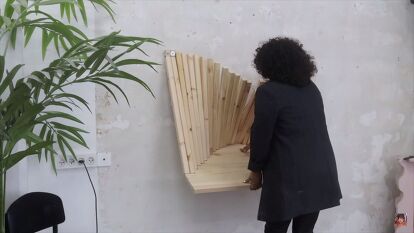
12. Hang the desk
For this part, you will need some help in the form of another person, as it’s very heavy; I have my husband. We’re going to hang the desk and insert the metal rod at the same time.
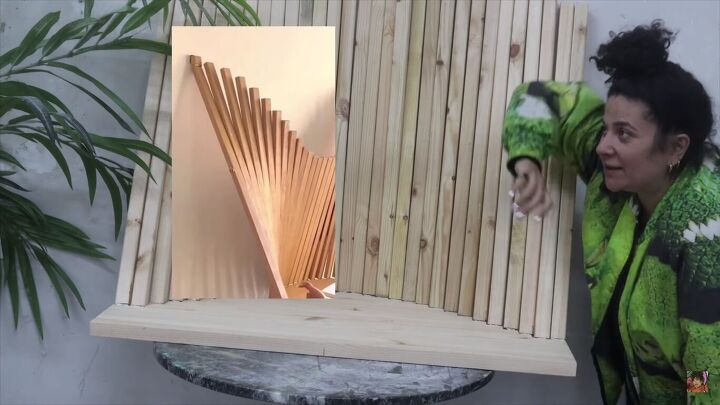
DIY flow wall desk
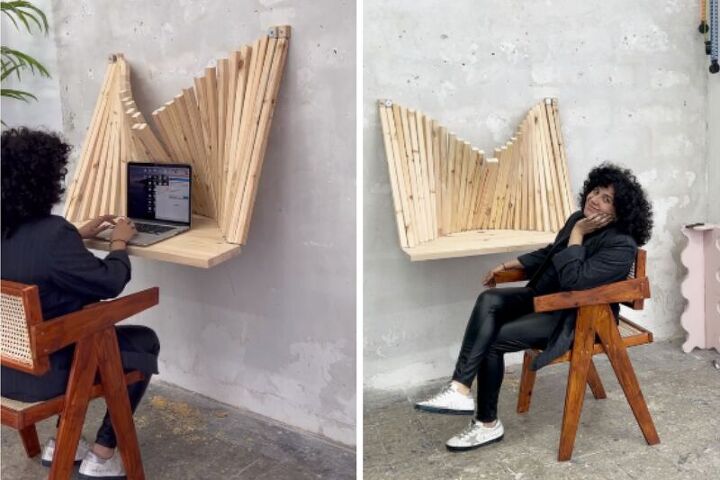

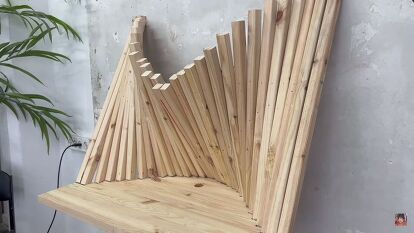
DIY flow wall desk dupe
Here is the finished DIY flow wall desk dupe! What do you think of it? Of course, it’s not a perfect replica of the original, but I think this is an achievable, basic DIY version that someone can recreate at home as a fun project.
I plan to give this a lick of paint in the near future, but I haven’t decided on a color yet. I have quite eclectic taste so, any recommendations?
Comments
Join the conversation
-
Impressive! What about painting every piece a different color? Or use metallic paint? Either would look great
-
Awesome job! I like the natural look of the wood. I would just go over it with a polyurethane, and let the wood speak for itself.


Frequently asked questions
Have a question about this project?