Transform a Vintage Toboggan Into a Bench

Vintage toboggans and sleds are a relatively easy find these days at estate sales and flea markets. Learn how to transform a vintage sled into a bench, making for one of a kind, functional decor in your mudroom or a small space entry in your home.
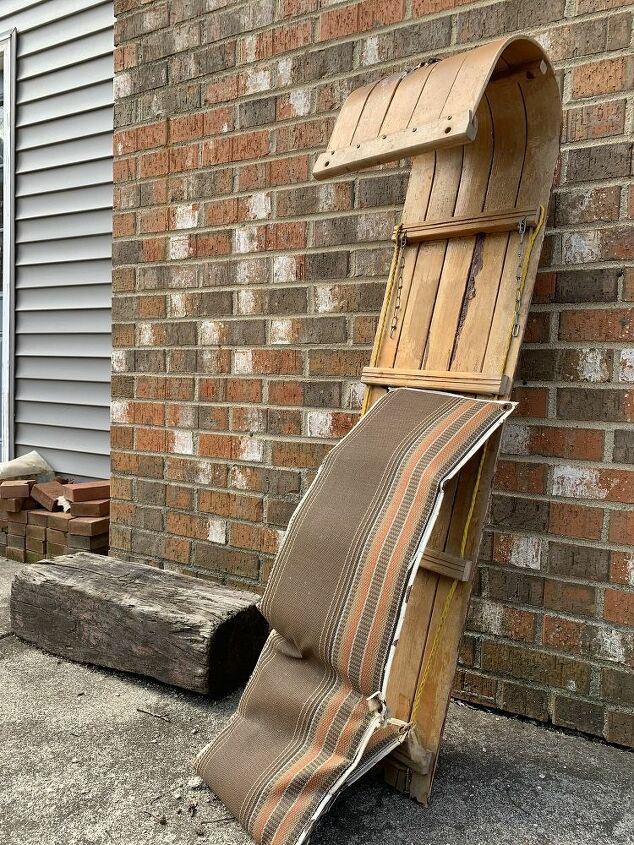
I picked up this vintage toboggan sled at an estate sale for $7. It was in rough condition, but it had good bones and a simple shape that would be great for transforming into a bench.
Start by removing the unnecessary pieces: in this case I removed the cushion, polyester rope at the sides, and a small chain that had been used to hand and store the sled.
Next up is a good sanding.
My original plan was to sand it back completely and re-stain, but as I started sanding I realized the distressed finish looked much better. I love how the two tones maintain that weathered, vintage look.
The wood slats of the sled are so thin that I needed to add supports before attaching legs. I used 1 foot x 6 foot common board that we had left over from another project. I measured and cut the common board to fit flush between the support slats of the sled.
Once the supports were cut I stained to match the sled as closely as possible.
Clamp the sled supports in place and drill your pilot holes for each screw.
With clamps still in place, drill the screws in place. I used four screws for each sled support.
With all four supports screwed in place, I then added the hairpin legs. I used four screws for each leg.
Once the legs were attached and I set it up in the mudroom, I realized that while the sides were sturdy, the middle was too thin and weak to hold any amount of weight. I took another piece of leftover common board and created one long support beam across the center of the sled on the underside.
With the middle support stained and screwed in place, the sled was much more sturdy, and capable of actually holding weight. The last step was to give the sled a coat of Feed-N-Wax sealer, which gave it a nice shine and ensures the wood won’t dry out over time.
Here is a look at the finished product in our mudroom. I added the vintage cooler as convenient way to store hats and gloves, but also keep them out of sight.
This give a better look at the top; I'm really digging the distressed, vintage look from the sanding!
Enjoyed the project?
Resources for this project:
See all materials









Frequently asked questions
Have a question about this project?
What is the weight capacity of the legs your used? Some are thin and designed for tables that don't hold a human.