Monogram Planter

5 Materials
$50-60
2 Hours
Advanced
So if you're from the south, you know monogramming is our way of life. Living miles and miles away up here in New York, I don't see monogramming much, if at all, so you know I've got to represent the sophisticated south by putting my monogram and/or last initial on just about every part of my life up here. That includes outside of course. I can't take credit at all for the perfect construction of this amazing piece--that is all Rob and his mathematical noggin'--I looped him in to help me with this project and he graciously took the reins. I'm super happy with the outcome!
I can't wait to plant bright, pretty flowers in this "M" next spring--can you imagine how amazing it will be all filled in with color?! I've also toyed with the idea of planting my herbs in this instead...what do y'all think?


Supplies (sorry y'all, we jumped into this without taking a supply pic!):


-old barn door (you can use a piece of plywood if you don't have a barn door)


-T-square (optional but it sure did help Rob mark out our "M")


-1x6 rough cedar plank (Rob picked up 40' at a local lumberyard.)


-nail gun/nails


-wood glue (needs to be weather proof if you're going to have this outside)


-plants/flowers/herbs of your choice
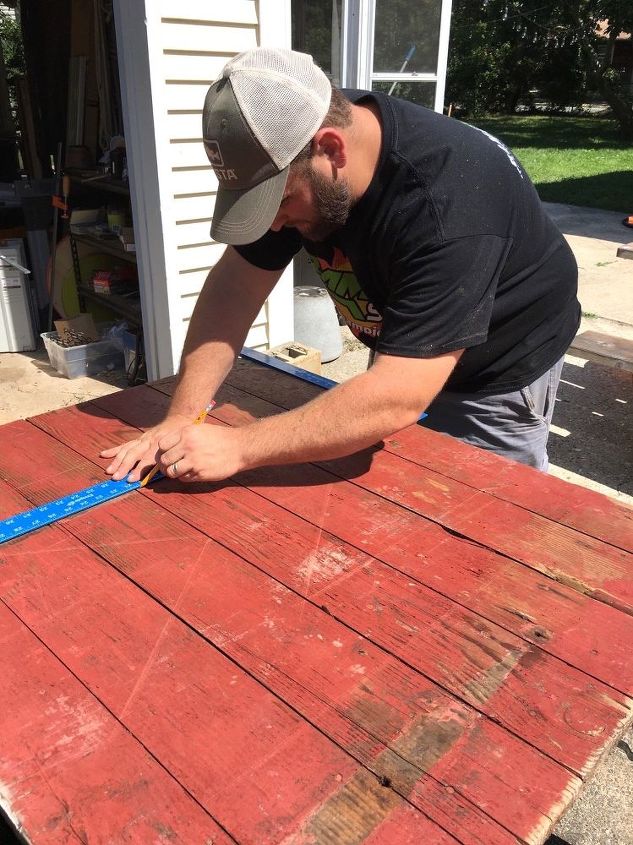
STEP 1: Mark out letter


First, Rob marked out the letter "M" with a pencil on our barn door. He used a T-square to make straight and calculated lines. Every person's will be different based on how big you want yours to be. We were going for big but not HUGE--our final letter was approximately 29"Hx30"W.
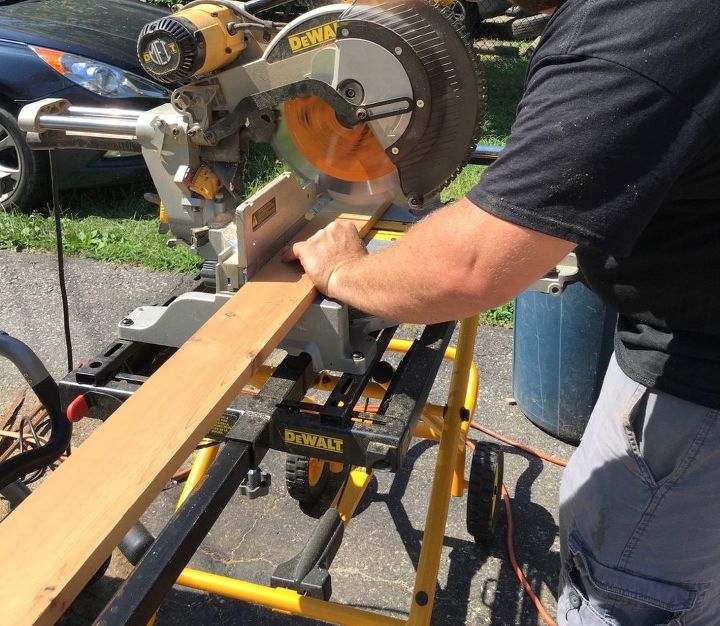
STEP 2: Cut cedar planks


Next, going off of the measurements he got from drawing out our "M" on the bar door, Rob cut the cedar planks accordingly.
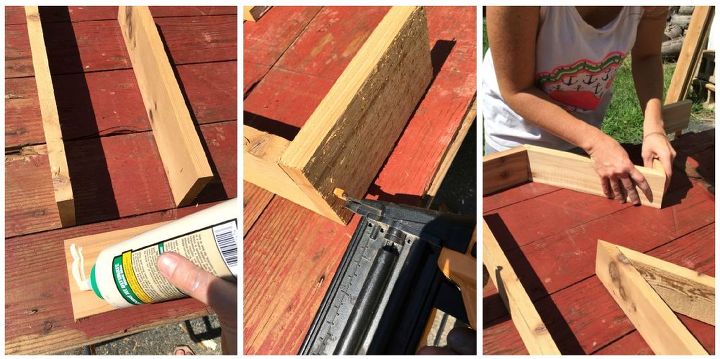
STEP 3: Construct letter


After Rob cut the planks to the sizes we needed, I started constructing our "M", two corners at a time. I applied a thin line of wood glue, met the pieces together and secured them with a few nails using a nail gun.
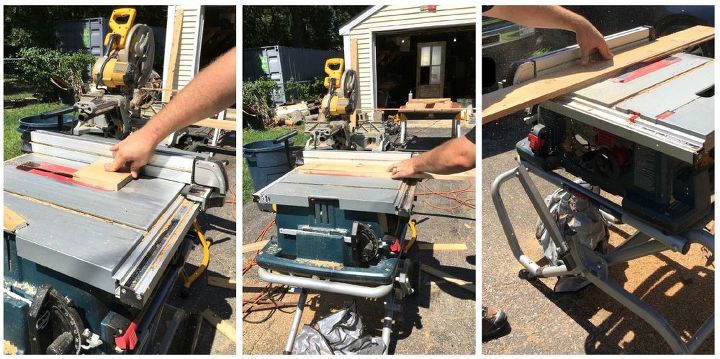
STEP 4: Cut cedar planks for shelves and front fascias


Once we finished up the construction of the letter, Rob used a table saw to create the shelves for the inside of the letter. We wanted the shelves to sit at an angle in order to allow soil to stay as well as for the water to naturally drain through the cracks.


He also used a table saw to cut cedar planks for the fascias (the wood that would cover all of the seams).
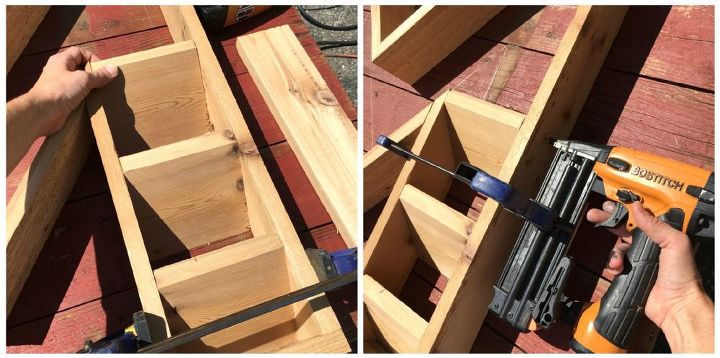
STEP 5: Add shelves and fascias


After Rob cut all of the shelves, we wedged them in (they fit in pretty snuggly) and held the sides extra snug in order to nail the shelves from the outside of the letter. *Note: we did NOT use wood glue during this part of the step.


Once the shelves were added, I took each designated fascia board, applied a thin line of wood glue, laid it out on the front of the letter where it belonged and added a few nails using the nail gun. [i apologize, I've searched our photos and there doesn't seem to be one of me doing this part of the step...you can see part of the fascias in the first picture of the next step).
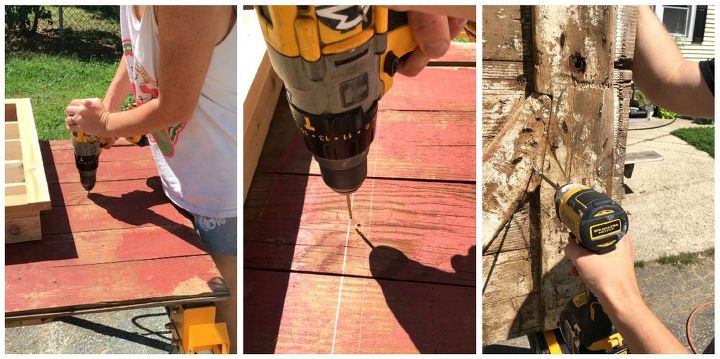
STEP 6: Attach letter to barn door


Finally, with the letter laying down as closely lined up to our original markup as possible, I traced the left and right side of the letter with a pencil. Then, I drilled 3-4 holes on the barn door IN BETWEEN the traced lines (look at the second photo, how my drilled hole is in between two lines...one of those lines was the original markup and the other was the final edge of our "M"). After my holes were drilled, I drove in 4" screws from the back of the barn door in order for the letter to be snug and flush with door.
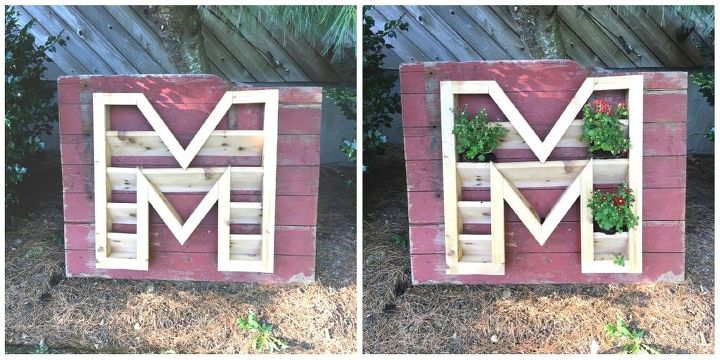
I'm a little disappointed that it's too early in the season yet to get mini pumpkins and gourds because that was my vision for the final photo of this project. For now though, I grabbed 3 individual mums for fall and I'll add my other fall touches once they become available (I'll make sure to add a picture!).
Suggested materials:
  • 40' 1x6 rough cedar planks   (lumberyard)
  • Barn door   (on hand)
  • Nail gun/nails   (on hand)
See all materials
Frequently asked questions
Have a question about this project?
  1 question
  • RoniC RoniC on Mar 20, 2023

    What are the angles you used on the shelves?

Comments
Join the conversation
2 of 37 comments
Next