


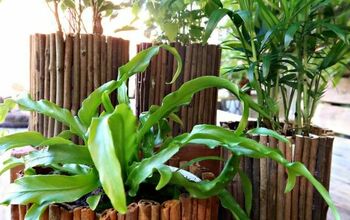
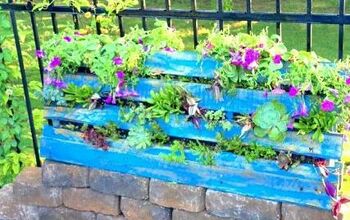
Rustic Pyramid Planter

by
Clint
8 Materials
$30
6 Hours
Medium
My first entry on this site was a rustic planter which I originally made to be paired with the planter I'm going to show you today. Its a little complicated but I've made a diagram and taken some photos to try and help with the process. There's also a video of the build on my YouTube channel, I hope you enjoy it!
{
"id": "3878420",
"alt": "",
"title": "",
"video_link": "https://www.youtube.com/embed/iZXgbbwxib4",
"youtube_video_id": "iZXgbbwxib4"
}
{
"width": 634,
"height": 357,
"showRelated": true
}
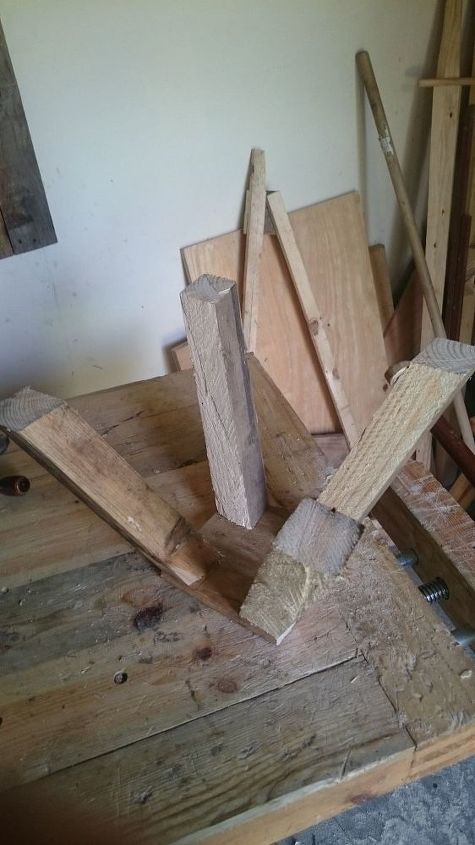
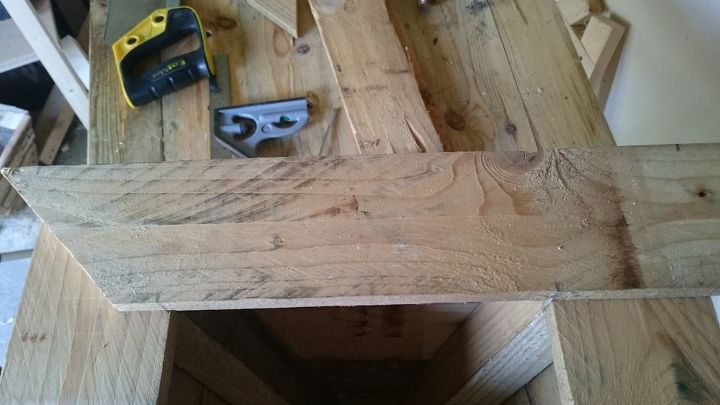
I started with a load of pallet wood, which makes up the majority of this project and cut 8 pieces to around 30cm each (12"). I then made them 4cm wide and 4cm thin (1 9/16"). Of course its easier to just buy some pre cut wood! But I like to recycle as much as I can. After all the pieces were cut I then found an angle of 115 degrees with my bevel gauge and used it to cut the compound angles, which is where the difficult part comes into the build.
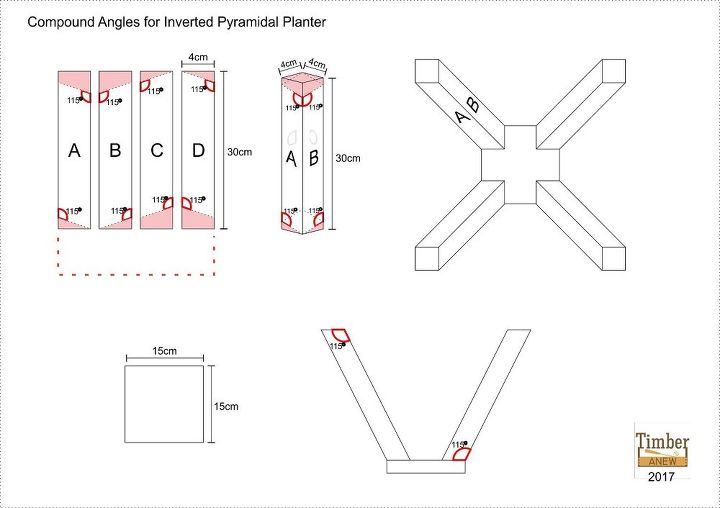
A compound angle is a cut that is made with 2 different angles in mind. Watching the video will help to understand this procedure and I have also made a diagram above which I hope helps to explain the cuts. Once these were cut I screwed them in from the bottom making sure to keep each piece in the corner.
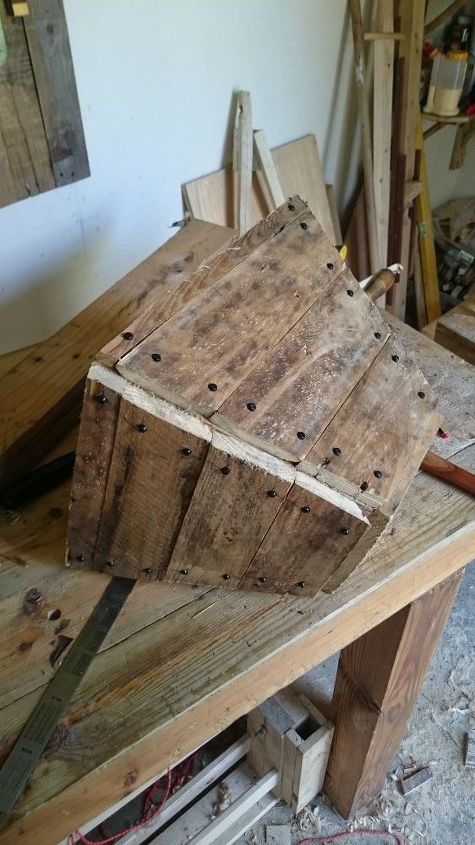
After the pieces are all screwed together it was time to grab some more pallet wood to make the siding. This was a fairly simple process which just involved holding the frame over a piece of pallet wood and marking it up. Then it was just a matter of cutting it and nailing it to the frame with ring shank nails.

When all the pieces were nailed on it was time to make the trim at the top of the planter. For this I decided to use some lighter coloured pallet wood.
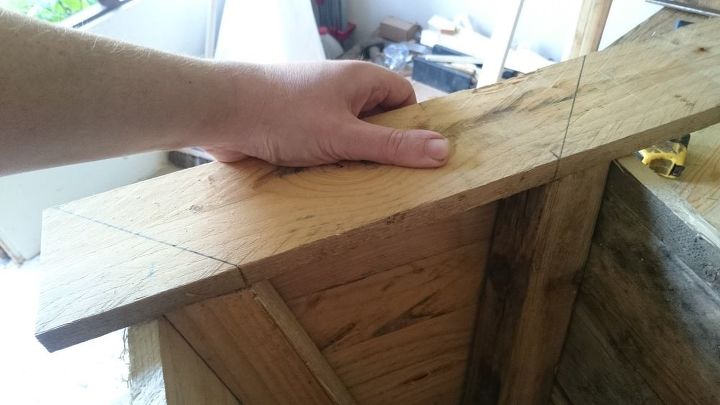
Holding a piece of wood on top of the planter I marked where the inner corners of the frame meet the trim. I then drew two 45 degree angles, cut the piece out and screwed it on. I repeated the same for the opposite side.
With two opposite sides of trim fitted on it was then just a case of holding a piece of pallet wood over them and marking where the angles were. I then cut those out and screwed them on.
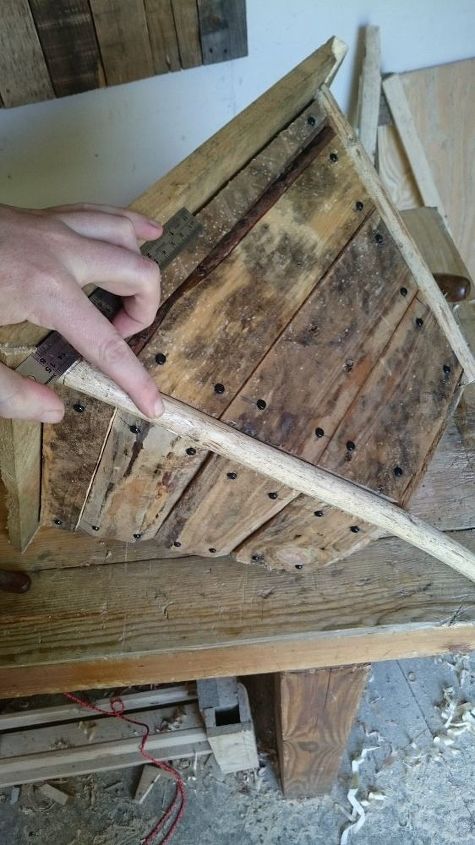
The trim was fitted and next I wanted to do something to accent the corners and add a bit of lightness to it. I had some old hazel rods lying around and so marked them against the trim with a ruler. All I had to do then was cut the angle, cut them to length and screw them on.
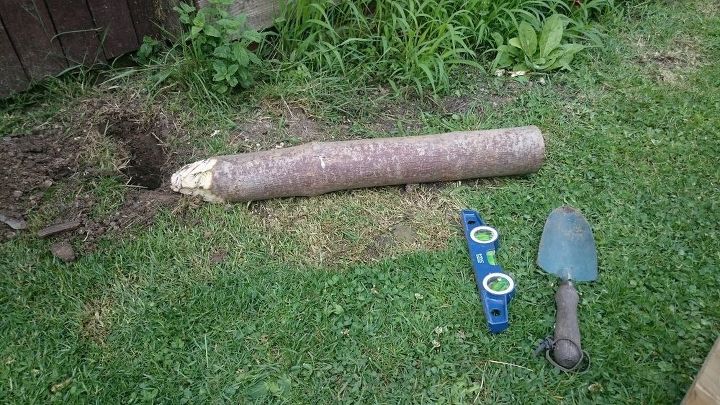
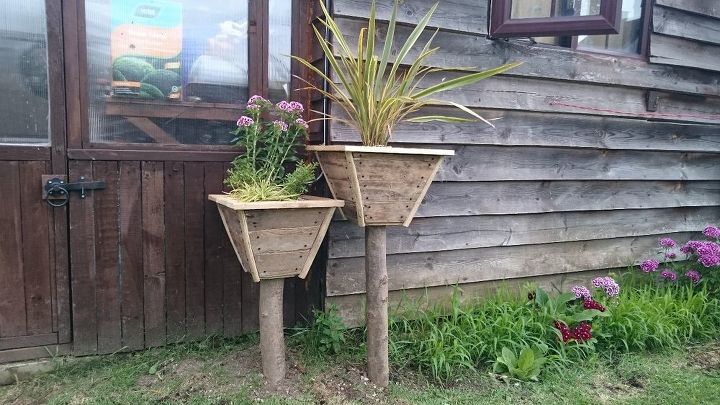
I cut two logs at different lengths as I wanted the planters to stagger over eachother and then cut some points on the bottom. I used my large mallet to bang them into the ground and screwed the planters on top.

Once the planters were fitted and screwed on I covered the inside with landscape material, filled them with compost and then found a few plants to display.
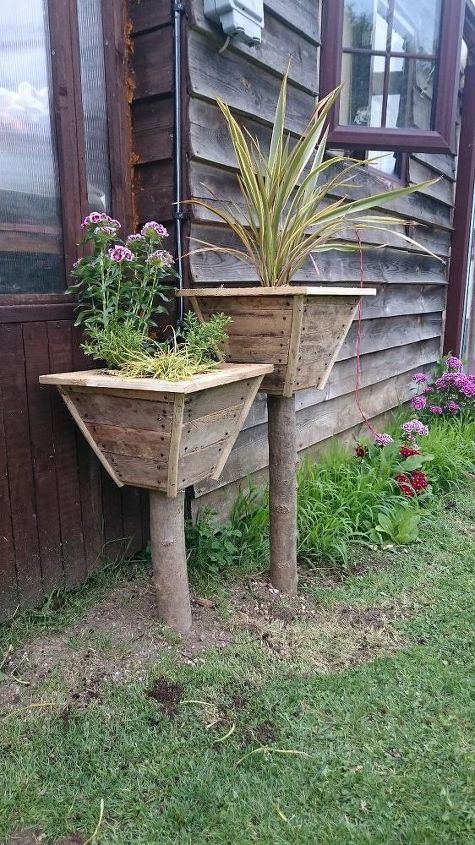
In the end I settled for a Phormium in the right planter and a Sweet William, two Hebes and a kind of grass in the left planter. They really don't take up too much room and look nice against the wood of the buildings.
I hope you enjoyed checking out these planters, if you'd like to show some support and check out my future and past projects then please give my Facebook page a like.
Thanks for looking and I hope to catch you soon!
Want more details about this and other DIY projects? Check out my blog post!
Comments
Join the conversation
4 of 56 comments
-
I had a few on here the other day...we are looking for a solution to the roofing issue, we had wamted a palm frond Tiki roof, but now realize the pitch is not steep enough to allow proper drainage...working on it..here are some pics...
-
I really like this! Will be making an attempt!


Frequently asked questions
Have a question about this project?
These are really lovely, and you can change the plants to suit the seasons/holidays, but what keeps the log from rotting in the soil/dirt??
Thank you!