


How to Clean a Refrigerator From the Outside In

By Alexa Erickson
The refrigerator is one of the most used appliances in the home. While keeping it stocked and organized may be your top priorities, a deep clean is likely on your to-do list. A good wipe-down of the outside helps avoid grimy buildup and keeping up with interior cleanings ensures spillage doesn’t harden and become difficult to clean out. Taking care of buildup also prevents the breeding of germs that can cause diseases like food poisoning.
This guide on how to clean a refrigerator will take you through the best methods and best practices to keep your refrigerator healthy and pristine.
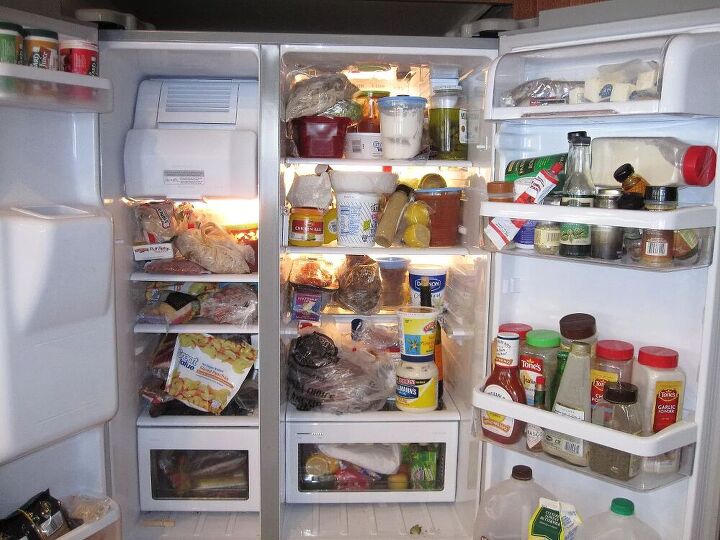
Photo via P.C. Richard & Son
Should You Clean a New Refrigerator?
Yes! As exciting as it can be to immediately use a shiny new refrigerator, it’s important to clean it first. A new household appliance requires cleaning to rid it of the smell of plastic, the accumulation of chemicals used during the production of the refrigerator, and the layers of dust and dirt from the appliance’s time in the warehouse and during the delivery process. Not cleaning the refrigerator also puts your food at risk for absorbing all the unpleasant aromas. These are the best practices for how to clean a new refrigerator:
- Remove any packaging present on the refrigerator, including protective plastic remnants.
- Clean the exterior side walls, door, and top of the refrigeration unit using a cloth soaked in a simple cleaning solution. Vinegar is a great deodorizer. Mix 1 teaspoon of vinegar with 3 liters of water for a quick homemade cleaning remedy.
- Next, thoroughly rinse all shelves, grates, boxes, various accessories, the back wall, drawers, the freezer, etc. using clean water, then wipe dry with a cloth.
How to Clean the Outside of a Stainless Steel Refrigerator
If the refrigerator is not new, you may be wondering how to tackle the grime left behind on the doors and handles of the fridge you’ve had in your home. It can vary depending on the type of refrigerator you have. Here’s what you need to know about how to clean different types:
To clean the outside of a stainless steel refrigerator, use a cleaner like Bar Keeper’s Friend Stainless Steel Cleaner and Polish and a microfiber cloth. Appliance brand Maytag suggests wiping in the direction of the grain. “Look for striations in the stainless steel finish running vertically or horizontally. This is the grain,” say the experts at Maytag. “Using a soft, dry cloth, wipe the cleaner in the direction of the grain. If you’re using a dish soap solution, rinse it off with a soft, damp cloth.” Next, buff with a different soft, dry cloth in the direction of the grain until it shines.
How to Clean the Outside of a Black Refrigerator
Black appliances are more likely to show certain kitchen stains like water spots, food spills, and fingerprints. Here's how to clean a black refrigerator.
Tools and Materials Needed:
- Dish
- One teaspoon dishwashing liquid or mild household detergent
- One pint warm water
- Non-abrasive sponge
- Glass cleaner
- Two microfiber cloths
Step 1: Mix Solution
In a dish, mix one teaspoon of dishwashing liquid or another mild household detergent and one pint of warm water.
Step 2: Dip Sponge
Dip a soft, non-abrasive sponge into the mixture. Wring it out.
Step 3: Gently Scrub Down Fridge
Wipe the damp sponge onto the surface of the refrigerator, gently scrubbing to remove residue. Let dry.
Step 4: Spray Glass Cleaner and Dry
Spray quick-drying glass cleaner on a microfiber cloth and wipe the surface of the fridge to remove any streaks from the soap. Finally, use a dry microfiber cloth to buff the surface, using a circular motion.
How to Clean the Outside of a White Refrigerator
Clean the outside of a white refrigerator using the same method as for a black refrigerator. However, if you are experiencing yellowing on the handles, a Magic Eraser is truly magical.
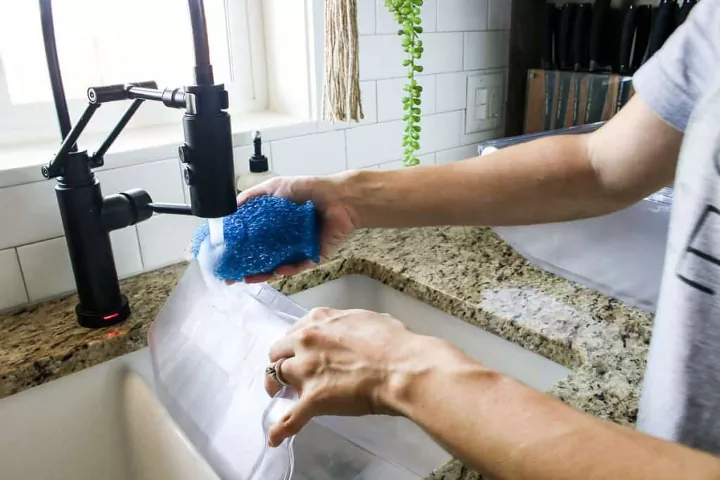
Photo via Chelsea @ Making Manzanita
How to Clean the Inside of a Refrigerator
The inside of your refrigerator holds all sorts of smells and, despite our best efforts to avoid them, spills. Here's how to thoroughly clean the inside of your refrigerator down to every nook and cranny.
Tools and Materials Needed:
- Dish
- One teaspoon dishwashing liquid or mild household detergent
- One pint warm water
- Soft, non-abrasive sponge
- Glass cleaner
- Two microfiber cloths
Step 1: Power Down Refrigerator
To conserve energy while the refrigerator doors remain open, power down the appliance. Begin by loosening the bulb in your fridge until it goes out, then set the temperature dial to “off,” and unplug it.
Step 2: Remove All Contents of Refrigerator
Place the contents on a clean countertop. As you remove items, review expiration dates, then toss what’s no longer valid. “Don’t leave foods out that need to be kept in the refrigerator for more than two hours,” the CDC recommends. Wipe food containers clean of any residue.
Step 3: Take Out Removable Items
Remove shelving, drawers, and any other removable parts. Wash each removable part by hand with hot, soapy water, being mindful to allow cold glass shelves to come to room temperature before washing to avoid cracking. Dry all items with a clean towel.
Step 4: Wipe Inside of Empty Refrigerator
Wipe down using an unscented mild cleaner (since food absorbs odors). Be mindful to tackle the inside of the doors and any drawers that cannot be removed. You can use a cloth to wipe clean using a solution of hot soapy water. For funky-smelling fridges, use a solution of two tablespoons baking soda and one-quart hot water. Baking soda is known for its effectiveness in neutralizing bad odors. Once washed, dry with a clean cloth.
Step 5: Replace Removable Parts
Place the shelves, drawers, and other removable parts back in the fridge, as well as the food you removed.
Step 6: Turn Fridge On
Plug the fridge back in, tighten the bulb, and set the temperature.
How to Clean a Refrigerator Without Turning It Off
We get it: The process of unplugging your refrigerator and taking everything out of it is not something you’ll want to do often. Luckily, once you do a good, deep clean, the next few cleanings will likely require 30 minutes or less, so you can plan to do the above steps without turning off the fridge. Cleaning company Molly Maid recommends deep cleaning every three to four months.
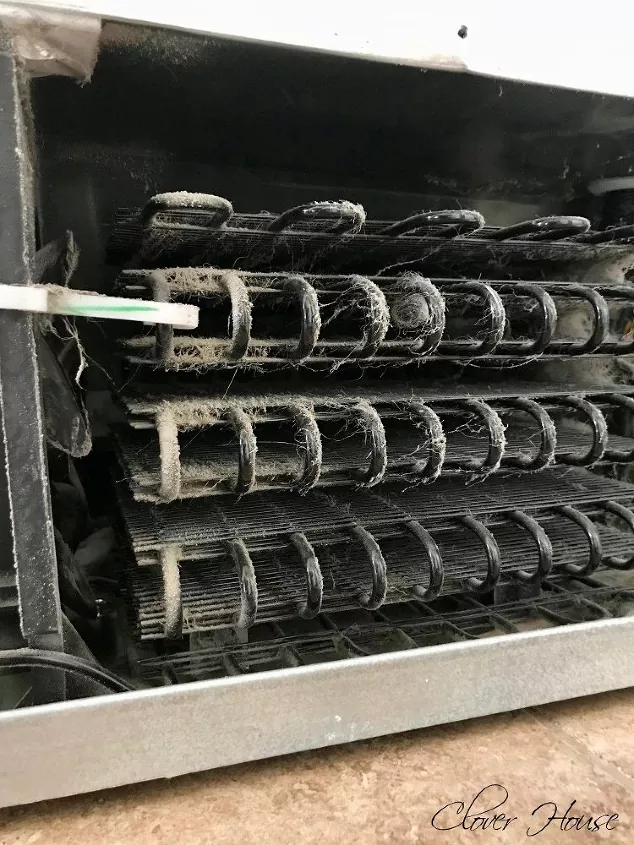
Photo via DeeDee
How to Clean Condenser Coils on a Refrigerator
An often overlooked part of the deep cleaning process is learning how to clean condenser coils on a refrigerator. Condenser coils cool and condense the refrigerator and are either located on the bottom of the fridge behind the toe-grill or on the back of the fridge. If they’re clogged, they cannot efficiently release heat. Here's how to clean them.
Materials and Tools Needed:
- Vacuum cleaner with brush and crevice attachments
- Bottlebrush
- Swiffer/mop
Step 1: Disconnect the Power Supply
Then pull the fridge away from the wall to access the back of the fridge and remove the refrigerator’s plug from its outlet.
Step 2: Remove Toe Guard
For coils beneath the fridge, remove the toe guard in the front of the unit to access the coils. If the refrigerator coils are on the back of the fridge, you’ll want to pull the fridge away from the wall.
Step 3: Remove Visible Dust and Debris
Use a narrow vacuum attachment to suck up dust and debris visible around the coils, in the nooks and crannies of the condenser coil area, and surrounding the fridge. This is also a great time to vacuum and mop behind the fridge.
Step 4: Remove Stuck-on Particles
Tackle stuck-on particles that do not come off with the initial vacuuming by using a long-handled brush on the unit. The brush will scrape and brush off buildup on the condenser coils. You may want to consider using a bottle brush to tackle particularly small and narrow areas.
Step 5: Return Fridge to Starting Position
Replace the toe guard, return the fridge to its original position, then plug it back in.
How to Clean the Water Dispenser on a Refrigerator
The refrigerator’s water dispenser may not be subject to food spills like the inside of the fridge, but it can still collect dirt, grime, and bacteria due to how often it is touched. Plan to do a deep cleaning on this portion of the fridge once a month.
If the water from your fridge’s dispenser is starting to taste funky, it might be time to flush out your fridge’s water line. Refer to your refrigerator’s manual to safely perform this task.
Tools and Materials Needed:
- Dry towel
- Spray bottle
- Water
- Vinegar
- Toothbrush
Step 1: Turn Off or Lock Dispenser
If your refrigerator’s water dispenser has a locking feature, turn that on. If it doesn’t pull out your fridge to unplug it (this cleaning should only take about 15 minutes).
Step 2: Clean Tray
Use a clean towel to dry the water dispenser’s tray of any standing water. Remove the tray from its post and clean in warm, soapy water. Dry with a clean towel.
Step 3: Mix Cleaning Solution
Add one part vinegar and two parts water to a spray bottle. Shake to mix.
Step 4: Spray Dispenser
Spray all parts of the refrigerator’s water dispenser, including its tongue(s), backsplash, and buttons. Wipe down everything with a towel.
Step 5: Scrub Remaining Stains
Use a toothbrush to scrub any stubborn mineral stains that might be left on the dispenser, using more of the vinegar spray as needed.
Step 6: Wipe Down
Use a damp cloth to wipe down all parts of the water dispenser one more time. Return the tray to its position on the water dispenser.
Plan to clean your refrigerator right before you go grocery shopping, as you likely have the least amount of food in your fridge at that time. Doing a quick wipe down quickly will ensure a more efficient deep clean when the time comes.
When's the last time you cleaned your refrigerator? Let us know in the comments below!
Comments
Join the conversation
-
For Yellowing use 30% peroxide, plastic wrap and a UV light. 30% peroxide is used to bleach hair and similar to the peroxide used to whiten teeth 😁. Paint a thick layer of peroxide on the surface, cover with plastic wrap, expose the surface to the UV light. The plastic wrap keeps the surface wet, you don't want it to dry because it won't work. It isn't instant but keep and eye on the surface when it is back to white or off white, remove the plastic wrap and rinse the surface thoroughly. This process doesn't stop yellowing but it does work to restore item to white.


Frequently asked questions
Have a question about this project?