


How to Make a Candle Wick With Cotton or Wood

By Judy Schumer
Learning how to make a candle wick is just as important as learning how to make the candle. Using cotton is the easiest way to make a candle wick at home, but you’ll still need to choose the right materials, method, and thickness, or your candle won't burn properly. You’ll also want to consider a wood candle wick to get the ambiance of a crackling fire without the expense or mess of one.
This guide will walk you through the types of candle wicks out there, plus we’ll walk you through how to make a candle wick using simple cotton and wood.
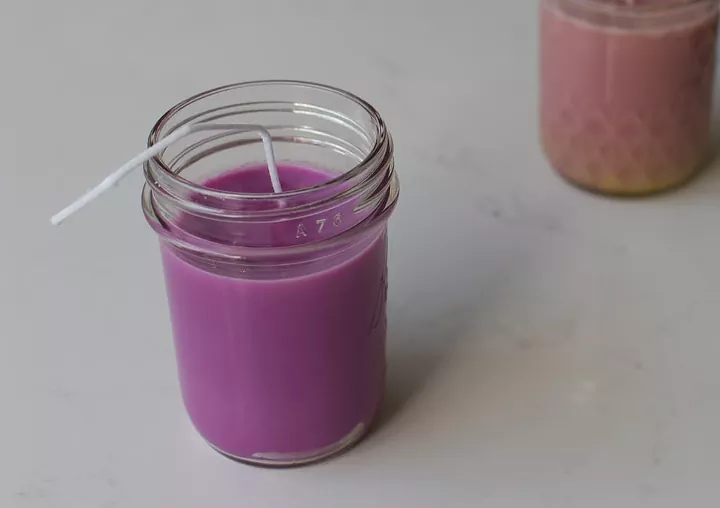
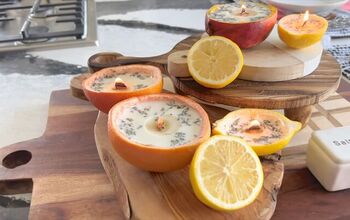
Photo via Audrey Kuether
Types of Candle Wicks
There are four main categories of wicks; each type will affect how your candle burns. Find out which wick is best for your candle-making needs.
Flat Braid Wicks
Flat braided wicks use multiple fibers to create a wick that curls as it burns. They self-trim as they burn, which results in less smoke and a cleaner burn. They are sturdy and best suited for taper candles and medium to large pillar candles.
Square Wicks
Despite their name, square wicks are rounded and stronger than flat braid wicks, but like flat braids, they curl while burning to prevent too much smoking. They’re most often used in natural and homemade candles made with beeswax, soy, and vegetable waxes. Square wicks, like other specialty wicks, are best purchased from a reputable candle supply shop.
Wood Wicks
Wood wicks are very rigid and easy to work with. They can be made of either hardwood or softwood, but softwood wicks are the most popular because they crackle as they burn, imitating a cozy, wood-burning fire. They work well in almost any type of wax.
Cored Wicks
Cored wicks are precisely what they sound like: a wick with a core. The outer part of the wick is always braided or knitted, but the core can be made of various materials. A cored wick is rigid and stands up straight in the middle of the candle, even when the wax is melting as it burns.
The most common type of core used in a cored wick is cotton, hemp, paper, and zinc.
Zinc core wicks are the most rigid because they’re made with metal. They work best in smaller candles like votives and tea lights which need a very strong core because they burn and create a wax pool so quickly. Zinc cores are also best suited for gel wax and paraffin wax candles and are not recommended for use in natural waxes you may use in at-home candle-making. While DIY may be attempted, it is extremely tedious work and doesn’t provide the level of tight composition required for safe burning.
Hemp wicks are all-natural, made from fibers of the hemp plant, and usually dipped in beeswax to make them more rigid. They’re the perfect choice for natural candles made from soy or beeswax.
In cotton-cored wicks, the cotton core is tightly wound and surrounded by either more cotton or a synthetic material. They are an all-purpose wick, working the best in medium to large candles and do exceptionally well in candles with multiple wicks.
Paper-cored wicks have very tightly-wound paper cores which help them burn hot, a characteristic best used for votive and pillar candles. They can burn very hot in glass containers, so care is needed when using them as a wick in a glass-contained candle. You’ll need to purchase paper-cored wicks from a reputable candle supply shop, as tight braiding is important for safe burning.
How to Choose a Candle Wick
Choosing your work based on the following factors will determine how well and how cleanly your candle will burn. It will also determine the “throw” of a scented candle, or how far the scent travels in your home. After all: You don’t want to have to stand over your candle to be able to smell it!
Determine Candle Diameter
Knowing the diameter of your candle is crucial when choosing a wick. Wider-diameter candles require more heat to melt the wax properly.
To generate more heat, you’ll need a larger wick, a zinc core wick, or more than one wick to avoid tunneling, which happens when your wick puts out only enough heat to melt the wax directly around it. The correct wick diameter will also help heat the wax more evenly to create a great throw, so you can fill your home with scent and burn fewer candles.
Candle Memory
Consider Wax Type
The type of wax your candle is made of also determines what wick you should use. Some wicks burn hotter than others, which are not recommended for natural waxes because these waxes melt faster. You should never use a zinc wick in a beeswax candle because it burns very hot, and the wax melts quickly.
Stiffer wicks like zinc are perfect for paraffin and gel waxes, which have a higher melting point.
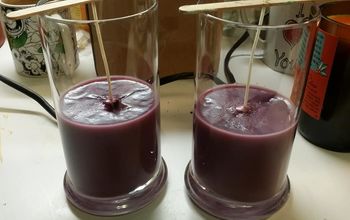
How to Make a Cotton Candle Wick
You can make high-quality cotton candle wicks at home that burn brightly and melt your candle wax evenly. The best method for making a cotton candle wick uses borax, which provides a superior quality flame that burns cleaner and brighter than a basic, wax-dipped, plain cotton wick. The salt in the solution stiffens the wick, making it rigid enough to use in all wax types.
Use color-free 100-percent cotton, hemp, or natural twine. If you’re making a wick for a small candle, use a single piece of cotton or twine. For thicker candles, braid two to three pieces of cotton together to make a thicker wick. A general rule of thumb is to use an additional piece of cotton or twine per inch for candle diameters larger than four inches.
Tools and Materials Needed:
- Scissors
- Ruler
- 100-percent cotton thread, hemp, or natural twine
- Medium glass mixing bowl
- 1 ½ cups hot water
- 2 tablespoons table salt
- Wooden spoon
- 4 tablespoons borax
- Pasta drying rack or plastic coat hangers
- Beeswax
- Double boiler or wax melter
- Small tongs
- Glass plate or dish
Step 1: Cut the Cotton
Measure the cotton or twine and cut to the desired wick length, adding three inches to the length to allow the wick to sit high enough in the candle. It can always be trimmed once you set it in your candle mold or container.
Step 2: Mix the Borax Soaking Solution
Pour the hot water into the glass bowl. Add the salt, stirring well with the wooden spoon until dissolved. Add the borax, one tablespoon at a time, stirring after each addition. Stir until completely dissolved.
Step 3: Soak the Wicks
Place your wicks into the solution and let them soak overnight. This step requires patience, but the solution-soaked wicks will burn brightly and evenly.
Step 4: Rinse the Wicks
After 24 hours, remove the wicks from the solution and rinse well with clean water to remove any crystals that have formed.
Step 5: Dry the Wicks
Using a pasta drying rack or plastic coat hangers, hang the wicks to dry for 24-48 hours. Make sure they are thoroughly dried before proceeding.
Step 6: Melt the Wax
Using a double boiler or wax melter, melt enough beeswax to coat all of the wicks.
Step 7: Dip the Wicks
Place the wicks into the melted wax to coat them thoroughly. Use tongs to remove the wicks from the wax.
Step 8: Dry the Wicks
Using the pasta rack or plastic hangers, hang the wax-coated wicks to dry for a few minutes until the wax begins to harden. Do not let it harden completely; the wax should still be soft to the touch but no longer dripping.
Step 9: Shape the Wicks
Place the wicks on a glass plate or dish and shape each one so they are straight when fully dry.
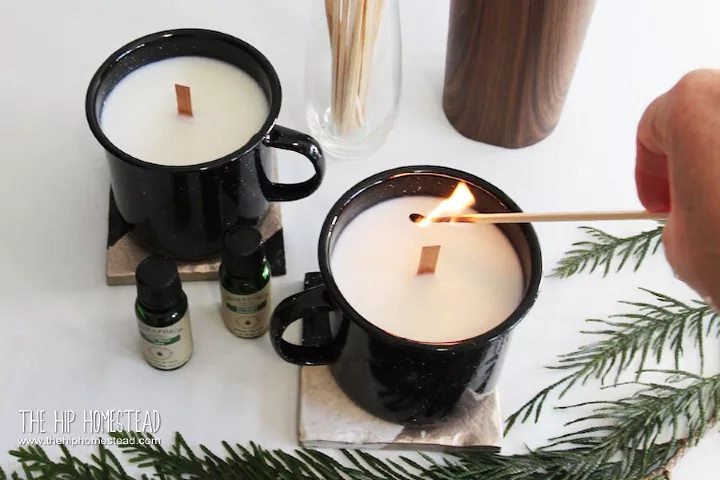
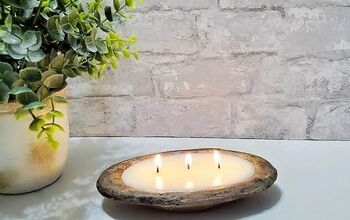
Photo via Jana The Hip Homestead
How to Make a Wood Candle Wick
Wood candle wicks add to the ambiance of candlelight with a crackling sound, mimicking a cozy wood fire without the mess.
You can find the wooden sticks you need to make the wicks and the wick clips at a craft store. The sticks are made from balsa wood, which burns well and has a nice crackle when lit. Using coconut oil will allow you to store the candle without the wick developing a rancid smell.
To make a wood candle wick, follow these easy steps.
Tools and Materials Needed:
- Balsa wood sticks
- Scissors
- Coconut oil, liquid
- Shallow glass baking dish
- Paper towels
- Wick clips for wood wicks
Step 1: Trim the Wood
Trim the wood sticks to the desired size. They should be an inch higher than the container they will be used in. For all-purpose wicks to be used later, measure the wood sticks to a length of 8 to 12 inches and trim them when you are ready to use them.
Step 2: Soak the Wood Sticks
Place the wood sticks in the glass dish and cover them with the liquid coconut oil. Let them soak for an hour.
Step 3: Remove the Excess Oil
Remove the wood sticks from the dish and place them on dry paper towels, patting them to remove the excess oil. You should be able to handle them afterward without oily residue left on your hands.
Step 4: Attach the Wick Clips
Push each wick into a wick clip to secure it. The clip will keep the wick upright in the liquified candle wax when you make your candle.
What type of wick do you use in your candles? Let us know in the comments; we’d love to hear from you!


Frequently asked questions
Have a question about this project?