


Create Thanksgiving Placecards or Download for Free
Welcome your guests with these fall/acorn themed placecards. Step by step instructions using PhotoShop Elements or download for free
What You Need to draw Fall and Thanksgiving Place Cards:
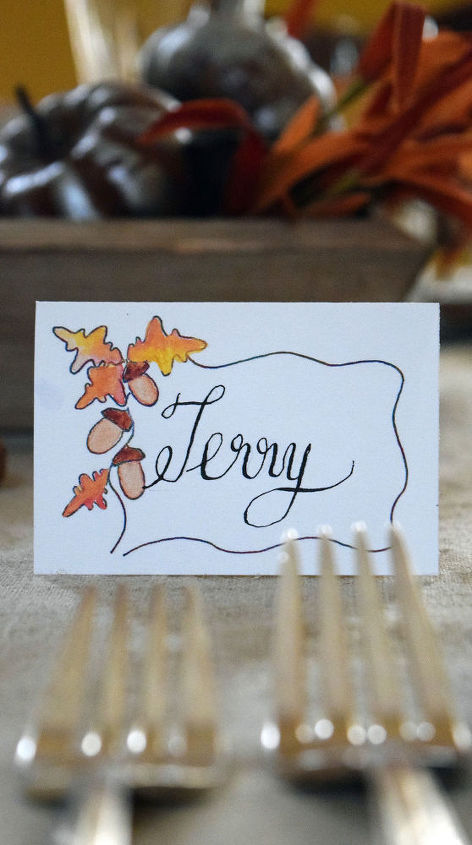
I used my ruler and lightly drew a 2″ by 3″ rectangle on my paper

I sketched out what I wanted my main drawing of acorns and oak leaves to be and where in pencil

I erased all my pencil marks

I’d be lying if I told you I accomplished what I wanted the first go round. Just keep at it until you get what you want.
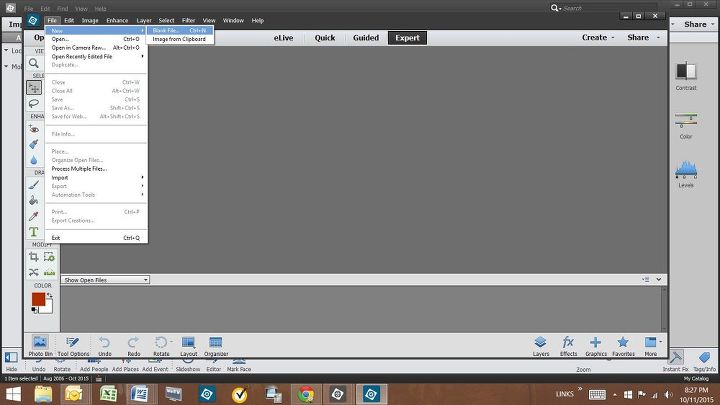
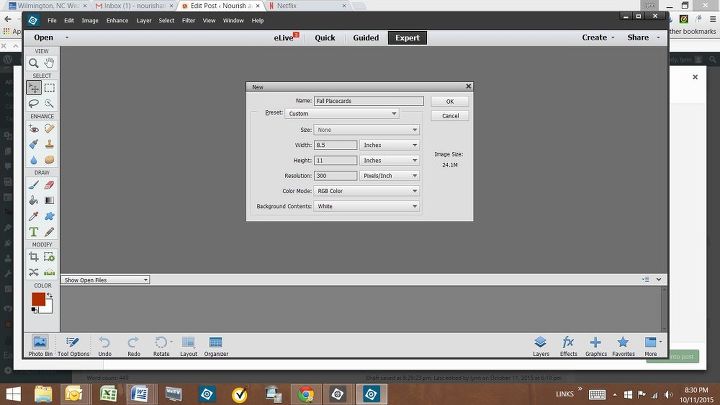
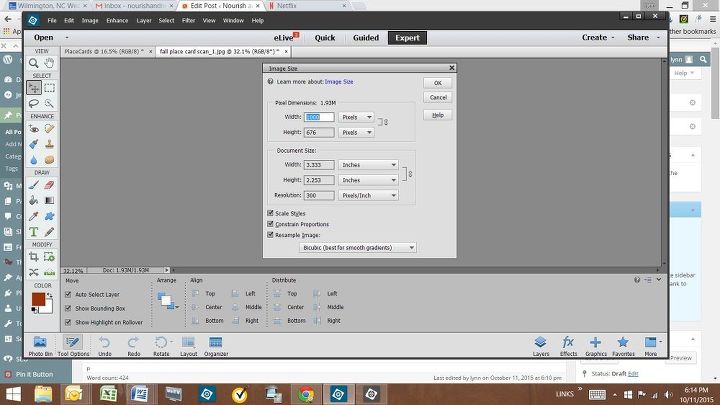
I made my New File 8.5″ by 11″ with a Resolution of 300Pixels/Inch and named in Fall Placecards.
Then I opened up the scan that I drew and resized it to 2.2″ by 3.3″ with 300 Resolution. You can see that I have 2 documents open across the top, “PlaceCards”, which is the new 8.5″ by 11″ document and “Fall Place Card Scan” which is the scan of my original drawing.
hen I used the shortcuts CTRL A which selects the image and then CTRL C which copies the image selected. You can tell it’s captured when you see the ants marching along the perimeter (I read that part about the marching ants somewhere and it has stuck with me!)
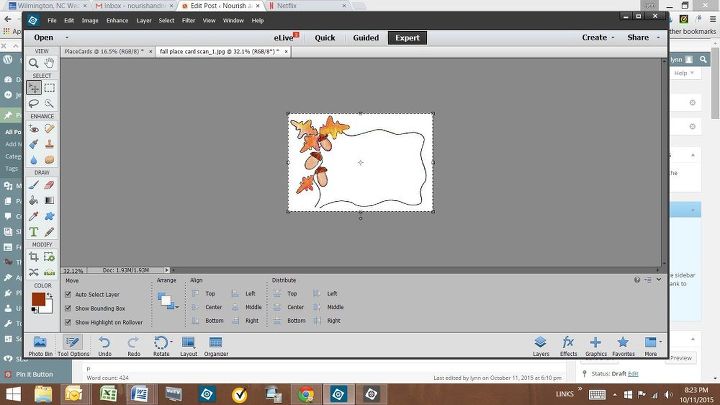
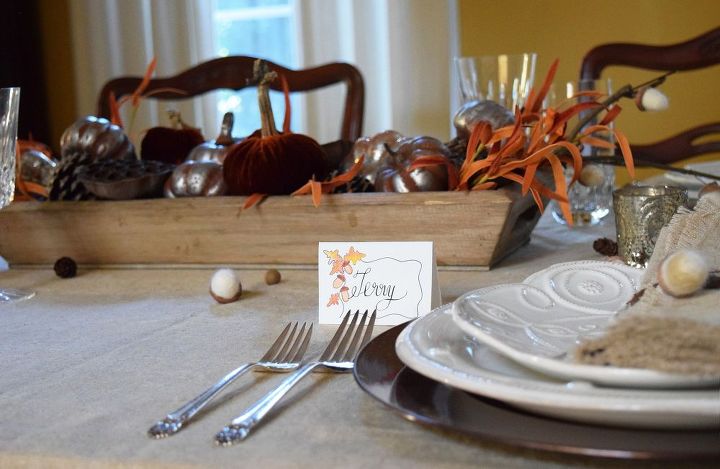
Then tap on the big 8.5″ by 11″ document where you want to paste your scan and hit CTRL V to paste it. I just hit CTRL V 4 times to put 4 of them on the page and then move them around.
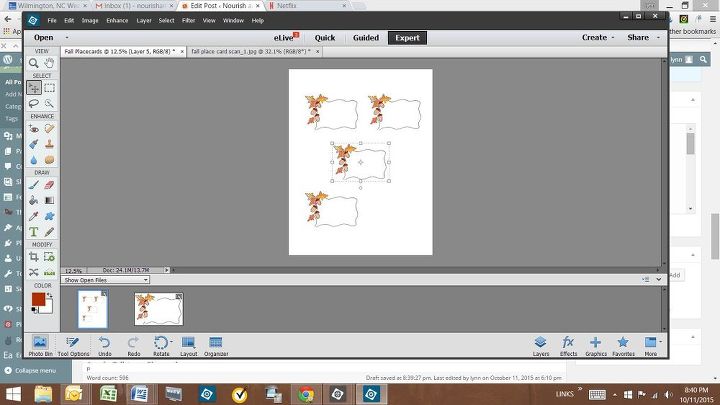
I found that 4 fit on one page best as it allowed space for them to be folded in half.

I am sure there is other software out there that will let you scan a document and manipulate the image, but all I know is PhotoShop Elements. If your schedule doesn’t allow for you to start this project now, I’ve attached PDFs for both sets of place cards for your use. Just link to my site to print them off.

Want more details about this and other DIY projects? Check out my blog post!
Comments
Join the conversation
2 of 3 comments
-
Perfect touch!
-
TY for the step by step, :)


Frequently asked questions
Have a question about this project?