


DIY Kid’s Thor Costume Using Dollar Tree Props: Part 1 - Weapons

I enjoy making costumes for my children, so I love it when I can find an inexpensive base for a costume that only needs simple modification. My son wants to be Thor for Halloween this year, so I bought a few of the kid’s props from Dollar Tree to make his costume.
This part 1 will show you how I made Stormbreaker, but you can easily adapt the tutorial to make his hammer (Mjolnir) instead. And of course, this method can be used for many other props!
The only thing I had to buy specifically for this part of the project was the axe from Dollar Tree, so my cost was only $1. Obviously if you don’t have some of these supplies, you will have to spend more, but they are mostly all staples of a craft stash.
You can find part 2 where I made the rest of the costume here: https://www.hometalk.com/diy/-43948027
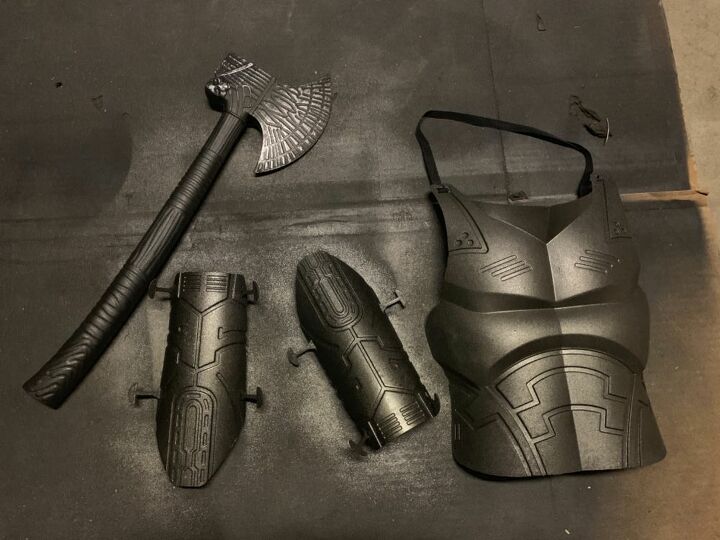
Here are the pieces I bought at Dollar Tree. I forgot to take a picture of the axe before starting, but all I have done to it so far is spray paint the handle black to cover the metallic blue that it was. **I recommend waiting to paint until you have finished modifying the head. Paper mache gets messy, and chunks of the paint came off with my sticky glue hands and I had to repaint it anyway.**
I also used some scrap foam, newspaper and glue for paper mache, paint (silvers, and brown are necessary) and yarn and/or twine.
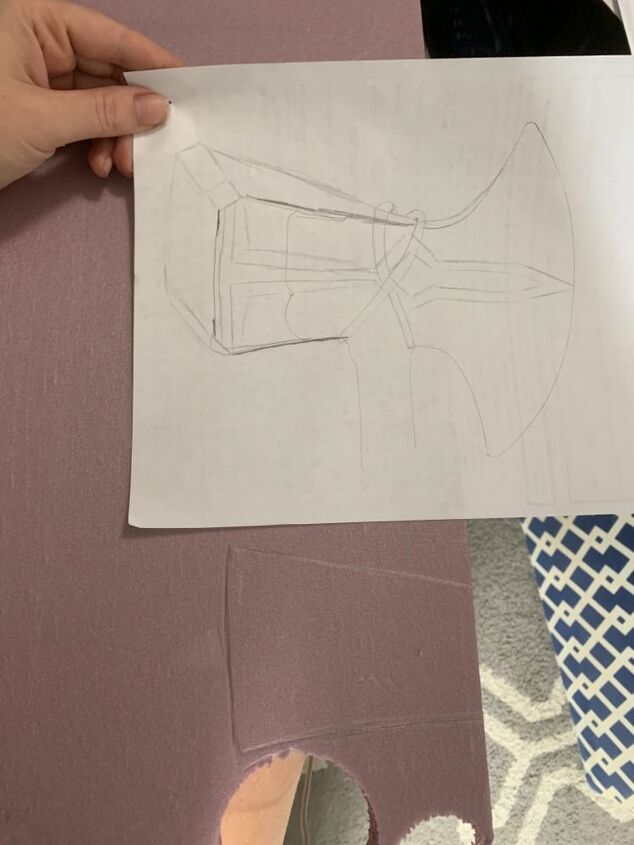
Next, I traced the current axe head, then drew out how I wanted to modify it into Stormbreaker. I decided not to modify the shape of the blade side, but if I were to do this again, I would probably cut the current head off and make and entire new one from scratch. This would have probably been easier to begin with.
**If you want to make the hammer instead, you can continue the tutorial, just adjust your template to copy the hammer head shape instead.**
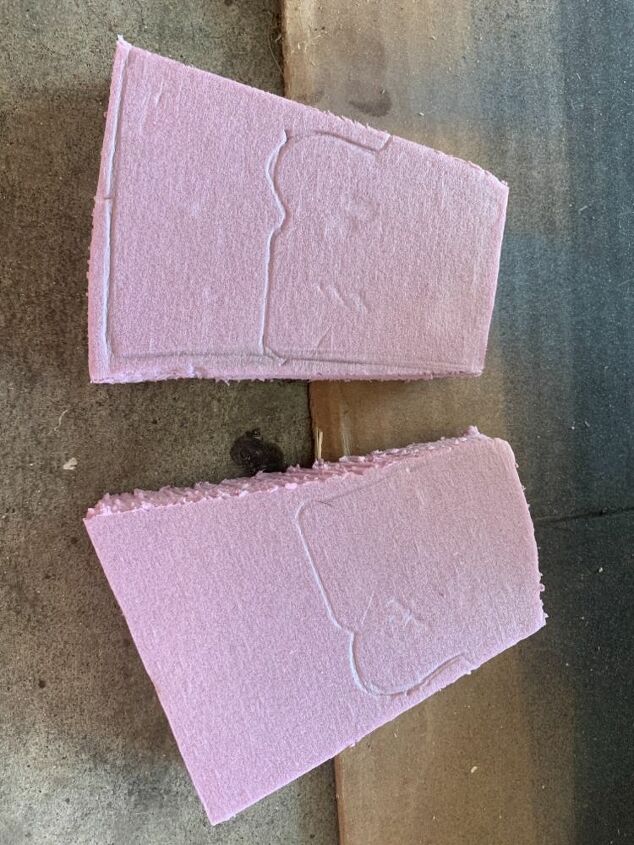
I used my drawing from above as a template and cut out chunks to make the back of Stormbreaker out of foam insulation that I had leftover from another project. I traced the shape of the existing axe into the foam to be carved out.
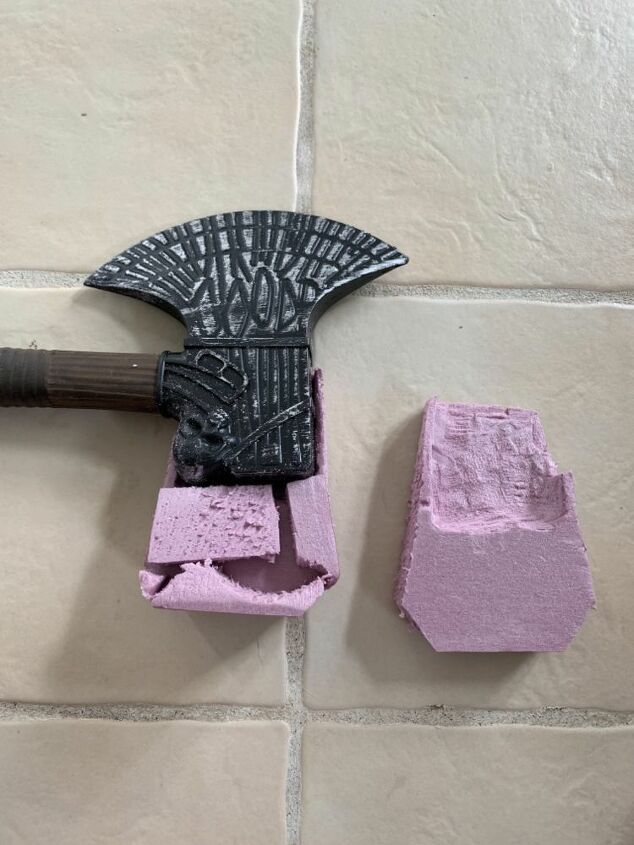
Using my rotary tool, I carved out a spot for the axe to sit inside of the foam. Because I wanted the back to wedge outwards, I used scrap pieces between the two sides.
**If you don’t have a rotary tool, you can also use a pumpkin carving kit.**
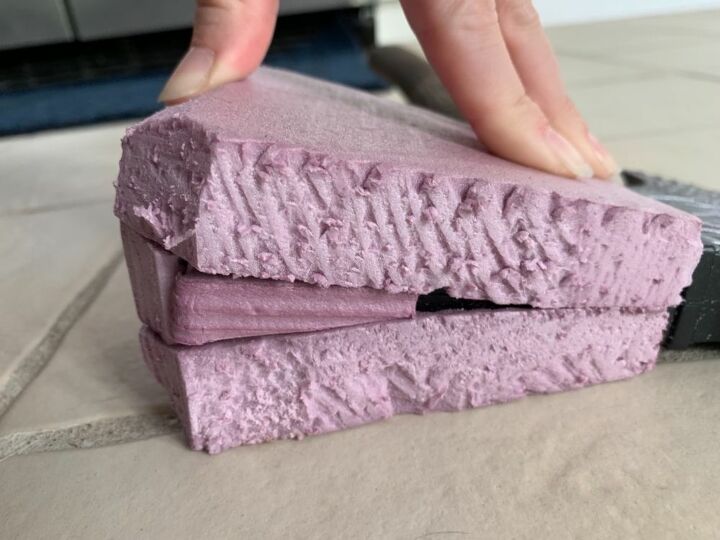
Here is a side view to show you what I mean.
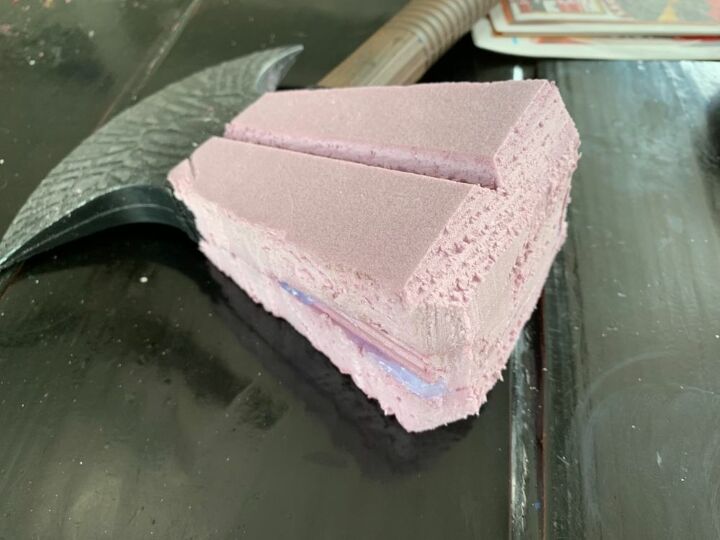
I used hot glue to attach all the pieces together. Depending on the foam you use, hot glue may not work and you will have to find another suitable glue.
After everything was glued, I used a sharp sedated knife to cut some of the designs into the foam and to refine the shape.
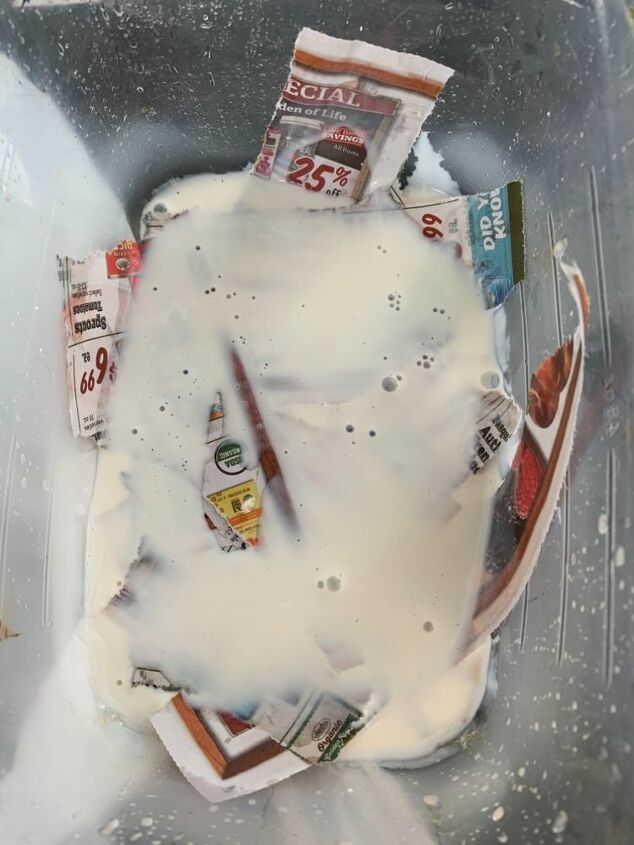
Next came a later of paper mache to cover the whole thing. I used watered down school glue with small pieces of newspaper.

Time to dry! I propped it up on the work bench with something heavy sitting on the end of the handle.
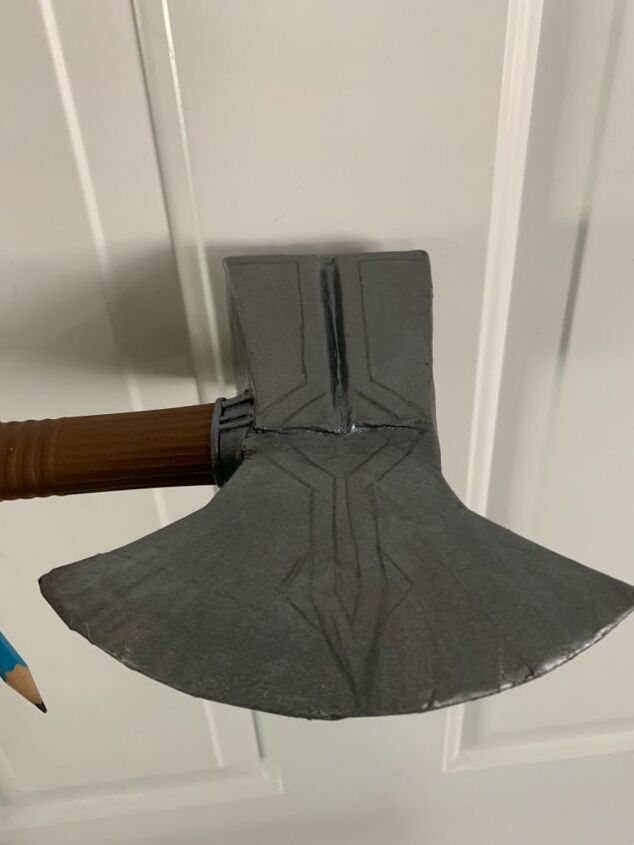
When the glue was dry, I lightly sanded it, then painted it with a flat black followed by a brushed nickel spray paint. I also used some brown acrylic paint for the handle.
Using a pencil, I drew some of the designs on.
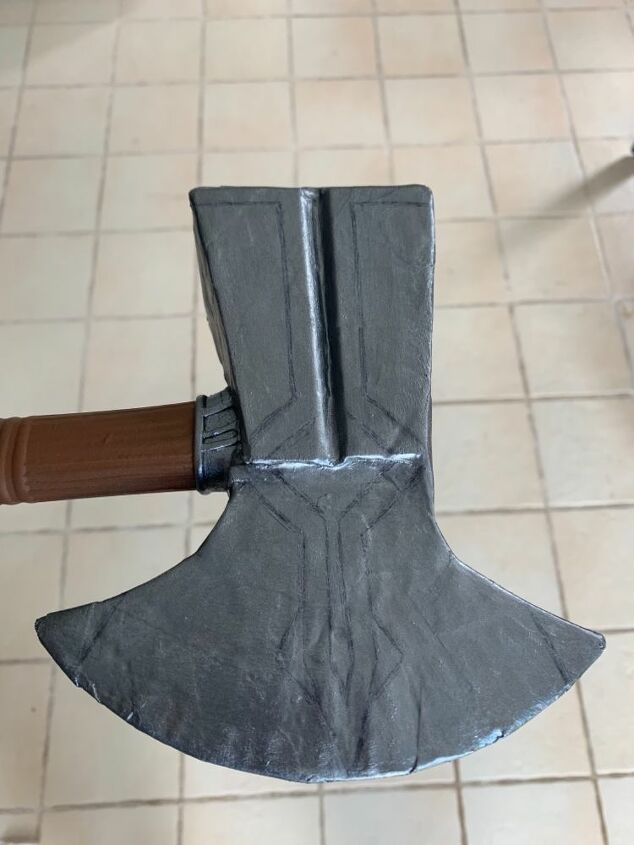
When I got the designs how I liked them, I traced them with a black super fine permanent marker, then lightly painting over everything with a metallic zinc acrylic paint. This softened the black market a bit and added some dimension to the metal color by having two different shades.
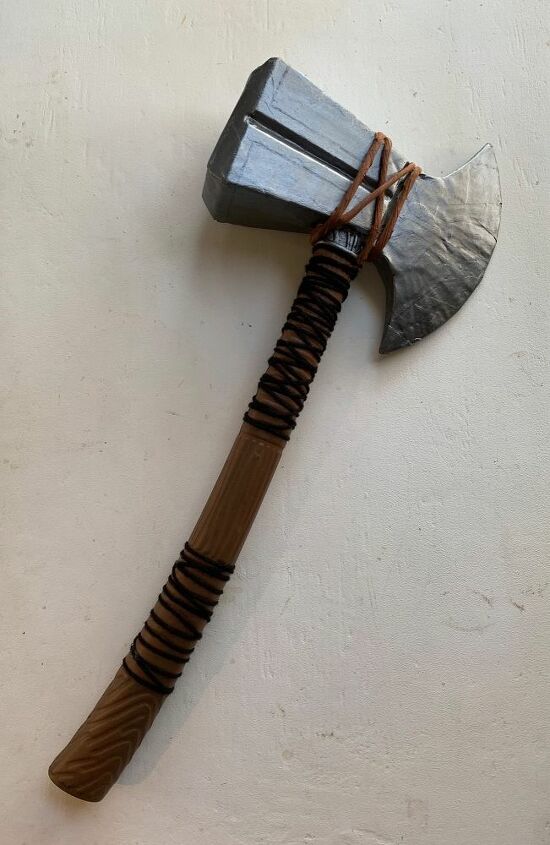
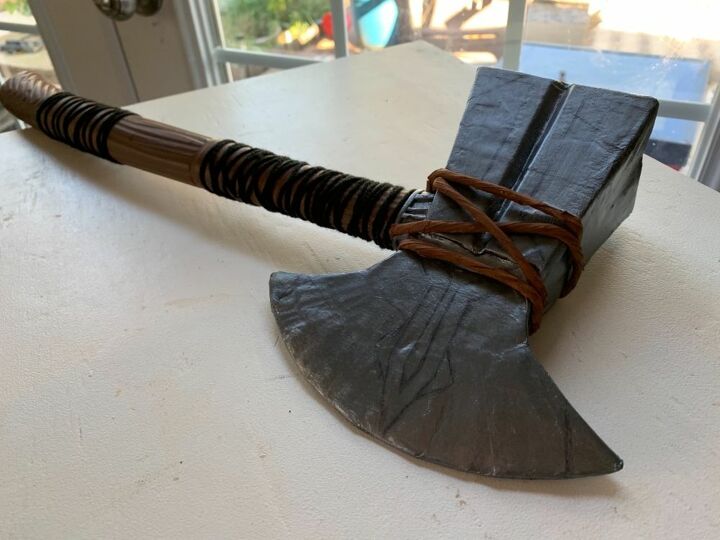
For a finishing touch, I wrapped and glued some twine around the head and some black yarn around the handle to make it look more like the movie version. I also painted the twine with the same brown as the handle. Finally, I gave it all a light coat of clear protective spray, because after all, this is for a kid to play with, and I don’t want the paint to chip!
Stay tuned for part two, where I make the rest of the costume using a Dollar Tree chest plate and arm bands!


Frequently asked questions
Have a question about this project?