DIY Kids Desk

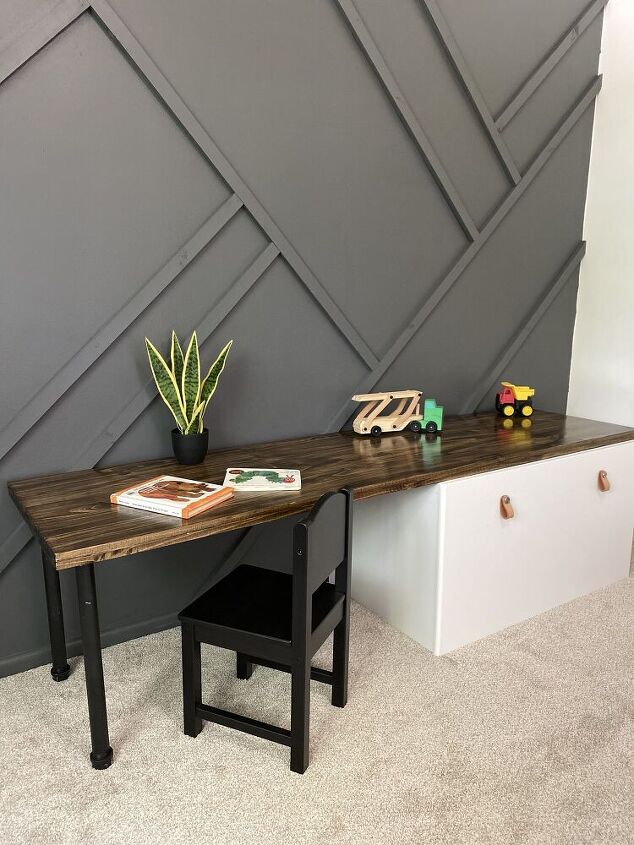
This is an easy DIY desk we recently completed in my son's playroom. We decided to attach the top of the desk to his toy box but this could easily be made as a stand-alone desk. Checkout my Instagram (@mrsashleyfrench) for detailed video of the full project!
First, we purchased the Stuva toy box from IKEA and planned to place the top of the desk on top of the toy box. This part is totally optional.
We purchased two 3/4-in x 20in x 6ft Edge-Glued Panel Spruce Pine boards from Lowes. I started by sanding them down using a palm sander to ensure they were smooth and had no rough edges.
I always apply a healthy coat of pre-stain wood conditioner before I stain any piece of wood. The wood conditioner will help the stain go on evenly. Allow the pre-stain to dry a minimum of 2 hours before applying your stain.
I used Minwax Dark Walnut stain and a clean dry rag to apply the stain on one side and the edges of each board.
I used a generous amount of wood glue all over the non-stained side of one of the boards.
I quickly lined up the second board on top with the stained side facing up. I used 4 clamps on each corner to firmly press the two boards together.
I added 1in wood screws throughout the boards to suck the two boards together tightly. Its important that the length of the screws are shorter than the width of the two boards so that your screws don't poke through the other side. The side where the screws are visible will be the underneath side of the desk.
I added four coats of Gloss Polycrylic. I lightly sanded the board with 400 grit sandpaper before applying the fourth and final coat. Allow it to dry fully between each coat.
We used galvanized steel pipes from Lowe's. We went with the 1in x 18in pipes. Screw the pieces together to make your legs.
I painted the steel pipe legs with Rustoleum Hammered Metal spray paint in black. Allow to dry for 24hrs before installing them to the desk top.
We used 1.5in wood screws to secure the desk top to the top of the toybox. We used 1in wood screws to secure the steel pipes to the underneath of the wood.
Just like that you have a rustic industrial kid's desk!
Enjoyed the project?
Resources for this project:
See all materialsComments
Join the conversation
-
 Ellen
on Jun 19, 2020
You can raise it as you mentioned when he gets older, or you could put this anywhere as a great storage bench! I’d keep gardening stuff & boots in the toy box.
-
 Ashley | DIY & Home Design
on Jun 19, 2020
That is an excellent idea!! That’s exactly what I will do! Thank you!
-
-
-









Frequently asked questions
Have a question about this project?
How do you plan to raise the height of the desk up for when he gets older?