DIY Tiered Tray - Thrift Store Project

Learn how to make your own DIY tiered tray using basic supplies from a thrift store.
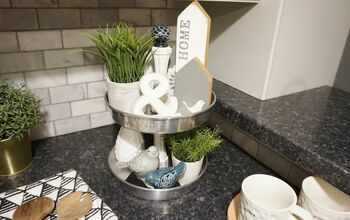
Tiered trays are an easy way to decorate for any holiday or season. They can go just about anywhere in your home; on a counter, mantle, table or buffet. You can style them with decor you already have and they are versatile enough to stay in place year round. Tiered trays can be expensive, they are beautiful and you might find one on sale or clearance, but in general they tend to cost a lot.
To make your own tiered tray, head to your favorite thrift store and pick up a few supplies.
- 3 cake pans in different sizes
- Wood candle holders
- PaintBrushes
- E6000 glue
When shopping look for 2 cake pans, or plates or even canister lids that are 3 different sizes. The largest will be the base, then a medium in the middle and the smallest on the top.
You will need 2 sturdy and solid candle holders to separate each tray. Make sure you find something that has nice flat ends to the glue can get a strong grip and secure the pans together.
Assembling a tiered tray Clean all the pieces then paint them to match your decor. I chose matte black for the wood candle holders. I chose to leave the 2 cake pans their original silver color. The scratches and dents add to the beauty of the tray.
I used silver spray paint to coat the canister lid so it matches the pans.
Once everything is dry, use E6000 or similar strong glue to hold everything together. I suggest doing 1 pan at a time and resting something heavy on top until the glue is completely dry.
To style this tray for Easter I rounded up items that fit the theme and started layering them on the tray. I started with large jars toward the back. Then I added moss and flowers to fill in the gaps. I filled the jars with more flowers and added faux eggs and a pretty sign to complete the tray.
Enjoyed the project?










Frequently asked questions
Have a question about this project?