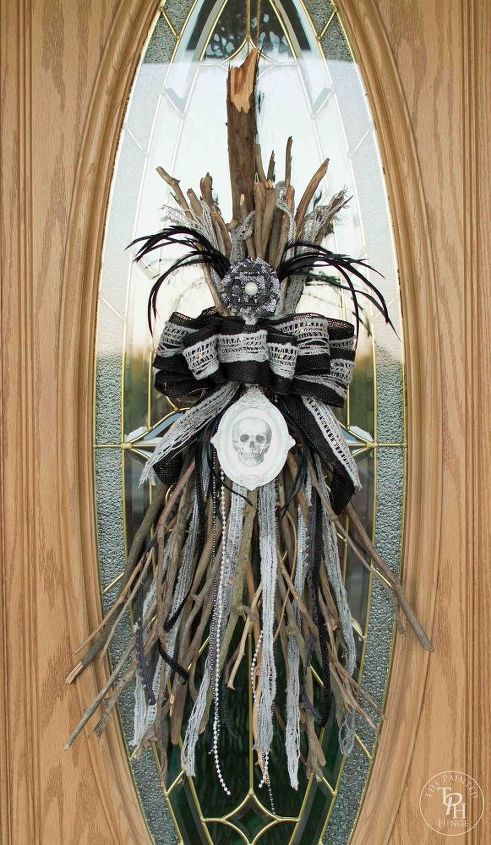
Witches Broomstick Halloween Swag Tutorial

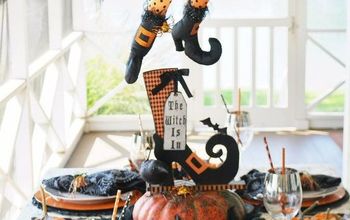
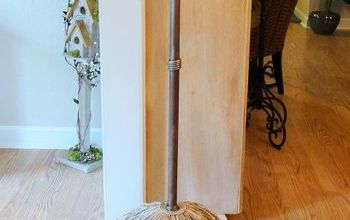
Halloween is just around the corner! I’ve been wanting to do some kind of witch broom to hang for a Halloween swag on my front door for Halloween, but I never liked the idea of hanging it upright from the top of the broom handle (the broom part where all the “pretties” were at would be low on the door instead of eye level) or hanging it upside down (anything I wanted to drape up would end up draping down- gravity and all).
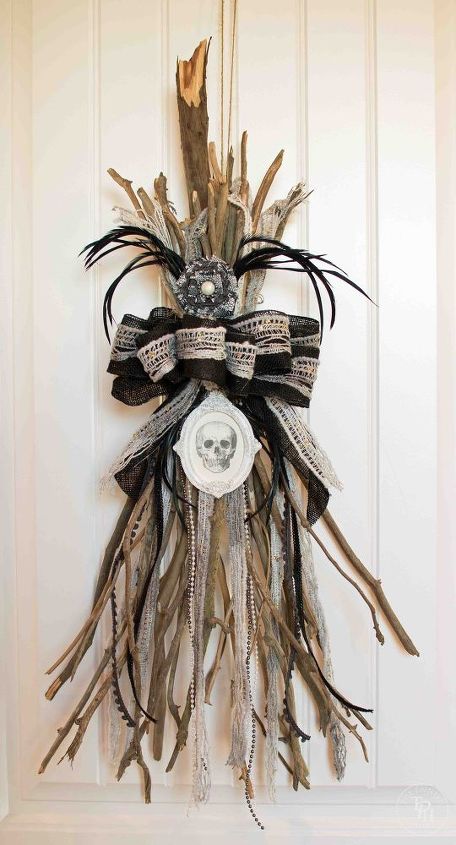
Then I thought, well, why not just do a broken broomstick? Witches break their broomsticks every once in a while just like everyone else, right?
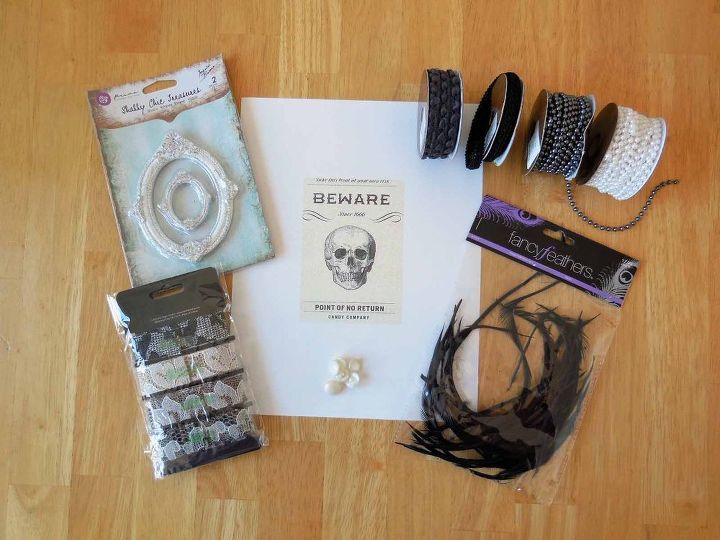
Here’s what you’ll need:


•Around 25 dead branches, each around 2 feet long long and roughly the diameter of a pencil at the thickest point (The ones I used here are from our 100+ year old redwood trees)


•One dead branch with a broken end, one foot long and roughly the diameter of a broomstick


•2 1/2″ x 10′ black burlap ribbon


•One skein Patron’s Pirouette yarn in Silver Sparkle (you won’t come close to using the whole skein)


•1/2″ x 1 1/2′ waistband elastic


•glue gun and glue sticks


•4″ x 6″ oval Shabby Chic resin frame


•Skull printout (or whatever you’d like to put in the frame)


•Plastic string pearls, white and gunmetal


•Lace-lined burlap ribbon


•Fabric ribbon, black and grey


•Black feathers


•Pearl button
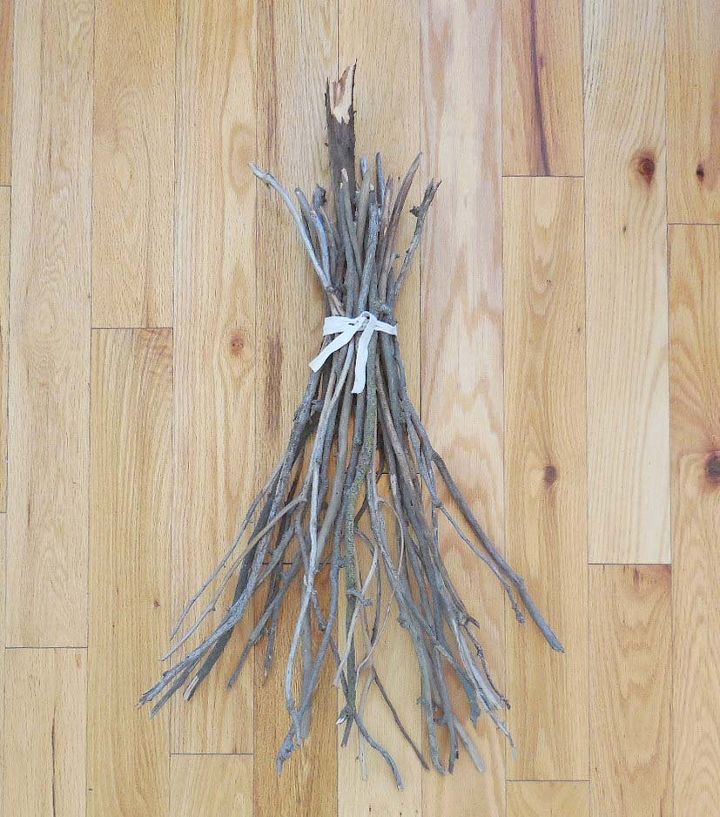
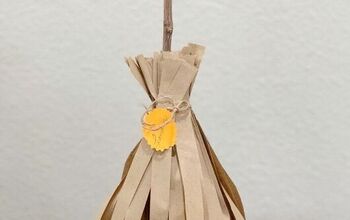
Bunch up the little branches, smallest ends pointing down, around the big branch, broken end pointing up, and tie with the waistband elastic. The waistband elastic keeps the branches secure so they don’t slip out, but allows enough flexibility to move them around to position.
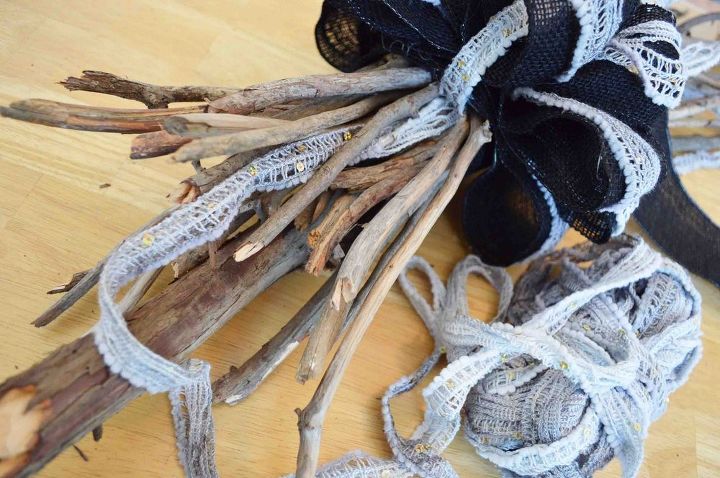
Cut enough of the burlap ribbon to wrap twice around the elastic and secure with glue.


Use the rest of the burlap ribbon to make a bow, then glue it on top of the burlap piece.


Run the yarn over and under the bow loops, securing between each loop with a bit of glue. Spread the yarn out over the loops.


Run more yarn from the bottom of the ribbon to the end of the branches, securing at the top with glue.


Do the same to the tops of the branches, securing at the bottom with glue and running the ribbon around and through the branches so they stay up.


Make another smaller bow with the lace lined burlap ribbon, string pearls, fabric ribbon, top it off with a pearl button, then glue it on the swag over the big burlap bow. I’m not going to go into a step-by-step of how I did it because I had no idea what I was doing and I just got lucky that it turned out anything near resembling a bow. There are a ton of directions on how to make a proper bow on the internet (of which I obviously followed none). And if you really don’t want to try making one, there’s always a lot of really cute premade ones you can buy.


Cut out the skull printout to fit the back of the picture frame, attach it with glue, then glue it on the swag underneath the big burlap bow. Run a few strands of beads and fabric ribbon from the bottom of the ribbon to the end of the branches, securing at the top with glue. Glue on a few black feathers on either side of the smaller burlap bow and the picture frame.
I hope you enjoyed this tutorial! For more picture of the process and of the finished project, please click on the link below!
The Painted Hinge
Want more details about this and other DIY projects? Check out my blog post!
Go
Frequently asked questions
Have a question about this project?
Comments
Join the conversation
 2 comments
Next