


How To: Cheap & Easy Handmade DIY Christmas Cards

It’s the most wonderful time of the year! And what better way to spread Christmas cheer than to send those you hold dear a Christmas greeting through good ole snail mail. I’m going to show you how to make easy handmade DIY Christmas cards that are sure to bring a smile and a chuckle to your family and friend’s face.
I’m going to be honest, I’ve never quite understood the whole Christmas card thing. This is just my personal opinion and observation, but paying to get professional photos taken, then a generic card designed and printed with nothing more than a “happy holidays'” slogan always felt boastful and in-genuine. I definitely understand that its all done with good intentions. But I think the way most do Christmas cards these days has lost its meaning over the years.
With that being said, its a tradition I definitely wanted to partake in but had my own ideas for how I wanted to spread Christmas cheer. I have gone the DIY route for the last five years, and have been told my cards are always an unexpected breath of fresh air. Let me show you how to create unique and heart felt Christmas cards that will cost even less than the traditional Christmas card route.
STEP 1: Plan and purchase your cards
Who remembers the old “elf yourself” Christmas videos you could create and send via email back in the day? I think that concept inspired my handmade DIY Christmas cards I have designed and created the last five years.
The very first year I had the idea, I came across these cute cards with a Christmas reindeer on them at Dollar Tree. I was single and only had a handful of college friends I wouldn’t be able to see for the holidays, and had the idea to glue my face on the reindeer and send them out.
For more inspo, visit emilyronehome for photos of past year's cards!
I had so much positive feedback and had so much fun making them that I decided to do it again the next year with the addition of my then boyfriend (now husband’s) face riding in a Christmas bus.
So, the first step is to choose your Christmas cards. Over the years, I have seen and chosen cute cards at multiple retailers including Dollar tree, Target’s dollar spot, TJ Maxx, Marshals, Home Goods, Micheals, and Hobby Lobby. This is by no means an all inclusive list, just gives you a place to start.
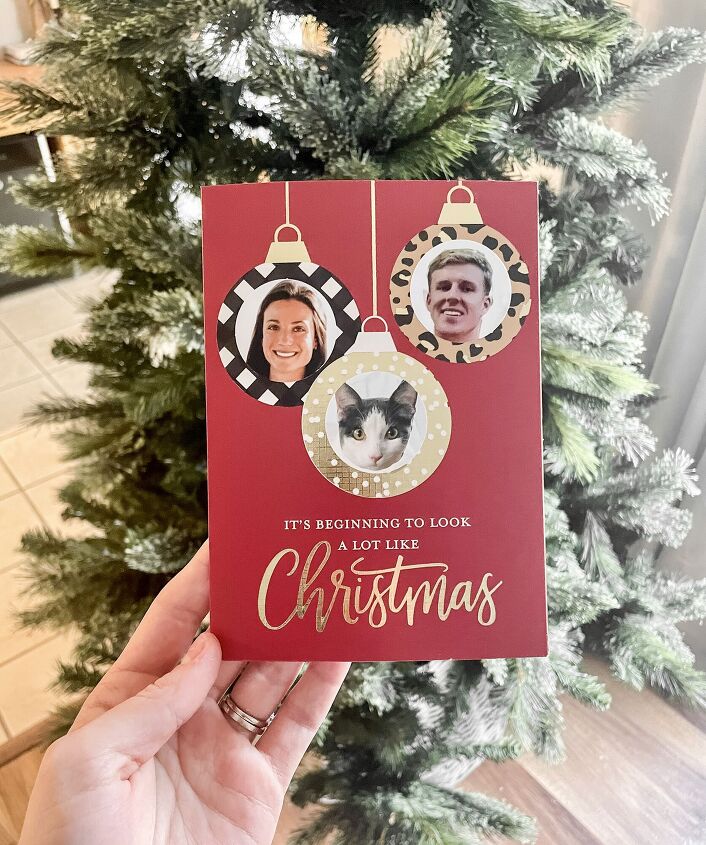
I also choose my cards based on the number of faces that will be included. For example, the first year it was just me, then me and my boyfriend, and it is now me, my husband and my cat, Oliver. I chose a card last year and this year with three good spaces for each of our faces.
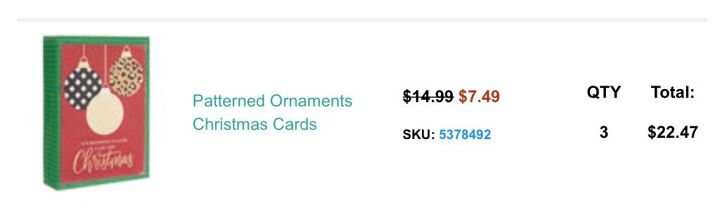
This year, I chose these cards online from Hobby Lobby with plans to put our faces on the ornaments.
STEP 2: Create face photos and print
Each year, as the number of cards I send out has increased so has the amount of time I must spend making them. Last year, I sent out about 50 cards. Cutting out three faces per card by hand was too much (that’s 150 faces!). This year, I decided to work smarter not harder. I chose to use a large 1.5 inch hole punch to extract our faces. So much quicker!
So, the photo editing process looked a bit different this year too. I muted the colors behind our faces in the photos to help everything look more uniform. I will explain the whole process below.
Choose photos
I do try to choose faces from photos of us from the past year to keep things relevant. It’s ideal if you can choose faces from the same photograph so that skin tone and lighting matches. But it’s not the end of the world if you can’t.
Mute background colors
There is more than one way to do this, but I prefer to edit my photo in Instagram first.
*Note- this step is not necessary if you choose to cut out each face by hand. I chose to add additional editing steps to my process this year since I decided to use a hole punch.
In Instagram, open the photo you wish to use as if you were going to add it to your story. Then, choose the “draw” button.
**for more pictures to illustrate this process, visit emilyronehome!
With the color white chosen, press and hold the 3rd “highlighter” button down for >1 second. This will add a white film over the entire image. Next, choose the eraser at the far right and carefully erase the film from the face until it is all removed.
Repeat the process for all faces you plan on using. Then you will use a photo editor (I prefer Canva) to put all photos on one page together. Putting all three faces in one image will help save money when you get the photos printed.

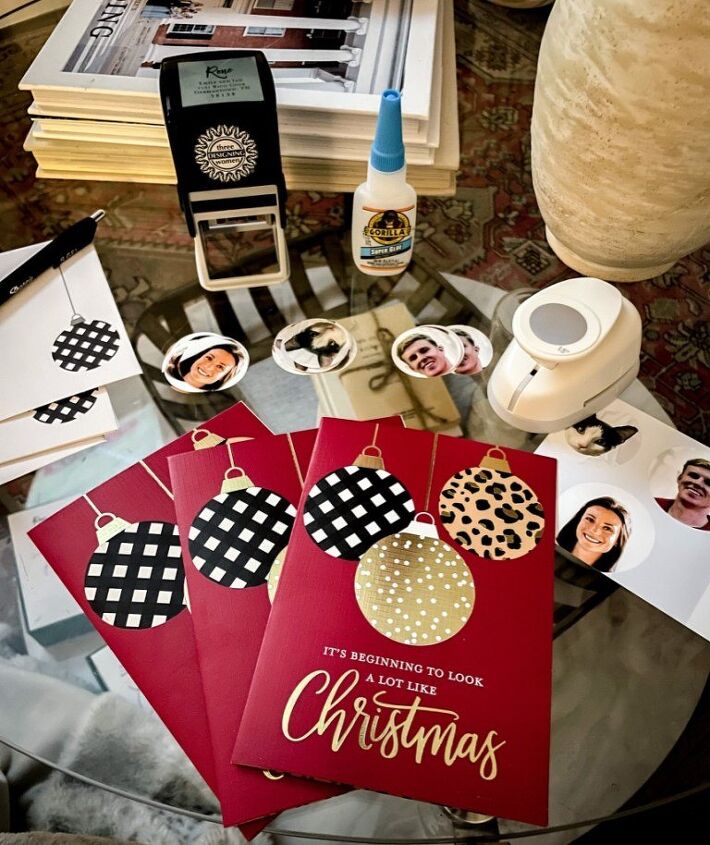
STEP 3: Assemble cards
Using your preferred photo printing service, send you image with all three faces to be printed. I usually send just one copy to be printed through the Walgreens app at a time until I have the sizing just right.
The print is usually ready within a few hours. Then, I assess if the images are too big or too small. Make changes, and re-order a print until you’ve got the sizing perfected. This year, I printed 4x4s and used a 50% off promo code offered through the app.
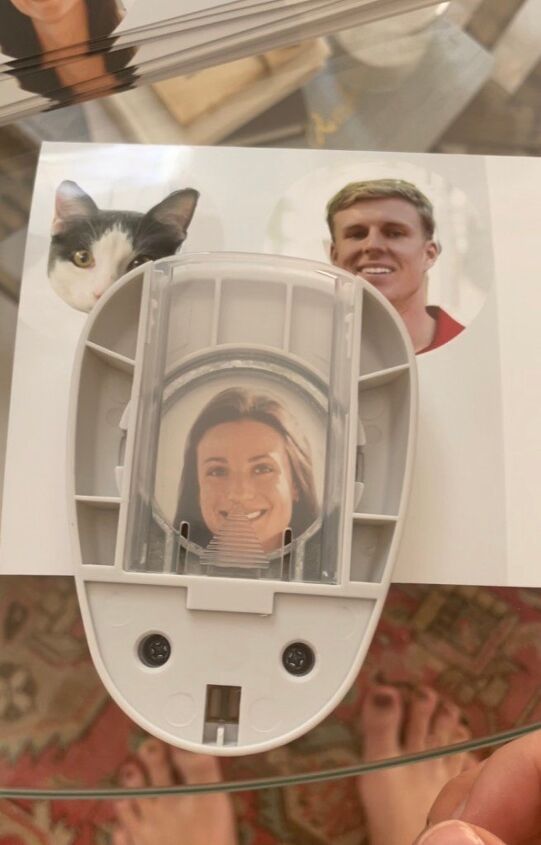
As I mentioned earlier, I used a 1.5 inch scrapbooking hole punch to cut out the faces. The great part about this hole punch is that there is a window on the bottom. You can see exactly where you are on the photo so you can line it up perfectly. Punch out all the faces using this method.
Once your faces are punched out, apply a thin layer of superglue to the back and press them onto your cards.
You will get into the groove and feel like you are working in Santa’s workshop on an assembly line! If your family is interested in helping, having more sets of hands and letting each person do a different step can speed up the process.
These cards usually have a short message on the inside, and I finish them off my adding a personalized, handwritten message and signatures to each.
STEP 5: Mail your Easy Handmade DIY Christmas Cards
It’s time to stamp and mail your easy, handmade DIY Christmas cards! These were so quick and easy, so I’ve had time to craft a few other holiday projects this year, including:
- DIY Christmas Swag Wreath
- Dried Oranges
- DIY Vintage Mercury Glass Ornaments
What do you think? I hope you feel this is a better alternative to the generic Christmas card you receive from so many others each year. And my grand total for 75 cards was $37.10 this year (plus postage). Not too bad! I’d love to see your cards if you choose to go the DIY route.
Comments
Join the conversation
-
Really good! First time in 30 years not sending a newsy letter, because there is no news! This is a perfect way to stay in touch in a personal way. Thanks so much for the inspiration!
-
This is such a great idea for Christmas cards. I make all my cards but have never thought of this idea. Thanks for sharing.


Frequently asked questions
Have a question about this project?