


How to Tie an Easy Gift Bow
Make this simple gift bow in three easy steps for prettier presents sure to impress! ⟹
December is well underway and you’ve probably begun or even finished your holiday shopping (I’ll admit I just began this week). This means now it’s time to wrap some gifts! I’ve loved beautifully wrapped gifts ever since I was a child. My father would have my mother’s gifts wrapped by the store and I would take in every detail…the perfectly creased paper, the little adornments, but most of all the bows! I always made sure we saved them to reuse because they were too pretty to throw away. It was a mystery to me how they made such beautiful bows and I was in awe of their skills!
But now in the age of the internet, Pinterest, and YouTube, it’s possible for us to be in on some of the pro’s wrapping secrets. Plus, now we have access to beautiful and affordable ribbon, where when I was a kid, it was those awful stick on bows with the matching waxy, shiny ribbon.
There are all kinds of ways to tie a beautiful bow, ranging from super simple to more complex. I use this easy way because if I’m being honest, I don’t want to spend the time making each gift a masterpiece, but I do want to make it special.
So today I’m going to show you this really easy way to tie a gift bow that is my go-to.
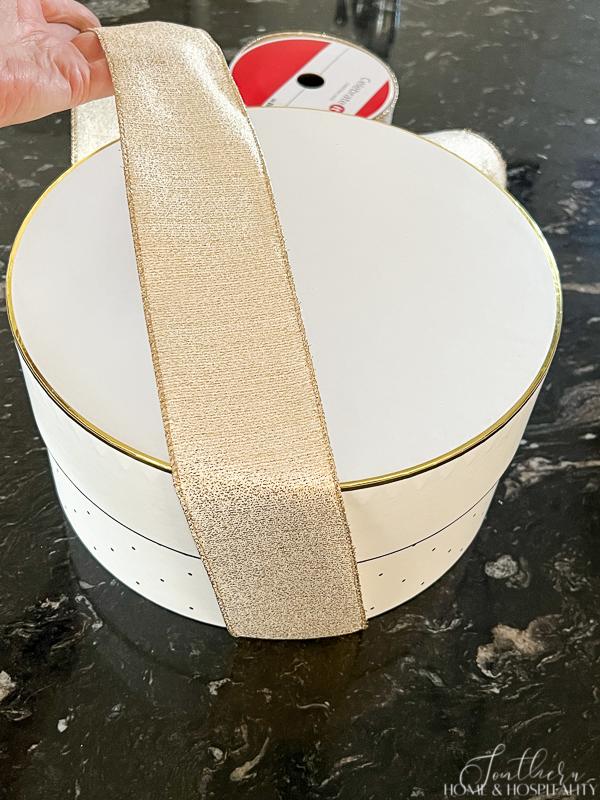
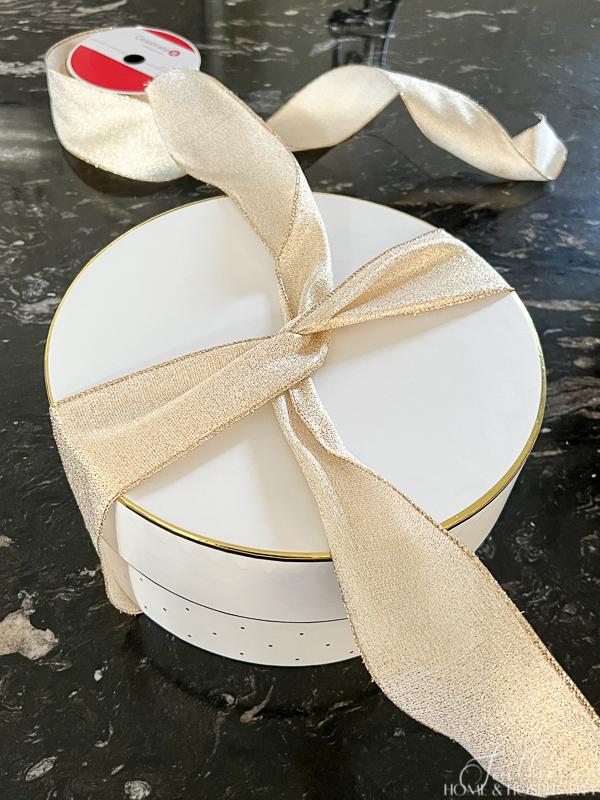
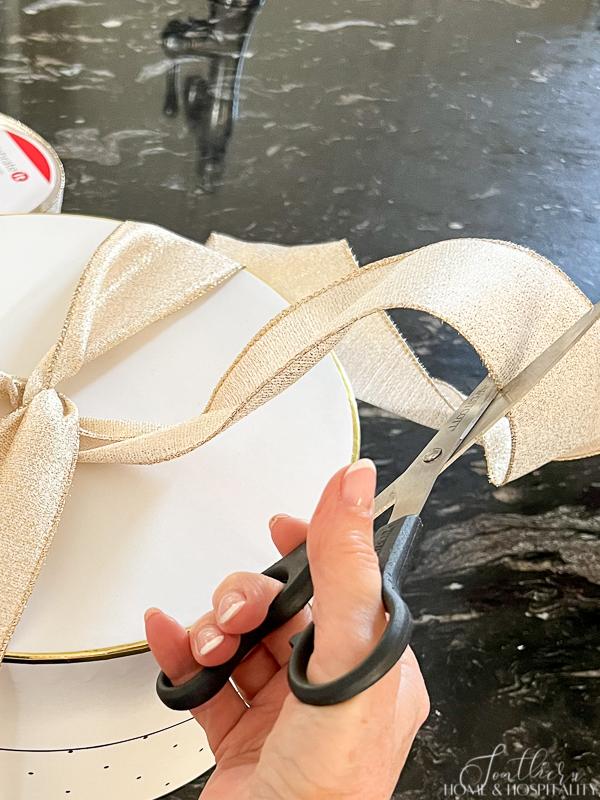
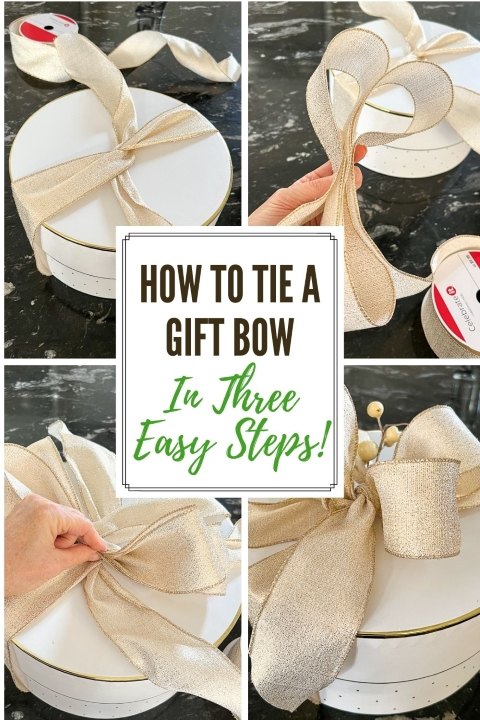
Cut a length of ribbon to tie around the package taking how long you want the tails to be in mind with a tad extra to allow for the knot. (You can trim them again when you are finished.) Tie it around the gift where you will want the bow. Cut it off from the spool if necessary.
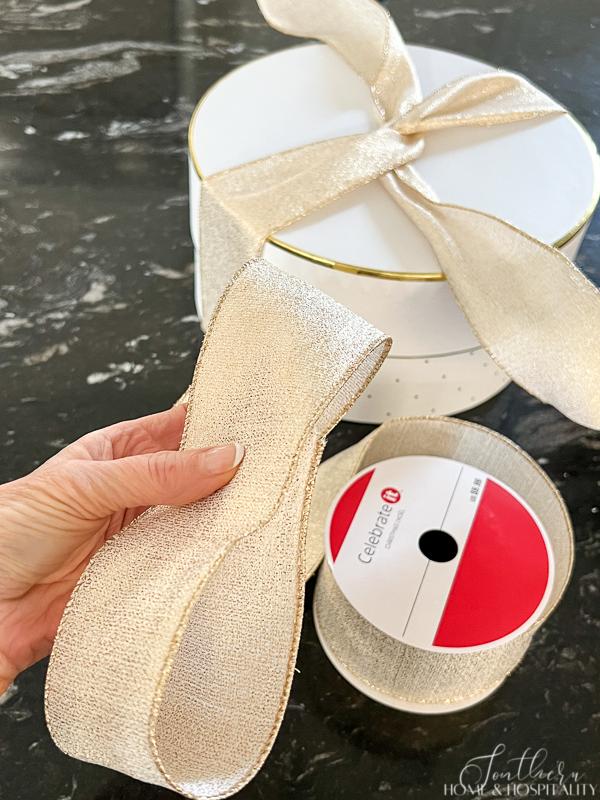
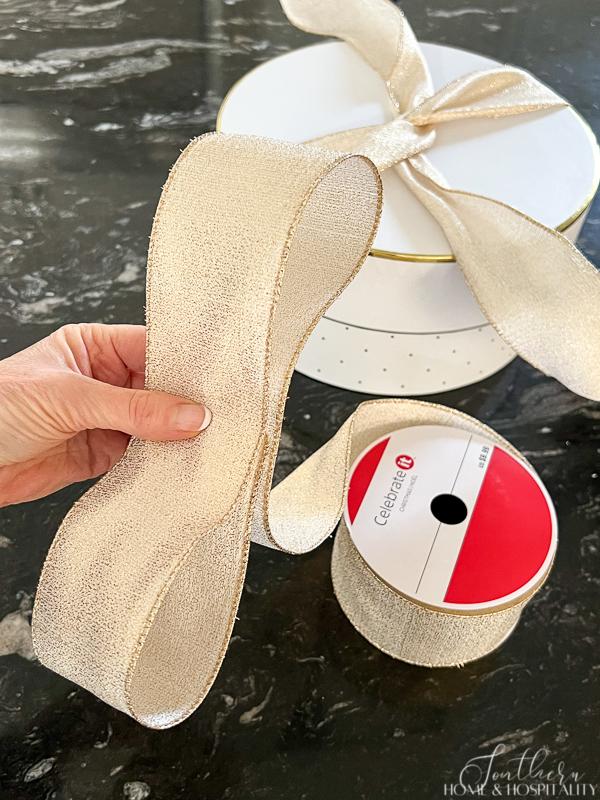
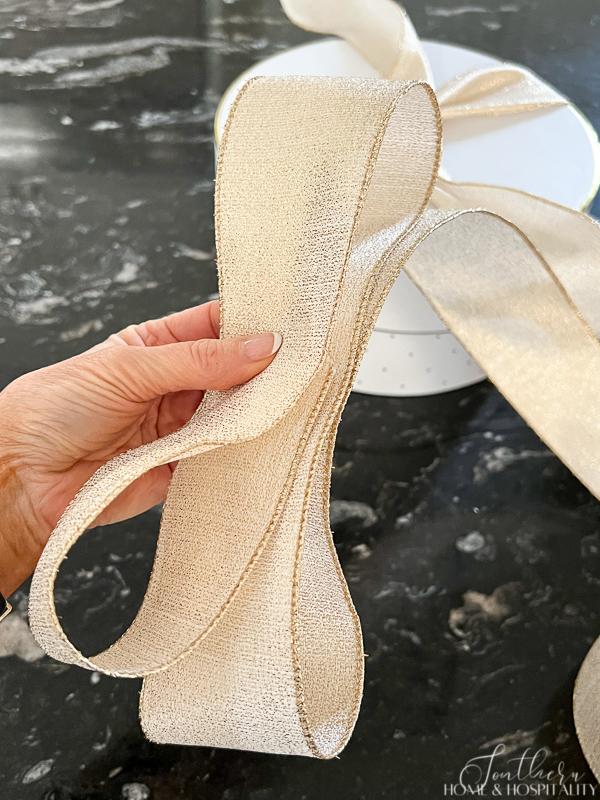

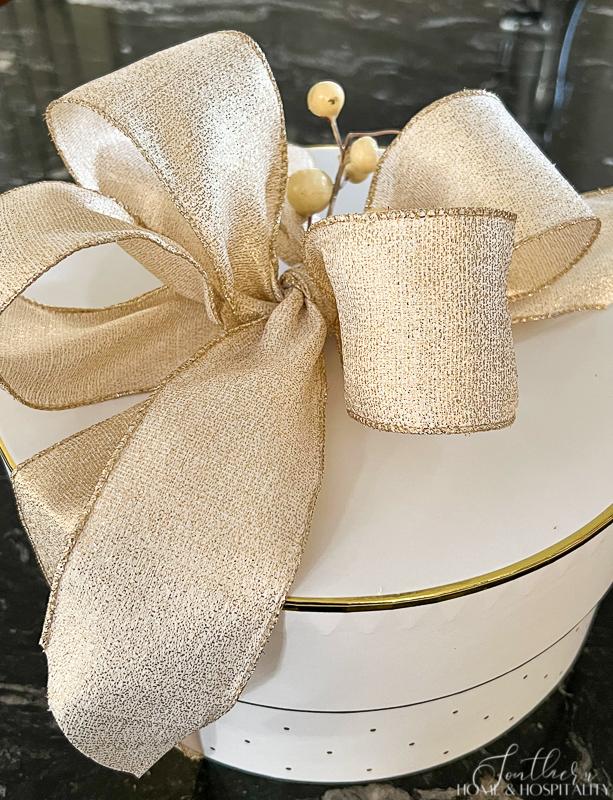
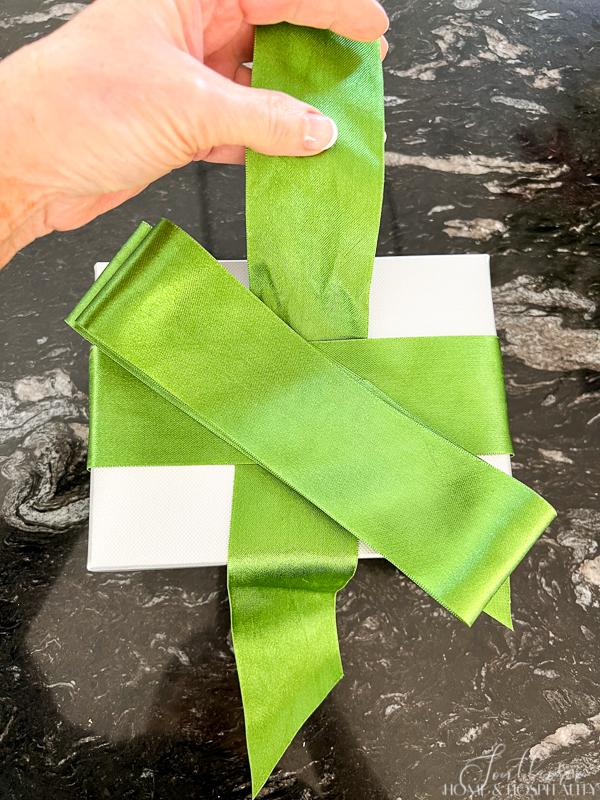
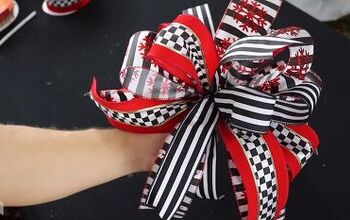
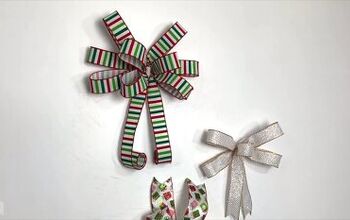
Take a second piece of ribbon and make a loop the size you want half of your bow to be. Make a matching loop on the other side. This will be the width of your whole bow. Continue making loops back and forth until you have 2 or 3 loops on each side.
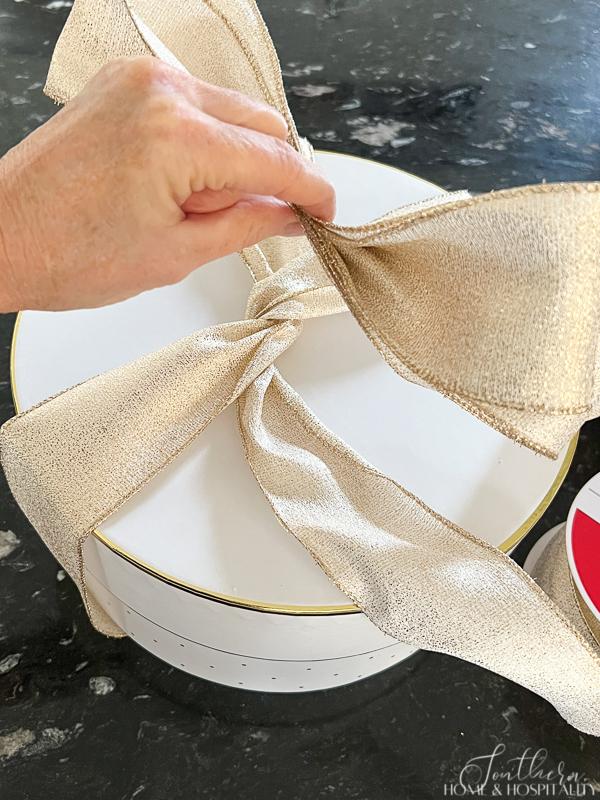
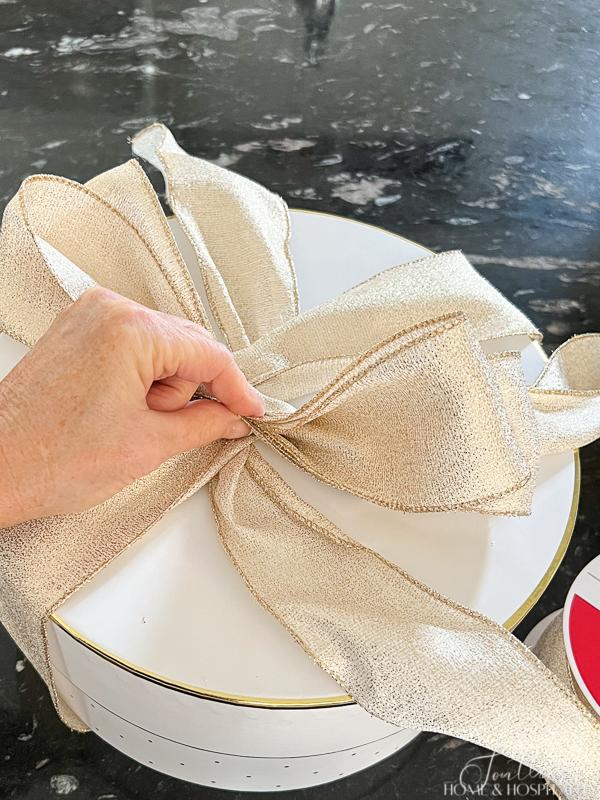
Lay the loops on top of where the ribbon is tied on the package and tie the first ribbon again around the center of the loops.
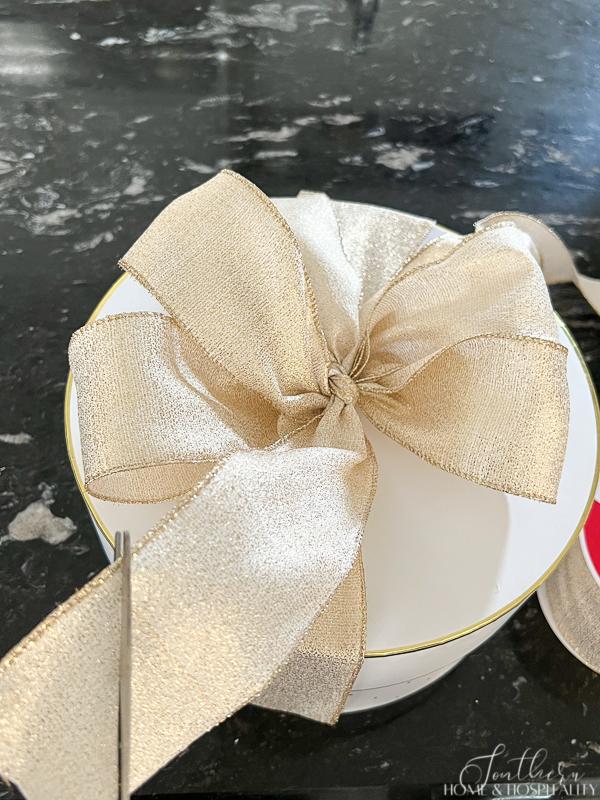
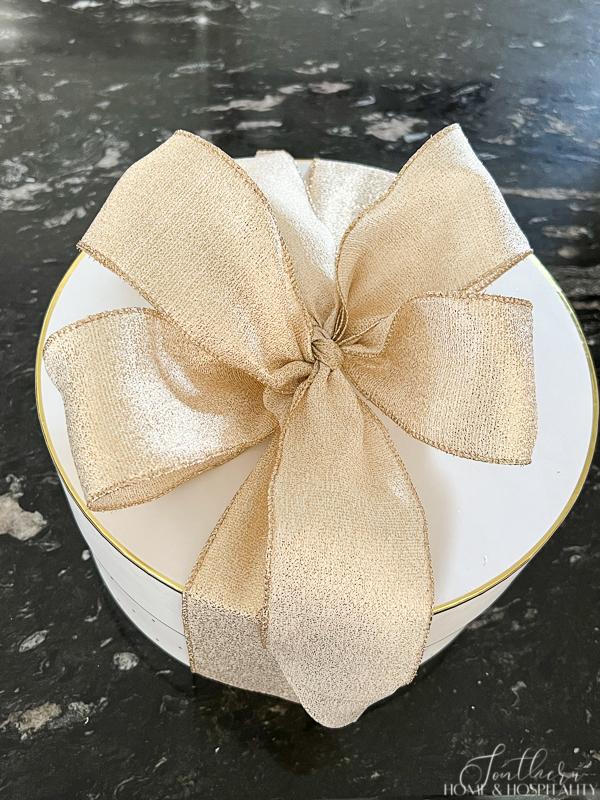
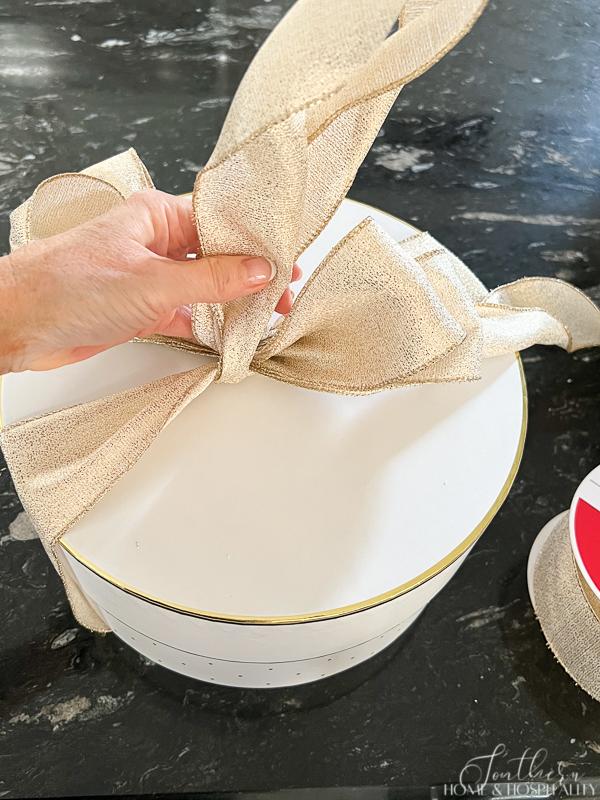
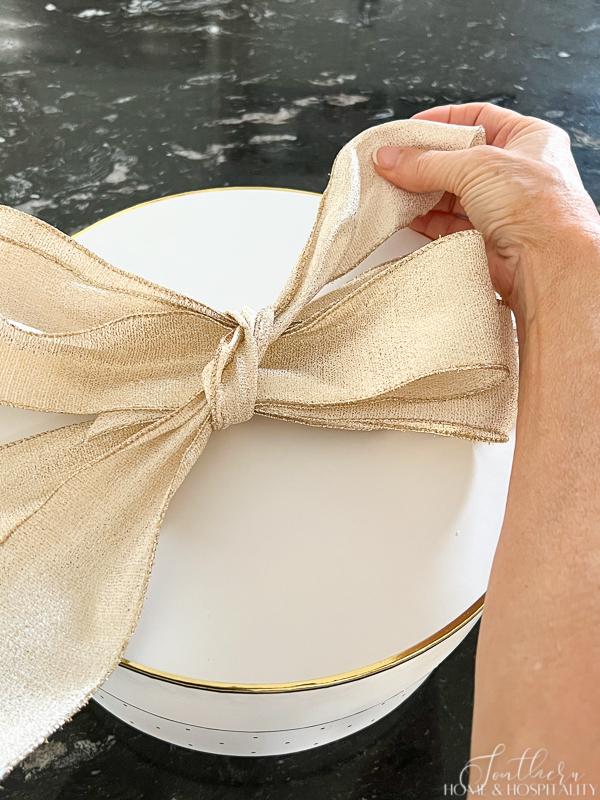
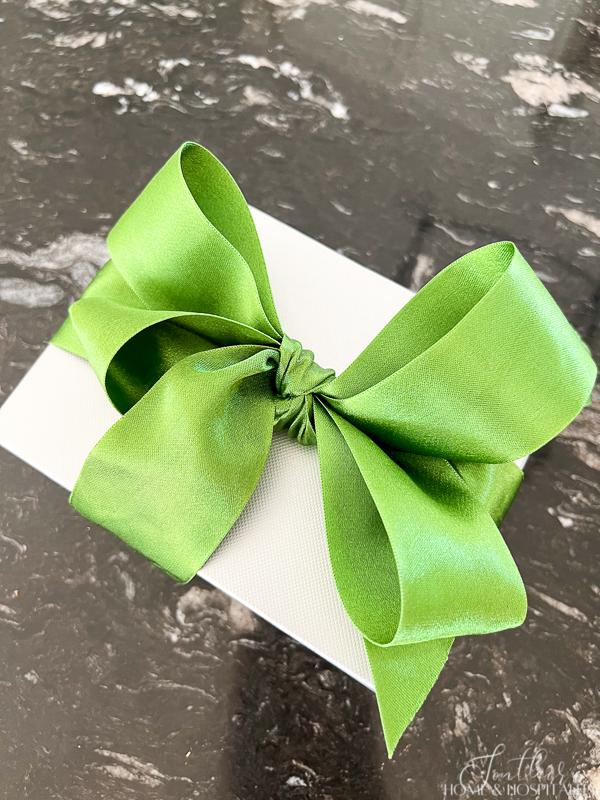
Pull apart and fluff the loops. Cut the ends of the tails if necessary. Then arrange and zhush the loops and tails on top of the package until pretty!
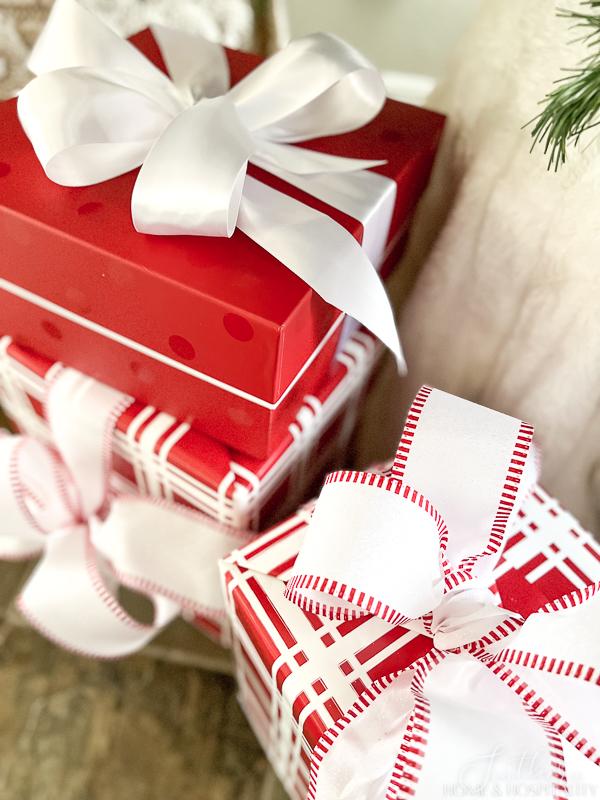
- The most common size bow using this simple method is to make four or six loops (2-3 on each side). For this demonstration I’ve done a four loop bow but you could do just two to four or more, depending on how full you want it and the look you’re after. I often use the four loop bow because it is a little more casual plus it saves ribbon!
- You can make the bow on its own by not tying the first length of ribbon around the package. Cut the first piece with the length of tails you want and slip it under ribbon already attached to the package. Make the loops with the second ribbon and tie the first piece around the loops.
- If you are using a ribbon that isn’t two sided, twist the ribbon in the middle where you are holding it when you bring it back and forth making your loops.
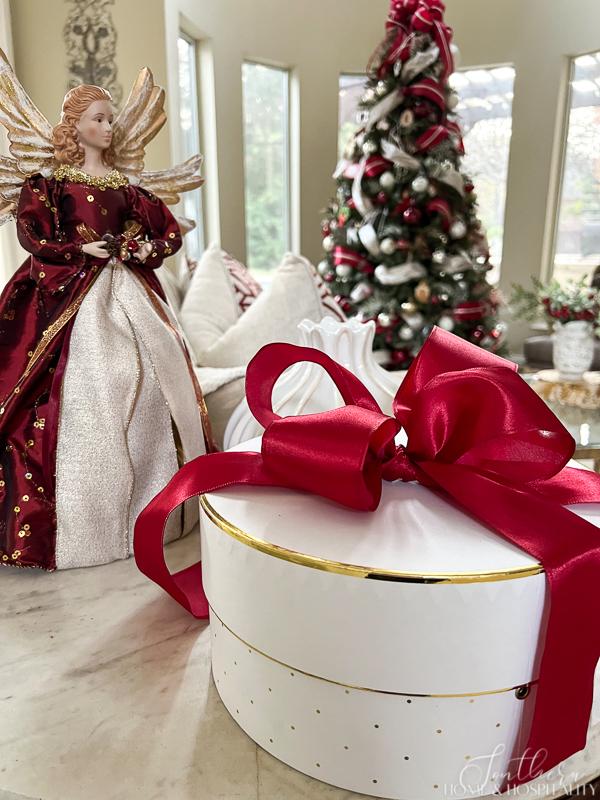
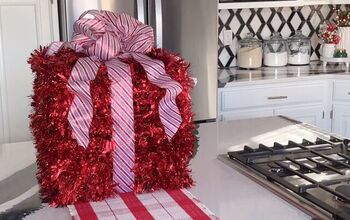
- Tuck in a little something extra to make the gift even more special!
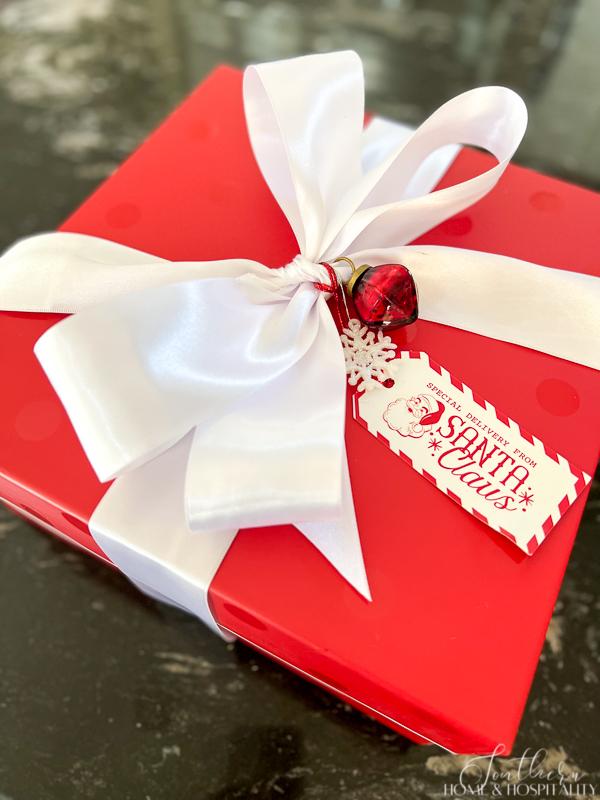
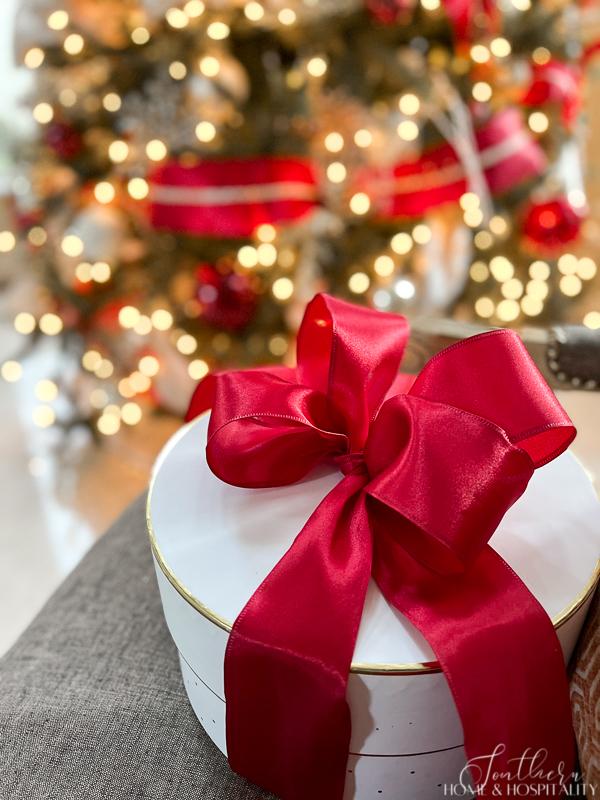
This kind of bow looks good with any type and texture of ribbon. The look of the bow will be much different depending on whether you use wired ribbon or not. I don’t mind that the loops don’t stand up for a nonwired bow. Personally, my favorite bows are made with pretty satin or grosgrain ribbon.
My friends and family can always tell which gifts I’ve wrapped because they always sport this pretty bow! I don’t want them to know how little time this really takes!
Happy wrapping!!

As always, I appreciate your visit, comments, and shares here! And don’t forget to subscribe for updates to keep in touch and to follow along with me on Pinterest, Instagram, and Facebook!!
Pin this for later:
Remember to pin this to your Pinterest Gift and Holiday boards to refer to later. You can FOLLOW ME ON PINTEREST and see all of my pins plus lots of other inspiring ones that I’ve found and pinned!

Comments
Join the conversation
-
Thank you for sharing this


Frequently asked questions
Have a question about this project?