


How To Make Faux Mercury Glass Ornaments
Don’t you love the look of those beautiful mercury glass ornaments you see in all the expensive catalogs?? I certainly do! I’m going to show you how to make mercury glass ornaments that are shatterproof and look like the real thing!! Plus, they cost a fraction of the price of real mercury glass ornaments!!
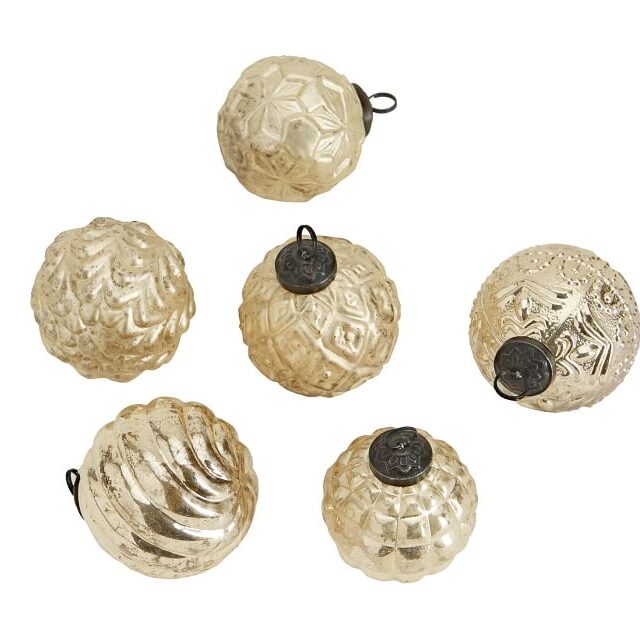
Inspiration Ornaments
One of my absolute favorite kinds of DIYs is to try and recreate something that I spotted in a high-end catalog. I love sharing how to get that expensive look for less. This holiday season I have a list of ornaments that I’m going to make that are inspired by Pottery Barn, Arhaus, and Anthropologie.
The faux mercury glass ornaments that I’m going to make are my take on this beautiful set from Pottery Barn. ( 5 ornaments for $39.50). Photo credit: Pottery Barn
Supplies for faux mercury glass ornaments
To make a set of the DIY mercury glass ornaments you will need to get Krylon Looking Glass Paint (it has to be looking glass paint, a silver metallic paint will not have the same effect), clear plastic ornaments ( I got mine from Hobby Lobby for $9.99 ), a spray bottle filled with a 50/50 mix of water and vinegar, and gold metallic paint.
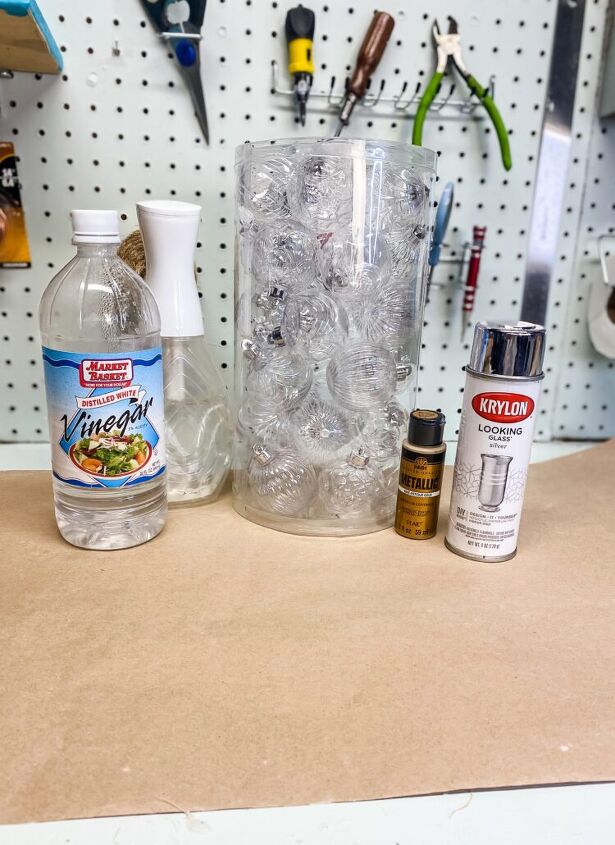
supplies
- KRYLON Loooking Glass Paint
- Clear Plastic Ornaments
- Metallic Gold Acrylic Paint
- Vinegar
- Water
- Hairdryer
Steps to make the mercury glass ornaments
step 1
This project should be done in a well-ventilated area. I’m in my workshop with an open window next to me. The fumes aren’t bad because you are spraying right into the ornament and not into the air.
Take the cap off of the ornaments and put them aside somewhere safe.
I did 5 short bursts of the looking glass paint right into the opening of the ornament.
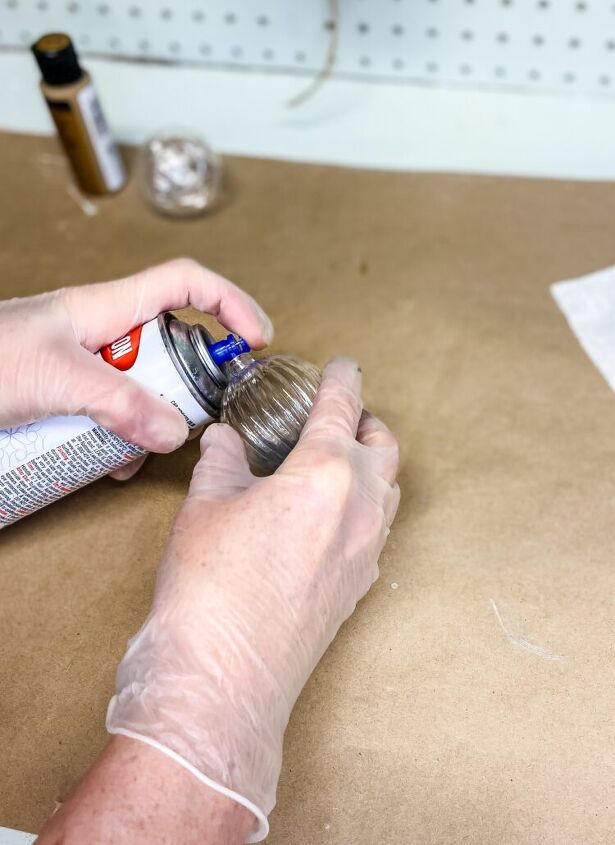
Then I rolled the ornament to spread the paint throughout the entire thing for about 20 seconds.
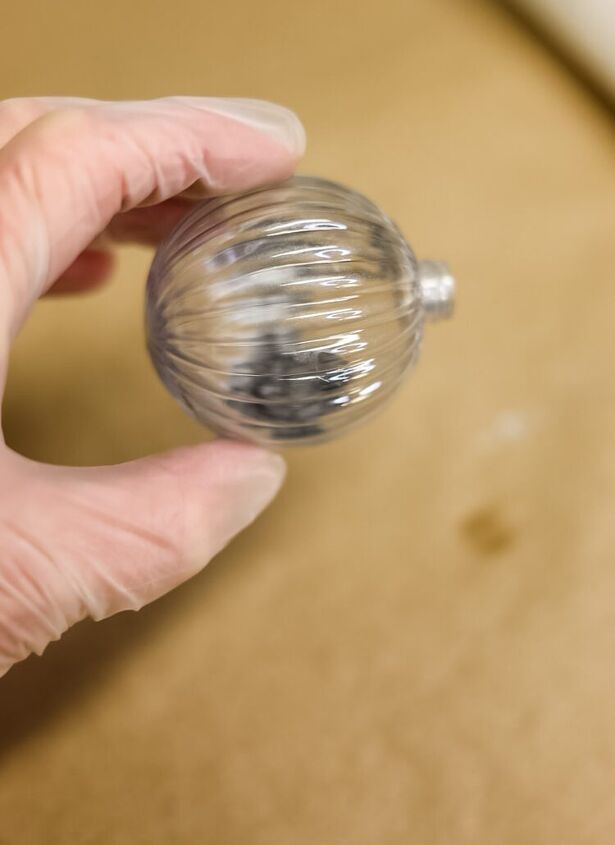
Take a hairdryer and while you are rolling the ornament aim the warm air over the surface of the ornament…you will see the paint transform as it starts to dry.
Only do this for about 20-30 seconds (you don’t want the paint completely dry).
step 2
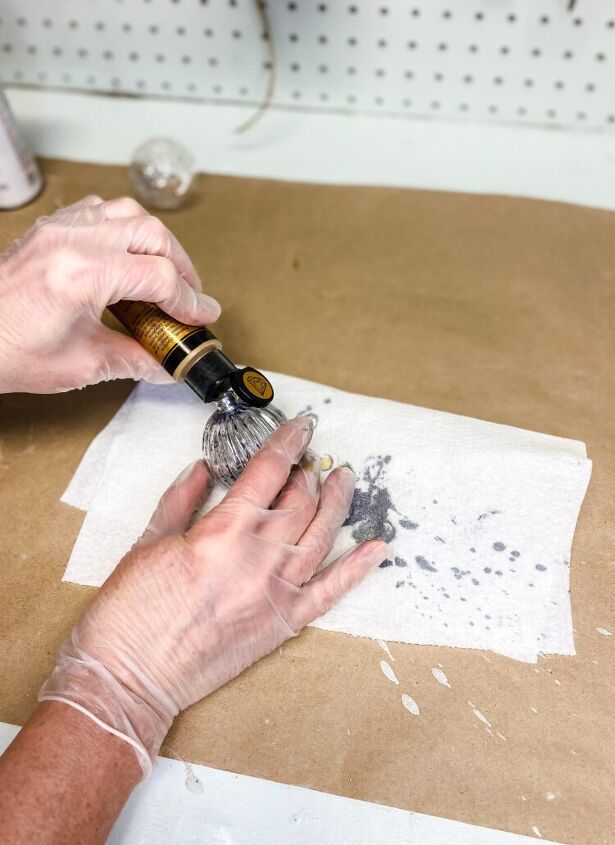
Then take your spray bottle with the 50/50 vinegar and water solution and do a couple of quick squirts inside the ornament…cover the end with a paper towel and shake the heck out of it!!
I tapped out the excess vinegar before hitting the opening with the hairdryer. (it doesn’t have to be on super hot either) until it looked dry.
For some of the ornaments, I needed to repeat the paint & vinegar step again because the coverage didn’t look great.
step 3
I added a squirt of antique gold acrylic paint into the ornament.
Then covered the end and shook the ornament until the paint was dispersed.
I turned on the hairdryer and rolled the ornament while hitting it with the warm air on both the outside and inside,
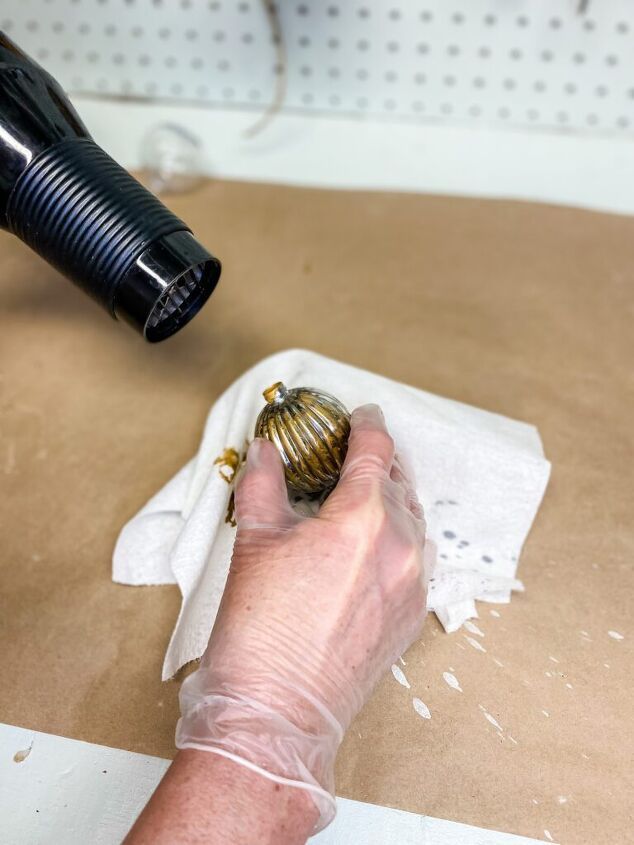
Put them aside to dry completely. The paint will develop more as it dries.
While I waited for the paint to dry I spray painted the ornament tops with dark metallic spray paint.

review of the steps
- 5 QUICK SQUIRTS OF LOOKING GLASS PAINT, ROLL ORNAMENT TO SPREAD PAINT
- AIM HAIRDRYER OVER ORNAMENT FOR 20-30 SECONDS AS YOU ROLL THE ORNAMENT
- A COUPLE SQUIRTS OF THE 50/50 VINEGAR & WATER MIXTURE
- COVER END AND SHAKE ORNAMENT TO DISPERSE, TAP OUT EXCESS
- HIT IT WITH THE HAIRDRYER FOR 30 SECONDS
- REPEAT IF NECCSESARY
- ADD A SQUIRT OF ANTIQUE GOLD ACRYLIC PAINT INSIDE ORNAMENT. COVER END AND SHAKE
- HIT IT WITH THE HAIRDRYER TO DRY PAINT FOR ABOUT 30 SECONDS.
- LET DRY COMPLETELY
After you make a couple and get the hang of it it only takes 2 minutes to make them and you can get a bunch done quickly!
variation to try
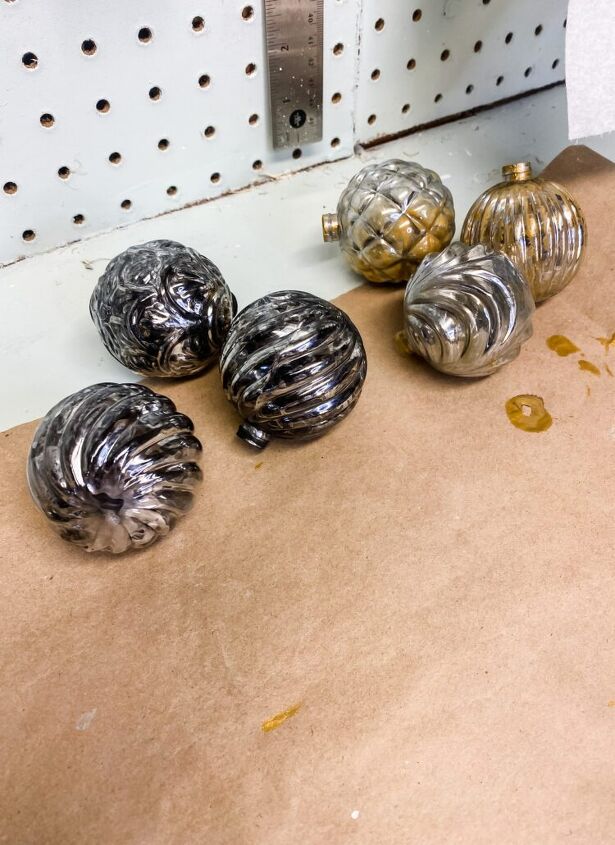
I made a few ornaments using black acrylic paint instead of the gold and they came out so cool looking too! They looked antique.
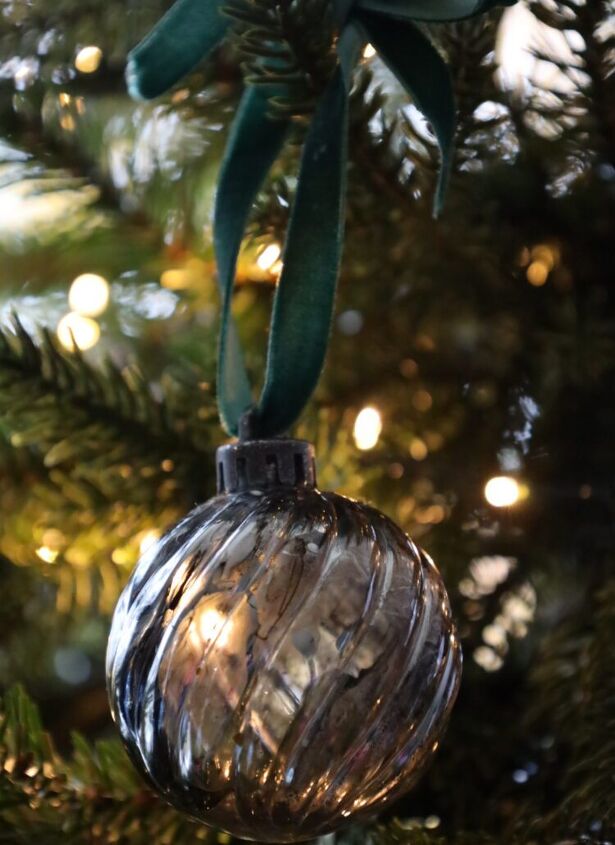
Finished DIY Mercury Glass Ornaments
Here’s one of the ornaments that I made using the black acrylic paint.
Here’s a few of the ornaments using the antique gold paint. Aren’t they pretty??!!
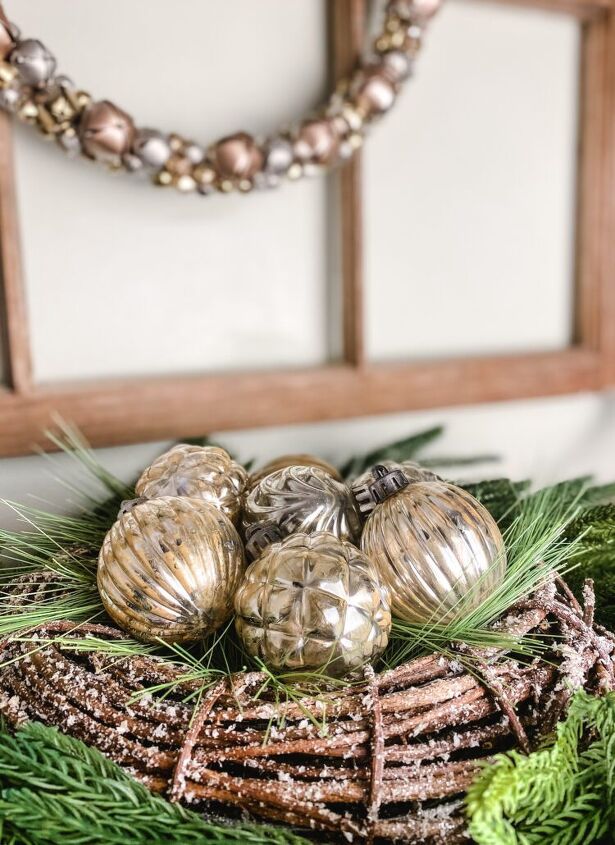
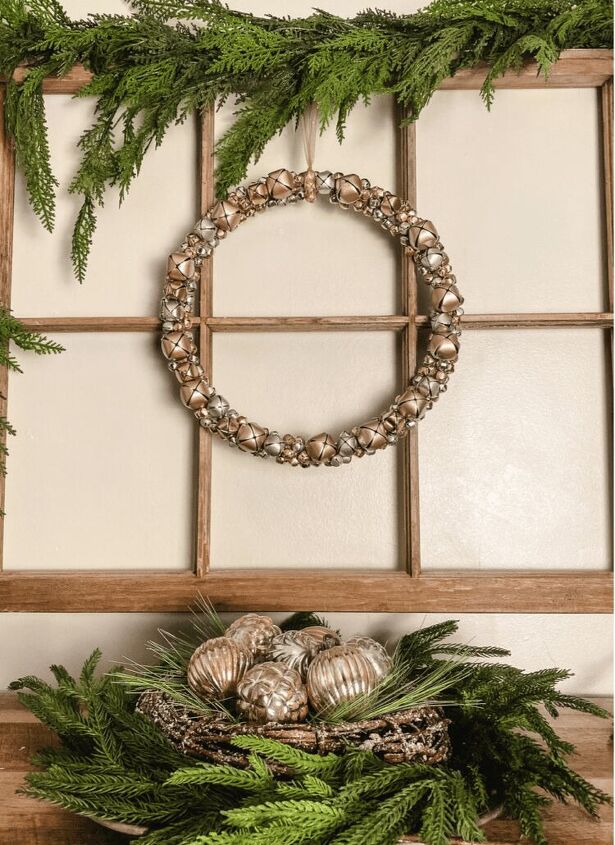
To make this quick Christmas display I used a vintage round silver tray and popped on a small grapevine wreath. I surrounded the tray with a few faux greenery picks before adding the faux mercury glass ornaments into the center.
I have it on the top of a bookcase with the DIY Jingle Bell Wreath that I made the other day hanging on the wall.
Looking for more Christmas Ideas… I have lots to get you in the holiday spirit! You can see them all right here.
DIY Christmas Decorations
Resources for this project:
See all materials


Comments
Join the conversation
-
I love mercury glass. Your ornaments are beautiful. I love them in the grapevine “bowl”, and I love the velvet ribbon! With grandkids, it’s much safer to use the plastic! 👍😁. Great job! Thanks for sharing! 🎄
-
What a creative idea! I love this one!


Frequently asked questions
Have a question about this project?
I wonder if it would work in glass ornaments ?
Do I need to water-down the acrylic paint?
Can you do this with dollar store glass vases or even mason jars?