


How to Make a Beehive Pinata, Teddy Bear Picnic Birthday Party Craft
Last weekend we had a Teddy Bear Picnic at our house to celebrate our little guys birthday. It was an adorable theme that wasn’t too much work to pull together. I had some crafty fun a few days beforehand making a beehive pinata to hang on the tree near the picnic table.
I found a brief article from Country Living with an amazing inspiration photo. This was pretty simple once I got going, but I sort of felt like I was winging it! While it takes a couple days to make because of dry time, it came together quickly. I thought it would be fun to share a little tutorial on how to make a beehive pinata, since I couldn’t find a thorough tutorial online.
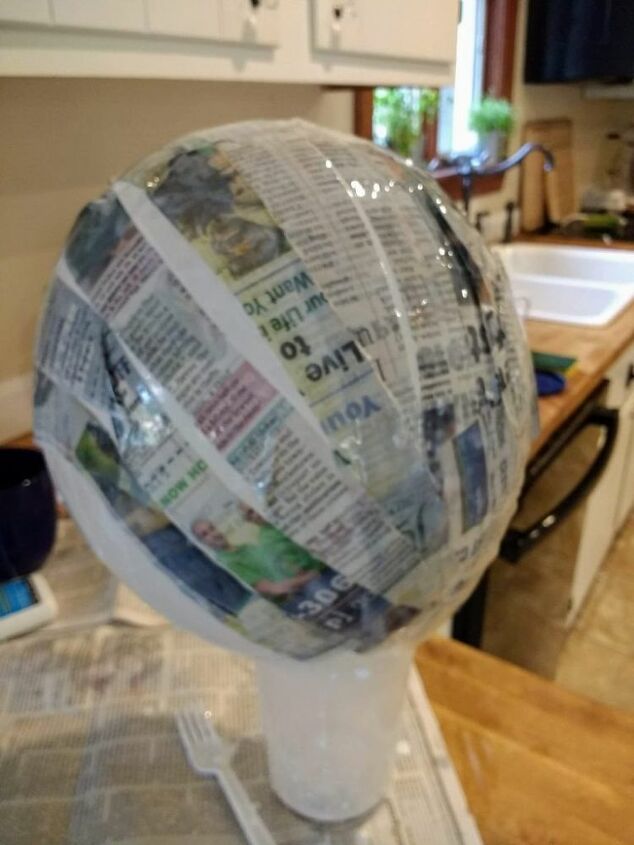
Just like most homemade pinatas, I started with a large balloon. I blew it up large, but not overfull. We definitely don’t want it to pop before the newspaper dries!
I set the balloon in a round plastic container, and started on the glue mixture. For our pinata, I used school glue and water mixed 50/50. (Come party time, I was surprised how tough this was to break! Will likely add some flour in next time.)
Next, I cut newspaper into long, roughly 1.5″ strips.
Then, it was time to get messy! I dipped the newspaper into the glue mixture and began applying it to the balloon. Time for fifth grade science project flashbacks!
Other pinata tutorials said to let it dry between each horizontal and vertical newspaper layer, but I thought that was too many steps! I covered the whole balloon with newspaper strips first going vertical, then horizontal.
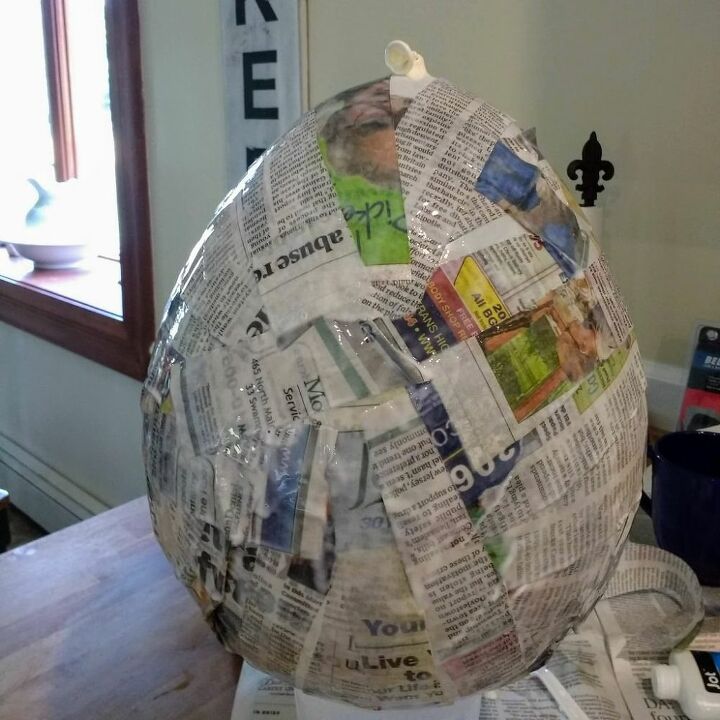
Once I felt like I had the whole thing mostly covered without too much overlap, I tied some string around the knot of the balloon and hung it to dry.
The next day, I added one more light layer of newspaper, mostly just going over any tiny gaps leftover. I just put more newspaper on willy nilly and hung it to dry again.
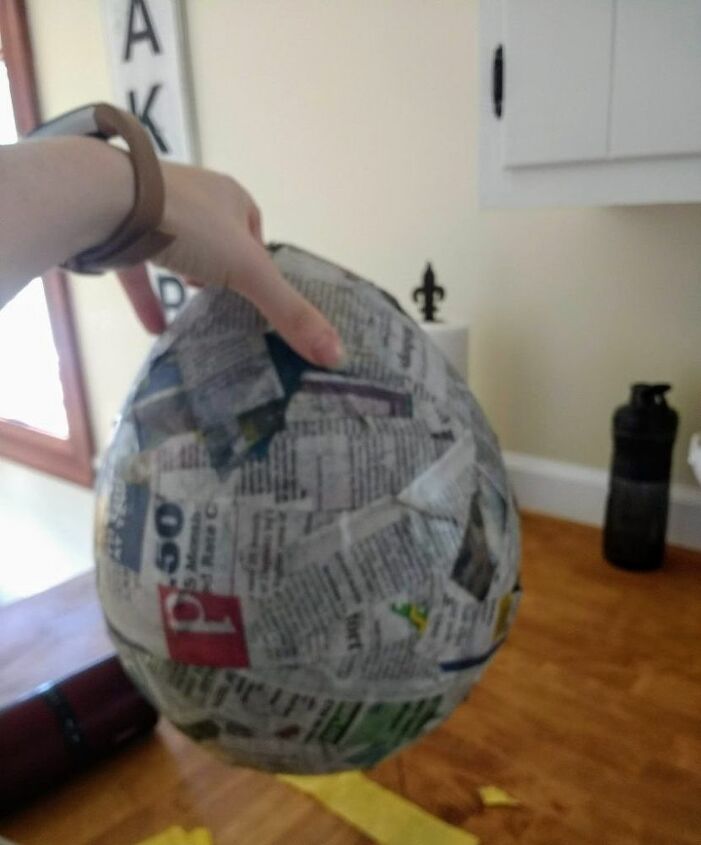
After that second layer dried, I popped the balloon and slowly let the air out. I was nervous my whole pinata would implode, but it didn’t! With a little shaking, the balloon came out the hole in the top.
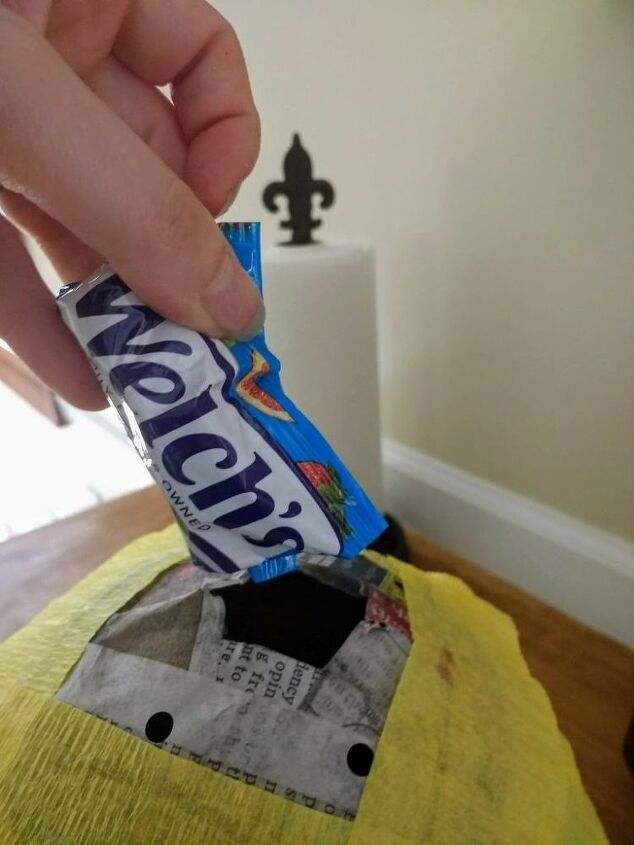
I shoved the treats into the top where there was a tiny opening. The weight of the treats helped keep it steady to decorate. I forgot to take a photo, but here is a picture of adding extra treats near the end.
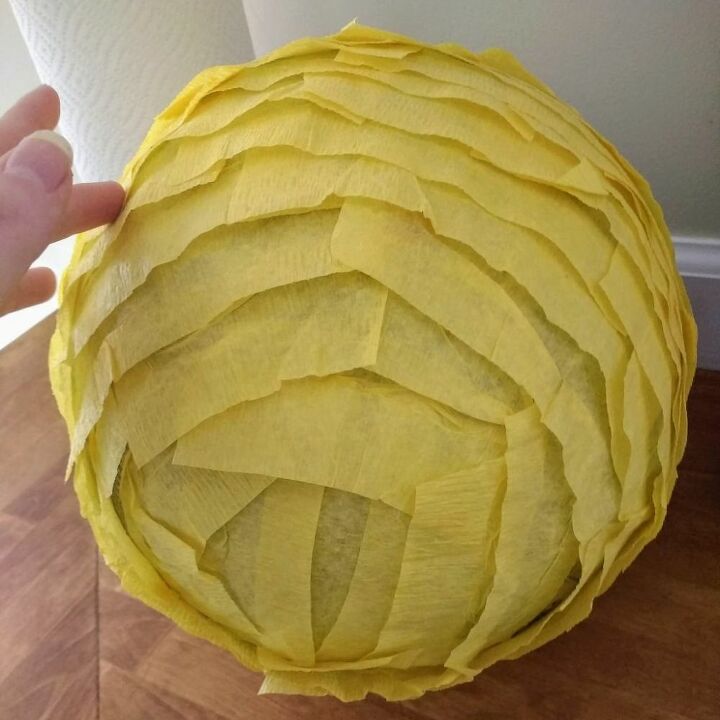
Time to get decorating! I used a glue stick to apply yellow crepe paper to the pinata in small strips, about 4-6″ long. I started as low as I possibly could at the base and went around in a circle to make the first layer. The second layer I glued on just above the first, so the crepe paper layer overlaps about half way. I attempted to sort of make it a staggered brick laying type pattern, repeating this up the entire pinata until i was near the top.
At the top, I realized I needed a much more substantial hanger than the few hole punched holes I originally planned on. The kids would have ripped the top before they had a chance to swing at it.
I found asumole video tutorial on YouTube for a hanger with cardboard and wire.
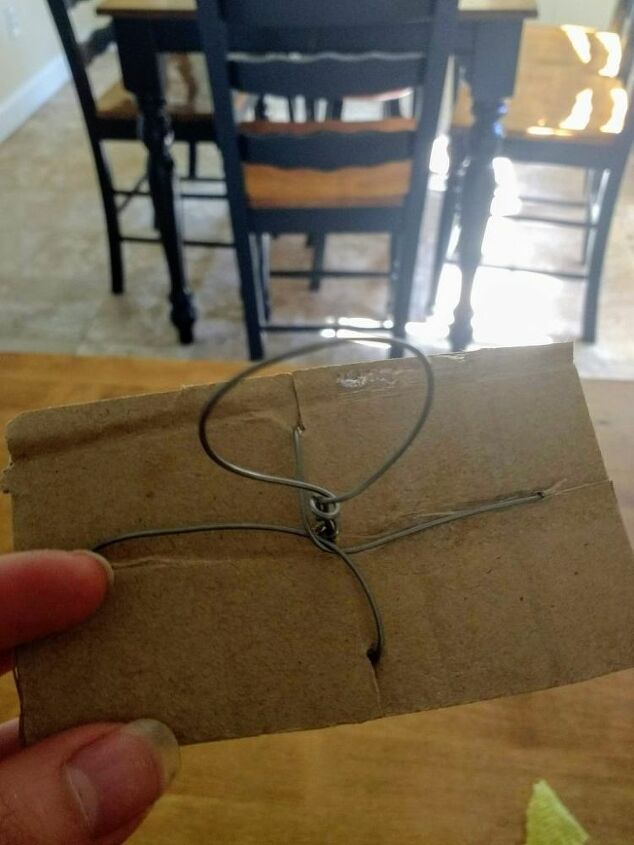
I inserted it into the top of the pinata by partially folding it lengthwise to fit in the small oopening. Using hot glue, I secured it to the top, applying it on top of the inserted hanger and on top of the pinata. Surprisingly, it was super strong!
Once the hanger was inserted, I finished applying the crepe paper layers. For the very top and bottom, I just glued the crepe paper down flat to cover the small circle of space left.
Next I added the bees! I used these adorable little wood bee embellishments I found. The ones I used had stickers on the back, so it was “easy as can bee! :p.
We used the extra bees for the kids to put in their honey slime so all the bees went to good use.
My husband hung the beehive pinata on the tree with clothesline. I think it turned out adorable!
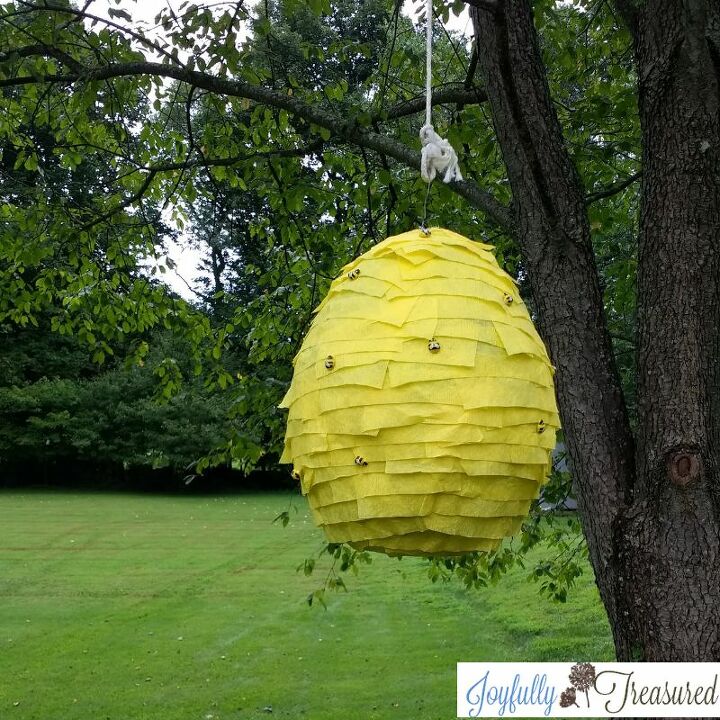
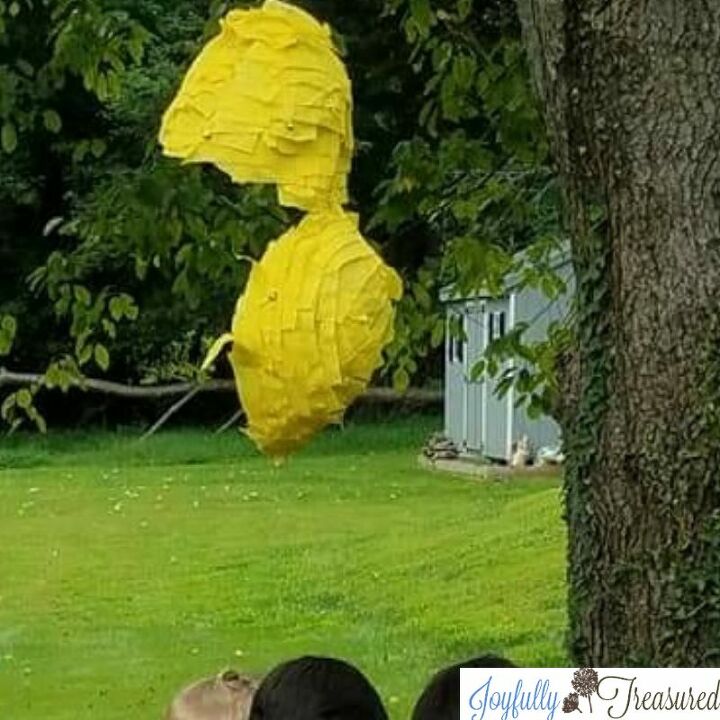
The beehive pinata was a perfect teddy bear picnic decoration, and my wild child loved that he and his friends got to try to smash it with a stick!
Do you have any fun pinata ideas to share?
Check out this post to get more inspiration for a teddy bear picnic themed birthday party!
http://joyfullytreasured.com/teddy-bear-picnic-birthday-party
Resources for this project:
See all materials


Frequently asked questions
Have a question about this project?