


Kitty Korner - Retractable Door for My Cat and Dog

We have a little cat and dog. My wife MUST sleep with the bedroom door closed (not locked) to ward off any would be attackers in the dark of night. I know... makes no sense... but it is what it is.
The problem is.. the cat wants in and the dog wants out during the night. If anyone comes home during the night or grabs a midnight snack.. the pets go crazy.
We need a door for them to pass through but we want to be able to close it off if needed... and it needed to look like a normal door.
Well... I researched and found this: The kittykornerdoor (https://www.kittykornerdoor.com/)
I am not sponsored not am I getting anything for this. I just wanted to show you how I used this special hinge, modifying my existing door to allow the cat AND dog to pass through. Basically made it bigger than intended.
Lets take a look...

They love hanging out together all day... when not fighting... they sleep together. Cute I know!
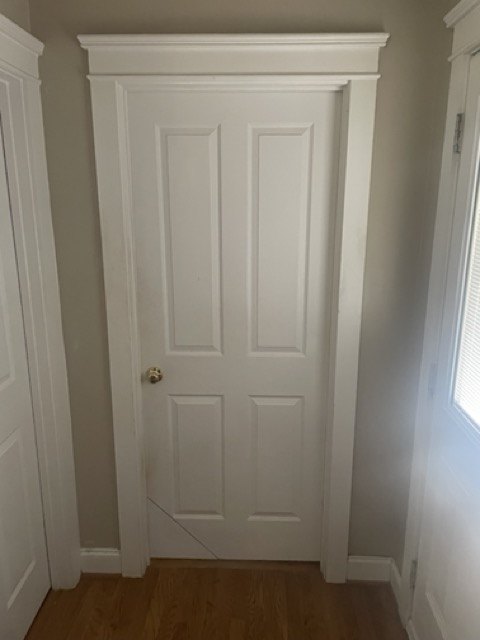
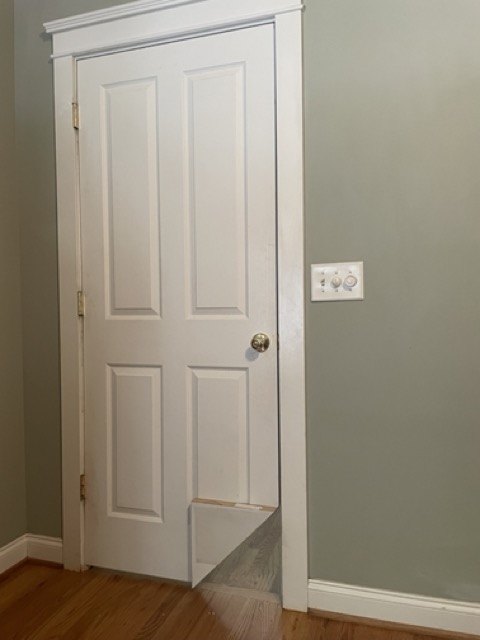
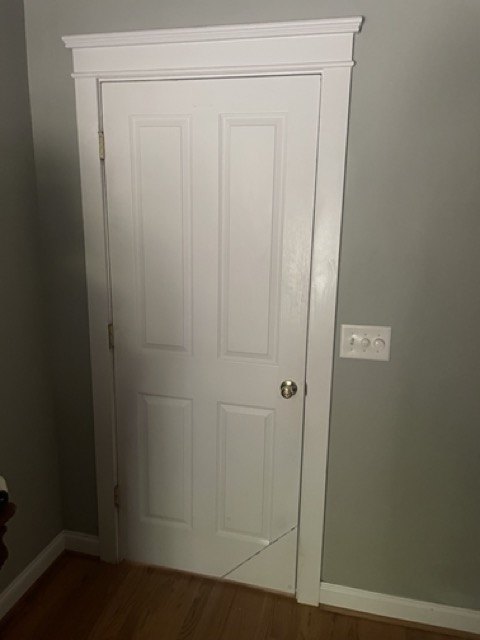
Here is the bedroom door. I am showing a picture of it already installed and closed... but let me show you what I did to make this work for both of them.
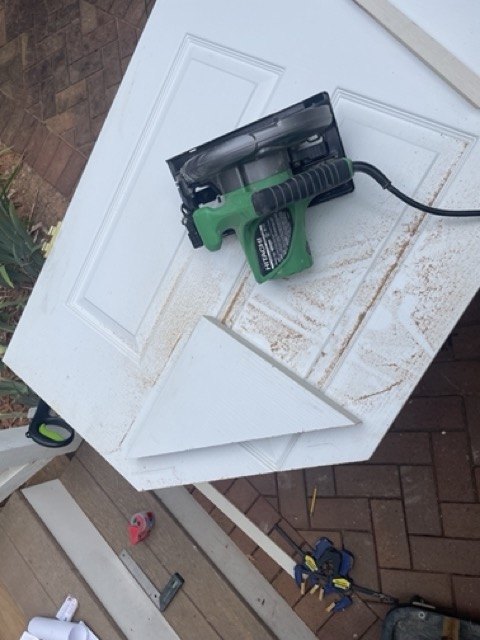
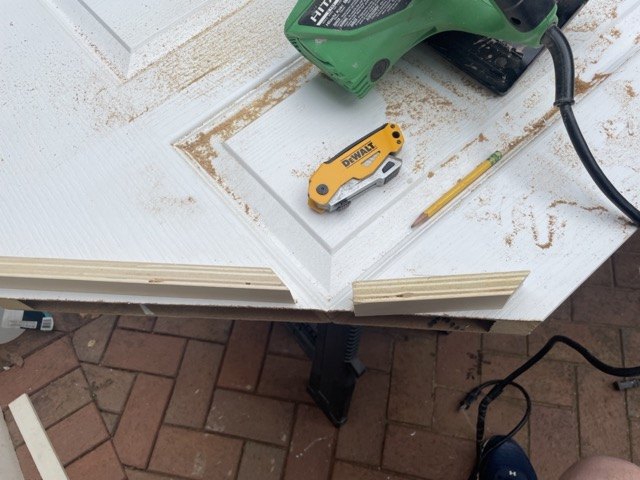
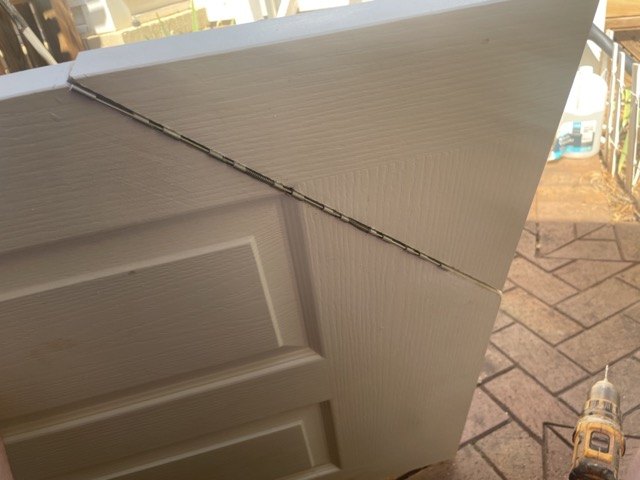
You start with cutting a corner of the door. I bought a special locking hinge.. you need to buy the correct one corresponding to which side your hinges are. In my case I needed to buy a "Kitty Korner Cat Door - SlideLock Hinge - RIGHT"
The instructions were for a small corner.. but I moved the line over about 2 inches to make it larger.
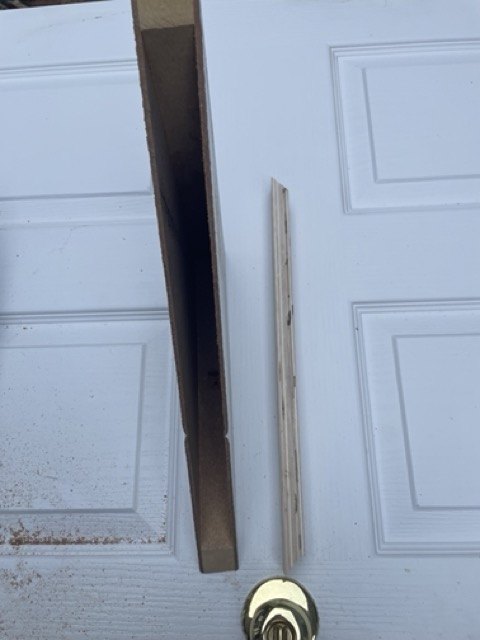
This is the corner. It is a hallow door.. so I needed something to screw the hinge to. So I cut a small pice of p3/4" plywood to fit. I cut 45deg angles on the corners, so it would match the opening. Depending on how large you cut your corner, you will have to play with the insert pieces to get them right.
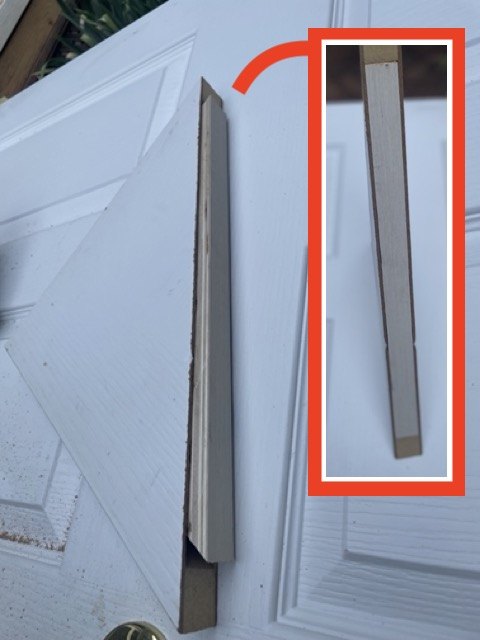
Here it is showing the insert from a few angles before I glued them in.
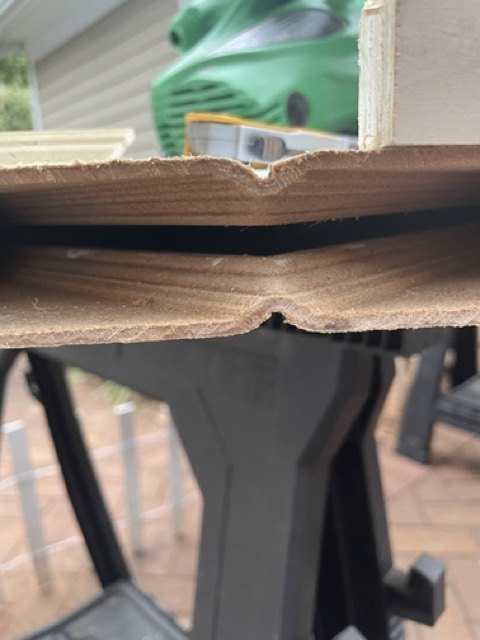
The main door has some patterns which take up some space inside, so I could not use a single piece to fill it.
I cut two pieces with the appropriate angles.
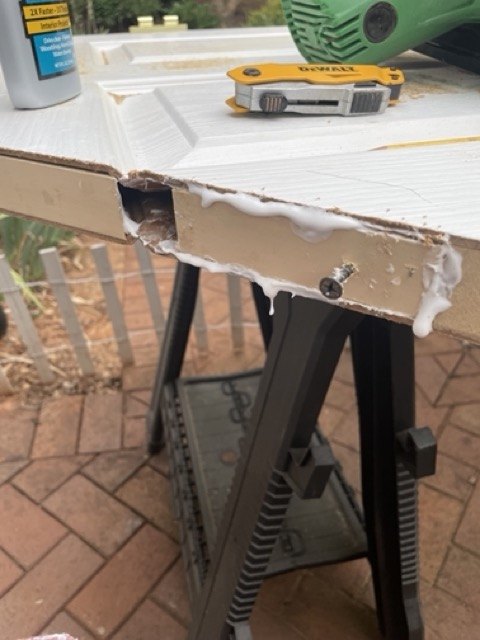
Like the other filler pieces I glued them in with some thick glue and some clamps. I had to put a screw in one side to pull it toward me to fit the reverse angle into position. I used a few pin nails to hold things in place too.
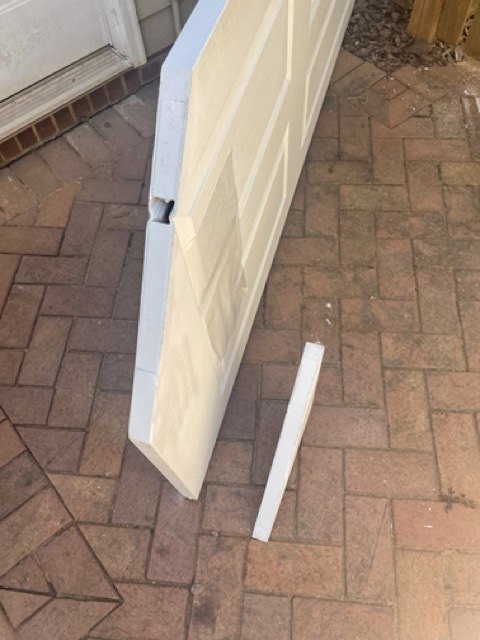
Here is the door and the corner piece with the filler wood in place and painted with some simple semi gloss project paint.

Here is where the magic happens. Since I made the corner larger... I had the hinge toward the top, and I used a small filler piece on the bottom the same size as the hinge thickness so there would not be a gap.
You can see this hinge has some springs to slide it up and down.. but the special locking tabs are what keep the door locked in place so when you lock it... they cannot simply swing it open! Genius idea!
I actually though of hacking a hinge together to do the same mechanism as this... but for the money... having it already like I needed... it was worth the $38 for the hinge (plus shipping)
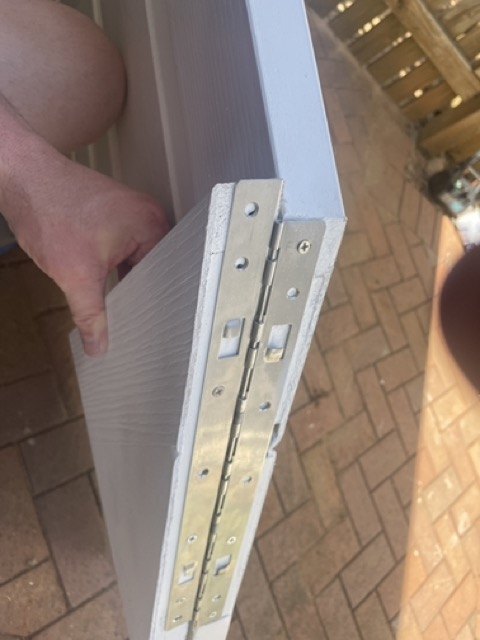
Here you can see how it can slide up and down the springs, to allow it to swing open or closed.
You can see the corner is a little proud along the jam side... so I ended up trimming a small sliver off the side to make it flush. It would not close with that extra sticking out. A quick slice and it was flush!
Here it with the bedroom door closed but the hinge door velcro-ed in the open position. Velcro was included in the kit as was the template, screws and a sticker to tell people how to slide it up to unlock.
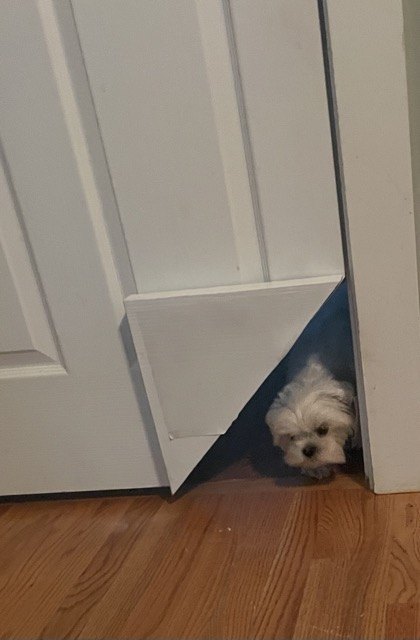
My dog can easily pass through. The plastic on the door flap is part of the scratch guard I out on so when closed they don't mark the door up. Took the dog about about 1 min to feel comfortable going through it. Now she runs through at full speed. Cat figured it out in 2 sec.
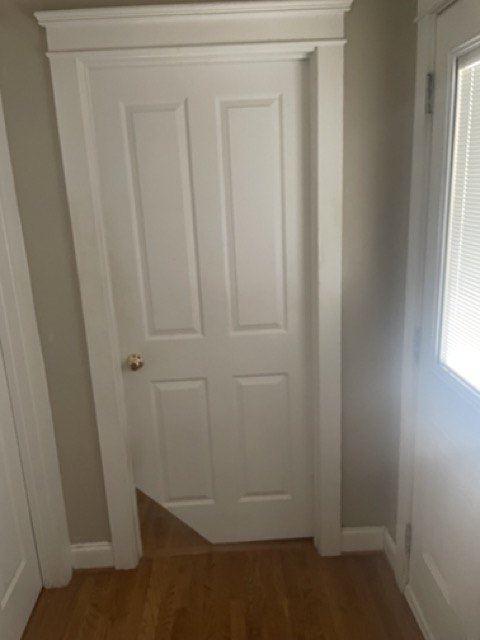
Here is what the other side looks like open.

Here it is closed. It looks like a "normal door"... worst case... if we move, I take this door with me and buy a replacement slab.
Here is the corner closed from the inside. You can see the hinge but it blends right in. I even painted the hinge white to help mask it even more.
The site has some good instructions, but because I modified it... I needed the filler pieces. Ever door is different, so I wanted to show you what I did.
Works great and we are so happy with it!


Comments
Join the conversation
-
That is one of the best tutorials I have seen. Clear instructions and clear photos. Great job all around!!
-
What a great way to save money also!!! Thanks for posting!!


Frequently asked questions
Have a question about this project?
Why am I chuckling at the mind image of your little pup charging through that hole at top speed? 😂❤️