


DIY Bird's Nest Wreath With Twigs and Flowers
Looking for an easy DIY project to decorate your home this spring? This bird's nest wreath with twigs and dried flowers is simple to make and looks great indoors or out!
I had so much fun making this quick and easy bird's nest wreath for spring! Spring wreaths are perfect for sprucing up your front door, front porch or for adding a touch of rustic charm to your indoor décor. This simple wreath project pairs really well with the rustic wood slice bunnies that I shared on the blog last week.
You should be able to get most of the supplies for this spring craft project from your local or online craft store.
TIP: I used a hay wreath this time but you can easily make a base for your bird's nest wreath from vines. In the blog post, I show how easy it is to create a vine wreath from scratch.
Twig wreaths also make great bases for a bird's nest wreath.
Find more seasonal decorating ideas on my blog, Chalking Up Success.
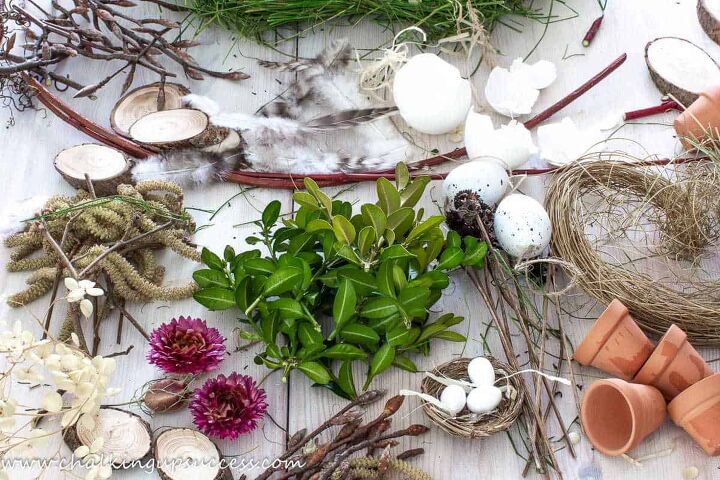
- Twig wreath or
- A wreath base. For example:
- Grapevine wreath
- Straw wreath
- Moss wreath
- Floral wire
- Natural materials like:
- Twigs
- Evergreen cuttings
- Garden clippings
- Natural grass (to make a DIY bird's nest)
- Small bird's nest
- Real eggshells
- Mini flower pots
- Real quails eggs (Blown)
- Oval wood slices
- Dried Hydrangea and Strawflower heads
- Feathers
Tools
- Garden secateurs
- Hot glue gun and glue sticks
Instructions
DIY Safety
A QUICK REMINDER: When attempting any DIY project, please take care to undertake the necessary safety precautions. You should always follow the manufacturer’s safety recommendations when using any product or tool. When following my instructions for a DIY project, you are doing so at your own risk.
Step 1 – Make the wreath base
If you are using a straw or grapevine wreath base, it's a good idea to cover it with dried green moss before you start adding your décor elements.
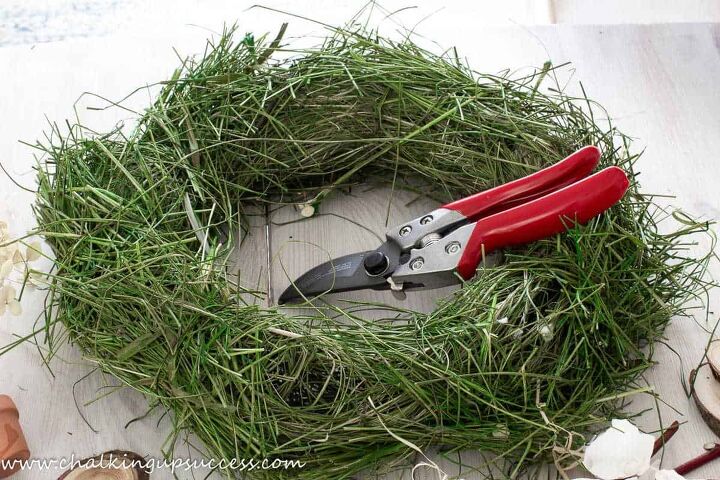
Step 2 – Add twigs
To give the wreath a rustic 'bird's nest' look, I'll be adding natural elements like evergreen clippings and twigs from the garden. Sprigs of willow are perfect for adding a touch of spring to wreaths.

Step 3 – Make a bird's nest
I found the smallest nests I've ever seen at my local craft store but they were so small that they looked a little lost when I added them to the wreath. See the original blog post to see what I did to make the bird's nest stand out more. To finish off, I added some tiny eggs to the top of the nest.
TIP: If you can't find tiny eggs, make your own with air-dry clay. Take a look at my tutorial on the blog for making DIY Easter eggs.
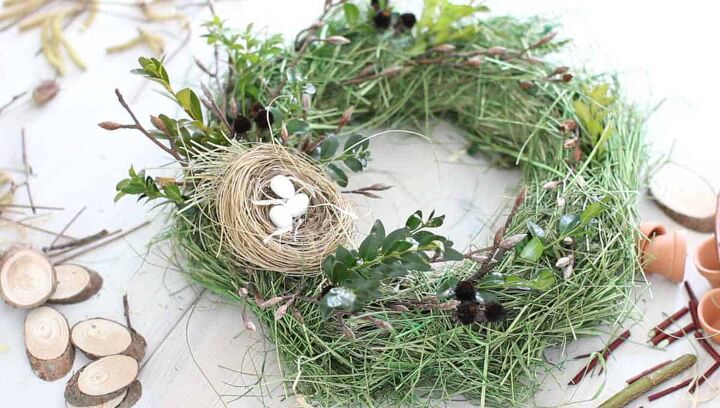
It's always a good idea to add a nest to your spring wreath if it's going to be hanging outside. See my blog post for the reason why.
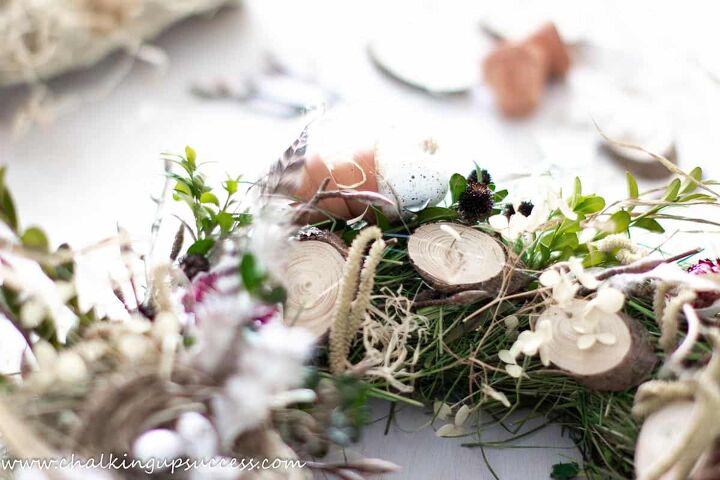
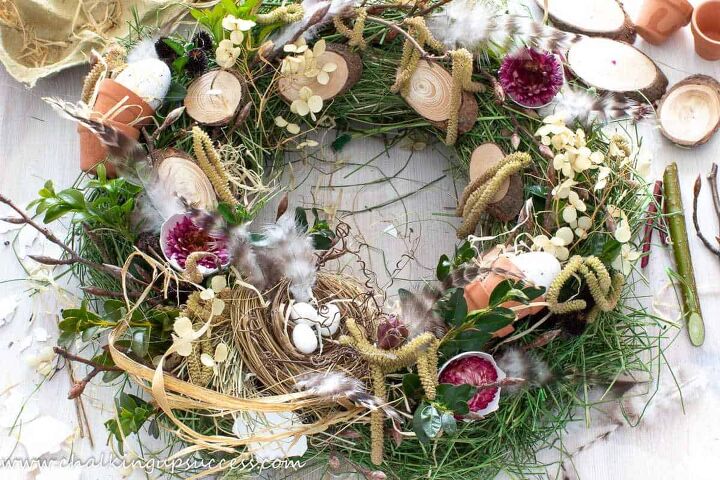
Step 4 – Attach wood slices
A great way to add more interest to the inner part of the wreath is by adding rustic elements like wood slices. Use the glue gun to attach small oval wood slices in a clockwise direction around the inside.
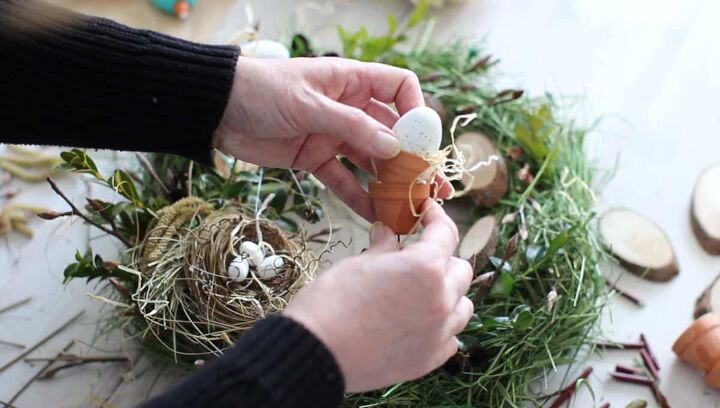
Step 5 – Make a mini flower pot stack
I found these tiny flower pots at my local garden supply shop. To make a flower pot stack for the wreath first, bend a length of floral wire into an 'S' shape. (See the original blog post for details of how I attached the flower pots to the wreath).
Step 6 – Add more twigs
Fill in around the sides of the wreath with more garden cuttings and twigs.
Step 7 – Attach eggshells
I used real eggshells to decorate my bird's nest wreath. Make sure to thoroughly wash the eggshells if you are going to use them for decor purposes.
TIP: Save the eggshells that you use when cooking or baking to use on Easter wreaths and spring décor displays. On my blog, you will see my kitchen decorated for Easter with lots of ideas for decorating with real eggshells.
Step 8 – Feather the nest
No bird's nest is complete without feathers! I used a pack of craft feathers to feather my bird's nest wreath.
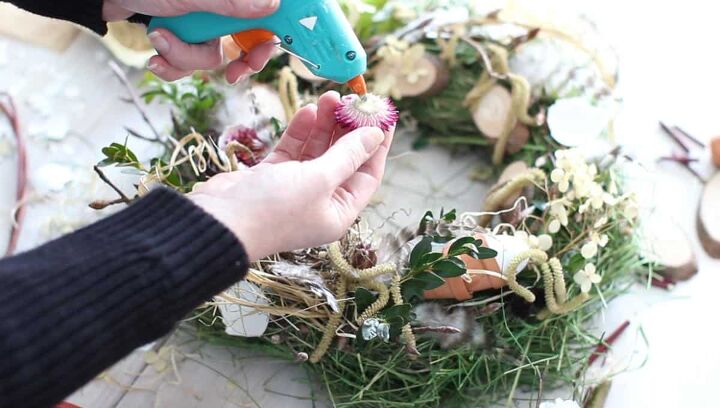
Step 9 – Add dried flowers
The last step in this bird's nest wreath tutorial is to add dried flowers. Strawflowers in shades of pink add a little pop of color to the wreath.
Step 10 – add a ribbon
The bird's nest wreath is finished! Now, you can either leave it as it is or you can add some burlap ribbon or in my case buffalo check ribbon for hanging. Tie some ribbon around the center of the wreath at the top and hang it wherever you like.
Conclusion
Spring projects like this DIY bird's nest wreath are a great way of sprucing up your home decor for the new season and don't take much time to make. Once you've gathered all of your supplies, you can have the entire wreath finished in minutes.
Have fun with your spring decorating!
Don't forget to visit the blog where you can subscribe to my weekly newsletter. You'll receive more creative ideas and DIY projects directly into your inbox. Additionally, you will gain access to our free e-books and printables library.
FOLLOW CHALKING UP SUCCESS
ON YOUTUBE
Subscribe to my YouTube channel to see more DIY, home decor and crafts - https://www.youtube.com/channel/UC4uyVGrJxoo8-7qlAg5_x-g?sub_confirmation=1 I can't wait to see you there!
Join our Facebook Group for creatives - Why not? It's FREE!
https://www.facebook.com/groups/organizedecoratecreatechalkingupsuccess
Like us on Facebook:
https://www.facebook.com/chalkingupsuccess/
Follow us on Instagram:
https://www.instagram.com/chalking_up_success/
Follow us on Pinterest:
https://www.pinterest.de/chalkingupsuccess/
Phew! That was a lot but thanks so much for your support, I really appreciate it! 

Comments
Join the conversation
-
This is absolutely gorgeous, Jayne!!!


Frequently asked questions
Have a question about this project?