


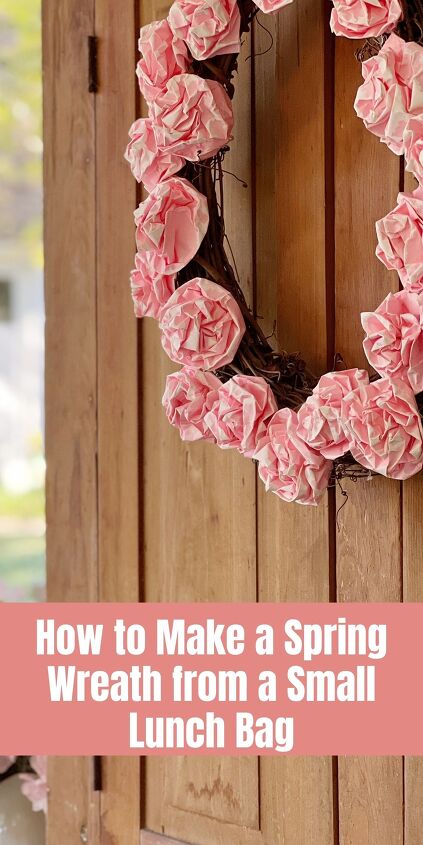
How to Make a Spring Wreath From a Small Lunch Bag
Wait. What? It’s true. You can make a spring wreath for your home from a small lunch bag. And you can make it any color.
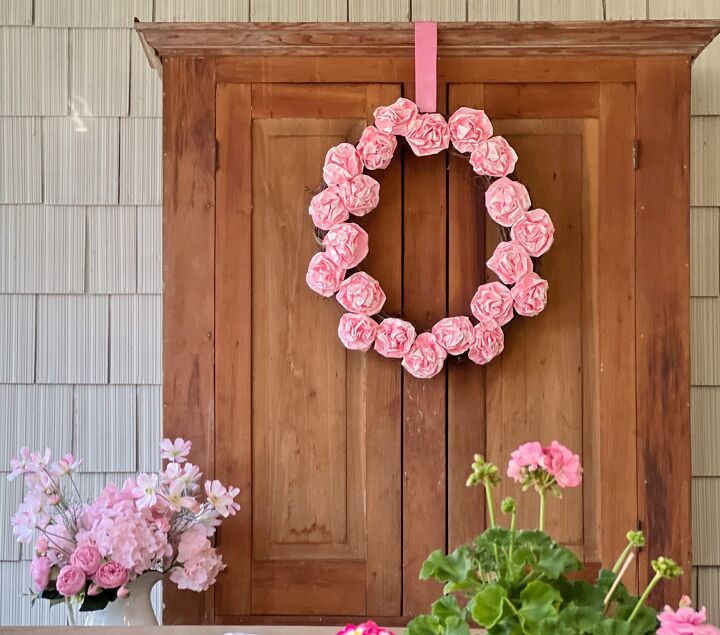
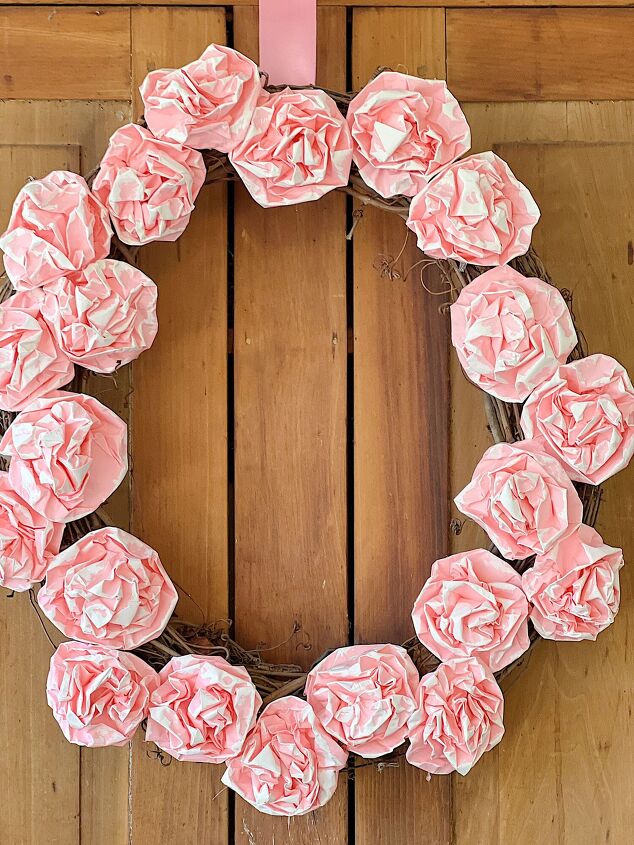
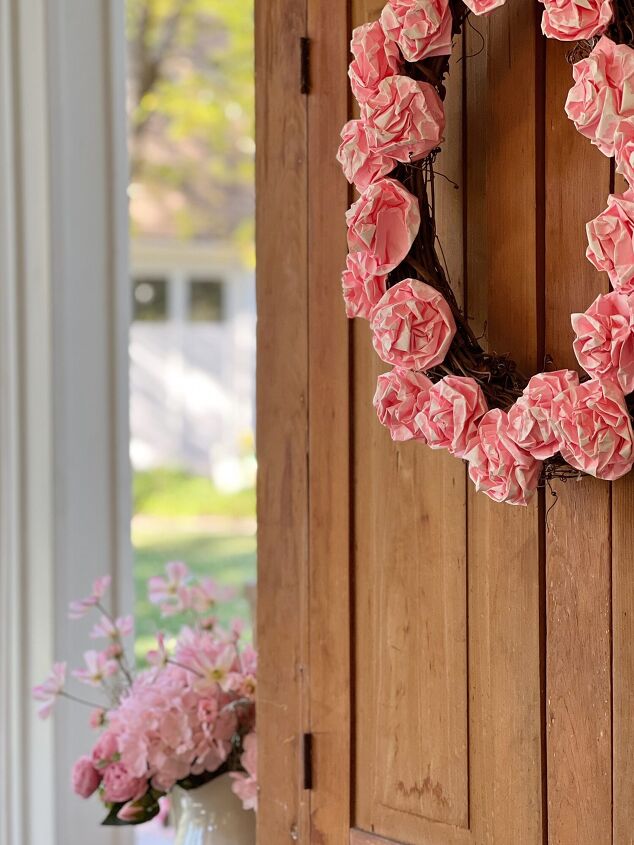
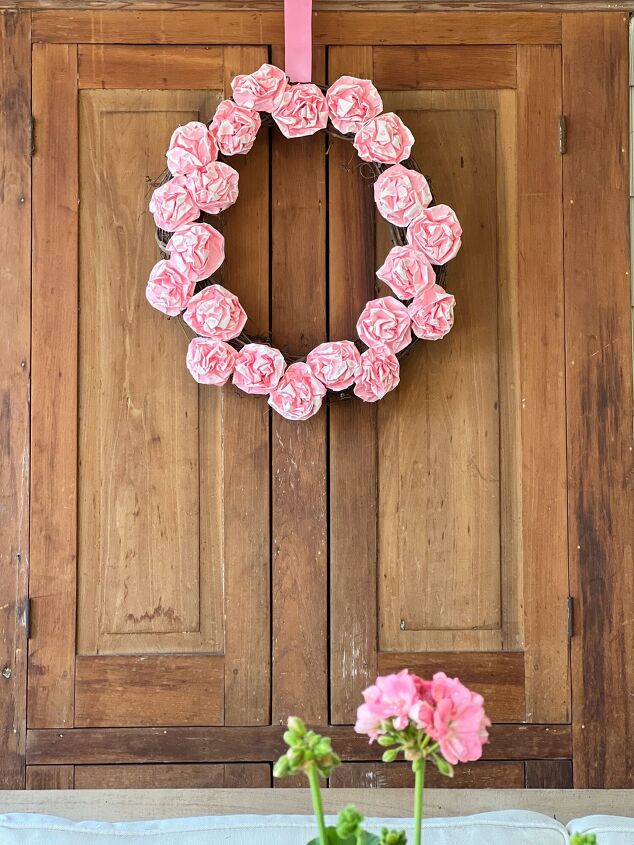
This spring wreath was made from pink small lunch bags. I twisted them to look like roses and then painted the edges of the “roses” to create some depth. Then I glued them to a grapevine wreath. That’s it!
Be sure to swipe below to see all of the spring wreaths created by some amazingly talented bloggers!

The inspiration for this wreath is the white paper bag wreath I made last month. You can read the DIY on my blog post titled The Forty Five Minute White Wreath.
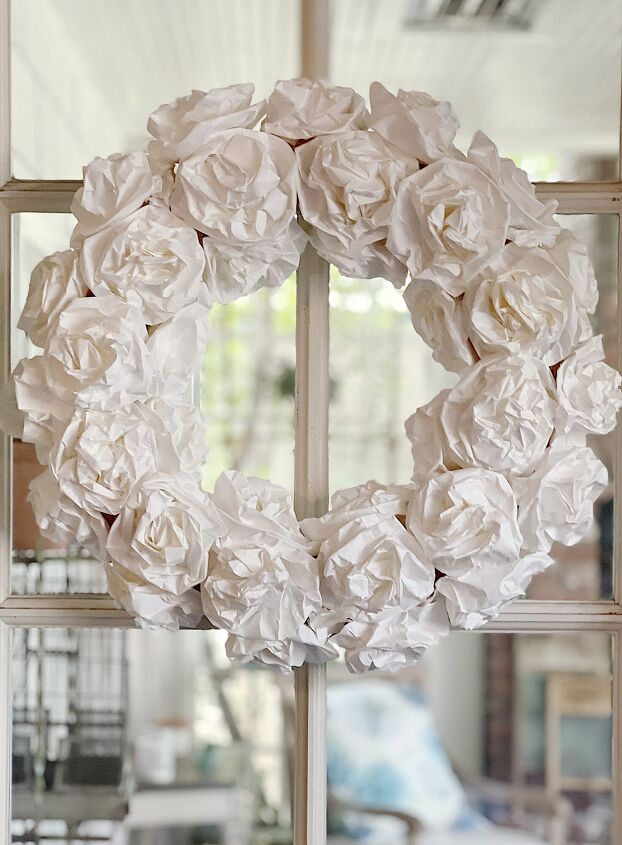
Obviously, you can make the same style wreath as the white one, using the pink flowers.
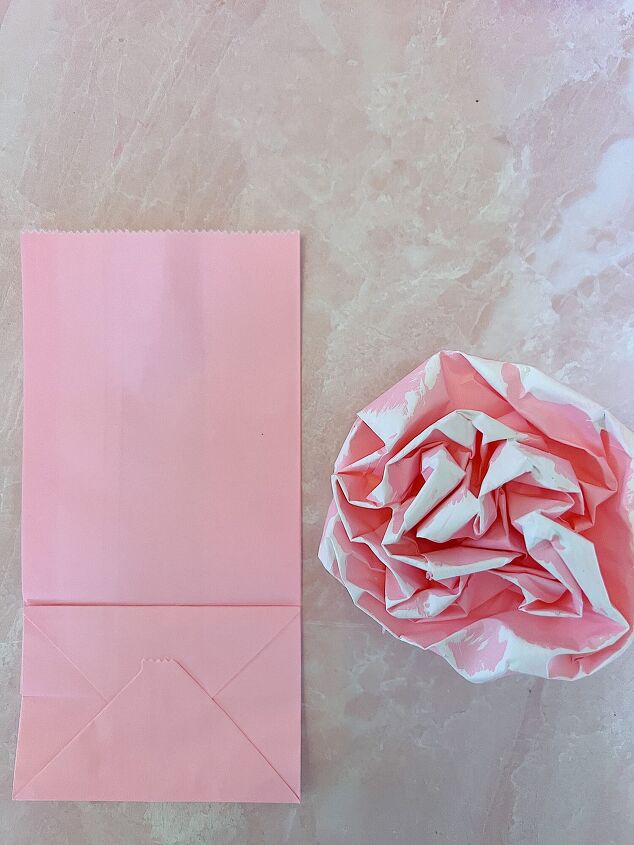
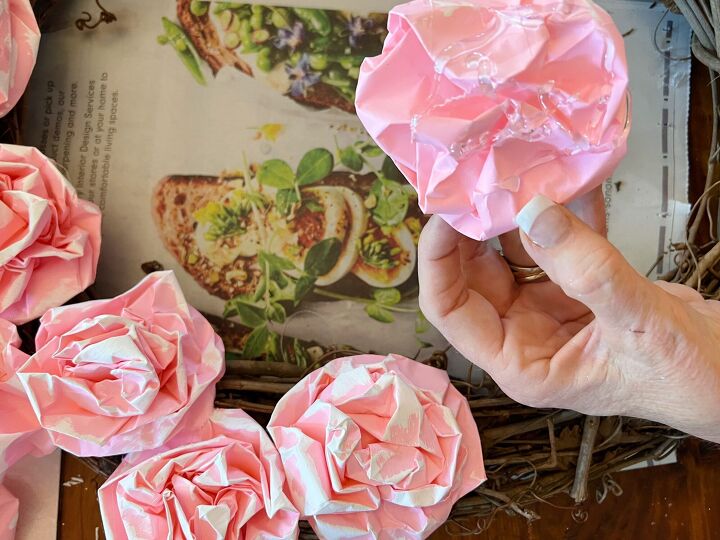
All it takes is a paper bag to make these roses and the wreath! Painting the roses was so easy and it still amazes me how much these came out. (I purchased the smallest bags which are the 3.5″ size. They come in 11 colors and are linked below.)
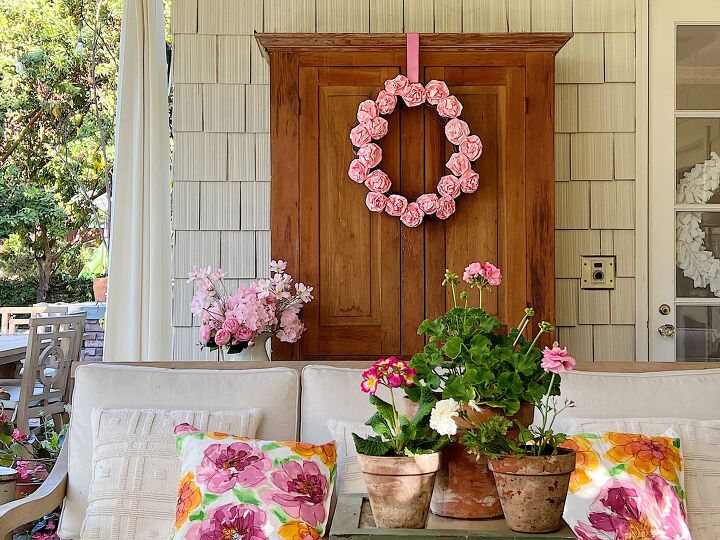
At first, I assumed I would hang this wreath inside our house. But the weather has been so incredible that I decided to hang it under our covered back porch. I love how it looks hanging on this cabinet. I think it is fun to find an unconventional place to hang wreaths.
If you are enjoying my blog, you can sign up to receive my blog updates here. .
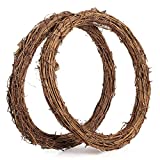
Grapevine wreath
Small lunch bags (I used the 3.5″ size)
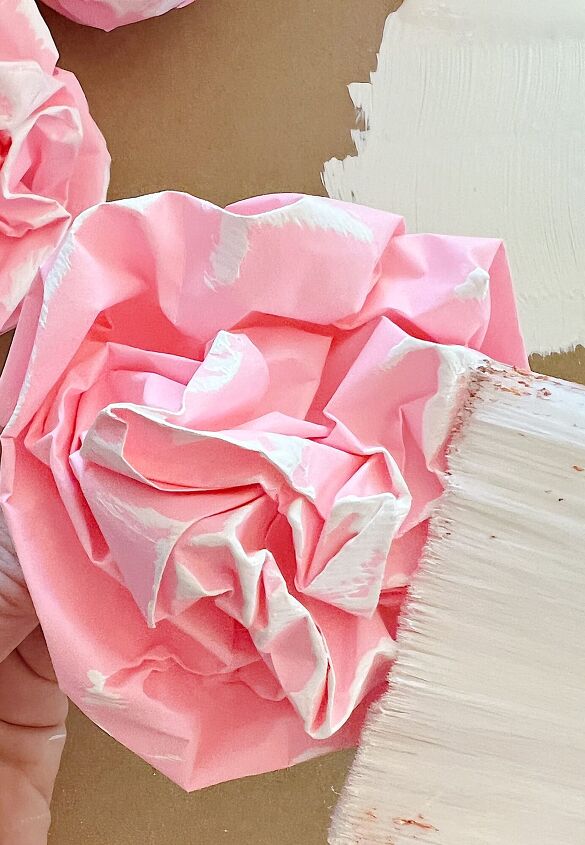
White acrylic paint and medium-sized flat paintbrush
Glue gun and glue sticks
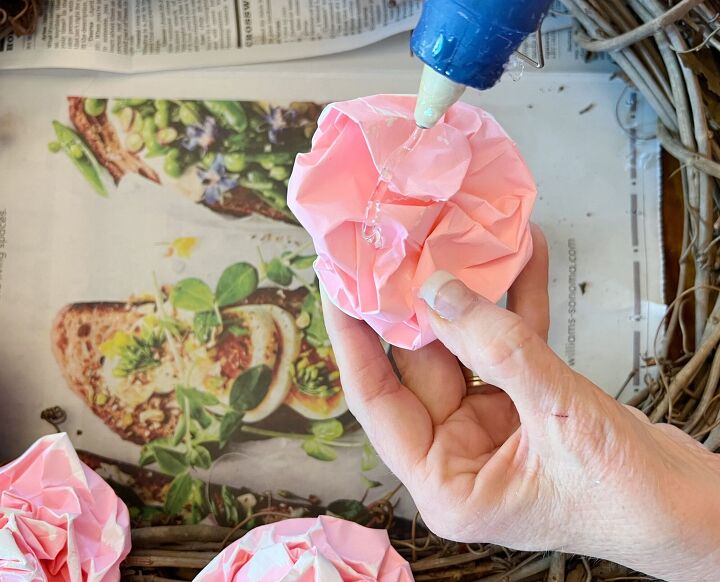
The first thing you need to do is make the flowers. Watch the video below and you will see how easy the roses are to make. The secret is that the roses don’t need to look the same. If you look closely you can see mine are all different!
The next step is to paint the edges of the roses. I used a large brush and white acrylic paint. The secret is to use thick paint (so don’t dilute it) and flatten the paint on a surface before you add it to the brush. Then paint the edges of the roses and let them dry.
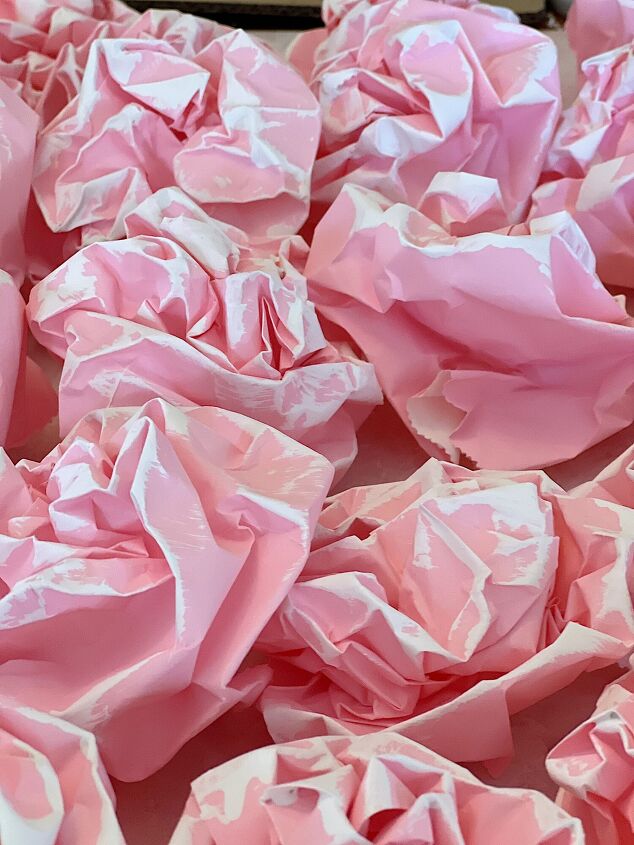
Here are my roses as they were drying.
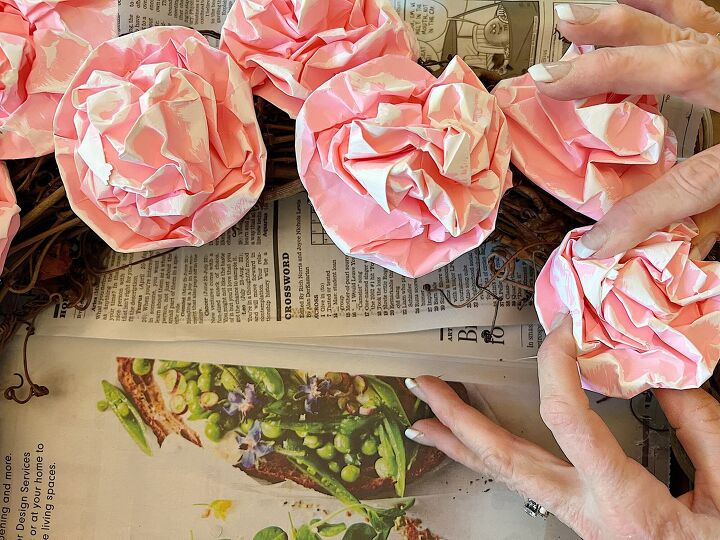
Once the roses are dry, apply hot glue to the underneath side of the roses. Cover the area thoroughly and press on to your wreath form. Hold for a few seconds while they adhere to the wreath.
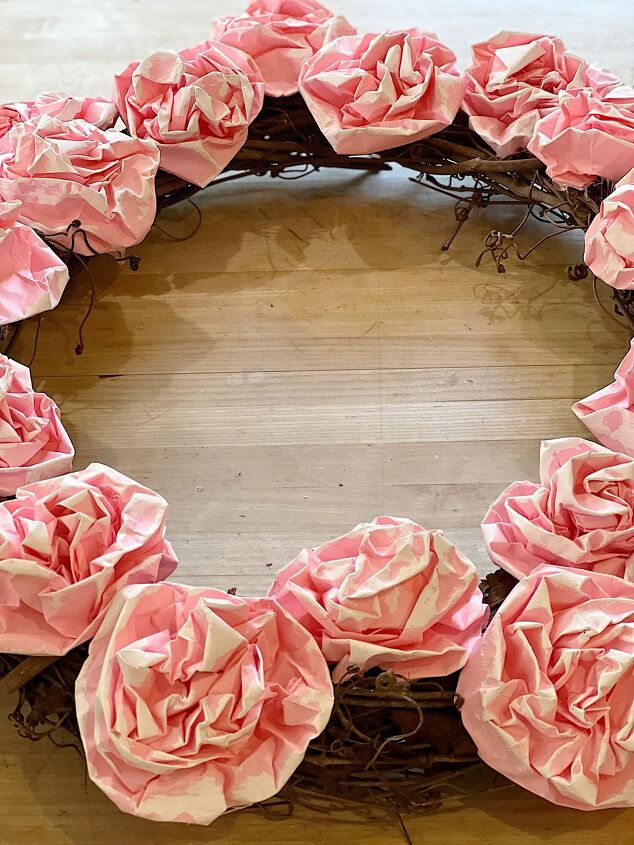
Here is the finished wreath! I hung it with a vintage pink ribbon.
I hope you will log on to watch my Amazon Live Show. Today I am hosting a show titled Easter And Spring Table Ideas. You can watch it live at 11:00 am PST to catch the replay anytime afterward.
Click here to watch (anytime after 11:00 am PST).


Sharing with you what I used to make this easy wreath!


Easy Dried Lemon Slice Spring Wreath | Twelve on Main
DIY Lemon and Olive Spring Wreath | The Happy Housie
DIY Modern Spring Wreath | My Sweet Savannah
Simple Spring Wreath | Paint Me Pink

Spring Basket Wreath | Modern Glam
How to Make a Spring Wreath from a Small Lunch Bag | My 100 Year Old Home
Easy Spring Tulip Wreath | Happy Happy Nester
Spring Wreath Ideas and DIY | Craftberry Bush

Buffalo Check Easter Wreath | Thistlewood Farms
Easy Spring Rainbow Butterfly Wreath | Tatertots and Jello
Easy Interchangeable DIY Spring Wreath | Your Marketing BFF
A Pressed Pansy Wreath | Finding Lovely
Pin the images below to your boards on Pinterest (just click the Pin button in the top left corner). You can also follow along with me on Pinterest!

For more real-time updates, follow me on Instagram @My100YearOldHome

ABOUT LESLIE
Welcome to My 100 Year Old Home. I started my blog so I could share my passion for entertaining, décor, cooking, and crafts. You will find all this and more right here. Read more…

Comments
Join the conversation
-
I didn’t see the video either.
-
No video.


Frequently asked questions
Have a question about this project?
Where's the video with the instructions? Your copy said it was " below" but it's not there. Thanks for fixing.