


Simple Spring Teacup Nest DIY
I don’t know about you, but I sure am ready for spring to arrive.
When you think of spring, what comes to mind?
For me it’s little nests filled with eggs that a loving momma birds tucked in unexpected places
and FLOWERS, lots and lots of flowers.
My love for spring blooms and tea inspired this sweet Spring Teacup Nest DIY.
I always seem to pick up a couple teacup and saucer sets when I am out thrifting.
This delicate pair is part of a set, but after I bought them, I noticed the porcelain cracking.
It makes them perfect to use for a craft project!
These spring teacup nests are so dainty and delicate.
They make me a bit wistful for the bitter weather to move on and let the birds know it is time to come back.
Oh, and the best part?
They are SO easy to make!
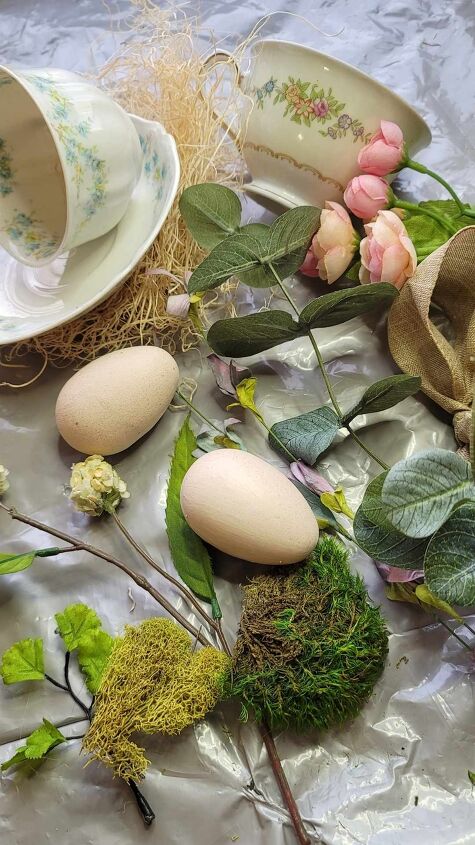
I like to gather materials before I start, so that I can have everything ready to go.
List of materials:
- vintage teacup & saucer
- glass/ceramic glue or epoxy glue
- faux egg
- coconut fiber /coir
- assorted moss
- mini grapevine wreath
- faux flowers
- faux greenery
- ribbon for bow
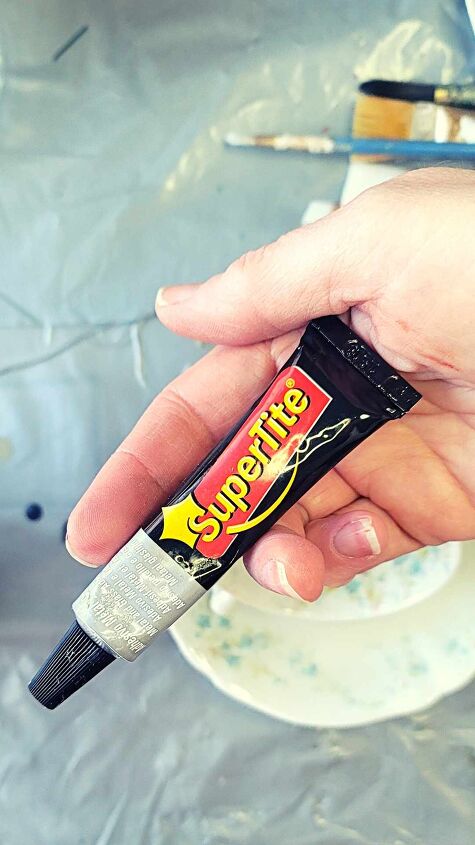
Now that you have all of your supplies, the first thing to do is to secure your cup to the saucer.
Look for a ceramic/glass glue or epoxy.
I love the 5 minute epoxy from Supertite.
It cures so fast.
My second choice is this glass glue from Supertite.
It takes a bit longer to cure, but it holds really well.
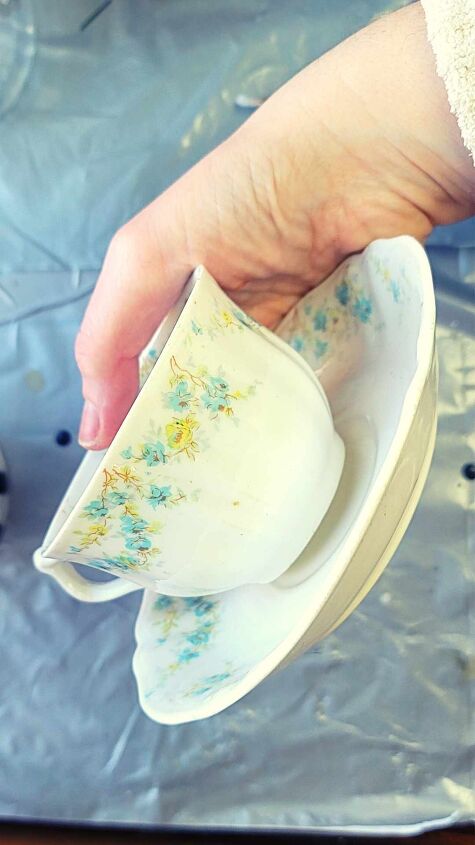
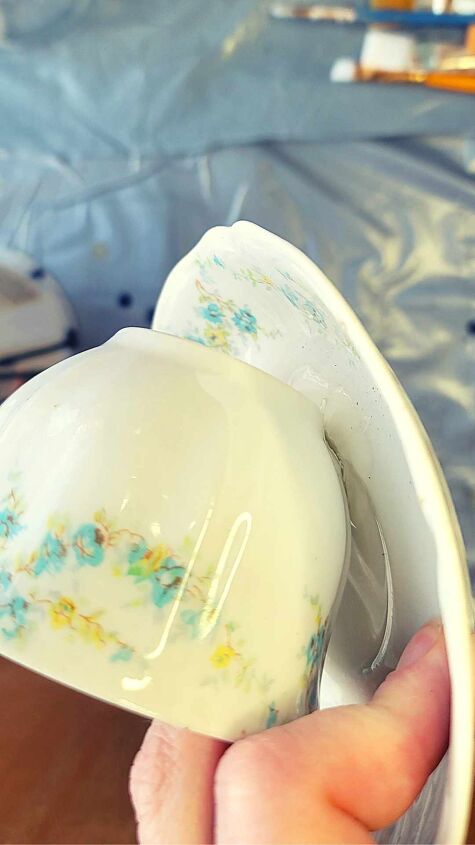
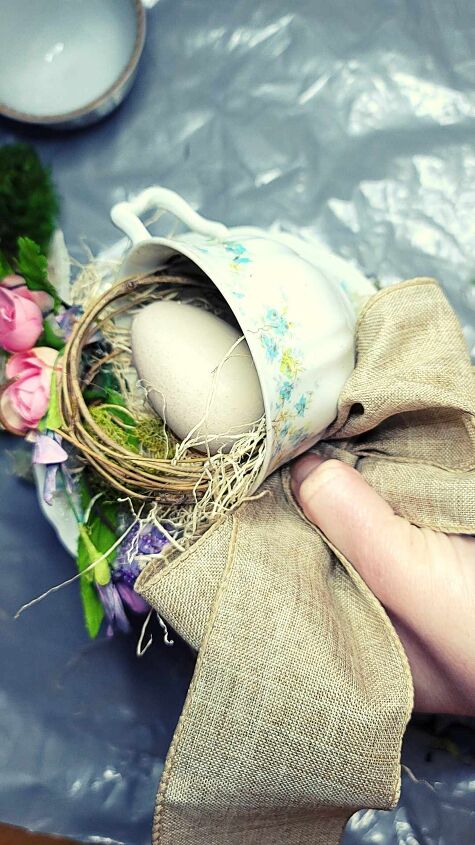
The teacup is going to lay on its side to create a little nook to hold the nest.
Add a bit of glue to the side of the teacup where it makes contact with the saucer.
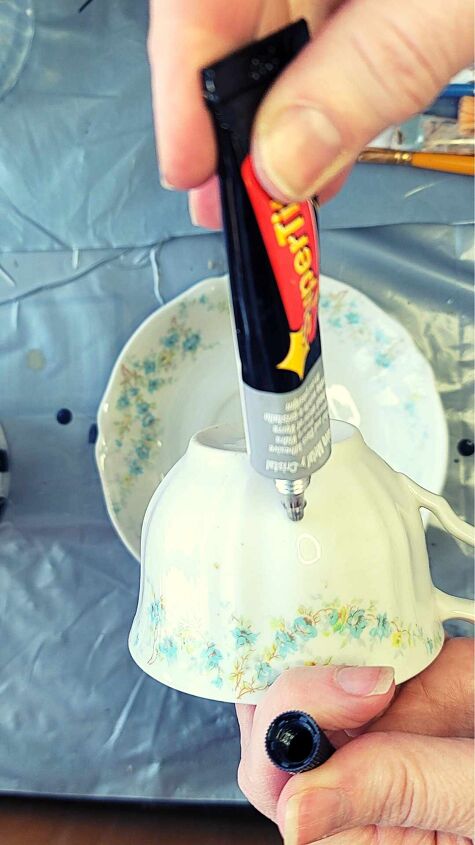
Once the glue is applied, lay the teacup on its side and gently press together.
Make sure the teacup is placed near the back of the saucer to leave plenty of room for the nest.
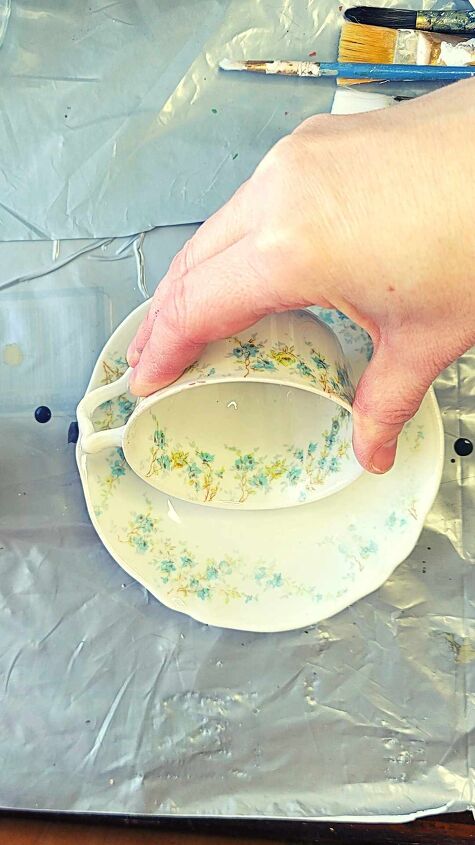
This glue takes about 2 hours to cure, but I let it set over night.
Now that the glue it set, there is the perfect little spot to nestle a nest.
Nestle a nest, see what I did there?
Let’s start working on the nest!
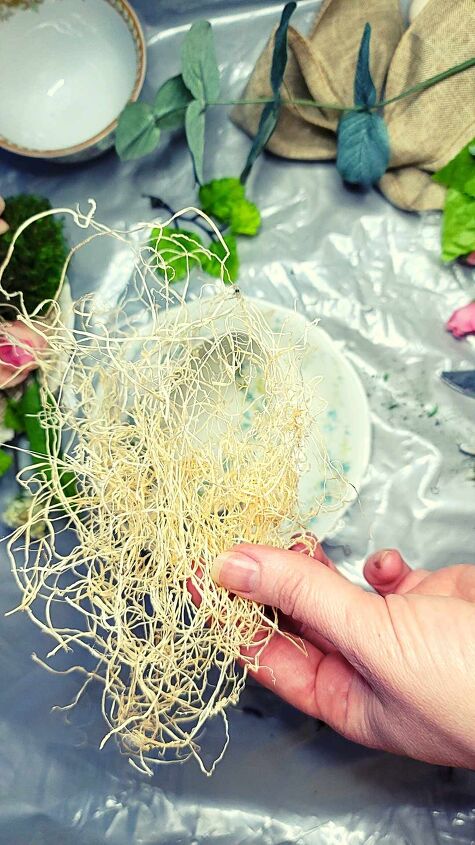
When you looked at the supply list, did you wonder what the coconut fiber was?
It’s this thicker stringy fiber that adds a soft base to the nest.
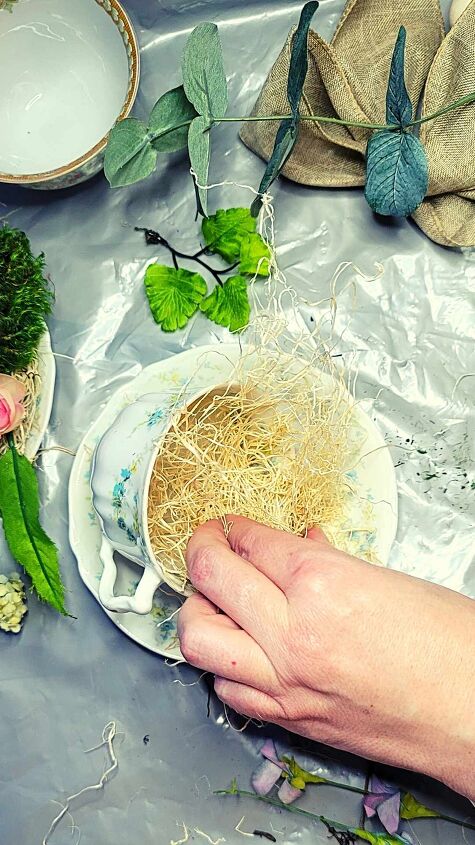
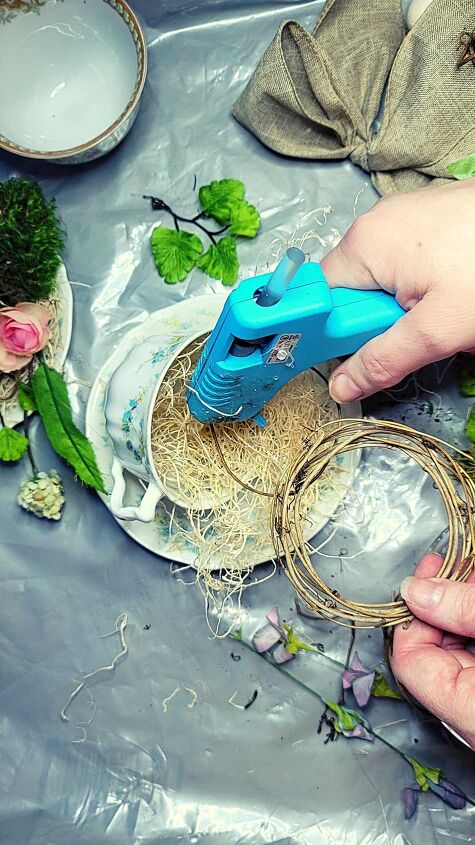
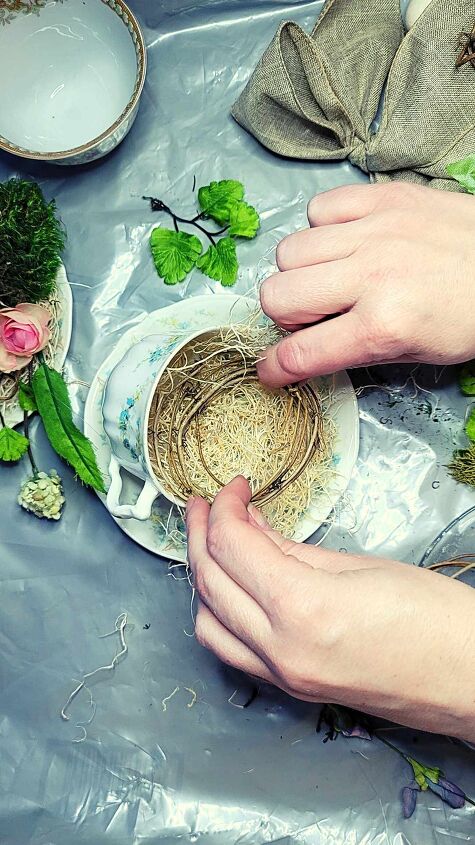
I grabbed a small handful and used a hot glue gun to carefully secure the coconut fiber to the inside of the cup.
Let a bit of the coconut fiber spill out on to the saucer.
I secured it with a bit more hot glue and carefully pressed down (being careful not to burn myself) to give it a few seconds to cool.
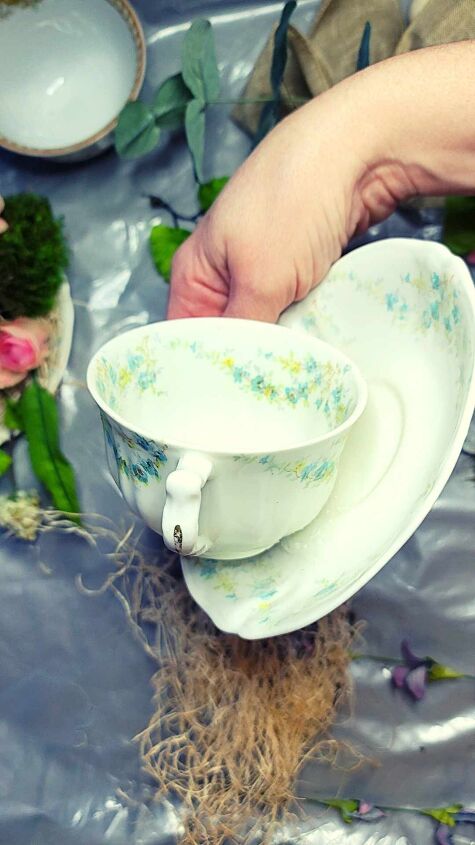
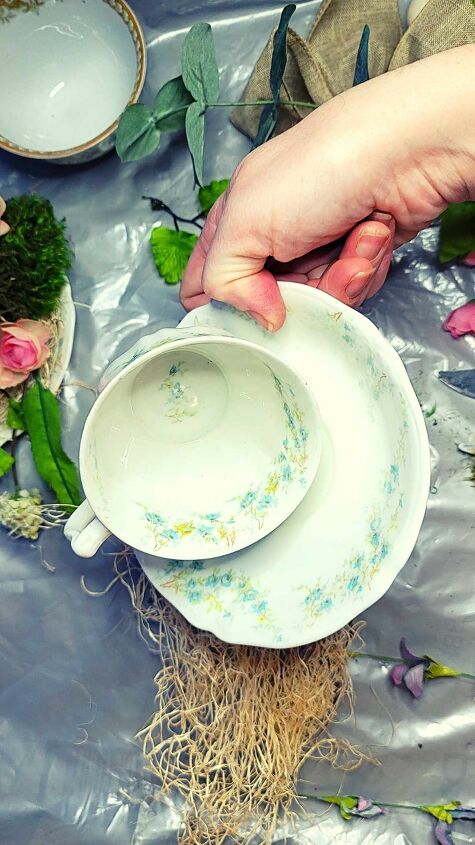
Next, grab a mini grapevine wreath and disassemble it.
Snap the vine that secures the wreath and unwrap it.
Then gently pull the mini grapevine wreath apart.
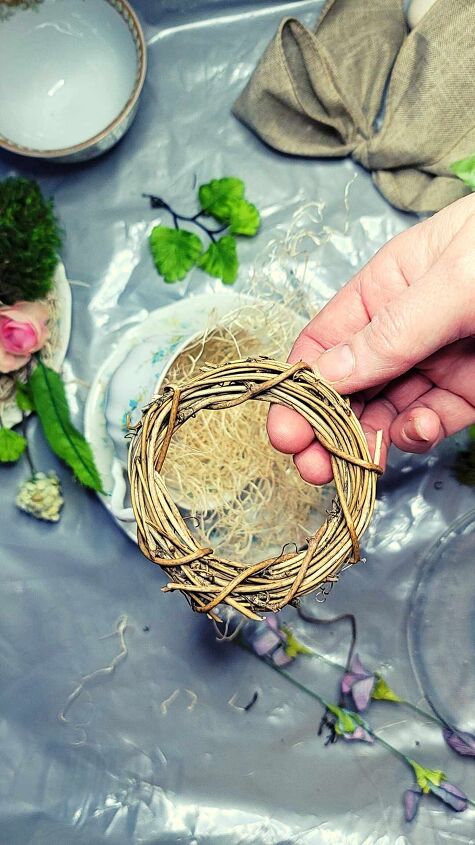
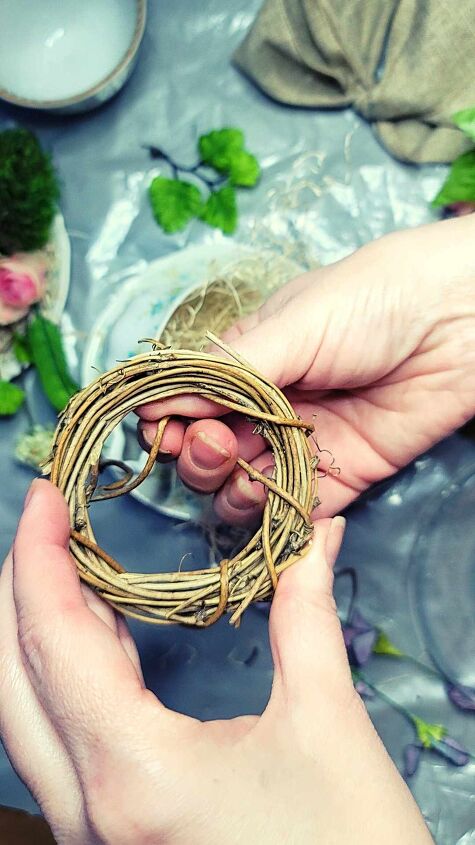
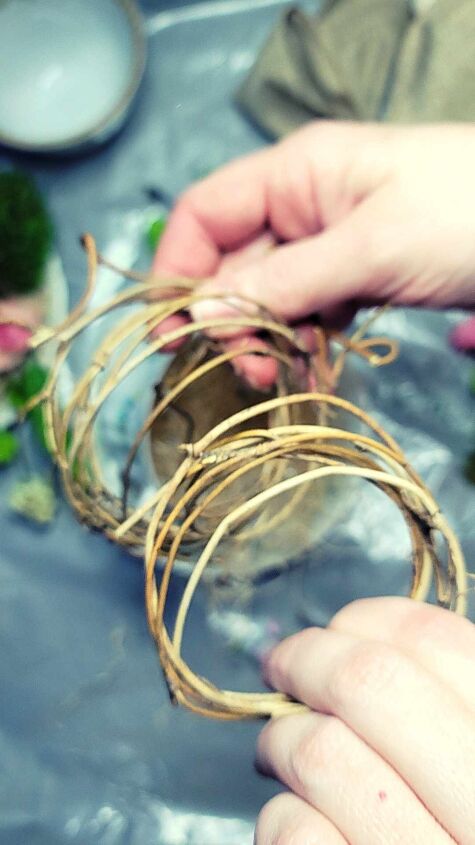
I broke the wreath in to 2 sections so that I could make 2 different spring teacup nests.
Take one section of wreath and glue it to the teacup.
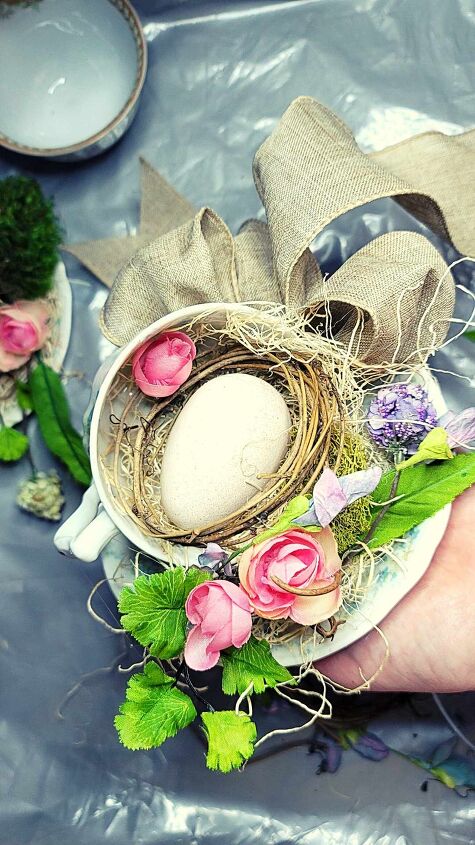
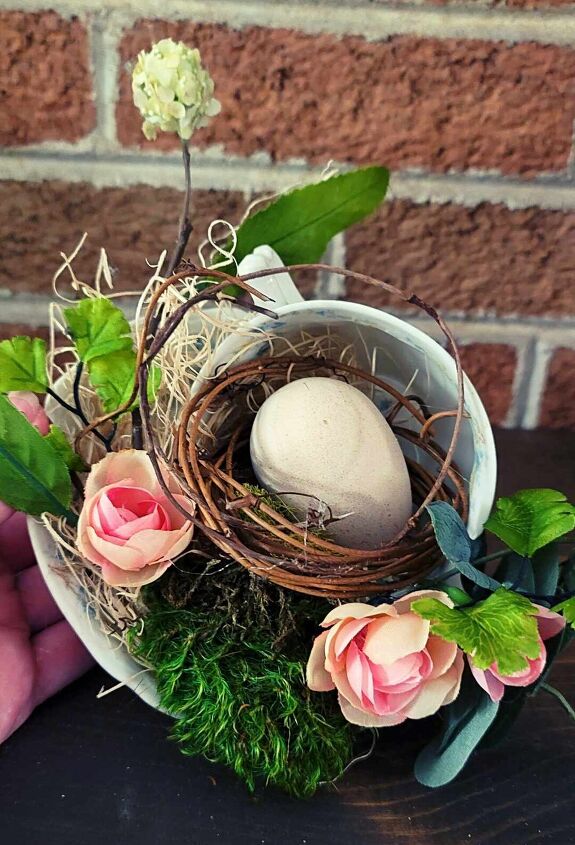
Secure your faux egg to the next with your hot glue and press in place for a few moments to make sure it is secured.
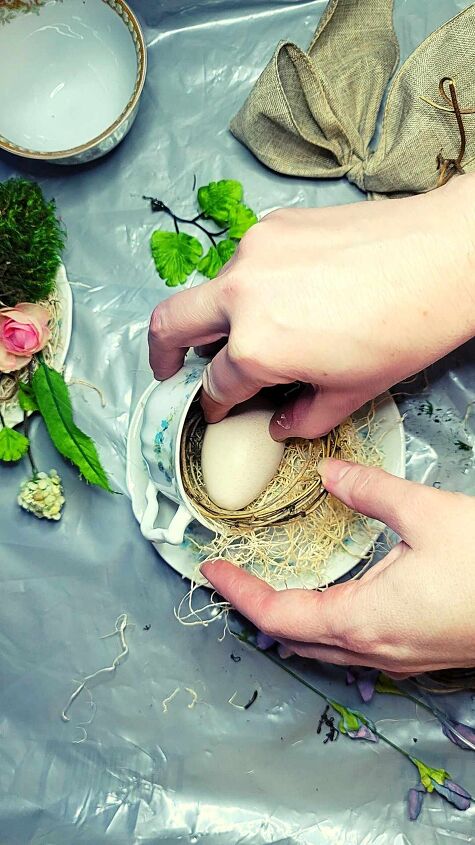
The egg is the main focus of the spring teacup nest.
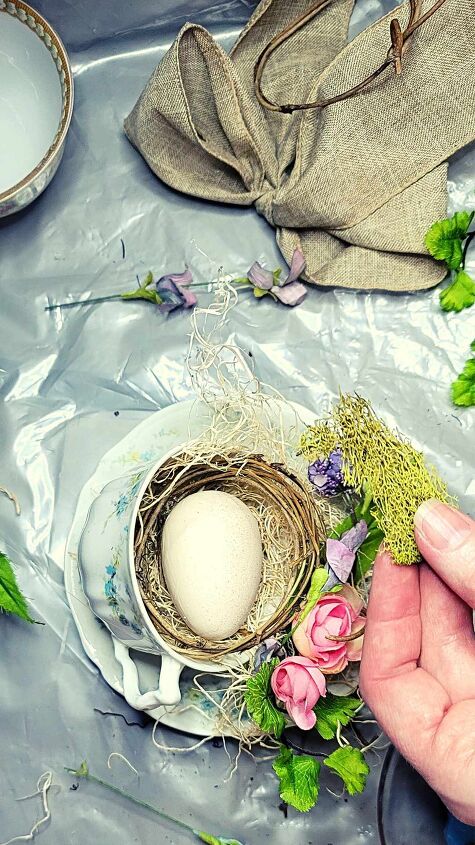
But we want to place an assortment of faux flowers, greenery and moss all around the teacup.
The nest is not meant to look neat and tidy, keep it a bit mussed when placing your pieces.

Next, I tucked in pretty little blooms and draped longer leaves and flowers around the nest.
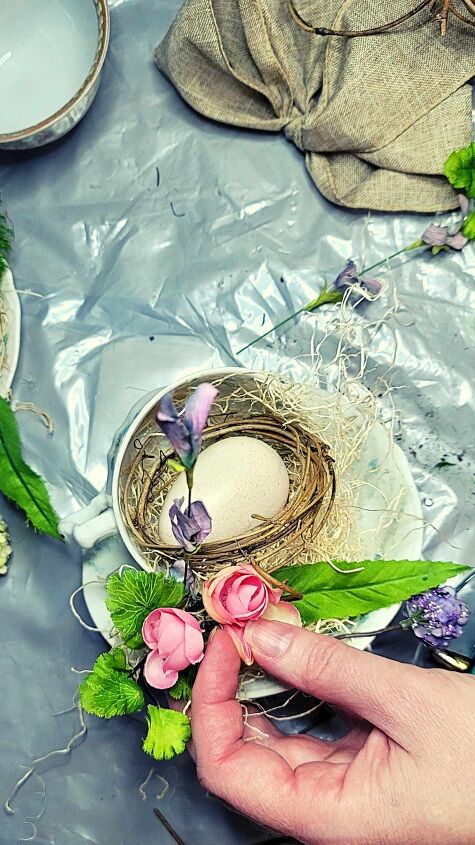
I like to add moss to my nest because it adds a pop of green and a bit of texture
There are so many ways to personalize your nest with different blooms and ribbon.
Once you have tucked in enough blooms and accents around your teacup nest, you can add a bow to the saucer.
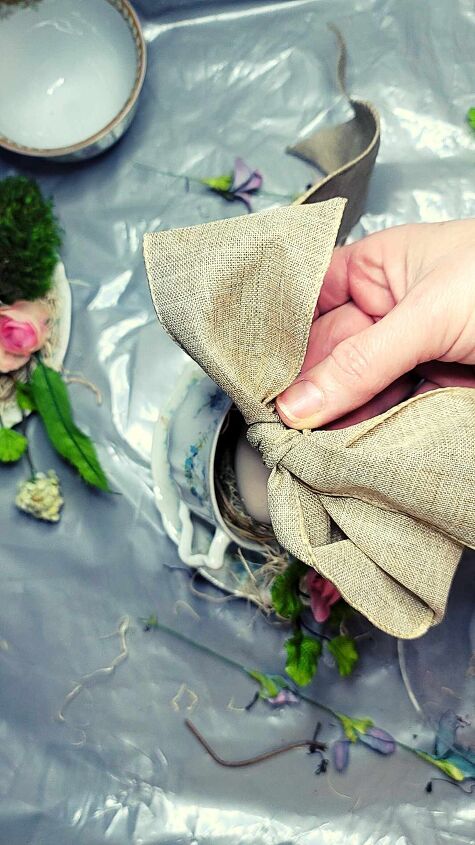
For one of the spring teacup nests that I made, I used this big wired linen inspired bow.
It was secured by adding a bit of hot glue to the saucer and fluffed to perfection.

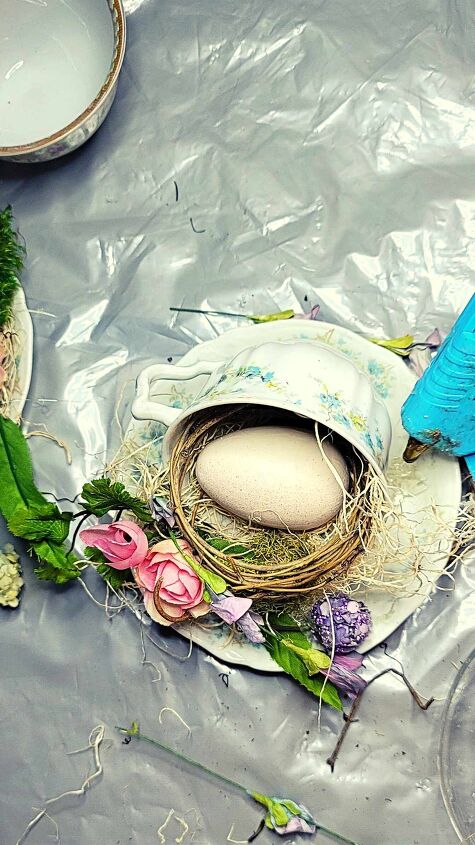
That’s it!
Wasn’t it easy?
I mean, how darling is this sweet little spring teacup nest?
As the snow falls outside and the temps are still below freezing in Chicagoland, it makes me look forward to the arrival of spring.

Here’s the one I made without the bow, I just tucked in a few more blooms.
I hope this DIY inspires you to make your own spring teacup nest.

If you liked the project, would you kindly Pin it and share it with others.
I would greatly appreciate it!
For more DIY Projects, furniture flipping tips and French Cozy Cottage inspired home decor ideas, please visit my blog A Loverly Life

Comments
Join the conversation
-
I absolutely love this for Easter, and I have a few of Grandma's tea cups. Thanks for the idea. and beautiful job.
-
Thank you so much - I hope you have fun making them.
It would make a cute Easter gift, too!


Frequently asked questions
Have a question about this project?