


Create a Welcoming Farmhouse Burlap Wreath for Only $10
Looking for a quick and easy way to spruce up your front door that won’t break the bank? Look no further! This farmhouse front door wreath will welcome your guests in style. A monogram, burlap, and faux greenery come together to create the perfect decor for your front door! Personalize yours according to your favorite colors, or create a few to match every season, it’s that cheap and easy! Follow my step by step tutorial to create your own now!
Tools and Materials
- Wreath frame
- Pipe cleaners
- Burlap ribbon
- Rotary blade (or scissors)
- Wire cutters
- Monogram
- Faux greenery
- Glue skillet

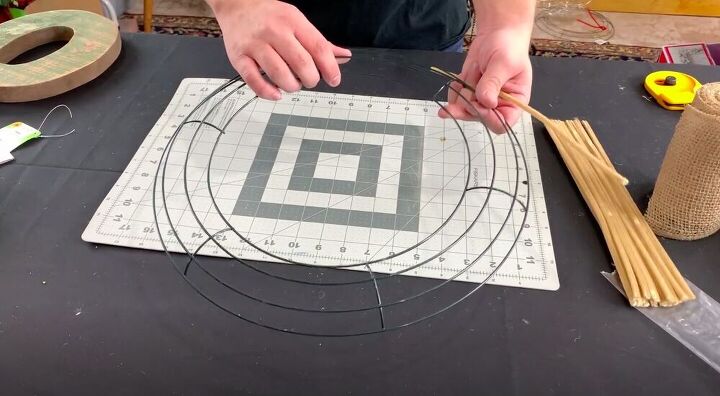
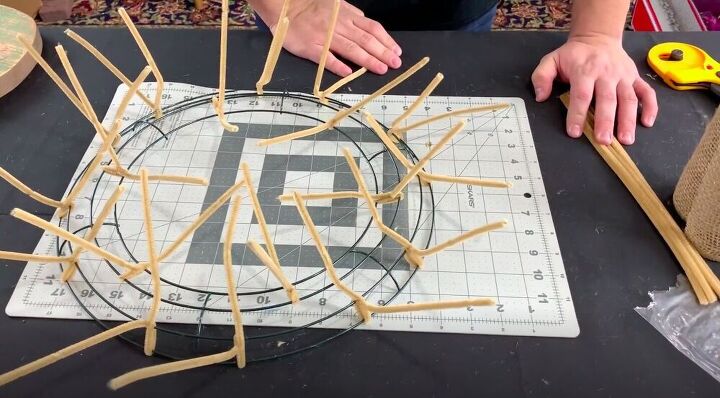
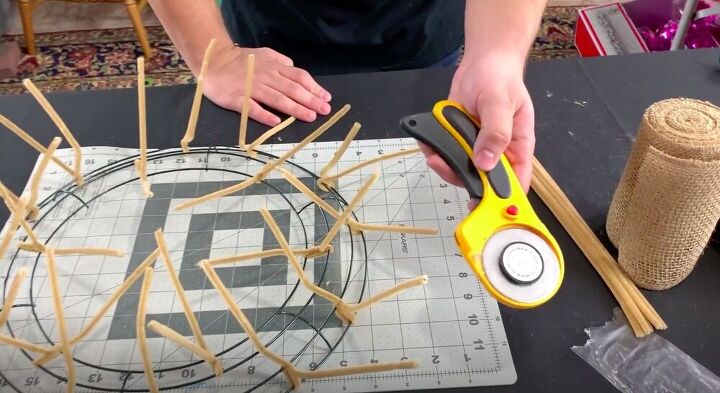
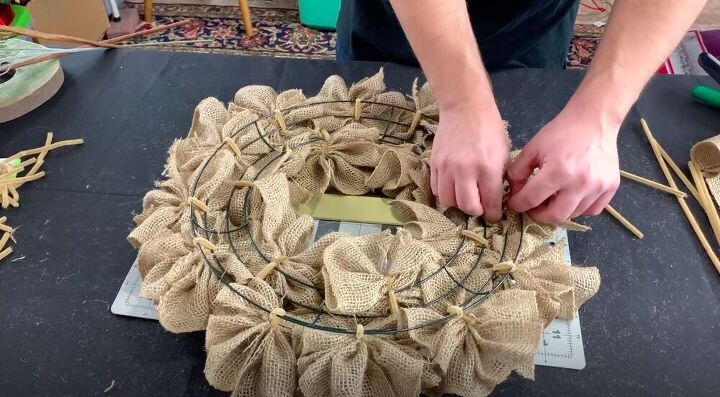
As you can see, the wreath frame I’m using has four wires and is divided into six sections. In each section I twisted one pipe cleaner around the inner two rings, and two around the outer two rings. This gives a total of 18 pipe cleaners throughout the entire wreath. Give each pipe cleaner a few twists to make sure that it’s secure.
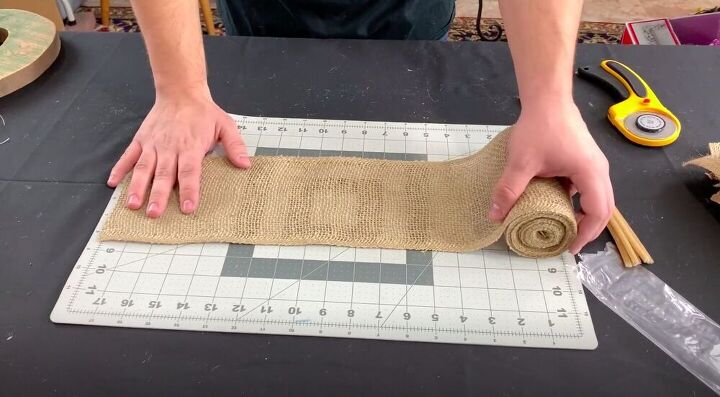
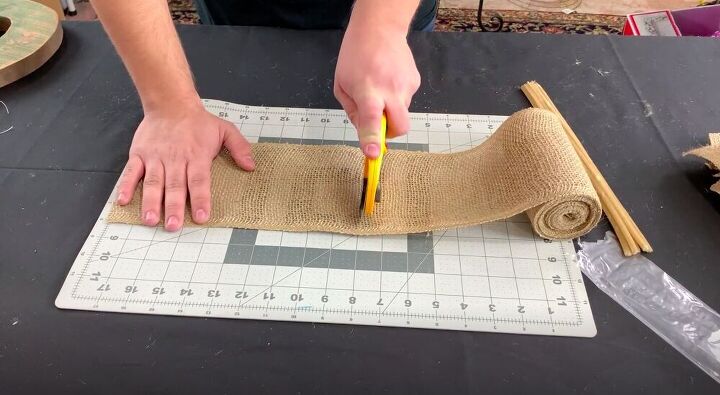
This part is quick and easy if you happen to have a rotary blade. If you don’t scissors will work as well, just make sure to cut as straight as possible to reduce the amount of fraying. Lay out the ribbon on a self healing cutting mat. I cut all of my pieces to 10” in length. As you can see, with a rotary blade it goes particularly quickly. Rotary blades are quickly becoming one of my favorite tools to work with.
Tip:
When using a rotary blade make sure to use it on a self healing mat. If not you run the risk of quickly dulling your blade.
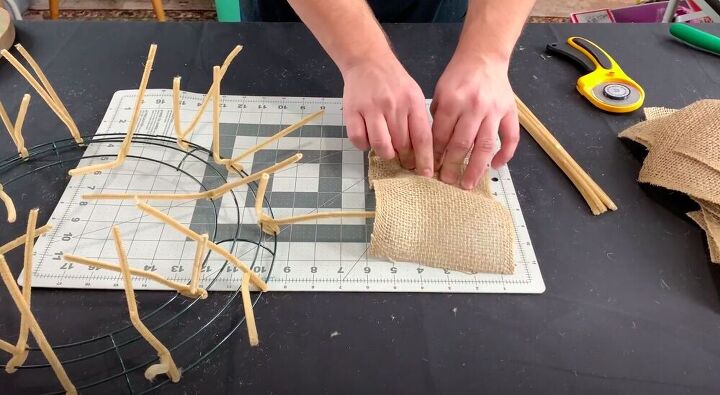
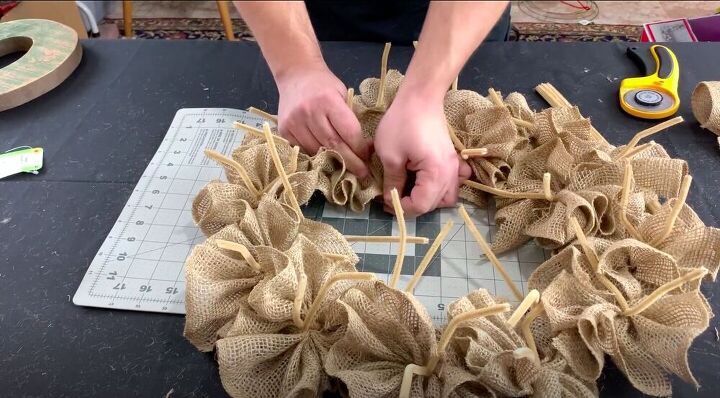
Lay the ribbon out with the short end facing you. Scrunch up the bottom and slowly pull the ribbon towards you. I’ve found that this is the best way to create a tight and even scrunch on the bowties.
Then twist a pipe cleaner right around the middle and make sure it’s secure to the wreath frame.
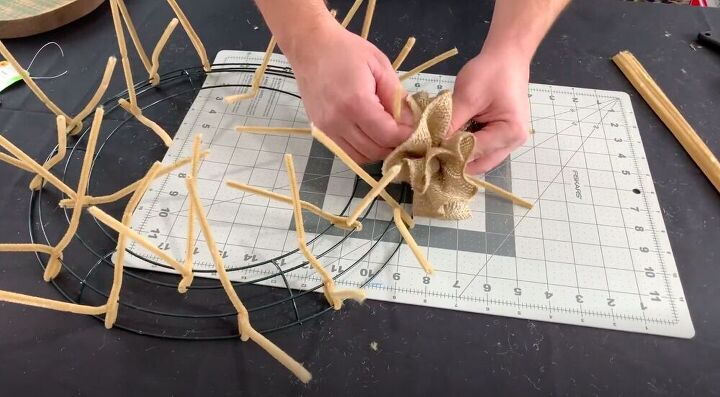
Each pipe cleaner should get two to three pieces of burlap in it. Make sure that you’re in a well ventilated area when working with burlap as it does shed tiny fibers into the air and you don’t want to be breathing them in.
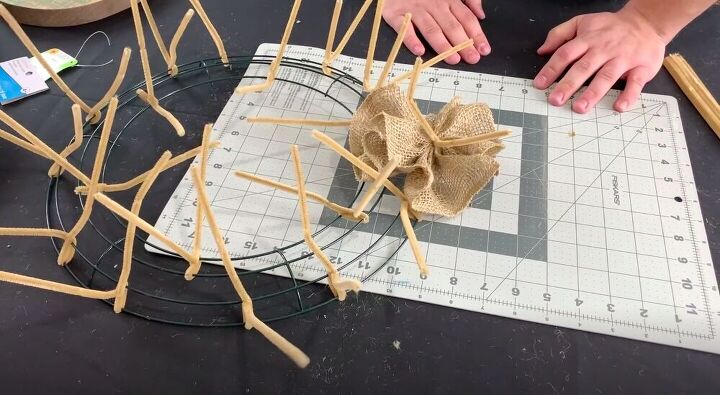
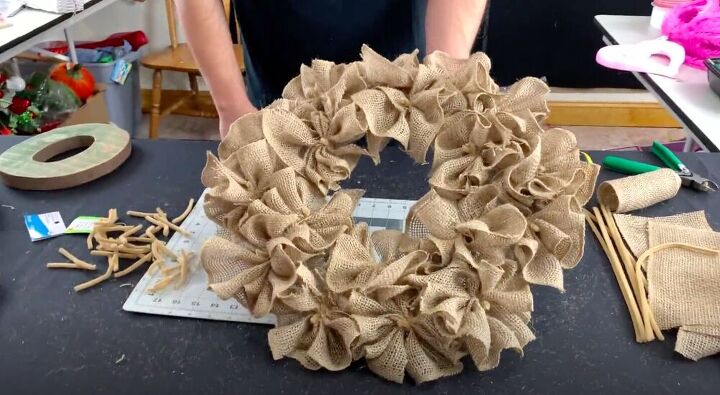
I continued doing this until I had covered the entire wreath frame. I particularly love burlap because it’s easy to personalize it.
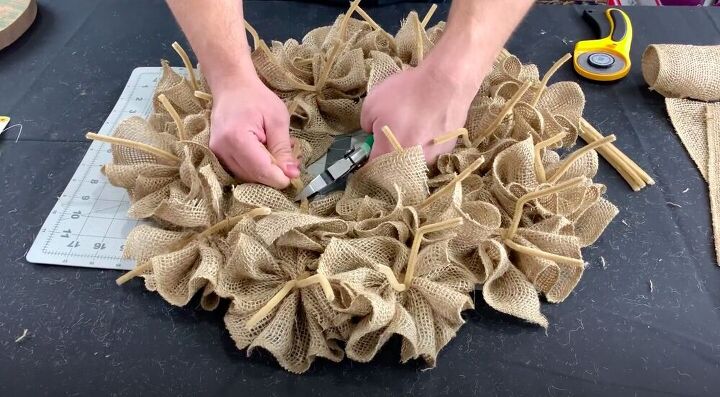
Once I had attached all of my burlap, I went through and snipped off the excess pipe cleaners. Make sure they are twisted enough and that the burlap is completely secure, and then cut close to the twist. By matching the pipe cleaners’ color to the burlap you really can’t see them once you snip off the ends.
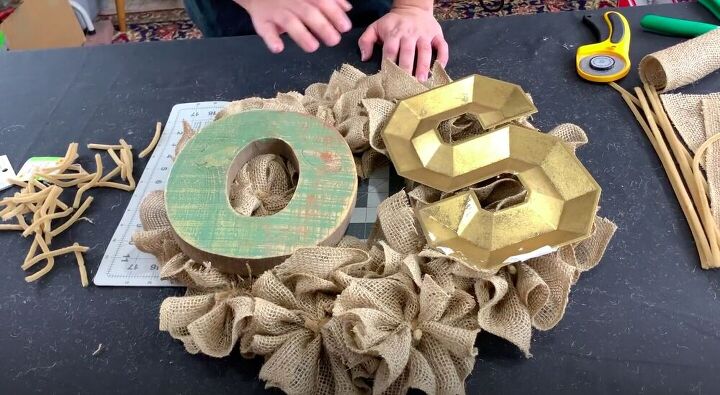
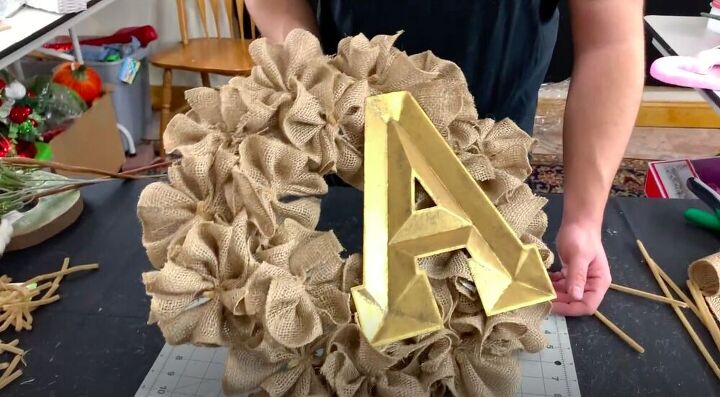
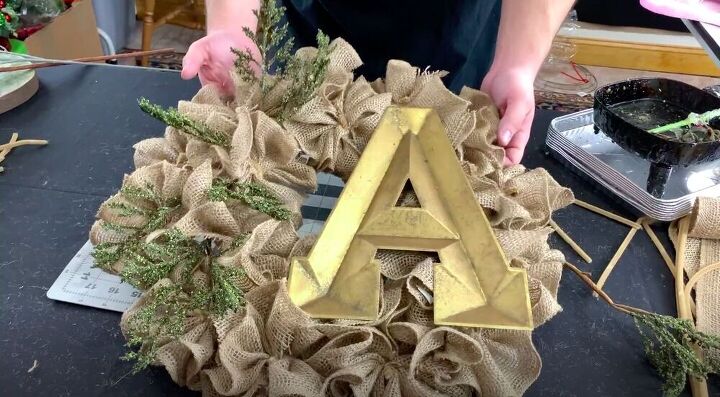
What you use here is totally up to you. If you want, you can add your house number here. I’ve chosen to go with a monogram, which I think makes this wreath look classy and elegant.
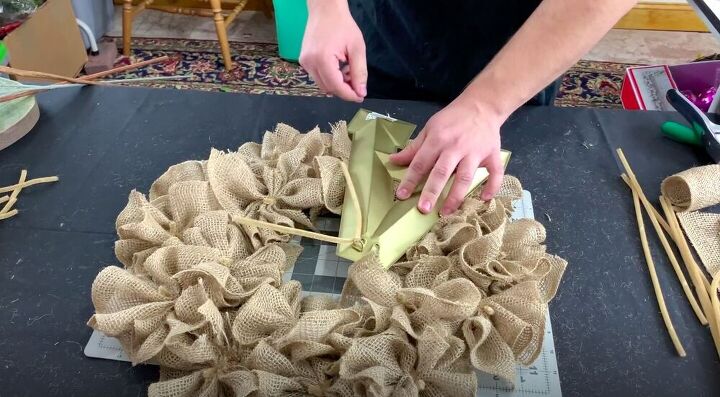
I’m making this wreath for my sister’s room, so I’m going with “A” for Alex. Depending on the monogram you use, you may have a few different options for how to attach it. I’m going to be attaching it using a pipe cleaner at the top of the letter and securing it to the wreath frame from behind. Never secure anything heavy to the burlap, always make sure to secure it to the frame itself.
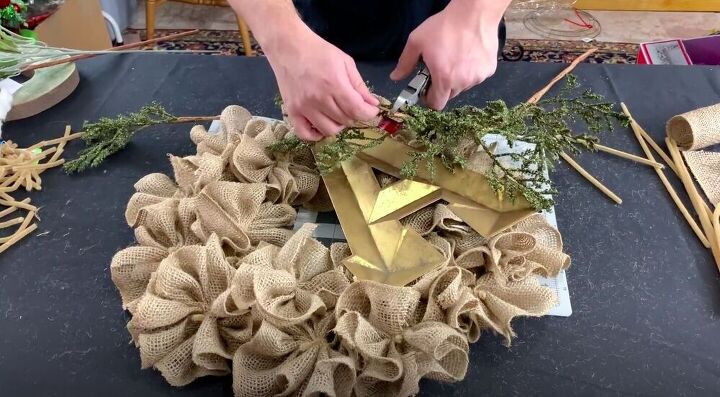
Once again, how you choose to decorate your wreath is up to you. I’ve chosen to go with some faux greenery to add some visual interest.
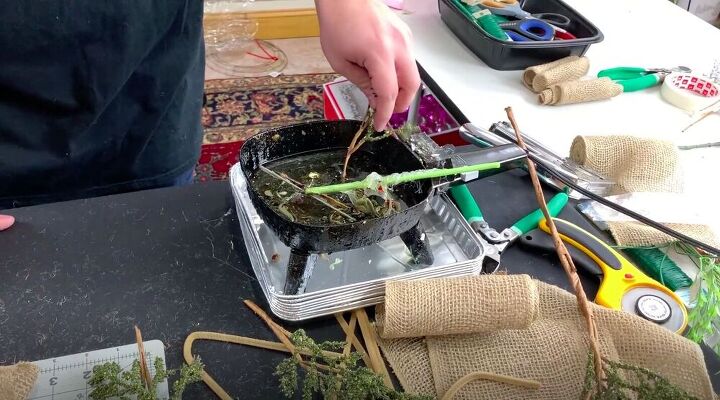
I cut it into smaller pieces, dipped the end in my glue skillet, and stuck it in place.
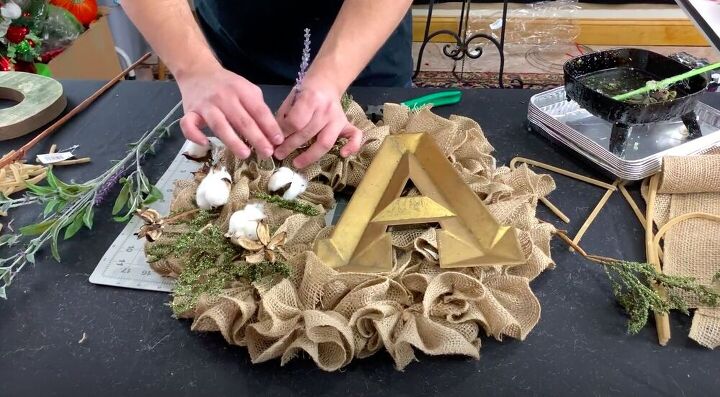
I also decided to add some cotton sprays here and there. This adds to the farmhouse look of the wreath, which is perfect for my sister’s bedroom.

Finally I went in with some faux lavender to add a touch of color and texture. I used the greenery from the faux lavender as well, saving on the cost of more separate greenery.
Tip:
A lot of stores offer 50% off coupons, so snatch up faux flowers and greenery when you see it, even if you don’t have a project in mind just yet. They won’t go bad or wilt like live flowers anyways!
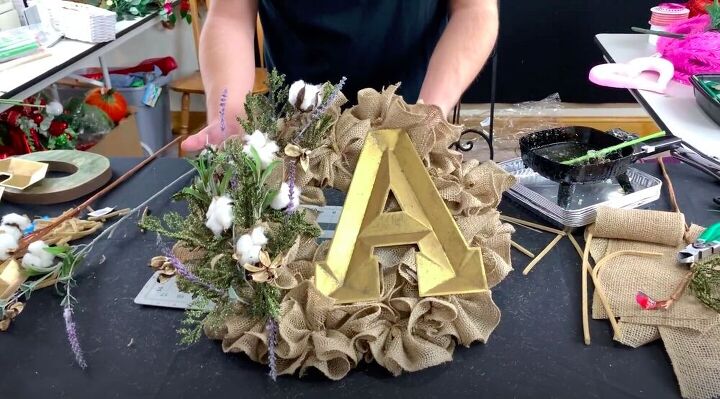

I hung my wreath on the wall with a command strip and with that I was done! This farmhouse monogram wreath is economical and fun to make! Personalize it for your space and aesthetic! How would you make yours? Let me know in the comments below.


Comments
Join the conversation
-
OMG that is absolutely amazing !!
I'm from Canada
thank you for sharing
thank you to Alex for filming


Frequently asked questions
Have a question about this project?
What size in height is the burlap used in this wreath?
Can you use material the same way as theburlap