


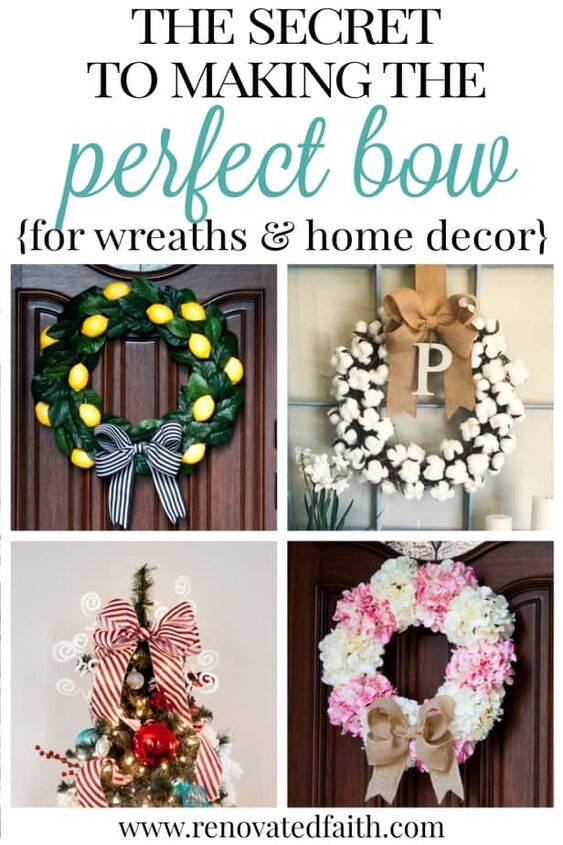
The Easiest Burlap Bow Tutorial (The Secret to Making a Burlap Bow!)
Burlap Bow Tutorial: How to Make a Bow for a Wreath
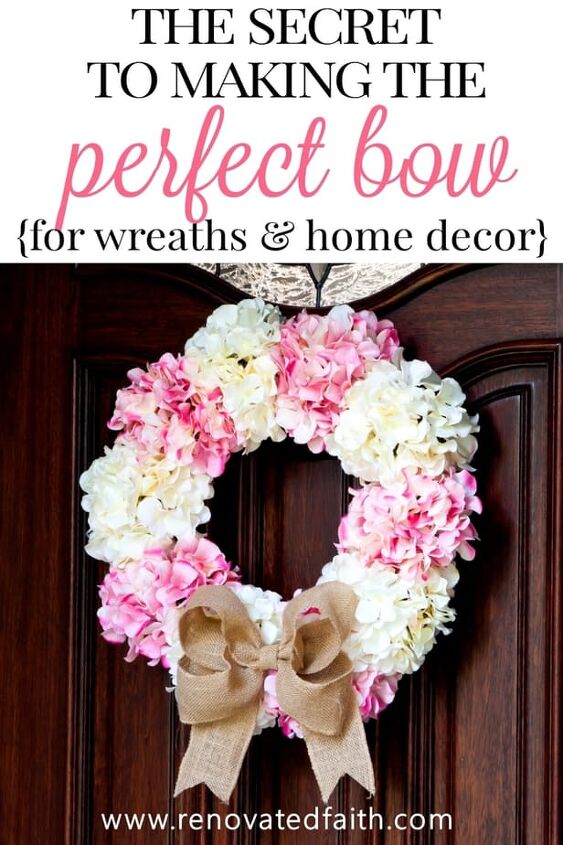
Want to know the easy way to make a burlap bow for a spring wreath, Christmas tree topper or home decor? Discover the secret to making a bow easily with this super simple burlap bow tutorial.
One fateful Christmas, my mom had an elaborate bow made for the top of her Christmas tree. It was huge, gorgeous and oh-so-expensive!
As she fluffed the branches in preparation to put her elaborate topper on the tree, my dad came into the living room, plopped on the couch and said, “what am I sitting on?”
That Christmas will forever be known as “the year Daddy sat on the Christmas tree bow.” No amount of fluffing and straightening could make that wire ribbon look the same as it once did.
Fortunately, you don’t have to waste your money on pre-made bows and you won’t believe how easy it is. These easy step-by-step instructions and video will show you how to make the perfect bow in very little time. I also show you my favorite ribbon to use for bow-making!
Whether you are new to crafting, or you’re a professional wreath maker, this burlap bow tutorial includes an easy little trick to have in your craft arsenal for any bows you need to make – burlap or otherwise!
LET ME SHOW YOU:
- How to save money by making bows instead of buying them
- A simple way to add a big burlap bow to your front door wreath
- How to decorate for your wedding with burlap bows on pews and chairs
- The easy way to make a bow for any home decor or project
- How to make a burlap bow for a tree topper
WANT TO SAVE THIS FOR LATER? CLICK HERE TO SAVE THIS PIN TO YOUR FAVORITE PINTEREST BOARD
(As an Amazon affiliate I earn from qualifying purchases. Please see my full disclosure HERE).
The Best Wire Ribbon for Burlap Bows
☑️ If you are curious or in a hurry, here is a quick link to the burlap ribbon I recommend: 3″ Burlap Wire Ribbon
Quick Links to Information in this Post
When my daughter Morgan was about 6 months old, I decided that I needed a way to work from home. For some reason, my answer to that dilemma was a hair bow business.
This seemed like a really good idea at the time and it lasted about a year. But after too many hot glue burns and 2 a.m. Dr. Pepper breaks, I decided it would be best to take an early retirement from the bow-making business.
Fortunately, I got to work with a really great shop in town called And Sew On. Here are a few of the Aggie bows I got to make:
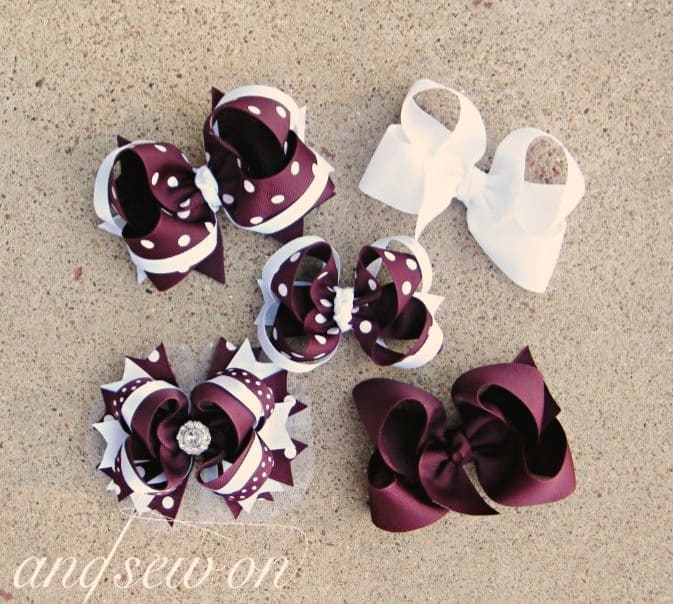
The nice thing about my hair bow venture was that my daughter has an unlimited, almost disposable, hair bow collection. But more importantly, I learned how to make a bow for any and every type of home decor including wreaths, mantels, mason jars and teacher gifts.
I’ve used this same technique to make a lot of burlap bows for various craft and home decor projects. As I show in the video, I love that it works well with any type of ribbon including burlap, wired burlap, satin, and grosgrain.
Supplies for Making a Burlap Bow:
Mini Hot Glue Gun – THIS one is my absolute favorite!
Hot Glue Sticks – I like these hi-temp mini glue sticks.
Wire Cutter
Craft Wire – I prefer this 28 gauge wire
Scissors – I love these scissors so much that I bought two pairs of them. I use them for everything!
3″ Burlap Wired Ribbon – This is my favorite ribbon for big bows!
How to Make a Bow for a Wreath: Step-by-Step Tutorial
Here is a full step-by-step video showing from start to finish:
STEP 1: How to Make a Bow with Wired Burlap Ribbon
The bow I’m making below is for an 18-inch grapevine wreath. For this same size bow, cut your 3″ wired burlap ribbon (I like this kind) to a length of around 52″.
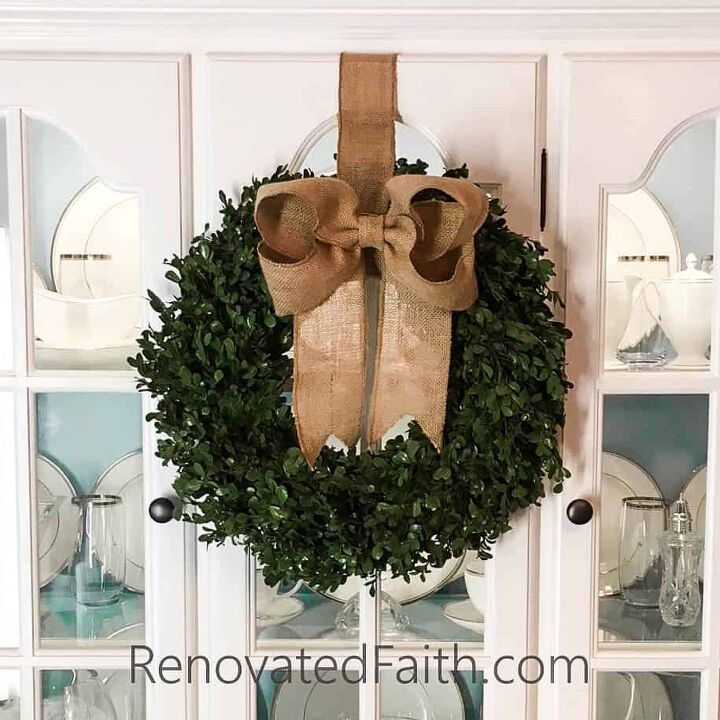
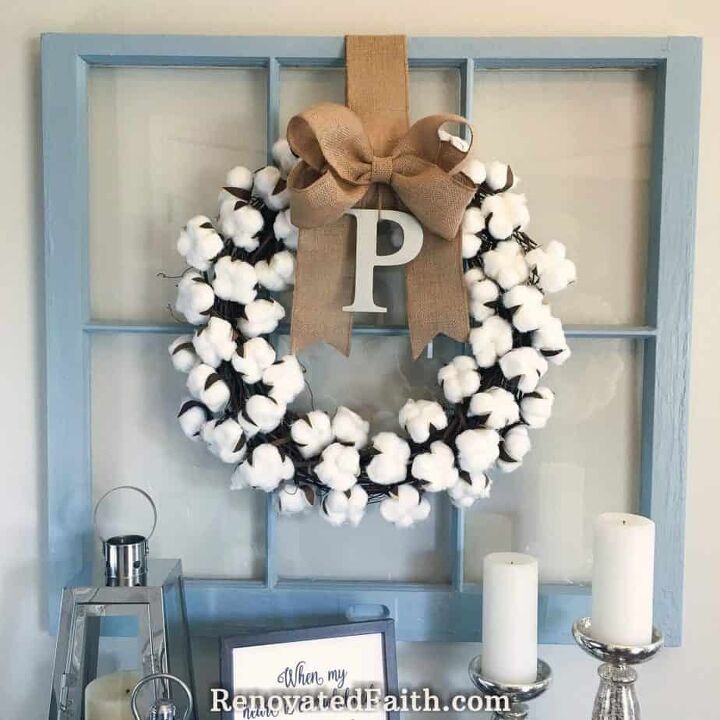
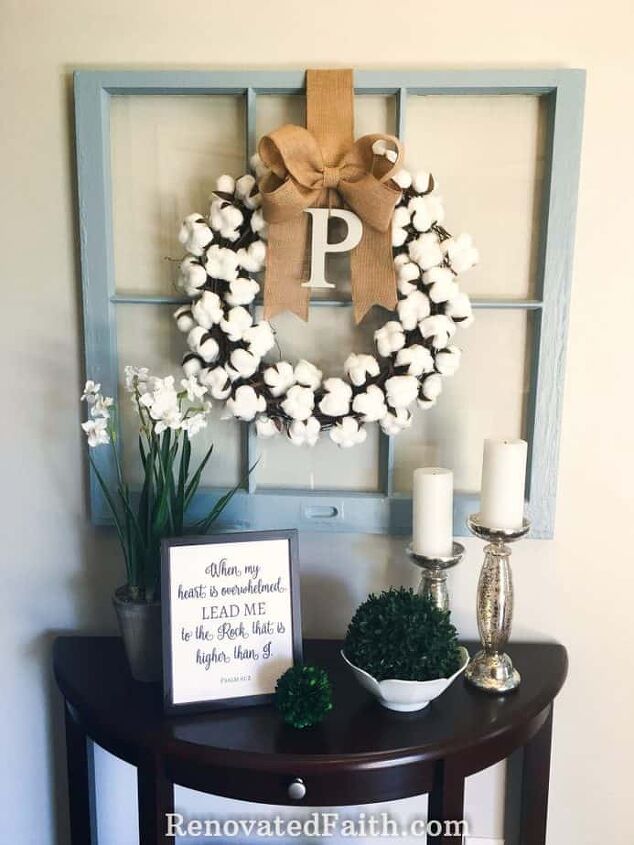
If you want a fluffier, loopier bow add a couple of inches, but if you want a flatter bow, subtract a couple of inches. I would consider the bow with the boxwood wreath above to be a fluffier bow and the bow with the cotton wreath below to be a little flatter.
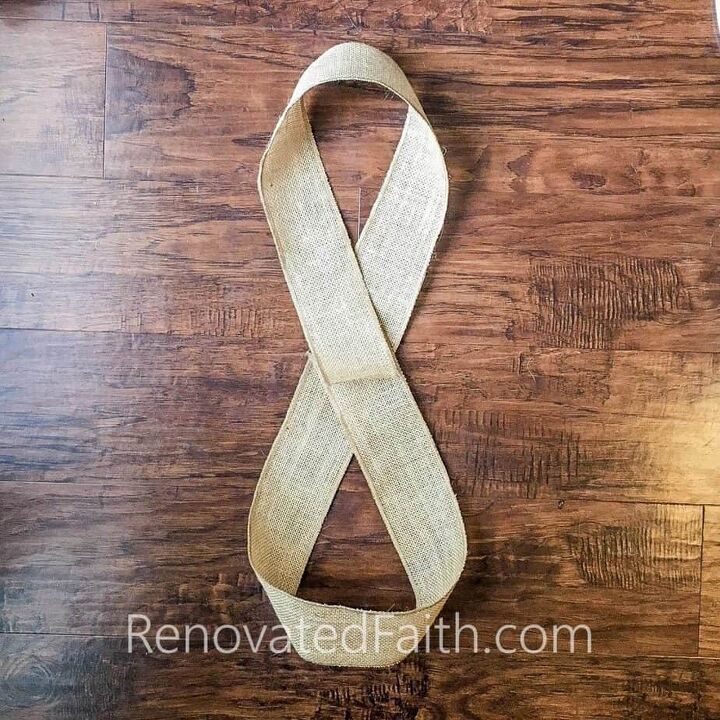
Lay out your ribbon and figure out the center point by dividing the overall length by 2. Make a light pencil mark there to give you an idea of where the center is when making your burlap bow.
How to Make Large Burlap Bows
If you want to make a big burlap bow for wreaths or home decor, follow the directions above using the 3″ wired burlap ribbon. If you want an even bigger bow, you can do one of two things: You can increase the length of your ribbon by 6-12″. If that’s still not big enough, you can also get thicker ribbon you can find here:
Burlap Ribbon, 3 Inch | Burlap Ribbon, 4 Inch | Burlap Ribbon, 6 Inch
How to Make Small Burlap Bows
This tutorial shows you how to customize a burlap bow to any project, whether it’s a wreath, a mantel, a mason jar or a teacher gift.
For smaller burlap bows, use a smaller thickness of ribbon, like 1 – 2″ wired ribbon. Also, decrease the length of your ribbon significantly. You want to look at the picture of the figure 8 below and make your figure 8 for the little burlap bows proportional to the big one – in other words just a smaller version. Every other aspect of the tutorial is exactly the same! 🙂 Here are some sources for thinner ribbon for small and mini burlap bows:
Burlap Ribbon, 1/2 Inch | Burlap Ribbon 7/8 Inch | Burlap Ribbon 2 Inch
Renovated Faith: What’s in a Name?
God never leaves a project half-done…He continually works on each one of us, as a lavish expression of His amazing love and grace. So many of my DIY projects remind me of how God renovates our hearts. If you are a work-in-progress, just like I am, check out the Renovate Your Faith Devotional at the bottom of this post. Click here to get a weekly reminder of new posts by email.
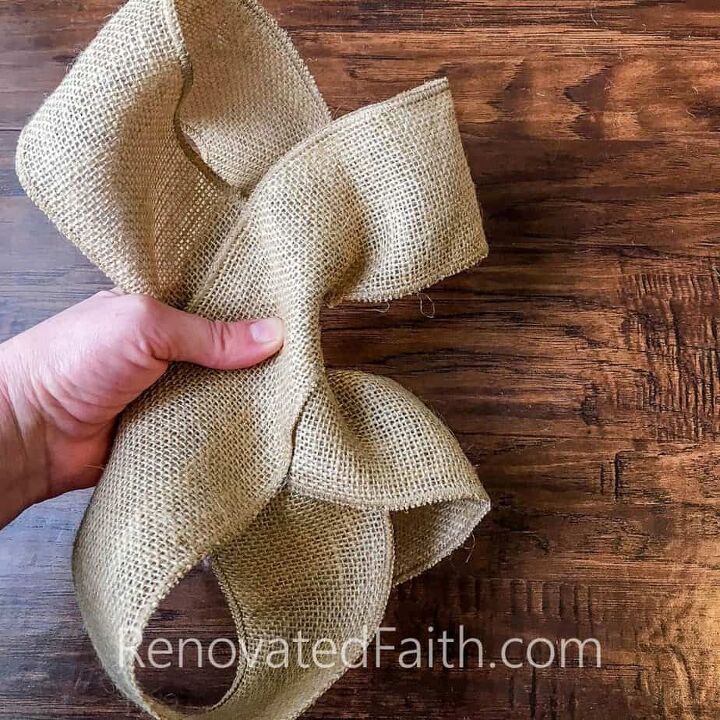
STEP 2: Make a Figure 8 to Start Your Burlap Ribbon Bow
Make a figure 8 just like below by pulling each end of the piece of ribbon around and to the center.
One end of the ribbon goes to the left and goes to the center and the other end will go to the right and come back to the center. Apply a couple of small dots of hot glue to hold the figure 8 in place.
Do you ever feel overwhelmed with all that’s on your to-do list? Does it seem that as soon as you one item is knocked off, 5 other tasks rear their ugly head?
It’s like being on a hamster wheel of frustration – always moving but never making true progress.
My thoughts were filled with overwhelm as I walked into my office from the living room. As I did, my eye caught a glimpse of a magazine on the coffee table entitled “DIY…something”.
For some reason, it hit me. The concept of “do it yourself” is one that is highly esteemed as a very American, ‘pull yourself up by the bootstraps’ way to live in today’s world of hustle.
But as someone that loves to DIY home projects and writes a DIY blog, I became starkly aware of the contrast in this concept and God’s ideal for how we are to live.
When we become a Christian, not only are we forgiven of our sin, have an eternal home with Him and the Holy Spirit indwells us for all eternity, but you no longer have to “Do It Yourself.”
As a child of God, we are never alone and never have to manage anything on our own ever again. He is forever by our side waiting to lead, guide, and direct us in the big decisions of life and even the most minute.
I get so preoccupied with “doing all the things” that I forget that He has freed me from the burden of the performance trap. Because I have been washed over with the grace of Christ’s sacrifice on the Christ, I’m no longer “in it to win it.” I no longer have to perform for myself or others because His death on the cross was the ultimate work done on my behalf – He has fulfilled the ultimate performance with a once-for-all sacrifice.
What does that mean for you and me? We now have the freedom to know that we are not defined by our failures or even our accomplishments. We are defined by His work on the cross, which has already been accomplished. And we can work in our earthly jobs as a form of worship to Him knowing that He is with it to carry our burdens – not just lend a helping hand – but to bear the full weight of them.
We no longer have to shoulder the weight of the world’s burdens on our backs because we have the king of the universe carrying them for us. Our only job is to hand our to-do lists to Him, knowing He will help us every step of the way.
“Come to me, all you who are weary and burdened, and I will give you rest. Take my yoke upon you and learn from me, for I am Gentle and Lowly in Heart and you will find rest for your souls.” Matthew 11:28-29
What burdens are you trying to carry on your own? Look to your Savior who anxious awaits to take them off your hands if you let Him.
To find out more about what it means for God to carry your burdens, click here: Why You Struggle to Rest & What To Do About It
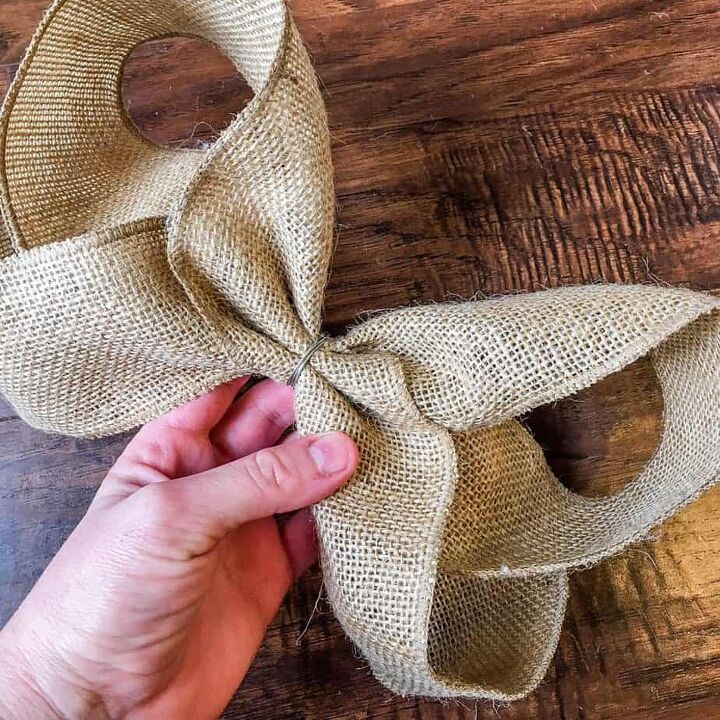
STEP 3: How to Make a Bow for a Wreath with Wire
Take a second to cut 12 inches of craft wire and have it ready.
Now bring each top and bottom of the figure 8 in so it is flat against the center of the 8. It should look like this for one end.
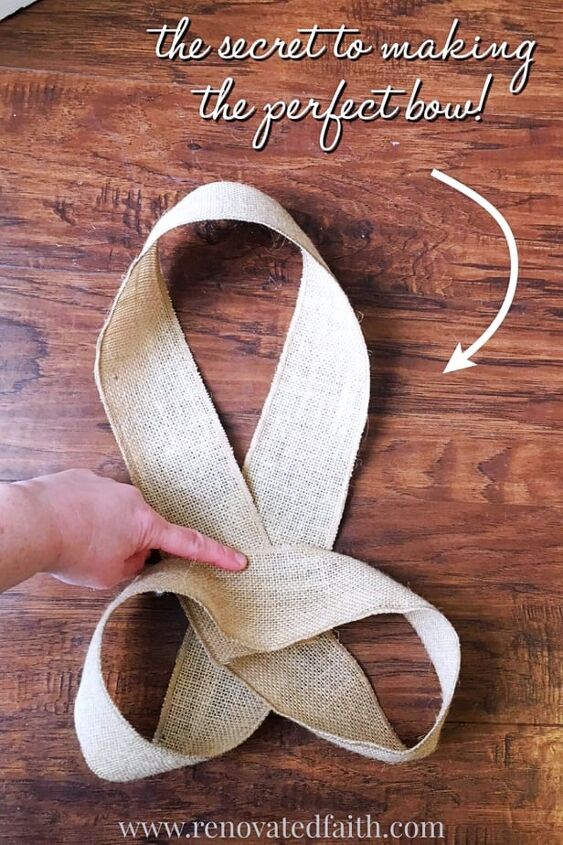
Bring the other side to the center in the same way and keep your hand on the center of the bow. This picture is the backside of the bow:
STEP 4: Making the Loops for your DIY Burlap Bow
Hold the burlap bow in place in the center and flip it over. This will be the front side of your bow.
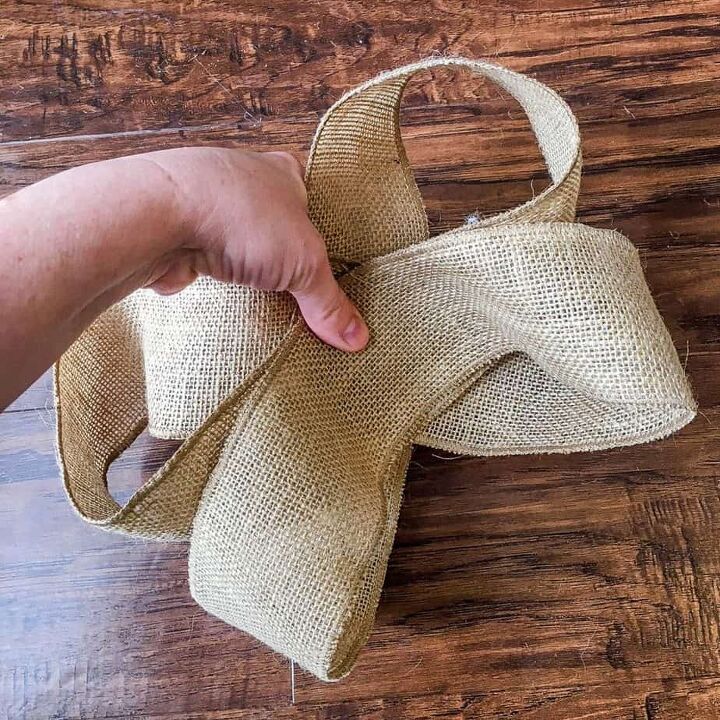
STEP 5: Fold the Center of your DIY Burlap Bow
While holding the bow tightly with one hand, fold the center so that you make three “wrinkles” in it. It’s fine if they aren’t exactly equal.
If you have a smaller bow, just try to get two wrinkles in the center.
Here is the pic of the first center wrinkle:
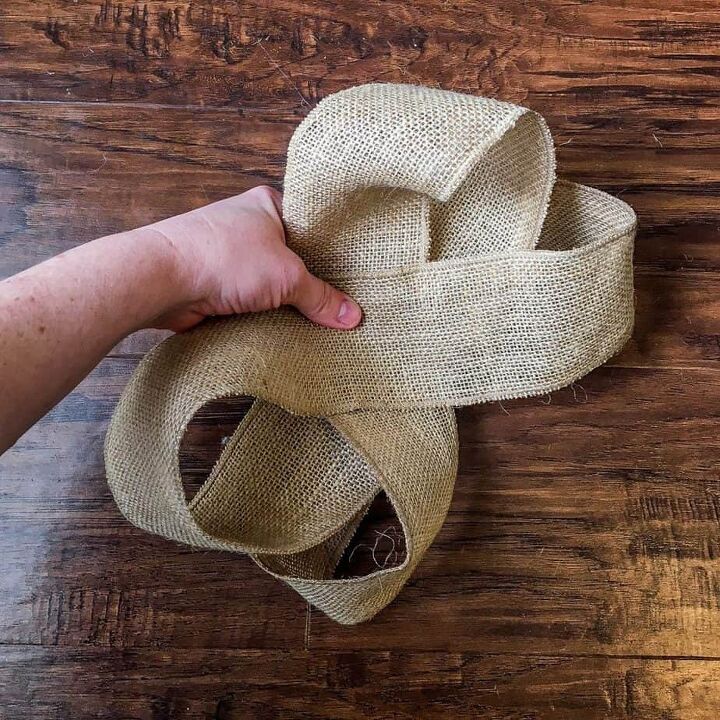
Here is a pic of all three center wrinkles for a big bow:

STEP 6: How to Tie a Burlap Bow with Wire
Then wrap your wire tightly around the center of the bow to keep the “wrinkles” in place. Twist the ends together on the backside of the bow.
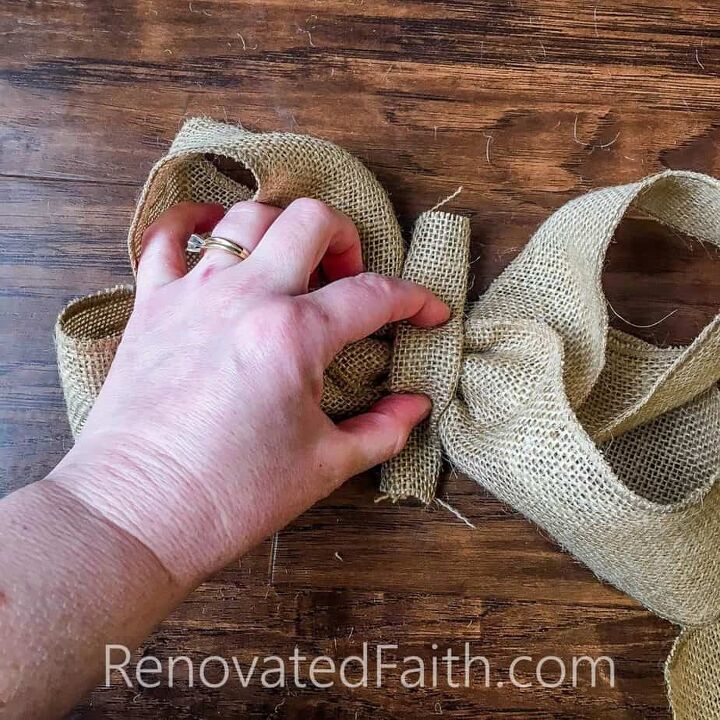
STEP 7: Add the Center to Your Burlap Ribbon Bow
You can see the bow starting to take shape. Take a 6-inch piece of your ribbon and roll it up length-wise so it is about an inch wide. Flatten it out and secure it with hot glue. Wrap this piece tightly around the center and hot glue the backs on each side. Cut off any excess ribbon.
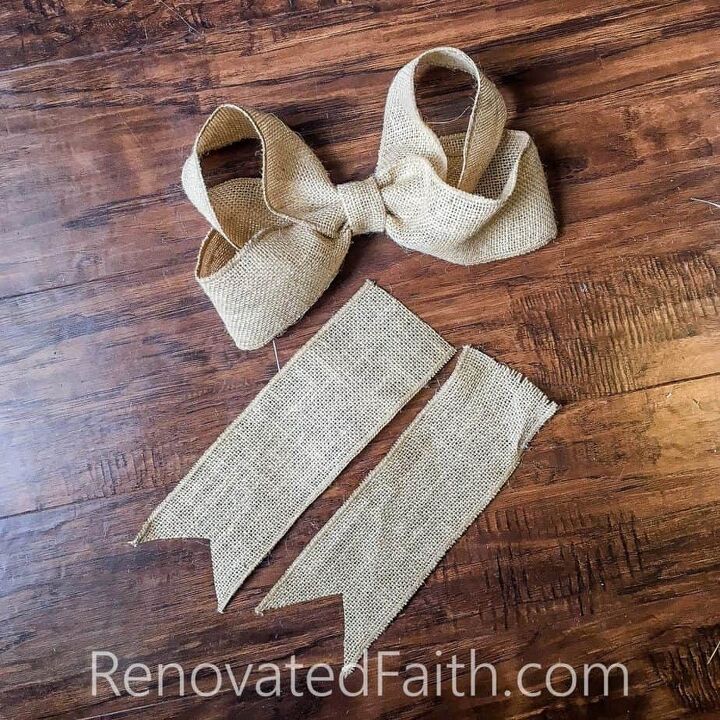
STEP 8: The Secret to Making a Burlap Bow
Here’s where I cheat a little to make this process so much easier! Cut two 10 inch pieces of burlap ribbon for the tails like this. Figure out where they would look best on the back of your bow before hot gluing them to the back.
Once you figure out the best location, just glue them on the back of the bow!
STEP 9: How to Make Burlap Bows with Tails
Last, cut a long piece of wire. Place a big dab of hot glue on the back center of your bow and stick the center of the wire through the glue. Let it cool completely.
Now, use the wire to attach the bow to your wreath, Christmas tree or home decor!
Now you have a perfect burlap bow to attach to any wreath or home decor. You can even use this method for making gift bows!
RENOVATE YOUR FAITH:
We were not designed to rely on our own strength. We are made to lean hard into our Creator, Comforter and Shepherd. Phil. 4:13

For more spiritual encouragement, click here for the rest of my project posts that also include Renovate Your Faith devotionals.
FREE Furniture Painting Cheat Sheet
Here’s where you can get my must-have painting tips for furniture! Get the password for the library with all of my free printables including wall art, checklists and templates by filling out this form:
DON’T FORGET TO TAKE A PICTURE!
Now that you are done, I’d love to see how it turned out! ❤️ Post the picture of your bow here!
The method of making hair bows is a little more difficult, which is why we cheat by adding by gluing on the tails in my Burlap Bow Tutorial. I tell a little about my bow business venture in my post The Kind of Mom I Never Want To Be.
Easy Burlap Bow Tutorial: Related Posts
How To Make A DIY Cotton Wreath For Less Than $10!
Simple Hydrangea Wreath for Spring
How to Make an Easy Peasy Lemon Wreath
The Easy Way to Paint Mason Jars
How to Make a Rustic Glam Christmas Wreath
How to Add Ribbon to a Christmas Tree
This cotton boll wreath was made with a grapevine wreath, cotton balls and paper! See how to make you own here: DIY Cotton Wreath for Less Than $10
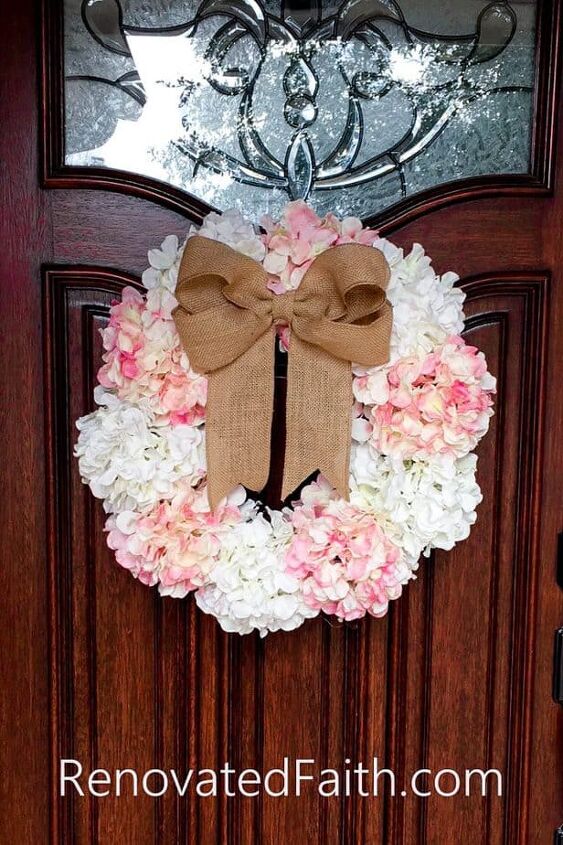
DIY Hydrangea Door Wreath {Why Spring Is The Season of Hope}
I made this hydrangea wreath for my front door and it has held up incredibly well! Click the link above to make your own.
How to Make a Burlap Bow for a Wreath
You can use the wire attached to the bow to tie it on your wreath. This type of wire burlap bow looks great on the top or bottom of any wreath.
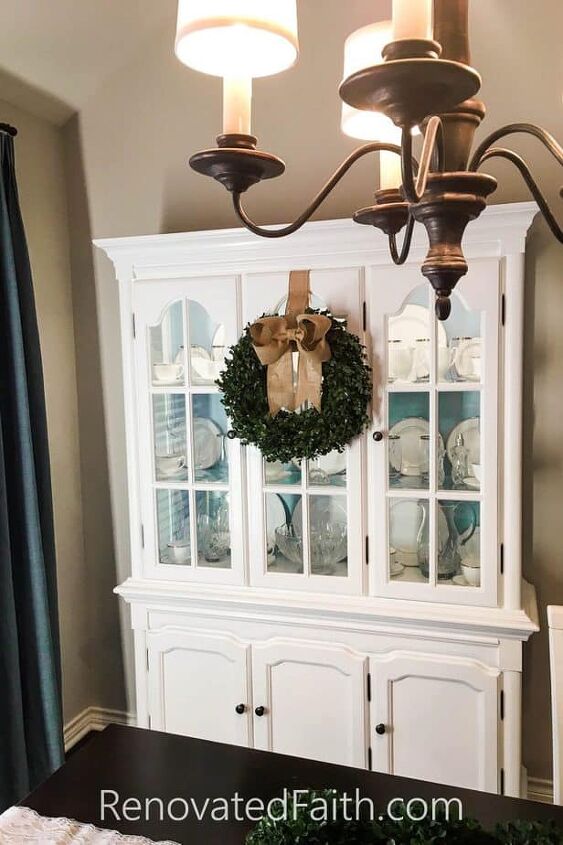
To get this same look, Amazon sells a wreath almost identical to this one: 20″ Boxwood Wreath Then, just attach your burlap bow and you are done! I actually made this wreath from real boxwood branches, but you can read why I DON’T recommend that here: How to Know When To DIY Home Decor or Buy It

How to Make a Burlap Bow for a Tree Topper

To make a bow for Christmas tree toppers and Christmas wreaths, use the same instructions above! Instead of wired burlap ribbon, here I use wired Christmas ribbon that is 2.25″ wide. Make the bow with the instructions in this post and attach it to the highest center branch of your tree. You can see in this post (How to Add Ribbon to a Christmas Tree) how I make it look like the same ribbon in the bow is intertwined throughout the whole tree!
How to Make a Burlap Bow for a Christmas Wreath

To see the full tutorial on how to make this rustic glam wreath click here: Rustic Glam Christmas Wreath with Ornaments and Wooden Balls
Easy Burlap Bow Tutorial – FAQ’s:
The Best Place to Put a Burlap Ribbon on a Wreath
You can put a burlap ribbon wherever you prefer. The instructions from this tutorial still apply! You can put the bow at the top, at the bottom or at 4 o’clock if you want to add some hydrangeas or an initial. It’s totally up to you and there are several options!
How to Make a Layered Burlap Bow
If you want to make a thicker, layered burlap bow, you can repeat steps 1-6 to make two separate bow “bodies”. Before adding the center strip of ribbon, stack the two bow bodies and then hot glue them together. Then continue with adding the center strip and continue the bow as usual. This is a great way to make a really fluffy layered burlap bow easily!
Easy Burlap Bows for Wedding Decor
If you are wondering how to make burlap bows for wedding decor you can easily use this tutorial! Use the instructions in step 1 to customize the bow to whatever size you need for the pew or for making burlap bows for wedding chairs.
You can hot glue the bow to a longer piece of ribbon that attaches to the pew or chair. Be sure to twist or gather the ribbon with wire before hot gluing it to the bow before attaching it. That will make it look like you made the bow from one long continuous piece of ribbon. No one will know the difference!!!
The Best Type of Ribbon for a Burlap Bow
If you can get wired ribbon, that usually helps the bow to stay in place and also be fuller. However, if you can’t find wired ribbon, you can see the tip below. You can find lots of burlap wired ribbon here: Wired Burlap Ribbon in All Colors
How to Make a Bow for a Wreath Stiff
If you can’t find wired ribbon, you can just as easily use ribbon without wire. To make it extra stiff and full, just spray the finished bow with a thick layer of hair spray. Let it dry and your bow will be stiffer than if you used burlap wired ribbon.
How to Make a Burlap Ribbon Bow for a Mason Jar
Use the instruction in step 1 to make a small burlap bow. When you are done, hot glue a piece of ribbon around the jar. Hot glue the end and cut off any excess. Then, just hot glue the bow to the ribbon on the jar to make it look like one continuous piece. To see how to spray paint and personalize mason jars, check out this post: The Easy Way to Paint Mason Jars.

Making Burlap Bows for Wreaths & Home Decor – Final Thoughts
Don’t forget to sign up for my free printables including my Free Furniture Painting Cheat Sheet. Click the link to sign up for my weekly newsletter which also grants you free access to my resource library full of wall art printables, checklists, and project plans!
Burlap bows are such a fun way to add modern farmhouse style to any wreath or home decor project. Knowing how to make them yourself will save you so much money and give you a lot more options. These easy tips and burlap bow tutorial will help you make the perfect bow every single time!
WANT TO SAVE THIS FOR LATER? CLICK HERE TO SAVE THIS PIN TO YOUR FAVORITE PINTEREST BOARD

I love to hear your thoughts and questions! Scroll down to leave a comment and I WILL reply! ❤️
Blessings,

Be sure to follow the fun here!
Email Subscription | Instagram | Pinterest | Facebook | Twitter

How to Make a Bow: Youtube Tutorial
Burlap Bow Tutorial: How to Make a Bow for a Wreath & Home Decor
Welcome to Renovated Faith, where I share about DIY projects, my faith and everything in between! When I’m not spending time with my family, you will find me redoing furniture in the garage or watering plants in my greenhouse. This blog is about transformation. Anyone can renovate a house but only God can transform our hearts!
Resources for this project:
See all materials


Comments
Join the conversation
-
Thank you so much for sharing not only the DIY but also Jesus Christ! I loved you post. I will be sharing your message with others. Very inspiring and refreshing. Again thank you so much. Have a blessed day!
-
Love the project, I realize we all witness in our own way, but this isn't the place, don't need the sermon


Frequently asked questions
Have a question about this project?
I love your bow, but I agree with Lilu. I was raised in a Christian home and I'm deeply religious in my own way - but not your way. Yours may be a Christian site, but others read it too. Would you listen to a Muslim, or a Buddhist or whatever spew their beliefs just to learn to make something? Please keep remarks to building the bow - just the facts, ma'am.