


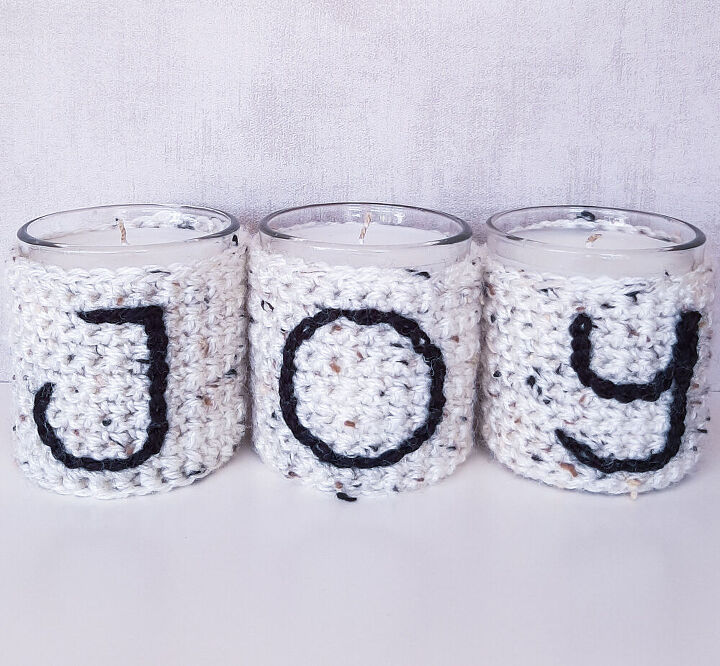
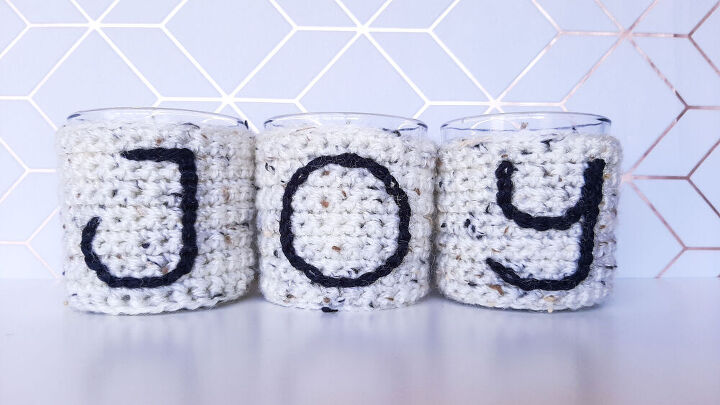
Christmas Crochet Jar Covers

If you are looking for a super quick, free Christmas crochet pattern, then these cute crochet jar covers are just the ticket.
This jar covers are so, so quick to work up. And as each one uses a very small amount of yarn, they are also perfect scrap yarn crochet projects!
I think it’s a lovely Christmas gift idea to crochet small projects like these as a set, so I added a simple monogram letter to each one. You could really customize your crochet jar covers in any way you like – spell out someone’s name, add a few more to spell out another festive phrase, the possibilities are endless :-).
Find the full pattern here: https://nedandmimi.com/jar-covers-free-christmas-crochet-pattern/
Finished measurements
Finished measurements will depend on your container size.
The jar cover is crocheted flat and should wrap around the container with a gap of approx. 1” / 2.5cm.
When seamed, the cover will stretch to fit snugly around the container.
As an example, my container (a glass candle holder) and cover measure as follows:
Container measurements:
Diameter: 3” / 7.5 cm
Height: 3.25” / 8.25 cm
Cover measurements (laid flat):
Width: 8.5″ / 21.5 cm
Height: 3″ / 7.5 cm
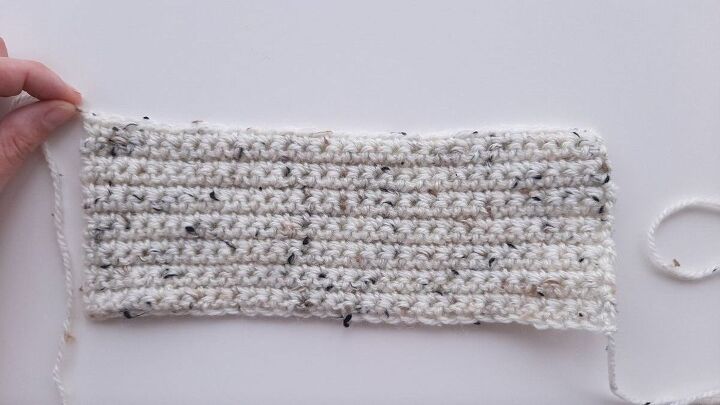
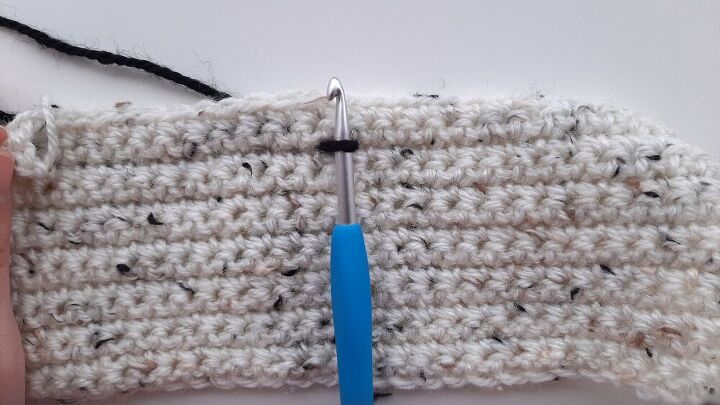
Ch 30, (or any number that will wrap around your container when slightly stretched. Your piece will pull in slightly as you work, so the starting chain should be approx. the same circumference as your container.)
Row 1: Sc in second ch from hook and each in ch across, turn. [29]
Row 2: Ch 1 (does not count as a st, here and throughout), sc in each st across, turn.
Repeat Row 2 until your work measures slightly less than the height of your jar/container.
Make 3 of these panels.
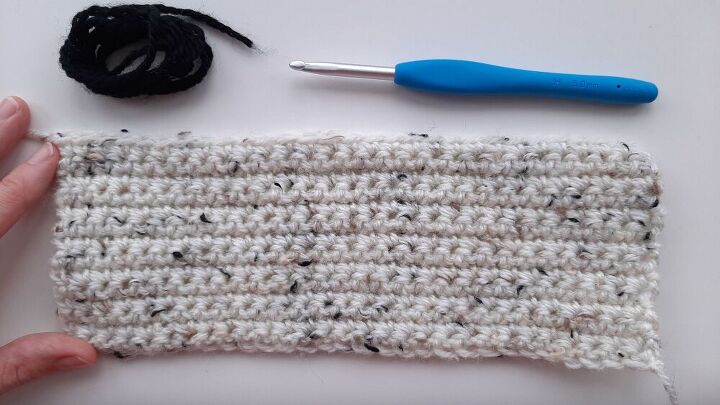
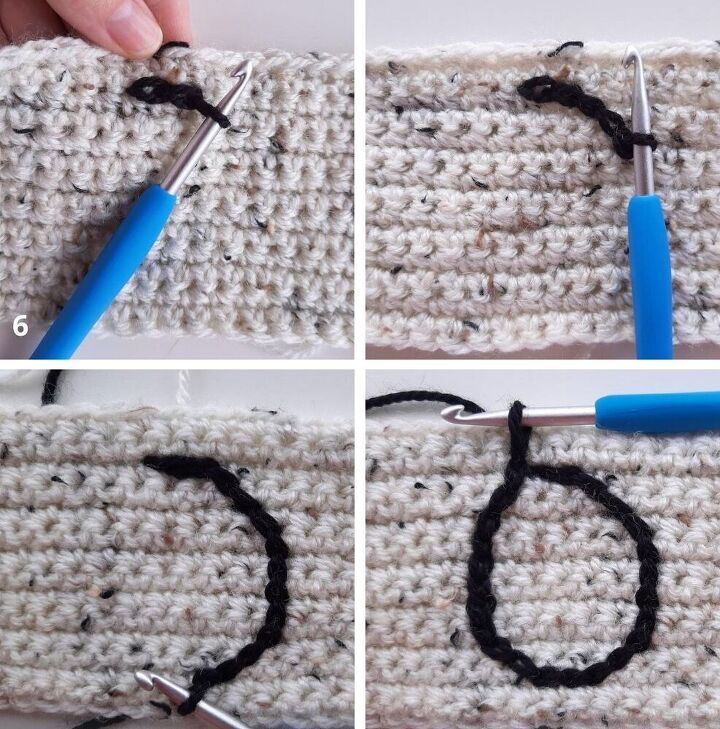
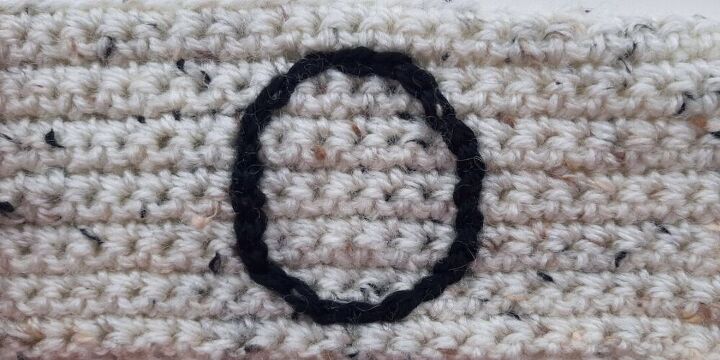
This example will demonstrate how to work the letter "O."
Start with your flat crochet piece and a small length of your contrast color (about 50″ / 125 cm).
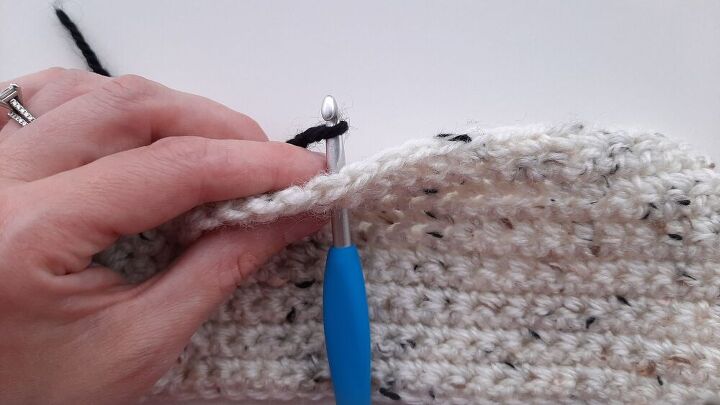
Keep contrast color yarn at the back of your work.
Insert hook through your work at the point you want to start your surface slip stitches.
Note: In this case, I inserted my hook through a space beneath the second last row, just left-of-center of my work.
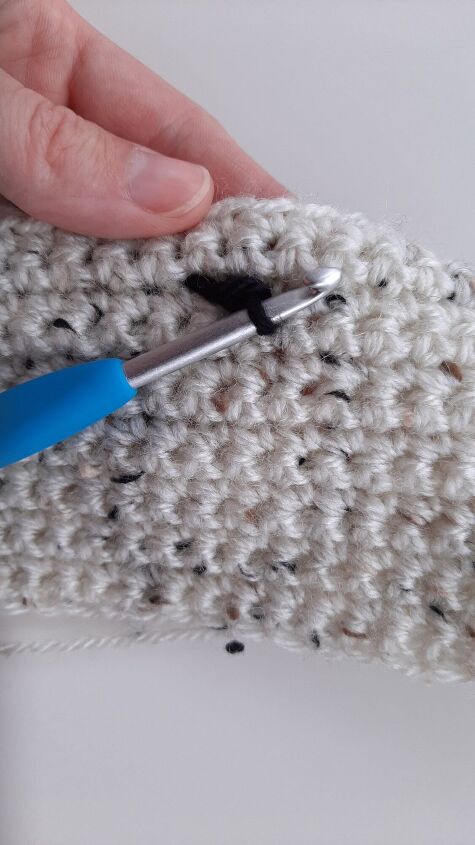
a. Insert hook into next “space” in the direction you want to go. In this case I am working from left to right in between 2 rows.
b. Yarn over (the yarn is still at the back of your work), and pull up a loop. First sl st made.
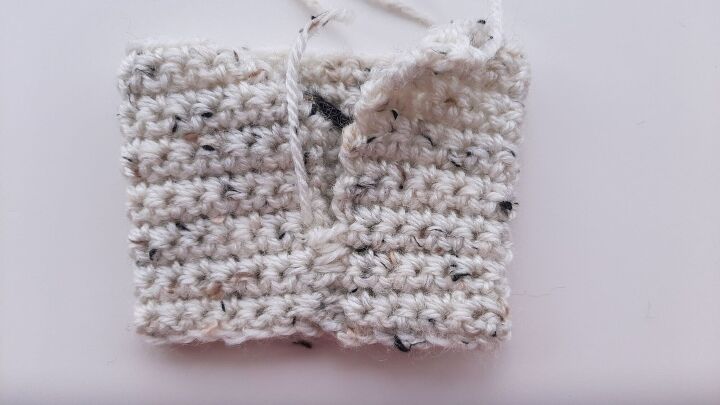
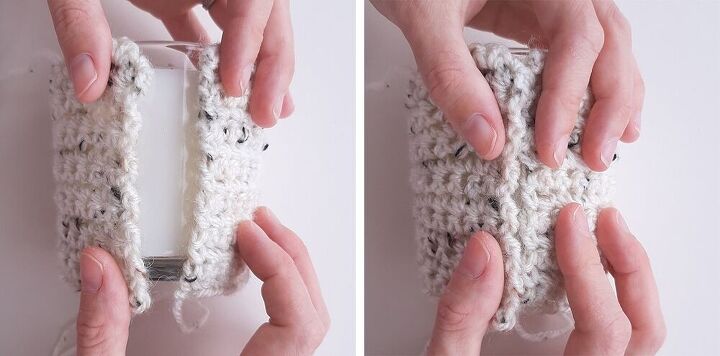
Fold jar cover panel in half (with WS facing out), and whip stitch edges together.
Weave in remaining ends.
Turn jar cover the right way around.


Frequently asked questions
Have a question about this project?