Decorate Your Mailbox for Christmas!

I like to decorate outdoors for Christmas, and for me that begins at the curb with my mailbox. Next it will be up the railings and stairway and then my front porch. This year I will decorate it all in red and gold!
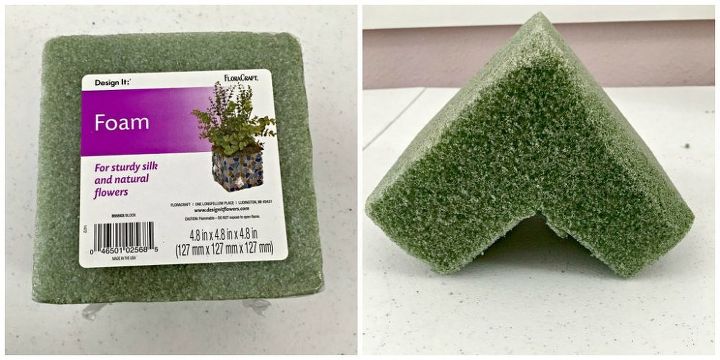
I began with a 4.8″ block of styrofoam and cut a corner out of it with an Exacto knife.
The mechanics of this are important so that you can attach your final decoration firmly to your mailbox. I used 24 weight floral wire and 4 buttons to secure the wires to my foam. Bend the wire in half and thread it through your button.
Push the wire down through your foam and on the back of your foam you will feed the two wires through another button, twist them tightly and then use the remaining length of wire into a circle. You will use those two circles to attach wire or zip ties to secure this to your mailbox.
For this demonstration I used white pipe cleaners to show you how you will thread the pipe cleaners through the wire circle, take the pipe cleaner beneath your mailbox and secure on the other side in the same way. I had to wire 3 pipe cleaners together to reach around my mailbox and up the other side to my other circle.
While working on my decoration inside, I sat it up on this lantern which I had turned on its side. This will be how the foam sits on top of your mailbox.
I tied a big red fluffy bow out of outdoor red velvet ribbon, and then secured a steel pick to the pipe cleaner I had used to tie my bow. This will keep the bow secure in the foam. Don’t know how to tie bows? Have you thought about asking for a ProBow for Christmas? I have!
I have turned this sideways so you can see how your mailbox will look from the side as you are beginning to make your arrangement.
I stuck the bow right in the top of my foam piece. Then I added several longer pieces of miscellaneous faux Christmas greens so they will flow over the side of my mailbox.
Continue to add greenery to your foam, but don’t go overboard with it yet!
The next step is to add several shatterproof Christmas balls. First add a little bead of hot glue around the cap on the top of the ornaments so the caps don’t pop off and send your balls rolling down the street. Next, feed a pipe cleaner through three different ornaments. I chose to use red and gold ornaments to match my outdoor decor this year. Bend the pipe cleaner over and add a steel pick OR a wood wired stick to them.
Begin adding the balls to your arrangement. Use a different textures and colors for a nice variety to your decoration.
Now will be the time to fill in with the extra greenery. After you have added all of the ornaments you want, go back and see where you can still see the foam or the mechanics of the arrangement like you see above. It was easy just to add a couple of little sprigs of greenery between the ornaments to finish up!
Here it is, my finished mailbox decoration for Christmas. I will keep it inside until right after Thanksgiving, but it is all done and ready to attach to my mailbox! For more details, check out my blog post on this at Celebrateanddecorate.com
DIY Christmas Decor Ideas
Enjoyed the project?
Resources for this project:
See all materials












Frequently asked questions
Have a question about this project?
How many pieces of faux greenery are needed for this project?
I have a 4-mailbox in one large rectangular brick base. I am looking to decorate that. Any ideas for this 4 holder brick mailbox?
Have you considered using a smaller bungee cord instead of pipe cleaners?