


Farmhouse Style Jar - Christmas Decor Idea
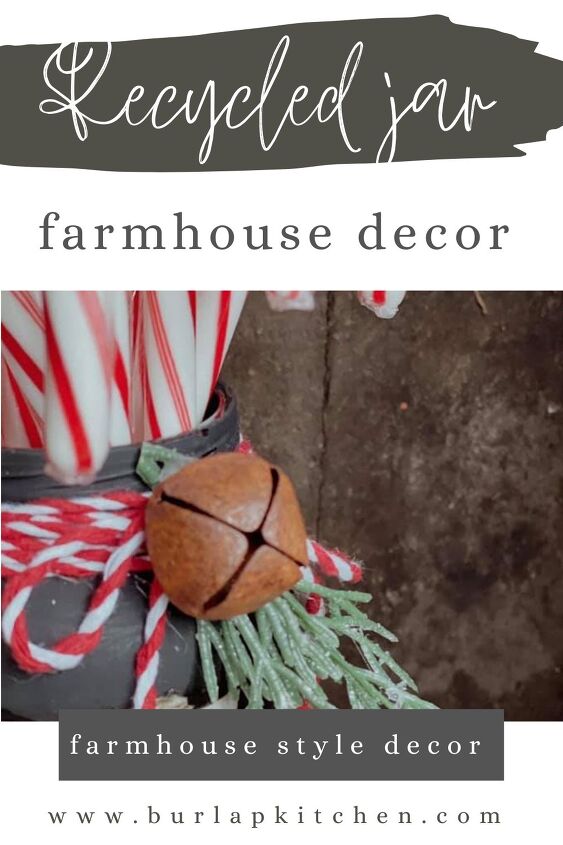
Today, I am happy to be sharing with you all how to create a farmhouse style jar for Christmas decor. This is such an adorable recycled Christmas DIY made using jars from your supper. I love seeing candy canes around during Christmas time, and this beautiful farmhouse style Christmas décor jar will have your guests thinking you bought it at a high-end craft store! However, this is a super budget-friendly Christmas DIY! How cute would these farmhouse style Christmas candy cane jars be to give away as special Christmas gifts to your friends and family?!
Today, I am happy to be sharing with you all how to create a farmhouse style jar for Christmas decor. This is such an adorable recycled Christmas DIY made using jars from your supper. I love seeing candy canes around during Christmas time, and this beautiful farmhouse style Christmas décor jar will have your guests thinking you bought it at a high-end craft store! However, this is a super budget-friendly Christmas DIY! How cute would these farmhouse style Christmas candy cane jars be to give away as special Christmas gifts to your friends and family?!
- Jar
- black chalk paint
- Mod Podge
- small gift bag
- bakers twine
- rusty bell
- greenery
- hot glue gun & glue sticks
- coffee – optional
- candy canes
Step 1. Using a recycled jar of your size and liking, peel away any labels so that the jar is completely bare.
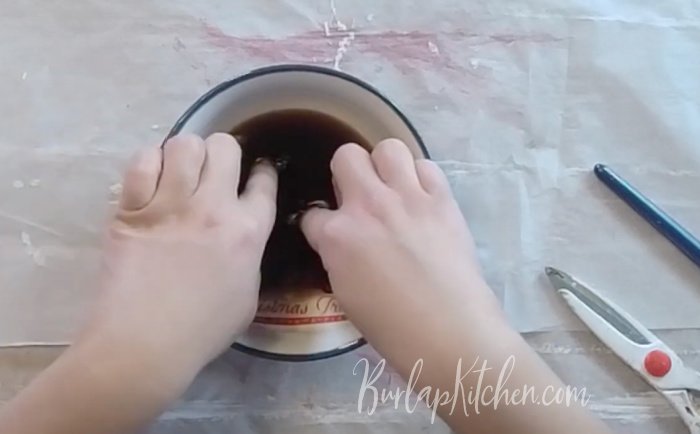
Step 2. I purchased mini Christmas gift bags from Walmart, and cut out the picture portion of the gift bag I wanted to use for my jar in a square shape. Next, gently rip around the edges of the picture to create a more rustic look. Then, dip the picture into some coffee and soak it for about 10-15 minutes. Then, allow your picture to dry completely. I allow mine to air dry overnight. Do not put these in the oven to dry as they will burn.
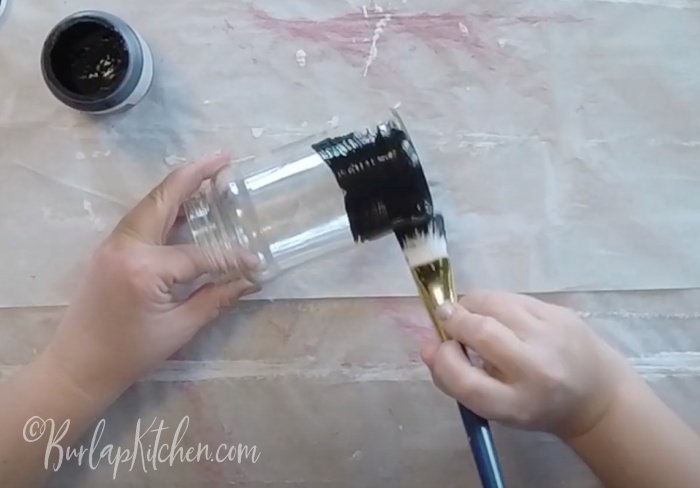
Step 3. Using Waverly chalk paint in the color “ink,” paint your jar. You will need to apply two coats of this black colored chalk paint to your jar. Dry in between each layer. Then, after the second coat, allow your jar to dry completely.
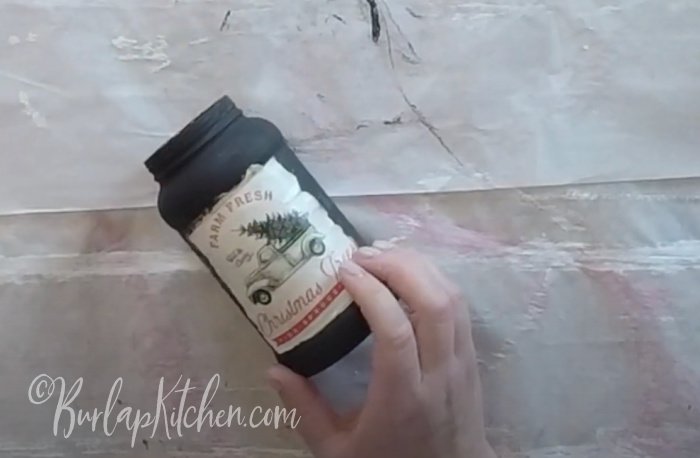
Step 4. Apply Mod Podge onto the back of your dry coffee-dyed picture. Then, carefully apply it to the front of the black chalk painted jar. Try to make sure it is centered before applying. Gently press down on the picture to adhere it to the jar. Allow to dry.
Step 5. This can be optional, but I applied some Mod Podge over the pine trees and the tires that were on the gift bag picture I used, to act as snow. Then, I gently sprinkled on some glitter over top of the Mod Podge, shook away any excess glitter, and allowed it to dry.
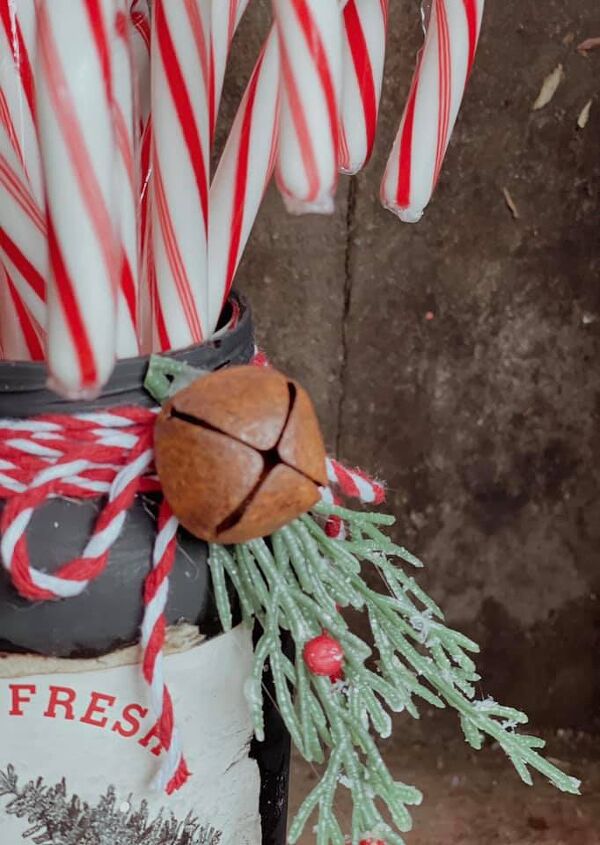
Step 6. Next, using baker’s twine and a pine pick, hot glue the pine pick to the top one side of the jar as an embellishment. Allow this to dry. Then, take the baker’s twine and wrap it a few times around the rim/top of the jar, tie it in the back, and then trim away any excess twine. Next, take the same baker’s twine and make a small bow. Hot glue the small bow over top of the pine pick, trimming away any excess twine. Then, hot glue a small rusty bell in the center of the small bow. Feel free to use embellishments of your liking. Allow everything to dry.

Step 7. Add some candy canes to your jar and enjoy!


Tags: highend

Comments
Join the conversation
-
Simple, pretty and practical!
-
So cute, thank you for sharing your crafty ideas!


Frequently asked questions
Have a question about this project?
I have a question. Most gift bags I’ve seen, even small ones are coated so its shinny and “durable”. Can you do this project with those type of gift bags?