


How to Build a Wooden Triangle Christmas Tree
Add some magic to your Christmas outdoor lighting with this DIY wooden triangle Christmas tree. You will need some pieces of wood, chicken wire, lights, paint stain and a garland to create a stunning decoration like this.
This is a shortened version of this tutorial. Please visit my blog for the full tutorial (See the link at the end of this post).
 See the how-to VIDEO HERE

MATERIALS
- Sides: Two, one metre (39 inches) lengths of wood. Mine is 4.5cm wide and 2cm thick.
- Bottom of the triangle: One length of wood 31 inches / 79cm
- Stand: A rectangular piece of wood. Mine is 11 x 6 inches (28 x 15 cm)
- Chicken wire
- Wood stain
- String lights
- Star garland - See tip below
- Silver craft wire
STAR GARLAND TIP - I made the star garland from air dry clay and there will be a tutorial coming for that on the blog. In the meantime, you can learn how to make air dry clay ornaments here.
TOOLS
- Mitre saw or
- Hand saw
- Electric sander
- Screws
- Drill
- Drill bit
- Staple gun
- Pliers
- Quick-drying wood glue
INSTRUCTIONS
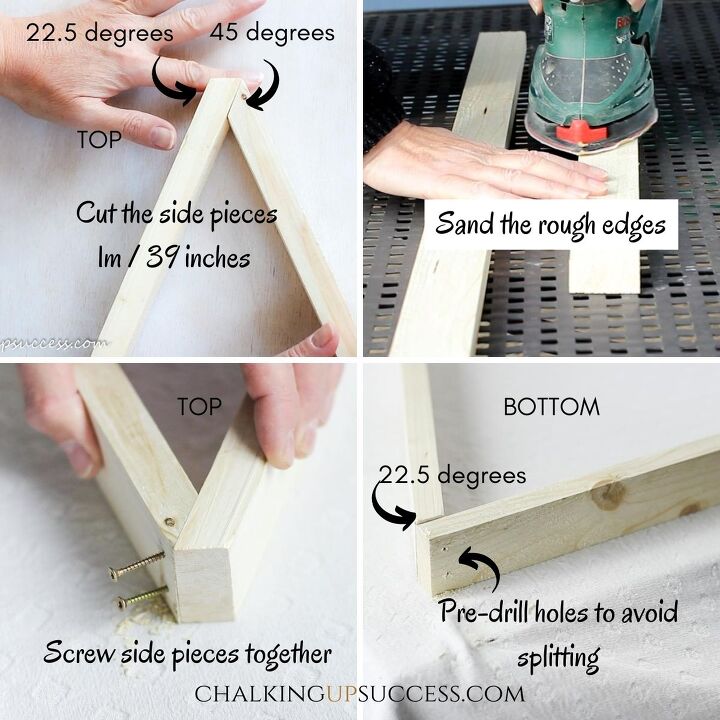
- Cut three lengths of wood to size. Top: Use a circular saw to cut a forty-five-degree angle at the end of one of the pieces of wood (right side) and a twenty-two and a half degree angle at the end of the left side. Use the mitre saw to make 22.5-degree cuts at the bottom ends of both side pieces. Bottom: Cut a piece for the bottom of the triangle measuring 31 inches / 79cm.
- Sand rough edges of the wood.
- Attach the right side to the left side. Pre-drill a small entry hole for the screw.
4 Build the base. Cut the third piece of wood at 31 inches / 79cm.
Screw left and right sides to the base with screws.
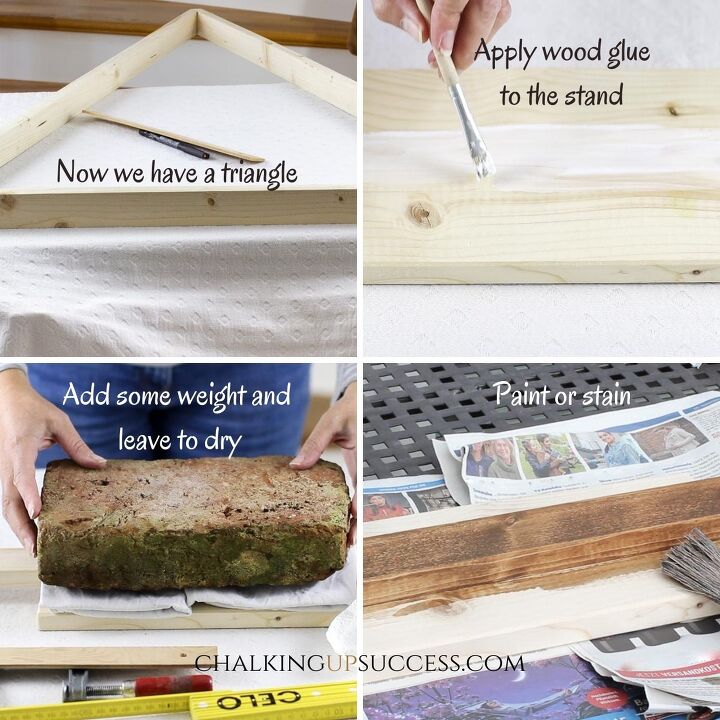
5 Glue the wooden triangle to the middle of the stand (a piece of wood 11 x 6 inches (28 x 15 cm).
6 Stain the wood.
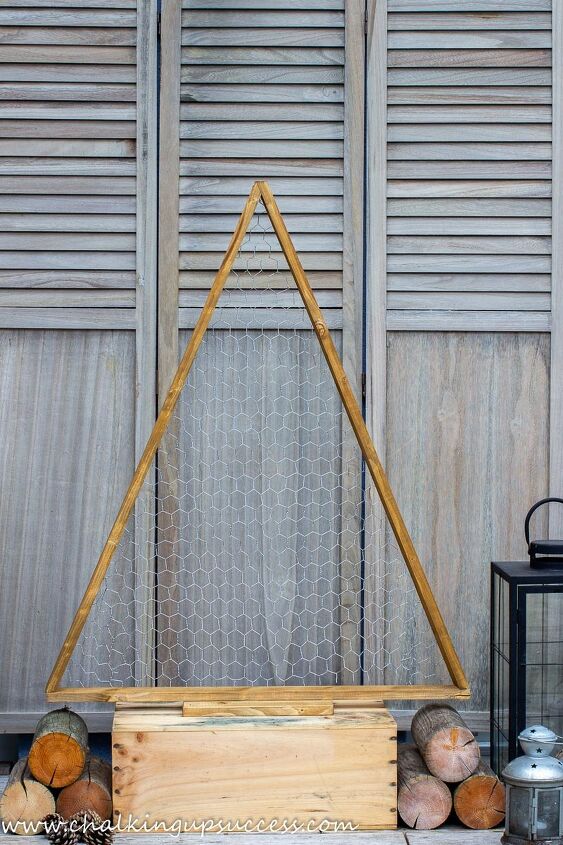
7 Cut a piece of chicken wire and staple it to the back of the triangle.
DECORATING
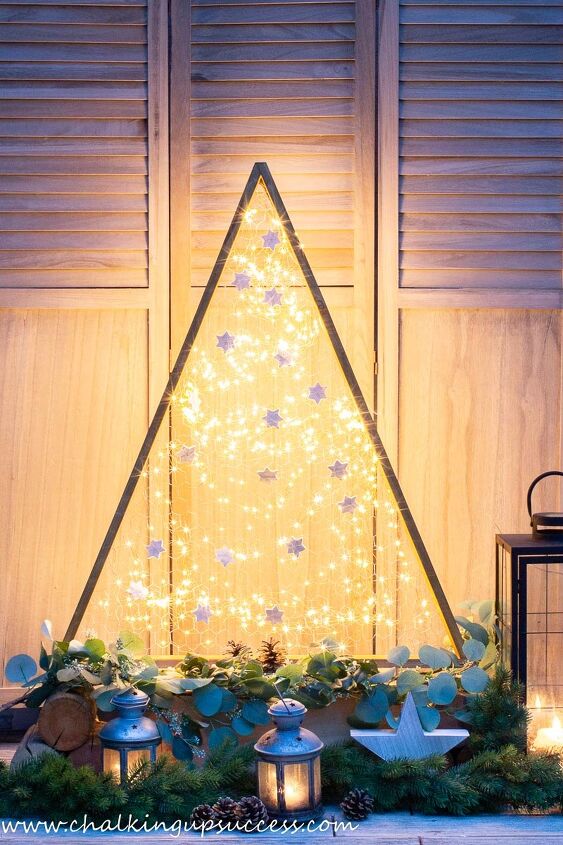
- String the lights over the tree.
- Attach a star garland.
Come on over to the blog to see how I decorated my wooden triangle Christmas tree and for more decorating ideas.
Thank you for visiting today, see you soon!
Jayne
WAIT!
Before you go, if you’re not part of our amazing creative community yet but would love to join us, I would love to have you stop by my blog Chalking Up Success for the full tutorial or to sign up for my latest posts, DIY, inspiring home decor, natural home recipes and more.
FREE RESOURCES
By signing up, you’ll also receive a copy of the free ‘Furniture Flip Checklist’ and gain access to all the other printables, e-books and labels in the VIP Resource Library.
FOLLOW CHALKING UP SUCCESS
CHALKING UP SUCCESS ON YOUTUBE
Subscribe to my YouTube channel to see more DIY, home decor and crafts - https://www.youtube.com/channel/UC4uyVGrJxoo8-7qlAg5_x-g?sub_confirmation=1
I can't wait to see you there!
Join our Facebook Group for creatives - Why not? It's FREE!
https://www.facebook.com/groups/organizedecoratecreatechalkingupsuccess
Like us on Facebook:
https://www.facebook.com/chalkingupsuccess/
Follow us on Instagram:
https://www.instagram.com/chalking_up_success/
Follow us on Pinterest:
https://www.pinterest.de/chalkingupsuccess/
Phew! That was a lot but thanks so much for your support, I really appreciate it! 

Comments
Join the conversation
-
Thank you, Elaine. The screws were just under an inch long.
-
Love it.


Frequently asked questions
Have a question about this project?
Beautiful tree...what size screws did you use---in inches.