


How to Hang Garland on Stairs With Zipties

To deck out your staircase with garland is no quick task, so I highly recommend allowing yourself plenty of time to complete the process. I have found that the less I try and rush through a project, the more smoothly it is completed.
Unpack and Fluff
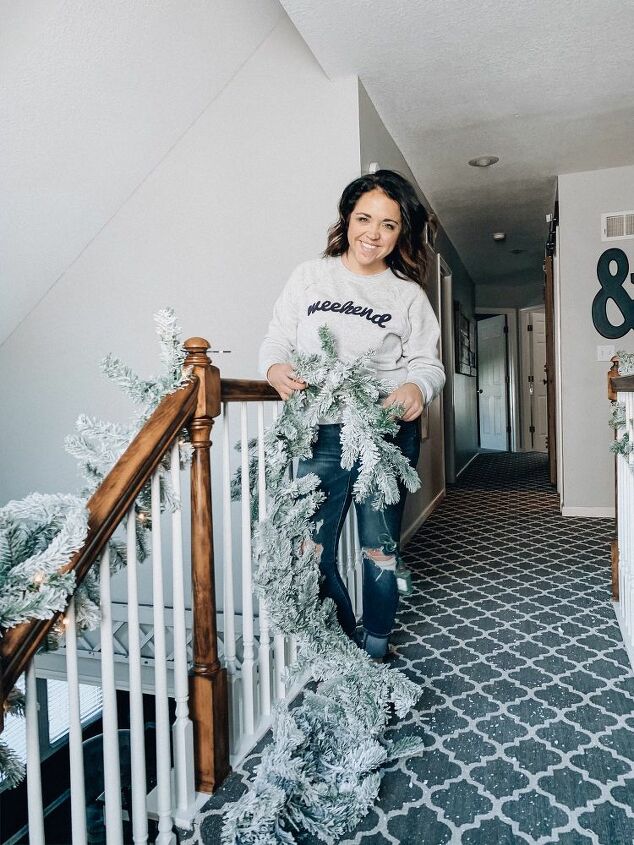
This decorating project was no exception. I first took the time to unbox and fluff each string of garland. You will need to do this each year as when it is stored, the garland (much like your Christmas tree) will become squashed and compact.
I ordered flocked garland from King of Christmas because I truly love the white snowy look, but beware that this type of garland is very messy. Even just pulling it out of the box, there was fake snow EVERYWHERE.
If you go with a flocked look, take a deep breath and know that it’s going to be messy. If you are anything like me, this might be a little difficult. I promise, it’ll all be worth it! I resolved that I was GOING TO create a mess and that I would just take extra time at the end of my project to get it all cleaned up.
Test Lights
The next step I took was to test the lights. Even though my strands of garland were brand new, I wanted to make sure everything was working right before I started the process of hanging them.
Take this opportunity to plan out where you will use outlets and if you will need extension cords. Every home is different and some homes have outlets in more convenient places than others do. Our outlets are fairly accessible, but I did still need a short extension cord on both top and bottom of the staircase.
Getting Started
Pick a starting point. Either chose to start at the top or the bottom of the stairs. I chose to go from the top down. It seemed to be easier to hang this way.
First, I attached the garland with the zip ties where I wanted it and tightly secured it by getting underneath the branches toward the main cord so I could conceal the zip tie there.
There are several ways to hang your garland from your staircase (wrap around, just below the handrail, deep swag, shallow swag). I personally love the swag look, so I decided to go with that.
My next step was to decide how much swag I would include. I took into consideration how much garland I had to work with and decided on a medium size swag.
Getting the Length Just Right
At the next attaching point, I used another zip tie, just like I had for the first time. I repeated the steps like this until I got to the end of the railing. Luckily, the garland ended up being just the right length and I didn’t have any excess to deal with. I think the main reason that I didn’t have any excess is because I was able to use the swag to make the length work for me.
When I finished attaching the garland to all of the bannisters, I went back to snip the excess off of each zip tie and made sure each one was concealed as much as possible.
For the final step, I decided to add a simple bow with this neutral linen ribbon I love from Hobby Lobby. While I didn’t have to do this to cover the zip strips, I am really pleased with how it gives the garland a finishing touch.
Fluffing your garland before getting it hung will allow you to see how it will truly fall.
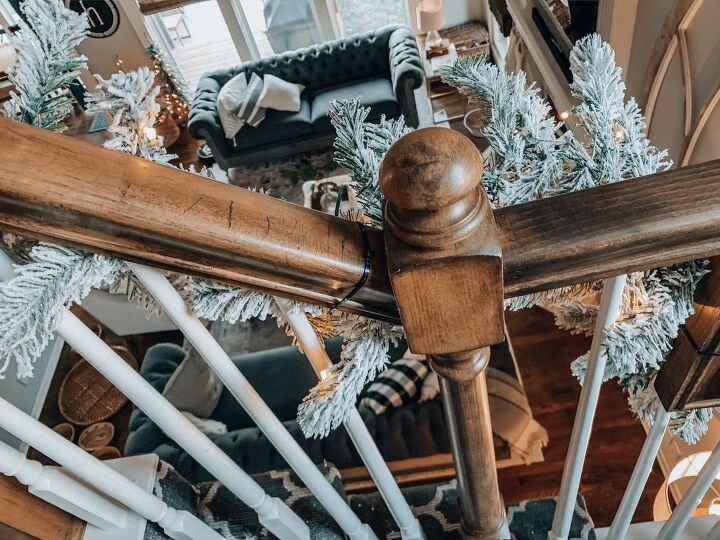
Use zip ties to securely attach your garland to the bannister.
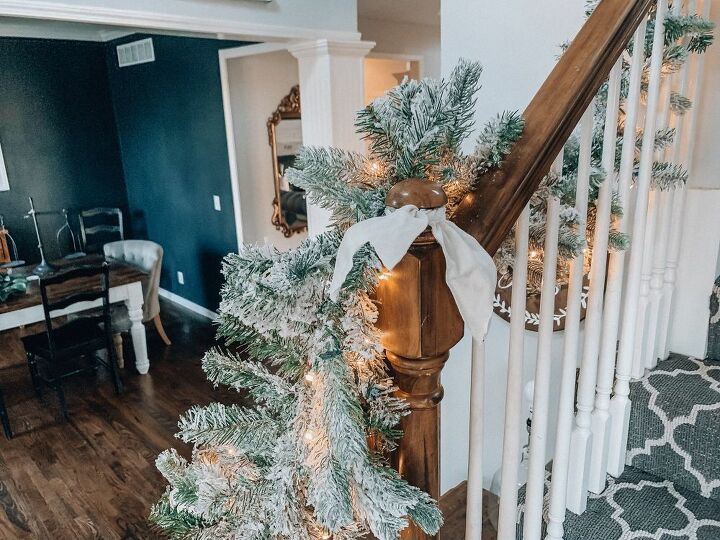
Easy and simple way to cover the zip ties and add more character is to use your favorite ribbon in those spots.

The final product is beautifully hung garland.


Frequently asked questions
Have a question about this project?