


How to Make a Decorative No-Sew Santa Basket
8 Materials
$8
2 Hours
Easy
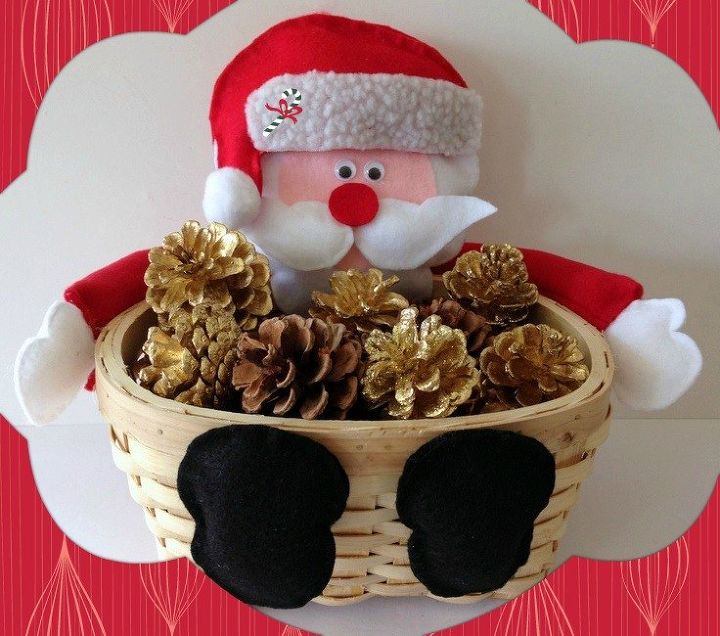
It's that time of year when we try to get a head start on Christmas holiday crafting! I'm sharing with you how to make an adorable No-Sew Santa Basket that's great for holding all things Christmas! We all could use something like this around the house during the holidays!
Let's start by copying and pasting the templates, enlarging to full page in Word.
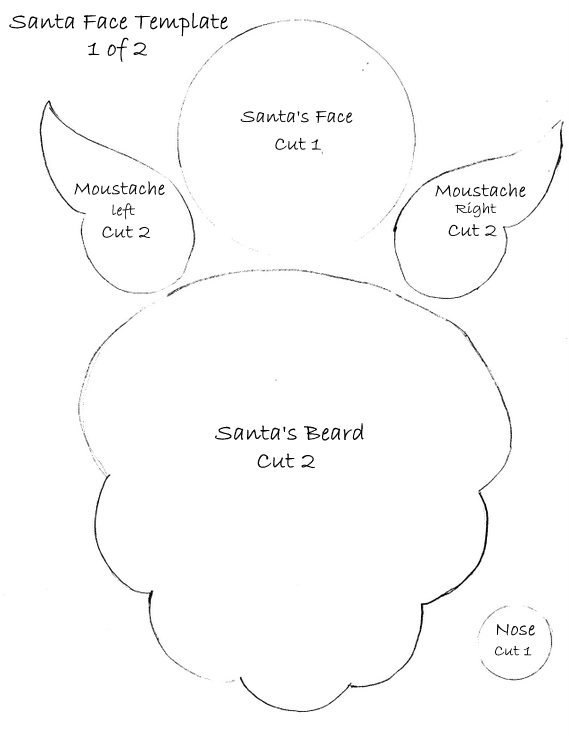
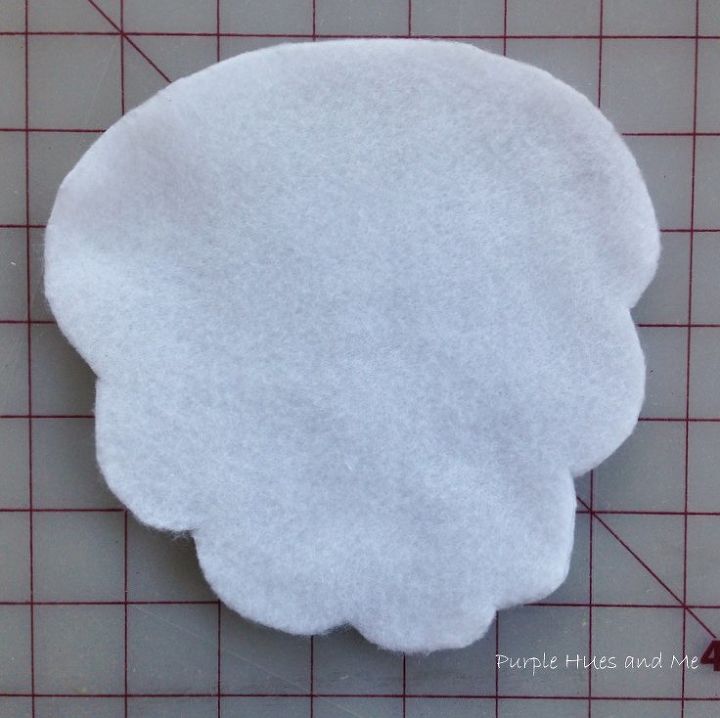
Next, cut out all the pieces required in felt. Beginning with Santa's beard pattern, run a narrowing line of fabric glue along the edge, leaving an opening and pressing together both pieces, applying extra pressure around the edges. Let dry.
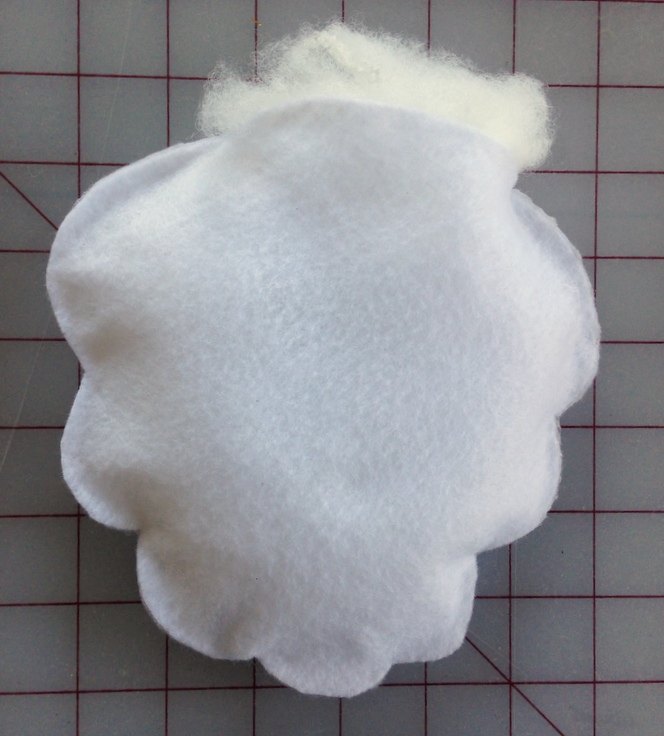
Lightly stuff with poly-fil and add fabric glue to open edges and close. Clamp edges to seal and let dry.
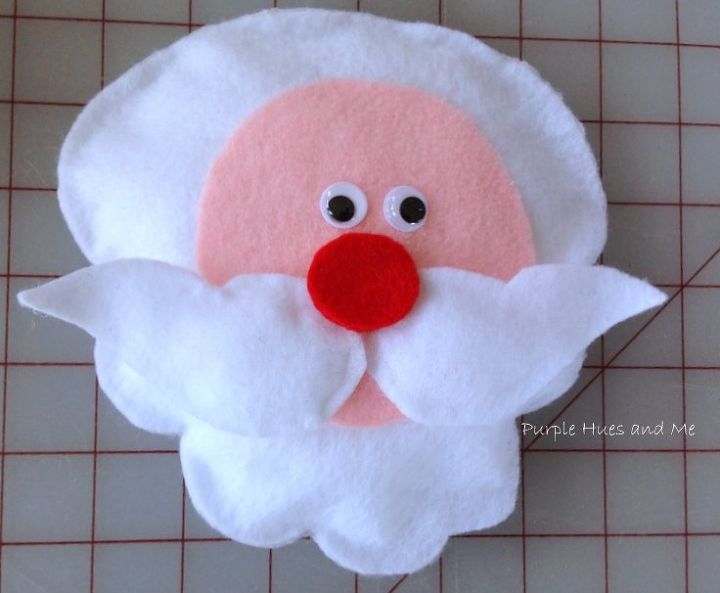
Continue putting Santa's face together by gluing around the edges, and apply to center of beard. Then the moustache, letting it dry and then lightly stuff. Next, glue moustache pieces together onto face. The nose next, and then the eyes.
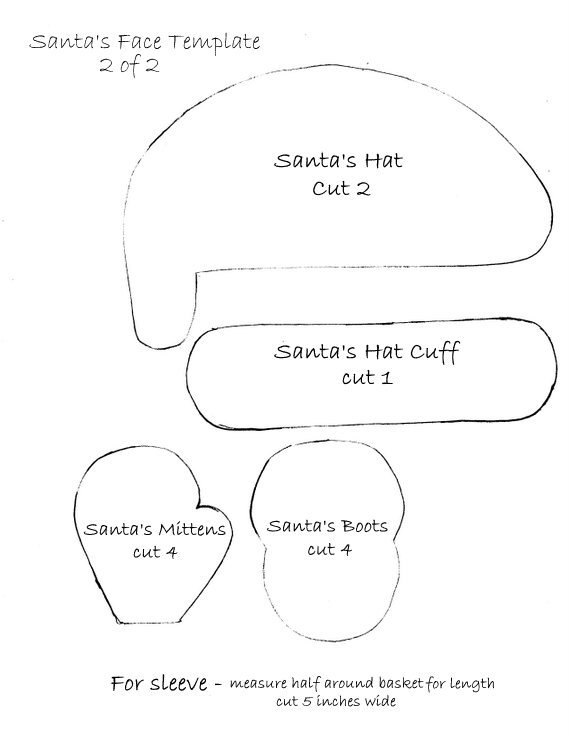
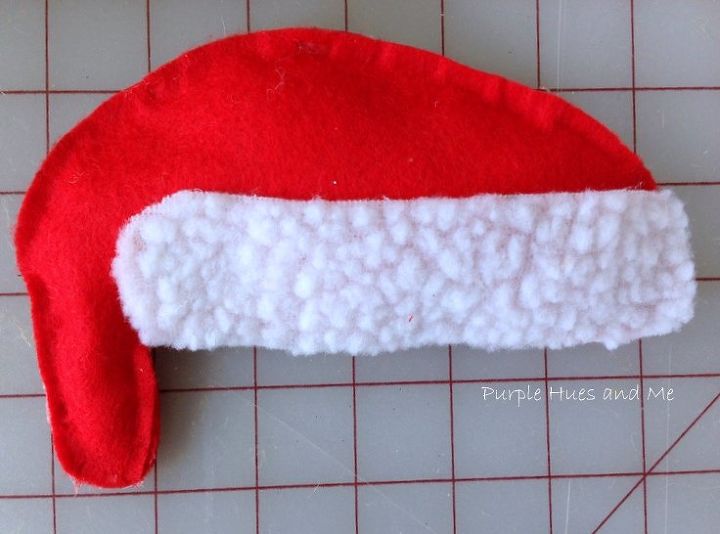
- For the hat, glue on the cuff trim to the hat form, let dry, and then add glue to the edges, leaving an opening on the bottom cuff edge.
- Add the back hat piece, matching edges and pressing together. Once dry, lightly stuff and insert santa head into opening of hat. Seal with glue. Add pom pom to hat tail.
- For the arms, measure half around basket for the length - in this case, 16 inches. Cut felt five inches wide and 16 inches long.
- Fold over, right sides together. Apply glue to long edge, sealing together, let dry, and turn inside out. Lightly stuff length.
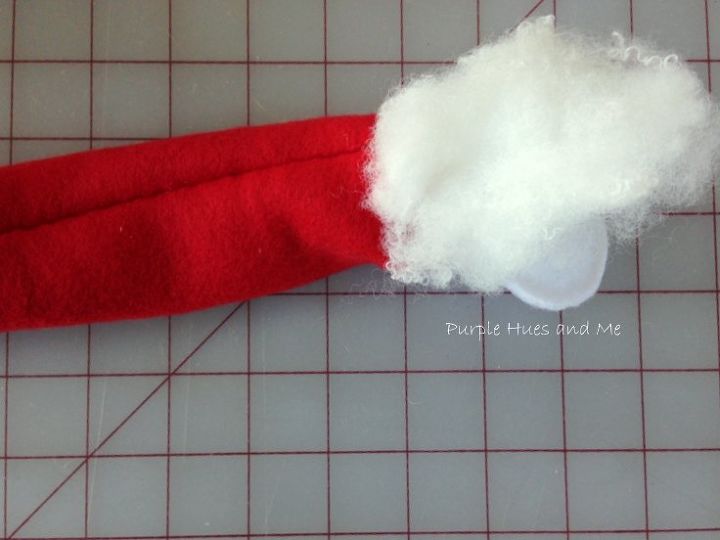
- Glue edges of Santa's mittens, leaving an opening, lightly stuff and glue open edges close. Insert mittens into ends of arms, gluing edges of arms and pressing together.
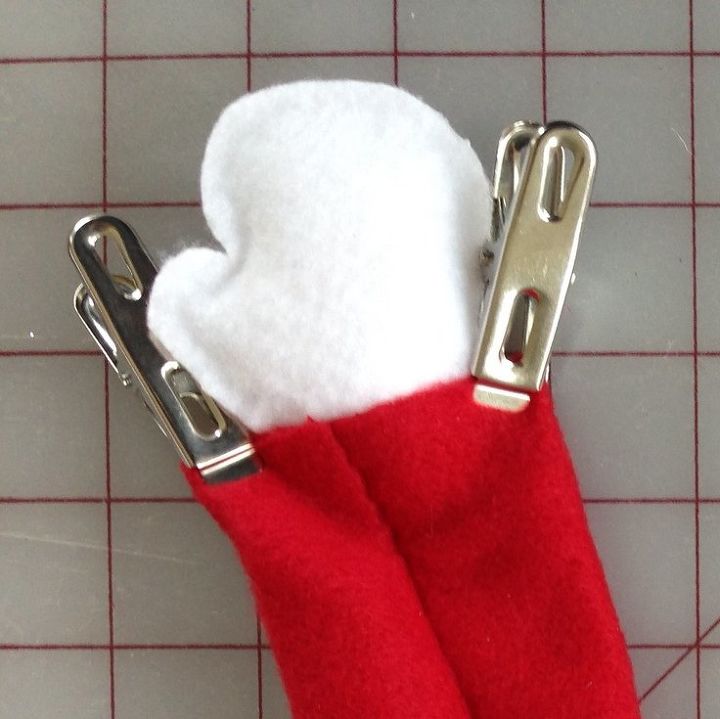
Clamp ends together to dry.
Hot glue arm with mittens onto basket.
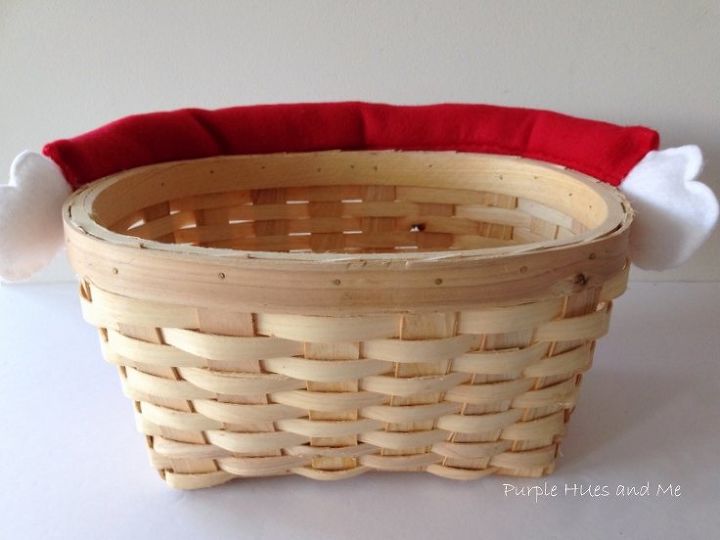
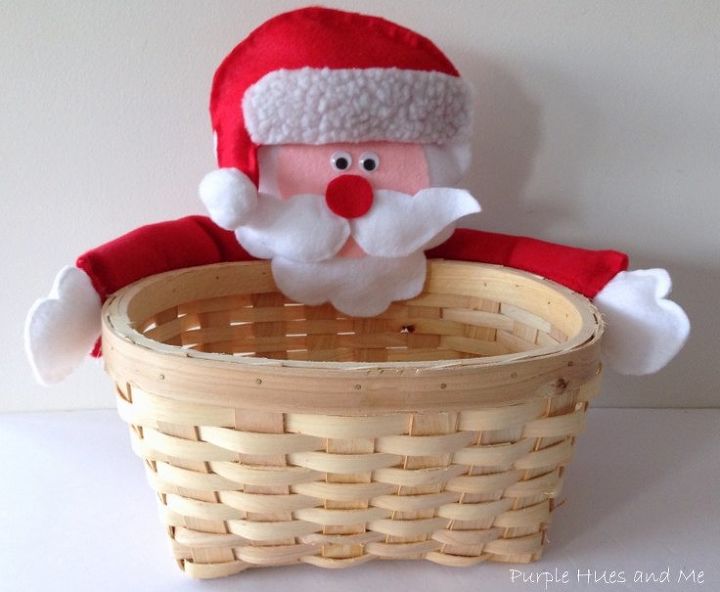
Glue head onto center of basket and arms.
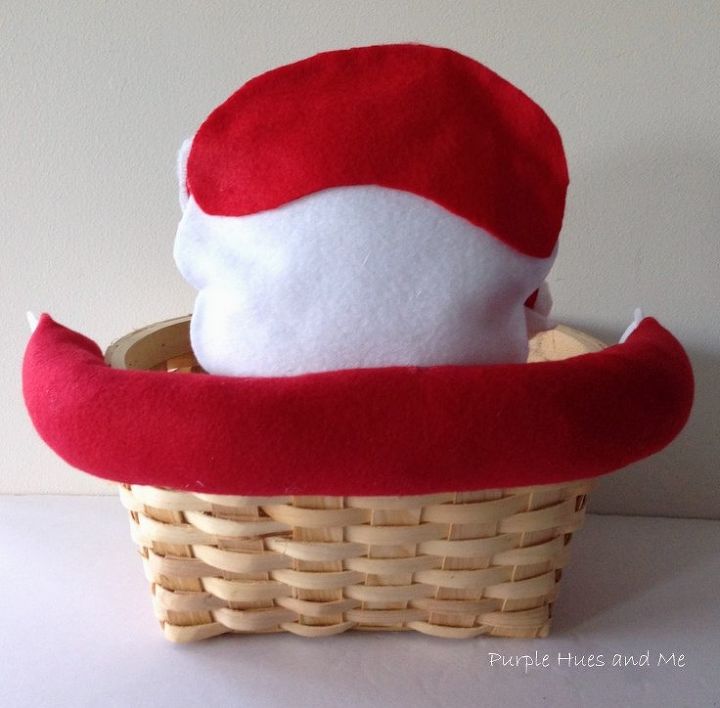
Back
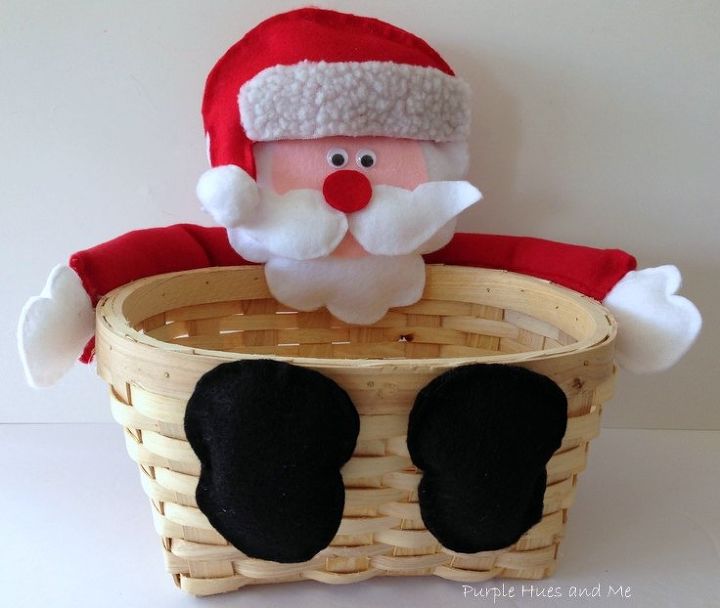
Add fabric glue around edges of Santa's boots, leaving opening and lightly stuff. Close open edges with glue and let dry. Hot glue boots onto front of basket at edge.
Have fun filling with holiday items!


Any price and availability information displayed on [relevant Amazon Site(s), as applicable] at the time of purchase will apply to the purchase of this product.
Hometalk may collect a small share of sales from the links on this page.More info

Want more details about this and other DIY projects? Check out my blog post!
Comments
Join the conversation
1 comment
-
This is adorable and not difficult at all. Thank You for sharing!


Frequently asked questions
Have a question about this project?