


How to Make DIY Holiday Wreath Place Cards
I’m always looking for unique ways to update my holiday table decor to fun up holiday dinners. Instead of the same table settings I’ve used in the past, I wanted to try something new — enter my DIY holiday wreath place cards.
I love the look of simple modern wreaths, but do you want to know what I love even more? Miniature versions! After some quick shopping on Amazon (as well as in my holiday decor stash at home) I had everything I needed to make my wreaths.
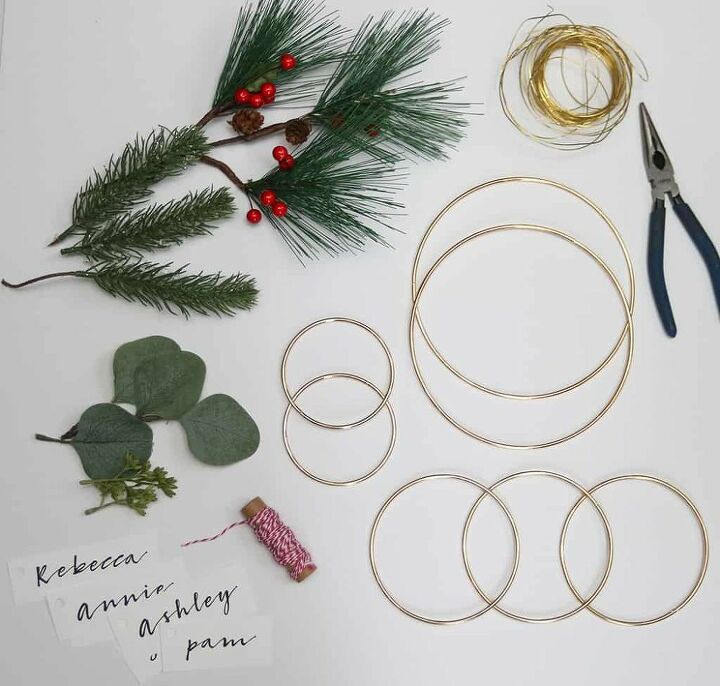
- Artificial pine cone picks
- Faux greenery (with some “ice” sparkle)
- Metal hoops (set of 10: 2″, 3″, 6″ – gold)
- Metal hoops (set of 10: 4″ – gold)
- Pliers and gold wire or
- Hot glue gun (not pictured)
- Craft/baking twine
- Paper and pen or
- Design software and printer
- Hole punch
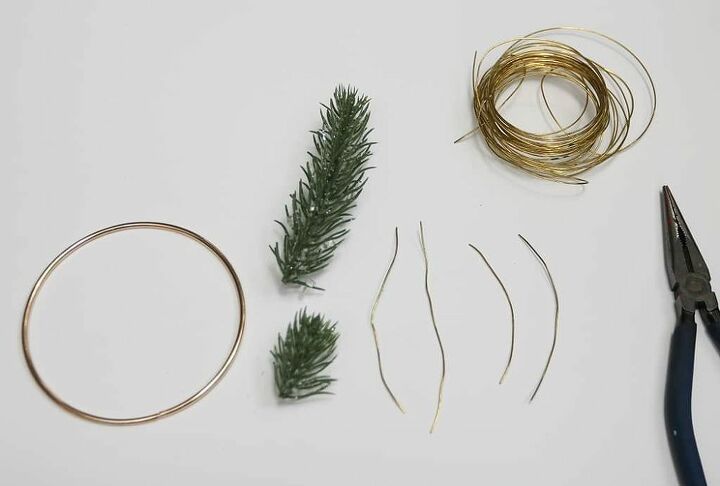
I started off with a 4″ metal hoop and my sparkly greenery, which I pulled off the stems to make smaller pieces. I originally thought it’d be easier to use my pliers and gold wire to attached the greenery to the hoops, but quickly realized that a glue gun is much easier.
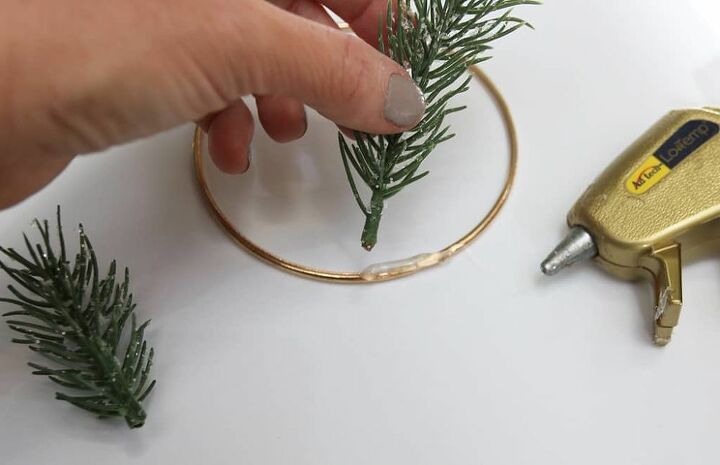
So I plugged the glue gun and began by placing the greenery over the mini hoops where they looked good to me. Then I glued one line of glue to one side of the hoop and pressed one greenery strand to it until the glue dried.
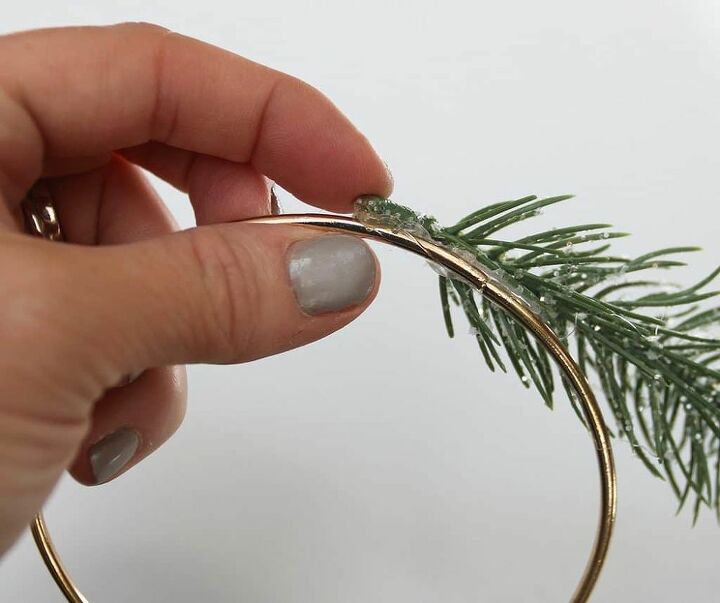
Adding a little more glue to the backside secured the greenery in place.
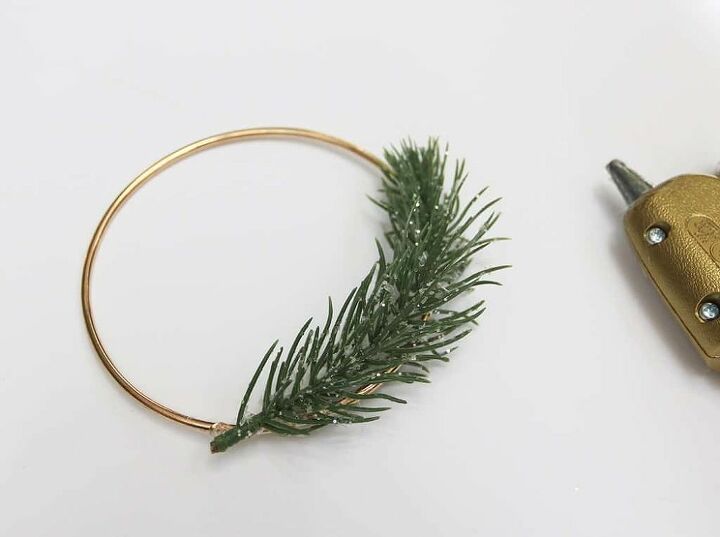
Once I was happy with the placement, I moved onto the other side of the wreath.
I like a slightly asymmetrical look, so I opted for a shorter section of greenery on the left side.

Once it was finished, I pulled off a few glue strands that remained on the greenery. That’s it!
the best part about working on a mini wreath is it take no time to complete one wreath and you can knock out a handful in 10 minutes!

I have decent printed handwriting skills, but my calligraphy could use a little more work, so I opted to design my place cards using my design software using a font ( Bambusa Pro), and printing them on card stock on my printer at home. I used a hole punch to punch a hole in the top corner.
I cut a strand of baking twine (approximately 5″-6″), ran it through the punched hole, and attached it to the hoop.

I repeated this step on all four hoops to make a set.
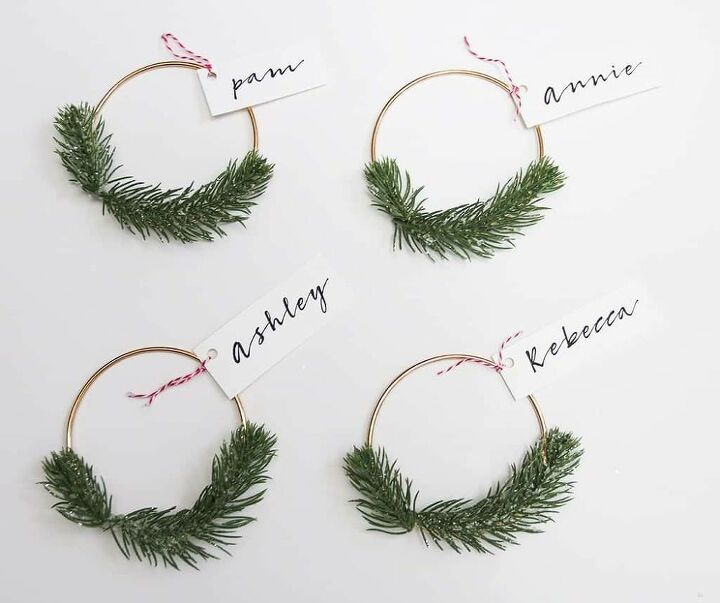
These DIY holiday wreath place cards will look classic and festive in any place setting from Thanksgiving through winter.
And if you want to keep it even more simple, you could simply fold some card stock into a small folded place card.

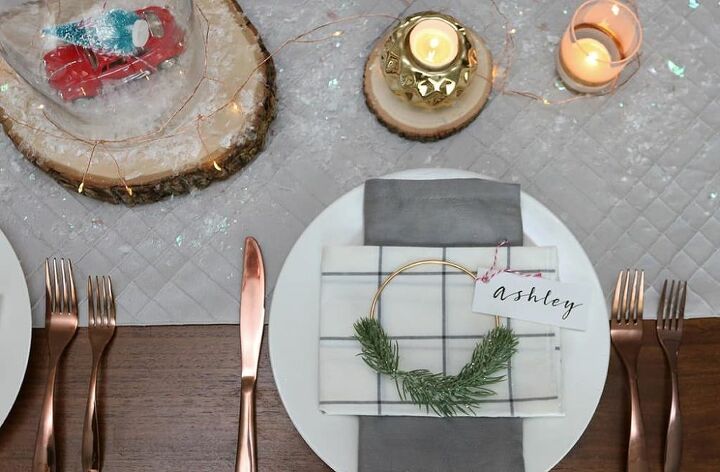
Here’s how they looked placed on plates and folded napkins. I used the extra greenery I had left mixed with some twinkle lights and candles I had on hand. So festive!
Before I get any hate mail I know I messed up the placement of the silverwear according to the etiquette books. :)

This setup could work for any winter occasion.
Resources for this project:
See all materials


Comments
Join the conversation
-
Audrey, these are just adorable!! What a great idea! Thanks for sharing

-
Thank you soo much Kara!! :)


Frequently asked questions
Have a question about this project?