


KEEPING IT SIMPLE ON THIS CHRISTMAS HOME TOUR

by
Linda
9 Materials
$400
2 Days
Easy
Christmas home tour with loads of ideas and tips for a winter wonderland holiday. This year I decided to spice things up here at Life on Summerhill and do some simple authentic decorating. Check out how liberating it is to go “less-is-more” for the holidays!
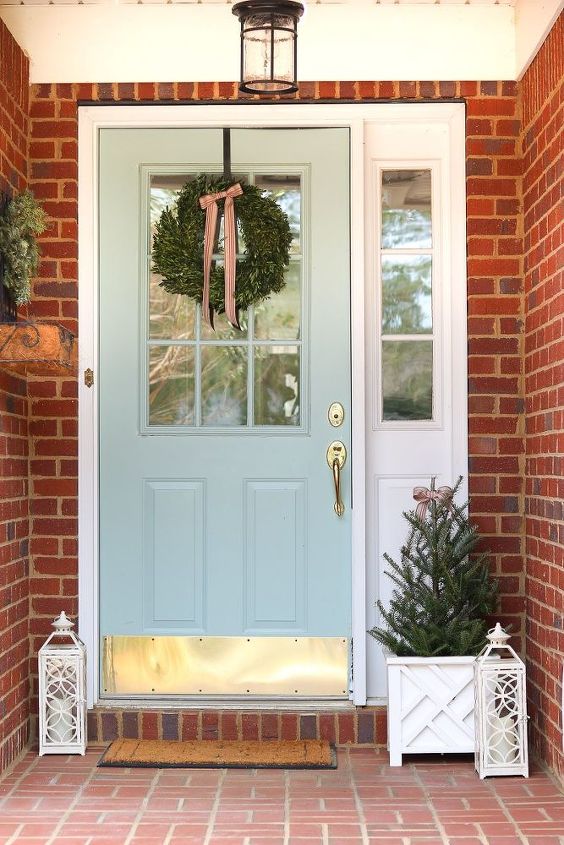
Step 1: Always start with your front door. This is where people get a hint of what is to come inside your home. Try some simple items like a real boxwood wreath with a long tail ribbon, a simple Christmas tree in your planter with the same ribbon as the wreath and a few lanterns to finish the look.
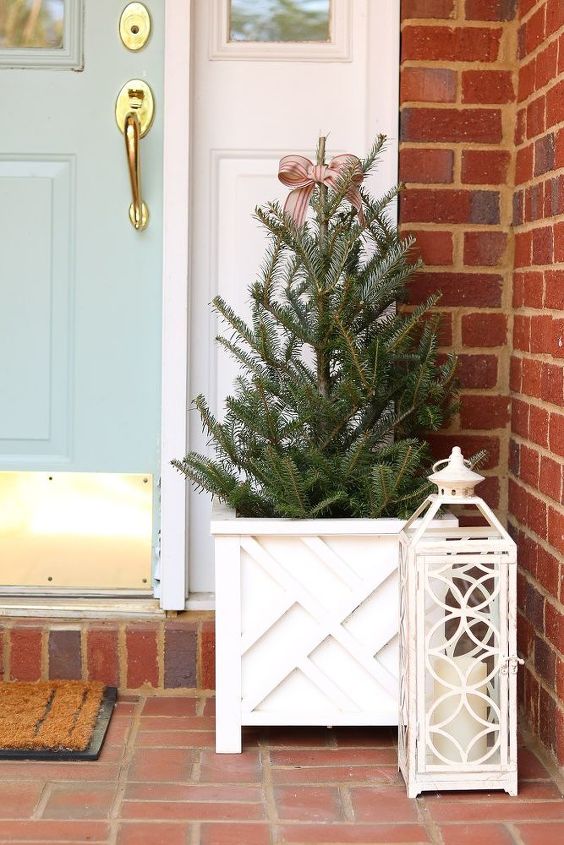
Step 2: Add some mini battery powered Christmas lights to the tree and batter powered candles inside the lanterns. Always remember your lighting elements when decorating.
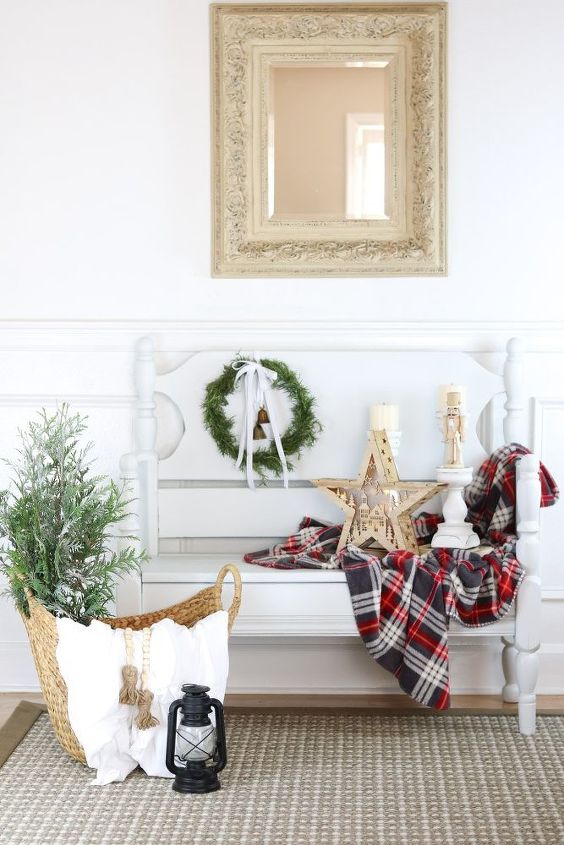
Step 3: Now that you have everyone wanting to see more give them a warm welcome inside by adding some similar style decor to your foyer. If you have a bench try this idea by draping a blanket and adding some accessories on the blanket. Then hang another natural wreath like this rosemary wreath with another long tail ribbon and brass bells. Then simply toss a basket next to the bench with some blankets inside, a lantern and another small Christmas tree. Don't forget to add some Christmas lights to the tree. To see more photos of this foyer click HERE.
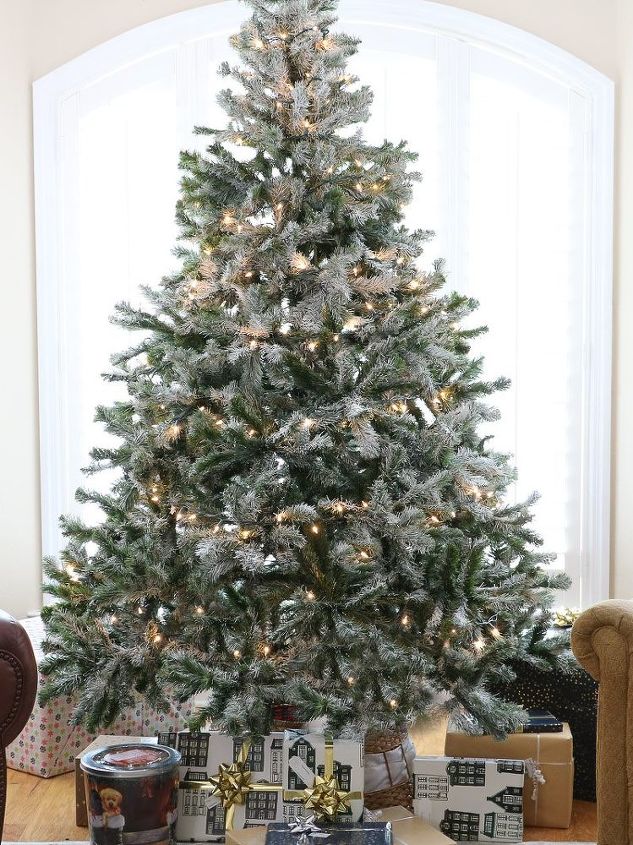
Step 4: Remember the title says, "Keeping it simple" well how about no ornaments this year. It was kind of by accident that this occurred but we found we loved it more and more. Consider flocking your tree and adding lots of small white Christmas lights. Talk about less-is-more!

Step 5: I am throwing in this step just in case you would like to have ornaments. My recommendation if your going for a look like ours is to do white and gold ornaments like these that I am putting on the tree.
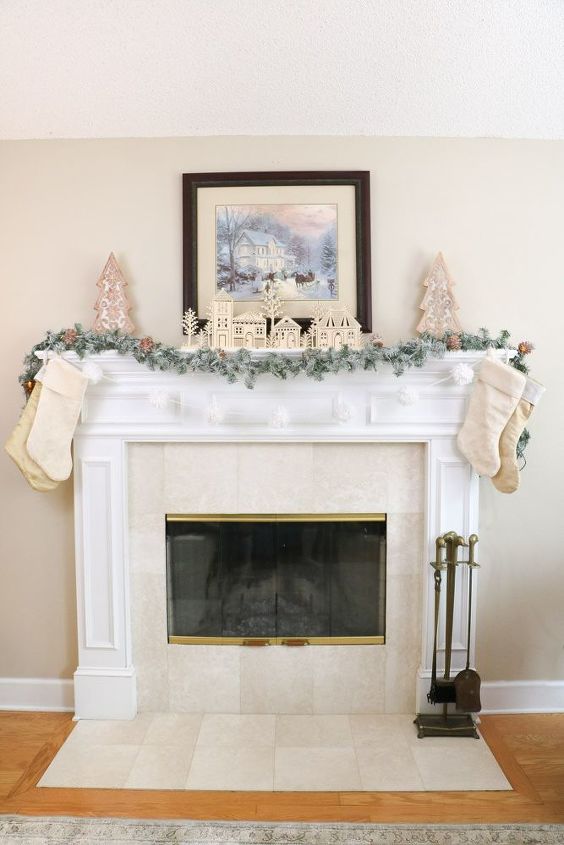
Step 6: Now on to the mantle. If you have a mantle, bookcase or anything you can stage as a mantle try these ideas. Start with your art.

Step 7: In our case we pull out this Thomas Kincade piece every year. It is so nice to have something fresh and new on the mantle for the winter months. This piece is no longer available but click THOMAS KINCADE for another idea. Next add something tall to the sides. We love these wooden carved trees. Adding height to the sides helps with symmetry.
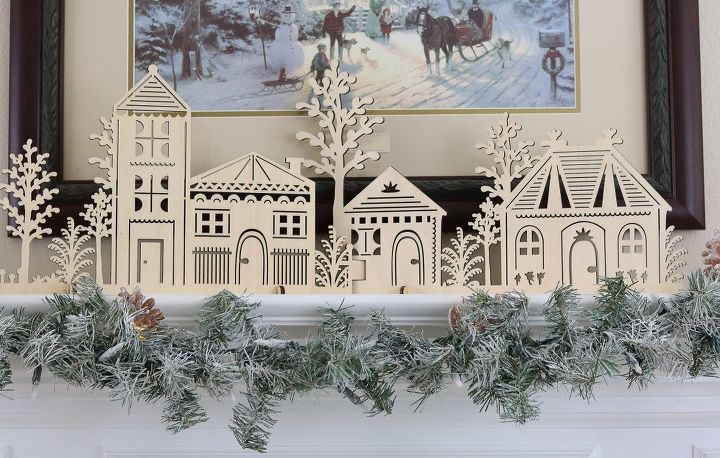
Step 8: The mantle is almost finished but look for something low and long in the middle like this laser cut wooden village by Crate & Barrel. Then gently add your garland, flocked of course, and some white lights or these pine cones lights.

Step 9: If you have been hanging around Life on Summerhill very long then you know how much I love garlands on our mantle. Try this super cute idea! Make some yarn pompoms in white then simply thread another long piece of yarn through them. This soft texture is just what the mantle needed.
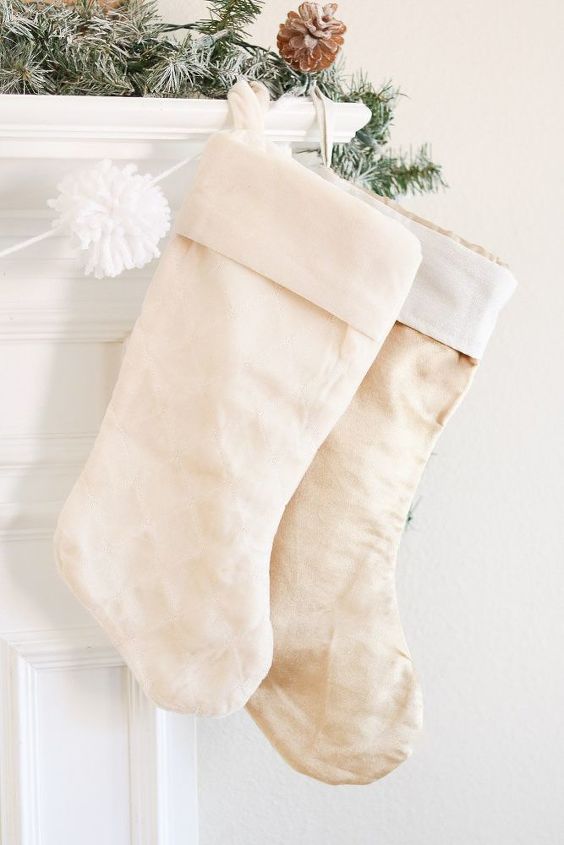
Step 10: The last step of the mantle is the stockings. Select some neutral stockings if you are going for this monochromatic look and hang them on the ends.
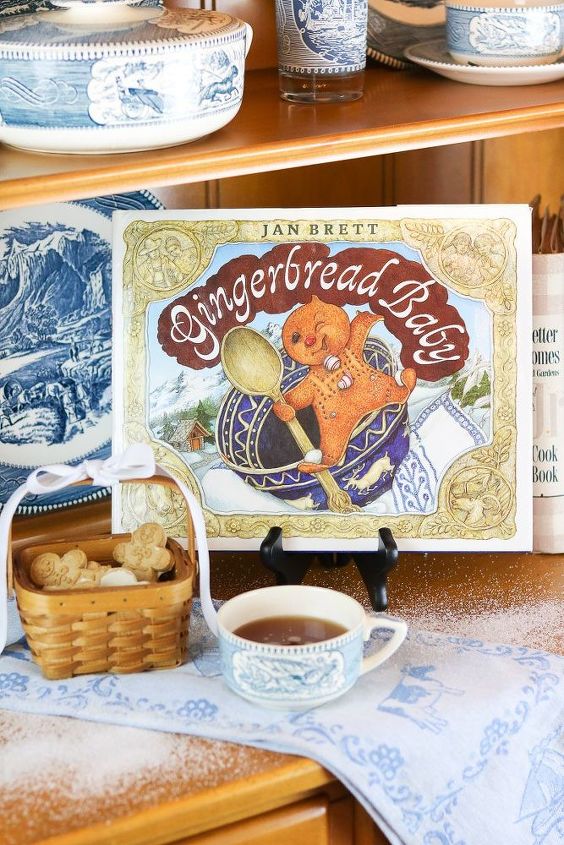
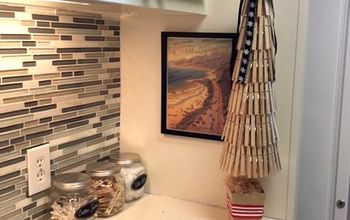
Step 11: Just when you think your house is finished I want to encourage you to not forget the kitchen. I love, love, love decorating the kitchen for the holidays. Here is a simple and easy trick. Pick out a children's book that has a gingerbread baby, house or some item you would find in the kitchen and place it on an easel. Then add a basket with some food inside, tie it with a ribbon and sit it on a kitchen towel that coordinates with the book. Sprinkle a little snow and like magic your holiday decorations are finished. If you like this Christmas book decor ideas check out more tips HERE. I hope you have enjoyed these ideas and tips and I hope you come back and join us more with loads and loads of other ideas for decorating your home.
Resources for this project:
See all materials


Any price and availability information displayed on [relevant Amazon Site(s), as applicable] at the time of purchase will apply to the purchase of this product.
Hometalk may collect a small share of sales from the links on this page.More info
Want more details about this and other DIY projects? Check out my blog post!


Frequently asked questions
Have a question about this project?